Transcription
NetSpective WebFilter Quick Start GuideNetwork Monitoring and Security Products by TeleMate.Net Software.
Copyright 2002-2015 by TeleMate.Net Software, LLC. All rights reservedAlthough the author and publisher have made every effort to ensure that the information in thisdocument was correct at press time, the author and publisher do not assume and hereby disclaim anyliability to any party for any loss, damage, or disruption caused by errors or omissions, whether sucherrors or omissions result from negligence, accident, or any other cause.Printed in the United States of America5.1.2015 Version 5.0TeleMate.Net Software5555 Triangle ParkwaySuite 150Norcross, Georgia 30092www.TeleMate.Net
CONTENTSCONTENTS .0CONTACTING NETSPECTIVE SUPPORT .1GETTING STARTED .1NETWORK DEPLOYMENT STRATEGIES.1Passive Configuration .1Inline Configuration .2Proxy Configuration.2Figure 1: Passive Configuration .2Figure 2: Inline Configuration .3Figure 3: Proxy Configuration .3Figure 4: 10Gbps Passive Configuration .4INSTALLING THE APPLIANCE HARDWARE IN YOUR NETWORK .4Network Configuration Settings .5Licensing the Device .5Network Diagnostics .6Reset to Factory Defaults .6Reboot/Shutdown .7WEB-BASED ADMINISTRATION.7Update the NetSpective Software Version .7Backup and Restore from a previous NetSpective installation .8Replication Roles .8A word on how NetSpective applies filtering policy to users .8Configure LDAP Integration .9Create and Populate Groups with LDAP Users .9Configure Group Policy .10Managing Overrides .11RAT Endpoint Inspection .11Building the CA Certificate (Inline Only) .12Authenticating Users .12Configure Logging and Install NetAuditor .14
CONTACTING NETSPECTIVE SUPPORTThank you for choosing NetSpective as your Internet Content Filtering Solution. If you have anyquestions or need technical assistance with your NetSpective setup, please contact ourhelpdesk at 678-589-7120 or by email at netspectivesupport@telemate.net.GETTING STARTEDIn order to perform the initial configuration of NetSpective, you will need: A monitor and keyboard. Licensing data from TeleMate.Net Software (license key, licensing server, and licensingpassword). This information must be obtained by contacting registration services at678-589-7140 or by email at registration@telemate.net. An Internet connection, allowing FTP downloads from public servers.NetSpective is a rack-mounted appliance. You will need to perform the initial steps of yourconfiguration in a place where you will have easy access to the back of the device. Therefore, wesuggest that you move the device to a rack only after performing the initial configuration steps. Onceyou successfully perform the steps listed in this manual, you are ready to access the Web-basedadministrative interface over your network.NETWORK DEPLOYMENT STRATEGIESThere are two possible network deployment strategies: Passive ( also referred to as side-scan ) andProxy configuration. Each deployment strategy is a licensable option.Passive ConfigurationThe easiest method is to use a switch with mirroring or SPAN capabilities. This feature can be found inCisco Catalyst series switches, as well as most economical and readily available switches. If you wouldlike to use a switch along with your NetSpective, you must configure the switch so that traffic boundfor your gateway/firewall or proxy can be monitored and intercepted by NetSpective.Using a switch that automatically routes Internet traffic to the gateway/firewall or proxy server from theinternal network, you will need to “mirror” the port that is being used for the internet traffic. Theadministrative network interface labeled “ETH 0 - Administration” should be connected to an availableswitch port and the mirrored port used for monitoring should be connected to the NetSpective interfacelabeled “ETH 1 - Monitor” as shown in Figure 1.Connecting the Monitoring NIC to the network is not required for licensing your NetSpectiveappliance. However, you will need to connect the Administrative NIC to your network for thispurpose. You will not be able to access the Web-based administration interface without firstlicensing NetSpective.CONTACTING NETSPECTIVE SUPPORT1
Inline ConfigurationThe Inline solution can be deployed as “Fail Open” to maintain internet connectivity in the event ofhardware failure. The solution may also be deployed as “Fail Closed” which will sever the flow of trafficin the event of hardware failure. With either deployment model, the administrative network interfacelabeled “ETH 0 – Administration” must be connected to an available switch port and must be routable toall end users. You may then choose to use “ETH 2 and 3 Fail OPEN” or “ETH 4 and 5 Fail CLOSED” foryour uplink and downlink respectively, as shown in Figure 2.The 15Hi can be deployed for 1 Gbps or 10 Gbps networks (Figure 4). When deploying as an Fiber OpticInline solution, the configuration can be changed from Fail CLOSED to Fail OPEN from within theAdministration Web Interface.Proxy ConfigurationTo properly control internet traffic in a proxy configuration both “ETH 0 - Administrative / Internal”and “ETH 1 - External” should be plugged into the upstream switch inside the firewall as shown inFigure 3.Figure 1: Passive ConfigurationInline Configuration2
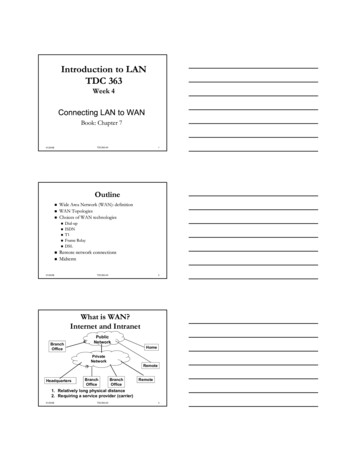
Figure 2: Inline ConfigurationFigure 3: Proxy ConfigurationFigure 2: Inline Configuration3
Figure 4: 10Gbps ConfigurationINSTALLING THE APPLIANCE HARDWARE IN YOUR NETWORK1. Unpack NetSpective and connect the monitor to the video graphics adapter on the back plateof NetSpective.2. Connect the keyboard to the interface on the back plate.3. Connect the power cables of both NetSpective and the monitor, then power them up. Thepower switch is located on the front of the device. Additional information can be found in theNetSpective Hardware Installation Guide.After NetSpective boots up, a login prompt will appear. Type ‘admin’ and press enter. When thedevice prompts you for a password, enter ‘webfilter’. You will be able to change the password laterfrom the Web-based administrative interface. When the login process is complete, you will see a textbased administrative console menu:[[ WebFilter :: Main Menu ]](1)(2)(3)(4)(5)(0)Configure NetworkingLicense DeviceNetwork DiagnosticsReset to Factory Default SettingsReboot / ShutdownExitFigure 4: 10Gbps Configuration4
Network Configuration SettingsFrom the Main menu, type ‘1’ and press enter to access the Configure Networking menu. Your current(default) network settings are displayed (see figure). Note that your network card link status is displayedfor both the Monitoring NIC and the Administrative NIC.[[ WebFilter :: Network Configuration ]]Current Settings:IP Address: 192.168.7.247Net Mask 255.255.240.0Gateway: 192.168.2.8Administrative NIC: UPMonitoring NIC: UP(1) Change Settings(0) ExitEnter SelectionType ‘1’ and press enter to change the settings:1. Type in a new IP address for NetSpective; press enter to continue.2. Type in the appropriate Netmask of NetSpective; press enter to continue.3. Type in the IP address of the network gateway; press enter to continue.4. Finally, type ‘Y’ and press enter to accept the changes. Press enter to return to the menu. Reviewyour settings and reconfigure if necessary. If the settings are acceptable, type ‘0’ and press enterto return to the Main menu.Installing 10Gbps Network Configuration: The network configuration page will list two monitoringNICs, one for the onboard gigabit NIC and one for the 10Gbps NIC. Simply select option 4 ‘SwapMonitoring NIC’ to swap the active NIC to the 10Gbps NIC.After configuring your network settings, please be sure to use the Shutdown option before you movethe device or power off (option #5 from the Main Menu, described in this document)Please confirm that the Administrative NIC is connected to your network and is in the “up” linkstatus mode.Licensing the DeviceTo complete the licensing process you should have received the following licensing data fromTeleMate.Net. If you do not have this information, please contact us at 678-589-7140 or by email atregistration@telemate.net for assistance.Network Configuration Settings5
NetSpective Licensing key and password IP address of a NetSpective Licensing Server1.2.3.4.From the Main menu type ‘2’ and press enter to access the Licensing Menu. Once there,type 1 and press enter to license your NetSpective.Type in the name or IP address of the licensing server. Press enter to continue.Type in the license key (20 characters plus dashes) and press enter. Please be sure to type allcharacters exactly as given to you by TeleMate.Net.Type in the licensing password and press enter to continue.NetSpective will now connect to the licensing server to activate your license. This will be followed by thestartup of additional services on the system. Once this process is complete, press enter to return to theLicensing menu. Review your licensing information (licensing key, number of users, license level, andsubscription start and end dates). Type ‘0’ and press enter to return to the Main menu.Network DiagnosticsIf NetSpective licensing fails, please check your network settings (Main menu, 2), or test theconnection to the licensing server using the Network Diagnostic menu. If the problem persists, pleasecontact NetSpective Support at 678-589-7120.From the Main menu, type ‘3’ and press enter to access the Network Diagnostics menu. This optionshould be used to diagnose any network connectivity issues. For further assistance, contact yoursystem administrator. You may type ‘0’ and press enter to return to the Main menu at any time.1. To ping a host, type ‘1’ and press enter. Type in the IP address of the host to ping and pressenter. You should see at least 3 packets being sent. If ping fails, check your connections,firewall rules, or any NetSpective setting, which could prevent a successful ping. Once pingfinishes, you will be taken to the Main menu.2. To display the route to a host via traceroute, type ‘2’ and press enter. Type in the IP address ofthe host to trace. If traceroute fails, check your connections, firewall rules, or any NetSpectivesetting, which could prevent a successful connection. If traceroute succeeds and you are stillhaving problems, make sure to check your firewall to ensure you have FTP access to publicservers. Once traceroute finishes, you will return to the Main menu.Reset to Factory DefaultsOn the Main menu, type ‘4’ and press enter to access the Reset to Factory Default Settings menu.Type ‘1’ and press enter to reset NetSpective to its original configuration. A prompt will ask for yourconfirmation before proceeding. To continue with the reset, type ‘Y’ and press enter.Important Note: If you reset the device, you will lose all of your configuration settings, including theblocking policies configured via the web browser interface.Network Diagnostics6
Reboot/ShutdownFrom the Main menu, type ‘5’ and press enter to access the Reboot/Shutdown option.1. To reboot, type ‘1’ and press enter. At the confirmation prompt, type ‘Y’ and press enter toreboot.2. To shutdown, type ‘2’ and press enter. At the confirmation prompt, type ‘Y’ and press enter toshut down your NetSpective.WEB-BASED ADMINISTRATIONNow that you’ve successfully configured and licensed your NetSpective appliance, you can access theWeb-based Administration interface. From any Web browser on your network, type in the IP addressyou assigned from the Network Configuration step in your Web browser’s Address bar. For example, ifyou assigned 192.168.2.247 as the IP address for NetSpective, you would type http://192.168.2.247 inyour Web browser’s address bar. A dialog box will appear prompting you to enter your user name andpassword. The default user name is ‘admin’ and the default password is ‘webfilter’. You can change thedefault administrative password from the ‘Managers’ tab in the NetSpective Web interface.From any of the areas you see in the product, clicking on the ‘Help’ or ‘?’ icon will take you to the helpsection. When a new tab opens, you will see the help section that refers to the area of the product youare in. The help section will give you a description of each section of the product. At the top of everyhelp page you will see links to our Authentication Guide and User Guide. The Authentication Guide outlines all our methods of determining username and IP addressassociation. This includes ways to authenticate BYOD, 1 to 1, and off network users. Once youhave your LDAP sources, Groups, and Group Policies configured, this will be the most helpfulguide for deploying your Logon Agents and configuring our Mobile Portals.The User Guide contains an overview of all the sections of our product. If you are looking formore information on a particular section, or want to see some examples of how things are setup, or are just interested in a description on what a particular area of the product is for, refer tothis guide.Note: Our Public Policy is a catch-all policy. Any unauthenticated users will fall under this policy andbe filtered. You may want to jump to the Group Policy section of this guide if you have placed theappliance in your network and do not want users surfing unwanted content.Update the NetSpective Software VersionThe first thing we want to do is make sure the appliance is up to date and can communicate with ouronline service.1. Navigate to the Device Information heading on the left side and click on the link next toUpdates. This link may read Current , Available , or Error.Reboot/Shutdown7
The Updates section is where we will apply system updates, manage category update intervals, andconfigure Micro Update intervals. From here the Update Status window will show you the most recentlydownloaded and applied updates, as well as any system updates that have been downloaded and areawaiting installation.2. Click the Get Updates button to check for system updates. This will also download any License,Browser Protection, or Category Updates that are waiting for your appliance. This section alsoshows the IP address of the online service that sends out updates. If you are having troubleconnecting to the updates server, make sure your firewall is allowing the NetSpective to connectto that IP address. For a list of all the port numbers and IP addresses that NetSpective uses, seethe User Guide.3. If the Update Status window shows a new version of NetSpective is ready to be installed, clickthe Install Update button. The appliance will restart during this process.Backup and Restore from a previous NetSpective installationThese settings can be found under the System Control heading by clicking on Backup & Restore. If youare upgrading from a previous NetSpective deployment, you may already be utilizing the AutomaticDaily Backups feature.In the upper left corner you can find the Backup Settings (Download) and Restore Settings (Upload)buttons. Simply use the Backup Settings to download the configuration on your previous appliance.Make certain your new appliance has all available updates applied to it before using the RestoreSettings.Replication RolesNetSpective can be configured with multiple appliances as hot spares for fail-over redundancy. You canreplicate your configuration settings from the System Control heading under Replication. Here you candefine the current appliance as a ‘Stand-Alone’, ‘Parent’, or ‘Child’. From your Parent appliance, you canthen add child devices from the ‘New’ button in the upper left corner.When adding a Child appliance to your replication, specify the Filtering Mode (Passive or Proxy), the IPaddress of the child appliance, the password of the child appliance’s Admin account, and the PublicPolicy on the parent you wish to use as the child’s public policy. You can optionally specify whichsettings you wish to replicate to the child appliance.A word on how NetSpective applies filtering policy to usersNetSpective filtering policy is configured in the Group Policy section. These Group Policies are then tiedto Groups, allowing you to set different policies for each group of users. Groups are then populate
1. Unpack NetSpective and connect the monitor to the video graphics adapter on the back plate of NetSpective. 2. Connect the keyboard to the interface on the back plate. 3. Connect the power cables of both NetSpective and the monitor, then power them up. The power switch is located on the front of the device. Additional information can be found .