Transcription
Recruiting Click-by-Click GuideTaleo RecruitingClick-by-Click GuideManager GuideTaleo Proprietary and ConfidentialUpdated: 11/18/2011Page 1 of 64
Recruiting Click-by-Click GuideTable of ContentsLegal and Confidentiality Information . 4Getting Started . 5Computer Settings . 5Screen Resolution . 5Full Screen Mode . 5Internet Explorer Zoom Option . 5Trusted Sites . 5Allow Pop-ups . 5Add Taleo to Favorites . 5Communications Menu . 6Computer Settings and Troubleshooting FAQ‟s . 7Log into Recruiting . 8Work with My Setup . 10Requisition Management . 14Create a Requisition . 14Requisition Creation FAQ‟s . 27Route a Requisition for Approval . 28Resend the Requisition Approval Request (eShare) Email . 32Approve a Requisition . 34FAQs Regarding Approving a Requisition . 36Candidate Management . 37Access and View Candidates. 37Change Step/Status using Shortcut Buttons . 40Revert a Candidate. 42Change Step/Status using More Actions Menu . 43Reject a Candidate . 45Where to Go for Support . 47CE Help . 47MEC/MEHC Help . 47NNG Help . 47KRGT Help. 47User Guide Updates . 47Appendix I - Requisition Fields Reference Guide . 48Requisition Tab . 48Logistics Section . 48Administration Section. 52Description Section . 53Attachments Tab . 54Attachments . 54Approvals Tab . 54Approvals . 54History Tab . 54History. 54Appendix II–Represented Job Codes. 55Appendix III–Nonrepresented Job Codes . 62Appendix III–Nonrepresented Job Codes . 62Taleo Icons . 63Taleo Proprietary and ConfidentialUpdated: 11/18/2011Page 2 of 64
Recruiting Click-by-Click GuideLegendBest PracticeNoteFor YourInformationPromptTaleo Proprietary and ConfidentialUpdated: 11/18/2011Page 3 of 64
Recruiting Click-by-Click GuideLegal and Confidentiality InformationCopy RightThis Session Guide is Copyright 2006 Taleo Corporation. All rightsreserved.Every effort was made to ensure that the information in this document wascomplete and accurate at the time of printing. However, information issubject to change. Taleo cannot assume responsibility for any errors oromissions due to ongoing configuration, software or process changes. Inaddition, changes or corrections to the information contained in thisdocument may be incorporated into future issues.Duplication RightsThis guide along with other materials for this course may not beduplicated or adapted unless copyright and duplication rights havebeen purchased from Taleo University.InformationConfidentialityIt shall be agreed by the recipient of the document (hereafter referred to as“the other party”) that confidential information disclosed by Taleo throughits documents shall be retained in confidence by the other party, and itsrespective employees, affiliates and/or subsidiaries, pursuant to the followingterms and conditions:Confidential Information for the purpose herein, the term “ConfidentialInformation” shall mean the following:Any information, know-how, data, process, technique, design, drawing,program, formula or test data, work in process, business plan, sales,suppliers, customer, employee, investor or business informationcontained in a document, whether in written, graphic, or electronicform; orAny document, diagram, or drawing which is either conspicuouslymarked as “Confidential”, known or reasonably known by the other partyto be confidential, or is of a proprietary nature, and is learned ordisclosed in the course of discussions, demonstrations, or othercollaboration undertaken between the parties.Taleo Proprietary and ConfidentialUpdated: 11/18/2011Page 4 of 64
Recruiting Click-by-Click GuideGetting StartedComputer SettingsScreen ResolutionIt is recommended that you set your screen resolution to the highest possiblesetting.1*These instructions may vary, depending on what version of Windows your computer has.1.1 Click on computer Start button1.2 Click on Control Panel1.3 Locate the Appearance and Personalization section1.4 Click on Adjust Screen Resolution1.5 Verify that the resolution is set to the highest settingFull Screen ModeThe Taleo application is best viewed in full screen mode.22.1 Click on the maximizewindowbutton located in the top right corner of the browser2.2 From the browser window, select keystroke alt enterNote: Use this keystroke to maximize or minimize the screenInternet Explorer Zoom Option3The Taleo application is best viewed when the internet explorer zoom option isset at 100%.3.1 On your Internet Explorer toolbar, select Page3.2 Select Zoom3.3 Make sure that 100% is checkedTrusted SitesAdd Taleo to your trusted sites.44.1 Go to: https://midamerican.taleo.net4.2 Go to Tools4.3 Click on Internet Options4.4 Click on Security tab4.5 Click on Trusted Sites4.6 Click on Sites button4.7 The Taleo URL should populate in the Add this website to the zone: box. If not, type:https://midamerican.taleo.net4.8 Click Add4.9 Click Close4.10 Click OKAllow Pop-upsAllow pop-ups from Taleo.55.1 On your Internet Explorer toolbar , go to Tools5.2 Select Pop-up Blocker5.3 Select Pop-up Blocker Settings5.4 Type: midamerican.taleo.net5.5 Click AddAdd Taleo to FavoritesAdd Taleo to your Favorites.66.1 Go to: https://midamerican.taleo.net6.2 Click Add to Favorites in the top left corner of your browser window6.3 In Name field type Taleo6.4 Click AddTaleo Proprietary and ConfidentialUpdated: 11/18/2011Page 5 of 64
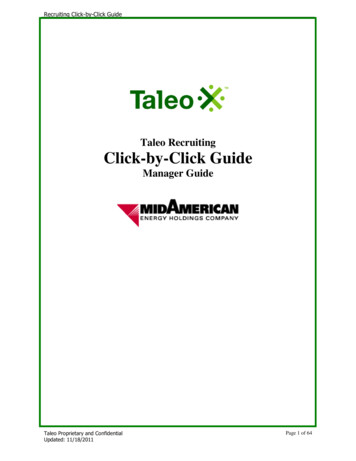
Recruiting Click-by-Click GuideCommunications MenuThe Communications menu is used to give Taleo users easy access to the mostup to date Click-by-Click guide and/or helpful training aides.It is located on the right side bar of Center Stage.Locate the Communications menu.7.1 Log in to Taleo: https://midamerican.taleo.net7.2 Click on Recruiting7.3 To get to Center Stage from anywhere in the Taleo application, click on Recruiting7.4 If the right side bar is minimized, click on the double arrow7.5 Click on thebutton to maximize iticon to display the Communications menuIf the Communications menu does not display.77.1 On your Internet Explorer toolbar, go to Tools7.2 Click on Internet Options7.3 Click on Security tab7.4 Click Custom level7.5 Scroll down to Display Mixed Content (located approximately half way down)7.6 Select the radio button, Enable7.7 Click OKLog out and sign back in to Taleo.You will be prompted with one or two of the following Security Warnings, find thewarning below that exactly matches the wording on your computer and answeraccordingly.7.1 Security Warning: The current webpage is trying to open a site in your trusted siteslist. Do you want to allow this?Answer Yes7.2 Security Warning: Do you want to view only the webpage content that wasdelivered securely?Answer No7.3 Security Information: This page contains both secure and nonsecure items. Do youwant to display the nonsecure items?Answer YesYour computer settings are now configured for you to use Taleo.Taleo Proprietary and ConfidentialUpdated: 11/18/2011Page 6 of 64
Recruiting Click-by-Click GuideComputer Settings and Troubleshooting FAQsI am getting an error that says my pop-up blocker will not allow me to access the site.Follow the instructions in steps 4-6 in the Computer Settings section of this guide.Is my password the same as my network password?No, not unless you set it the same. The system does not correlate with the networkpassword. So when you change your network password, it does not change your Taleopassword.I forgot my password, how do I get a new one?Follow step 3 of the Log Into Recruiting section of the user guide.Taleo Proprietary and ConfidentialUpdated: 11/18/2011Page 7 of 64
Recruiting Click-by-Click GuideLogin to Recruiting1Enter the Taleo URL into your Internet Explorer address bar:https://midamerican.taleo.net.If a message displays informing you that you cannot access Taleo because yourpop-up blocker is turned on, select (from your browser menu) Tools Pop-upBlocker Turn off Pop-up Blocker.*More detailed instructions on how to turn off the pop-up blocker are located in theComputer Settings section of this manual.2Click Enter (on your keyboard) or click the browser Gobutton.Save the Sign In page URL to your Internet Explorer favorites.*More detailed instructions on how to save Taleo to your favorites are located in theComputer Settings section of this manual.Enter your User Name and Password in the appropriate fields.User Name Your T-NumberThe Password is case sensitive. If you have forgotten your password or are a firsttime user, follow the instructions below:33.1 Click on Forgot your password?3.2 Enter User Name and email address3.3 Click OK3.4 Receive an email from taleo@midamerican.com with the subject, “Forgot yourPassword?” and follow instructions to reset password3.5 If you have not received the email, check your junk mail3.6 If you are still not receiving the email, then contact the system administrator atemployment@midamerican.comNote: Your password must comply with the following protocol: 4It must contain between 6 and 32 characters from the following set:! # % & ( ) * , -. / : ; ? @ [ \ ] „ { } 0123456789ABCDEFGHIJKLMNOPQRSTUVWXYZ abcdefghijklmnopqrstuvwxyzIt must contain at least 1 letter(ABCDEFGHIJKLMNOPQRSTUVWXYZ abcdefghijklmnopqrstuvwxyz)It must contain at least 1 numeric character(0123456789)It must contain at least 1 character(s) from the following set:!# %&()* ,-./:; ?@[] { } It must not contain more than two identical consecutive characters (AAA, iiii, , )It must not contain your user nameIt must not contain your email addressClick the Sign inTaleo Proprietary and ConfidentialUpdated: 11/18/2011button.Page 8 of 64
Recruiting Click-by-Click GuideYou will be prompted with one or two of the following Security Warnings. Findthe warning below that exactly matches the wording on your computer and answeraccordingly.5.1 Security Warning: The current webpage is trying to open a site in your trusted siteslist. Do you want to allow this?Answer Yes55.2 Security Warning: Do you want to view only the webpage content that wasdelivered securely?Answer No5.3 Security Information: This page contains both secure and nonsecure items. Do youwant to display the nonsecure items?Answer Yes6Select Recruiting from the Taleo main menu.The Center Stage main menu appears.Taleo Proprietary and ConfidentialUpdated: 11/18/2011Page 9 of 64
Recruiting Click-by-Click GuideWork with My SetupSelect My Setup.My Setup allows you access to the following items:1 Change your Taleo password – Proceed to steps 2-5Delegate your Taleo tasks – Proceed to steps 6-9Set preferences – Proceed to steps 10-12Set Frequent Collaborators – Proceed to steps 13-14Set Frequent Approvers – Proceed to steps 15-18Change your Taleo password2Under the General tab, click the EditAccount section.3In the Password field enter your replacement password.button and scroll down to theYour password must comply with the following protocol: It must contain between 6 and 32 characters. Use only characters from the following set: ! # % & ( ) * , -. / : ; ? @ [ \ ] „ { } 0123456789ABCDEFGHIJKLMNOPQRSTUVWXYZ abcdefghijklmnopqrstuvwxyz It must contain at least 1 rstuvwxyz) It must contain at least 1 numeric character (0123456789) It must contain at least 1 character(s) from the following set: ! # % & ( )* ,-./:; ?@[] { } It must not contain more than two identical consecutive characters (AAA,iiii, , ) It must not contain your user name It must not contain your email address456In the Confirm Password field re-enter your replacement password.Click the Save and Closebutton.Delegate your Taleo tasksDelegation allows you to temporarily assign your tasks, such as approvals, toanother employee. This can be helpful when you plan to be out of the office forany length of time.Click the DelegateTaleo Proprietary and ConfidentialUpdated: 11/18/2011button under Account.Page 10 of 64
Recruiting Click-by-Click GuideIn the Alternate User field:7.1 Click the Selector789button7.2 Type the employee‟s name in the Name field7.3 Click on the Refreshbutton7.4 Click the Selectbutton next to the employee‟s nameUse the CalendarClick the DoneClick Yeswork items.icon to select the From and To dates.button.to confirm that you allow the delegee to access the delegator‟sbutton is now an Update Delegation button and there is a note above the button that indicates who hasbeen delegated and the time frame of the delegation.The DelegateSet preferences10Click on the Preferences tab, click the Editupdate Preferences.button and scroll down toUnder Preferences, scroll down in order to modify:1111.1 General - User Preferences11.2 Search Preferences11.3 Candidates - How candidates are viewed11.4 Requisition Preferences12Click Save and Closeto save updates to the Preferences tab.Set Frequent Collaborators13When frequent collaborators are added in My Setup, the collaborators that youadd will appear by default on every single requisition that you create. It issuggested that you only add the frequent collaborators in My Setup that shouldappear by default for almost every requisition that you create.Click on the Frequent Collaborators tab and click on the Addbutton.Taleo Proprietary and ConfidentialUpdated: 11/18/2011or ModifyPage 11 of 64
Recruiting Click-by-Click Guide14.1 Type the employee‟s name in the Name field and then click on the Refreshbutton14button next to the employee‟s name14.2 Click the Select14.3 Repeat steps 1-2 above until all frequent collaborators are listed in the SelectedCollaborators box14.4 ClickThe frequent collaborators should now appear in the Collaborators section of theFrequent Collaborators tab. The Addbutton is now a Modifybutton.Set Frequent Approvers15Frequent approvers can be added in My Setup for requisition or offer approval.The approvers that you add in the Requisition Approval section will appear bydefault on every single requisition that you create. It is suggested that you onlyadd the frequent requisition approvers in My Setup that should appear by defaultfor almost every requisition that you create.Click on the Frequent Approvers tab and click on the Addbutton in the Requisition Approval section.or ModifyThis section adds Frequent Approvers when requesting requisition approvals.16.1 Type the employee‟s name in the Name field and then click on the Refreshbutton.1616.2 Click the Selectbutton next to the employee‟s name16.3 Repeat steps 1-2 above until all frequent approvers are listed in the SelectedApprovers box16.4 ClickThe frequent requisition approvers should now appear in the Requisition Approvalsection of the Frequent Approvers tab. The Addbutton is now a Modifybutton.Frequent approvers can be added in My Setup for requisition or offer approval.The approvers that you add in the Offer Approval section will appear by defaulton every single offer that you create. It is suggested that you only add the frequentoffer approvers in My Setup that should appear by default for almost every offerthat you create.17Click on the Addor Modifybutton in the Offer Approval section.This section adds Frequent Approvers when requesting offer approvals.Taleo Proprietary and ConfidentialUpdated: 11/18/2011Page 12 of 64
Recruiting Click-by-Click Guide18.1 Type the employee‟s name in the Name field and then click on the Refreshbutton.1818.2 Click the Selectbutton next to the employee‟s name18.3 Repeat steps 1-2 above until all frequent approvers are listed in the SelectedApprovers box18.4 ClickThe frequent offer approvers should now appear in the Offer Approval section ofthe Frequent Approvers tab. The Addbutton is now a Modifybutton.Taleo Proprietary and ConfidentialUpdated: 11/18/2011Page 13 of 64
Recruiting Click-by-Click GuideRequisition ManagementCreate a RequisitionBefore you get started you will need:1. The job code and job code extent for the position that you are creating arequisition. The instructions below will assist you in obtaining the job code andextent for either a represented or nonrepresented position.Represented positions:Appendix II-Represented Job Codes (located at the end of this user guide) lists all represented jobcodes.Nonrepres
7.1 Log in to Taleo: https://midamerican.taleo.net 7.2 Click on Recruiting 7.3 To get to Center Stage from anywhere in the Taleo application, click on Recruiting 7.4 If the right side bar is minimized, click on the double arrow button to maximize it