Transcription
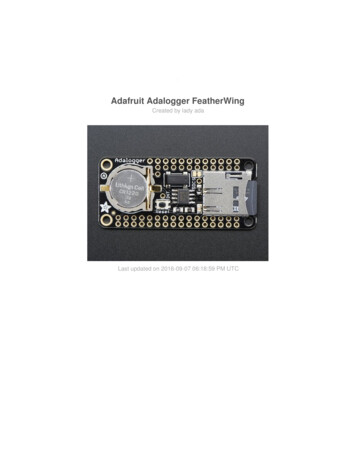
Adafruit Adalogger FeatherWingCreated by lady adaLast updated on 2016-09-07 06:18:59 PM UTC
Guide ContentsGuide ContentsOverviewPinoutsPower PinsRTC & I2C PinsSD & SPI PinsAssemblyUsing the Real Time Clock2377891114What is a Real Time Clock?14Battery Backup15CR1220 12mm Diameter - 3V Lithium Coin Cell BatteryTalking to the RTCFirst RTC testSetting the timeReading the timeUsing the SD Card4GB Blank SD/MicroSD Memory CardUSB MicroSD Card Reader/Writer - microSD / microSDHC / microSDXCFormatting under Windows/MacGet Card InfoDownloadsDatasheets and FilesSchematicFabrication Print Adafruit ogger-featherwing1516161819212122222329292929Page 2 of 30
OverviewA Feather board without ambition is a Feather board without FeatherWings! This is theAdalogger FeatherWing: it adds both a battery-backed Real Time Clock and micro SDcard storage to any Feather main board. Using our Feather StackingHeaders (http://adafru.it/2830) or Feather Female Headers (http://adafru.it/2886) you canconnect a FeatherWing on top of your Feather board and let the board take flight! Adafruit ogger-featherwingPage 3 of 30
This FeatherWing will make it real easy to add datalogging to any of our existing Feathers.You get both an I2C real time clock (PCF8523) with 32KHz crystal and battery backup, anda microSD socket that connects to the SPI port pins ( extra pin for CS). Tested and worksgreat with any of our Feathers, based on ATmega32u4, ATSAMD21, Teensy, or ESP8266. Adafruit ogger-featherwingPage 4 of 30
We recommend the Arduino's default SD library to talk to the microSD card socket. OnESP8266, the SD CS pin is on GPIO 15, on Atmel M0 or 32u4 it's on GPIO 10. You can cutthe trace to the default pin and change this to any pin. To use the RTC, use our RTCliblibrary (http://adafru.it/c7r). If you need a precision RTC, check out our DS3231FeatherWing (http://adafru.it/3028) Adafruit ogger-featherwingPage 5 of 30
Great for any kind of datalogging or even data reading! Some light soldering is required toattach the headers onto the 'Wing but it's a 10 minute task. Adafruit ogger-featherwingPage 6 of 30
PinoutsEvern though every pin from the Feather is 'doubled up' with an inner header, not all of thepins are actually used!Power Pins Adafruit ogger-featherwingPage 7 of 30
On the bottom row, the 3.3V (leftmost) and GND (third from left) pin are used to power theSD card and RTC (to take a load off the coin cell battery when main power is available)RTC & I2C PinsIn the top right, SDA (rightmost) and SCL (to the left of SDA) are used to talk to the RTCchip.SCL - I2C clock pin, connect to your microcontrollers I2C clock line. This pin has a10K pullup resistor to 3.3VSDA - I2C data pin, connect to your microcontrollers I2C data line. This pin has a 10Kpullup resistor to 3.3VThese pins are in the same location on every Feather Adafruit ogger-featherwingPage 8 of 30
There's also a breakout for INT which is the output pin from the RTC. It can be used as aninterrupt output or it could also be used to generate a square wave.Note that this pin is open drain - you must enable the internal pullup on whatever digital pinit is connected to!SD & SPI PinsStarting from the left you've got Adafruit ogger-featherwingPage 9 of 30
SPI Clock (SCK) - output from feather to wingSPI Master Out Slave In (MOSI) - output from feather to wingSPI Master In Slave Out (MISO) - input from wing to featherThese pins are in the same location on every Feather. They are used for communicatingwith the SD card. When the SD card is not inserted, these pins are completely free. MISOis tri-stated whenever the SD CS pin is pulled highThe SDCS pin is the chip select line.On ESP8266, the SD CS pin is on GPIO 15On Atmel M0 or 32u4 it's on GPIO 10On Teensy 3.x it's on GPIO 10You can cut the trace to the default pin and change this to any pin by soldering a wire toany available pad. Adafruit ogger-featherwingPage 10 of 30
AssemblyWhen putting together your Featherwings, think about how you want it to connect, you canuse stacking headers:Or plain female socket headers: Adafruit ogger-featherwingPage 11 of 30
The most common method of attachment for the featherwing is putting stacking or femaleheaders on the Feather mainboard and then putting the Wing on top: Adafruit ogger-featherwingPage 12 of 30
But don't forget, you can also put the stacking headers on the wing and stack theFeather on top of it! Adafruit ogger-featherwingPage 13 of 30
Using the Real Time ClockWhat is a Real Time Clock?When logging data, it's often really really useful to have timestamps! That way you can takedata one minute apart (by checking the clock) or noting at what time of day the data waslogged.The Arduino IDE does have a built-in timekeeper called millis() and theres also timers builtinto the chip that can keep track of longer time periods like minutes or days. So why wouldyou want to have a separate RTC chip? Well, the biggest reason is that millis() only keepstrack of time since the Feather was last powered - that means that when the power isturned on, the millisecond timer is set back to 0. The Feather doesnt know its 'Tuesday' or'March 8th' all it can tell is 'Its been 14,000 milliseconds since I was last turned on'.OK so what if you wanted to set the time? You'd have to program in the date and time andyou could have it count from that point on. But if it lost power, you'd have to reset the time.Much like very cheap alarm clocks: every time they lose power they blink 12:00While this sort of basic timekeeping is OK for some projects, a data-logger will need tohave consistent timekeeping that doesnt reset when the power goes out or isreprogrammed. Thus, we include a separate RTC! The RTC chip is a specialized chip thatjust keeps track of time. It can count leap-years and knows how many days are in a month,but it doesn't take care of Daylight Savings Time (because it changes from place to place)This image shows a computer motherboard with a Real Time Clock called theDS1387 (http://adafru.it/aX0). Theres a lithium battery in there which is why it's so big. Adafruit ogger-featherwingPage 14 of 30
The RTC we'll be using is the PCF8523 (http://adafru.it/reb)Battery BackupAs long as it has a coin cell to run it, the RTC will merrily tick along for a long time, evenwhen the Feather loses power, or is reprogrammed.Use any CR1220 3V lithium metal coin cell battery:CR1220 12mm Diameter - 3V Lithium Coin Cell BatteryPRODUCT ID: 380These are the highest quality & capacity batteries, the same as shipped with theiCufflinks, iNecklace, Datalogging and GPS Shields, GPS HAT, etc. One battery per order.http://adafru.it/em8 0.95IN STOCKYou MUST have a coin cell installed for the RTC to work, if there is no coin cell, it will actstrangely and possibly hang the Arduino when you try to use it, so ALWAYS make SUREthere's a battery installed, even if it's a dead battery. Adafruit ogger-featherwingPage 15 of 30
Talking to the RTCThe RTC is an i2c device, which means it uses 2 wires to to communicate. These two wiresare used to set the time and retrieve it.For the RTC library, we'll be using a fork of JeeLab's excellent RTC library, which isavailable on GitHub (http://adafru.it/c7r). You can do that by visiting the github repo andmanually downloading or, easier, just click this button to download the zipDownload RTC Libraryhttp://adafru.it/cxmRename the uncompressed folder RTClib and check that the RTClib folder containsRTClib.cpp and RTClib.hPlace the RTClib library folder your arduinosketchfolder/libraries/ folder.You may need to create the libraries subfolder if it's your first library. Restart the IDE.We also have a great tutorial on Arduino library installation duino-libraries-install-useOnce done, restart the IDEFirst RTC test Adafruit ogger-featherwingPage 16 of 30
The first thing we'll demonstrate is a test sketch that will read the time from the RTC once asecond. We'll also show what happens if you remove the battery and replace it since thatcauses the RTC to halt. So to start, remove the battery from the holder while the Feather isnot powered or plugged into USB. Wait 3 seconds and then replace the battery. This resetsthe RTC chip. Now load up the matching sketch for your RTCOpen up Examples- RTClib- pcf8523Upload it to your Feather with the Wing on!Now open up the Serial Console and make sure the baud rate is set correctly at57600baud you should see the following: Adafruit ogger-featherwingPage 17 of 30
Whenever the RTC chip loses all power (including the backup battery) it will reset to anearlier date and report the time as 0:0:0 or similar. Whenever you set the time, this willkickstart the clock ticking.So, basically, the upshot here is that you should never ever remove the battery once you'veset the time. You shouldn't have to and the battery holder is very snug so unless the boardis crushed, the battery won't 'fall out'Setting the timeWith the same sketch loaded, uncomment the line that starts withRTC.adjust like so:if (! rtc.initialized()) {Serial.println("RTC is NOT running!");// following line sets the RTC to the date & time this sketch was compiledrtc.adjust(DateTime(F( DATE ), F( TIME )));This line is very cute, what it does is take the Date and Time according the computer you'reusing (right when you compile the code) and uses that to program the RTC. If yourcomputer time is not set right you should fix that first. Then you must press the Uploadbutton to compile and then immediately upload. If you compile and then upload later, the Adafruit ogger-featherwingPage 18 of 30
clock will be off by that amount of time.Then open up the Serial monitor window to show that the time has been setFrom now on, you won't have to ever set the time again: the battery will last 5 or moreyearsReading the timeNow that the RTC is merrily ticking away, we'll want to query it for the time. Let's look at thesketch again to see how this is donevoid loop () {DateTime now rtc.now();Serial.print(now.year(), DEC);Serial.print('/');Serial.print(now.month(), DEC);Serial.print('/');Serial.print(now.day(), DEC);Serial.print(" ("); Adafruit ogger-featherwingPage 19 of 30
rial.print(") ");Serial.print(now.hour(), DEC);Serial.print(':');Serial.print(now.minute(), DEC);Serial.print(':');Serial.print(now.second(), DEC);Serial.println();There's pretty much only one way to get the time using the RTClib, which is to callnow(), afunction that returns a DateTime object that describes the year, month, day, hour, minuteand second when you called now().There are some RTC libraries that instead have you call something like RTC.year() andRTC.hour() to get the current year and hour. However, there's one problem where if youhappen to ask for the minute right at 3:14:59 just before the next minute rolls over, andthen the second right after the minute rolls over (so at 3:15:00) you'll see the time as3:14:00 which is a minute off. If you did it the other way around you could get3:15:59 - soone minute off in the other direction.Because this is not an especially unlikely occurance - particularly if you're querying the timepretty often - we take a 'snapshot' of the time from the RTC all at once and then we can pullit apart into day() or second() as seen above. It's a tiny bit more effort but we think its worthit to avoid mistakes!We can also get a 'timestamp' out of the DateTime object by callingunixtime which countsthe number of seconds (not counting leapseconds) since midnight, January 1st 1970Serial.print(" since 2000 ");Serial.print(now.unixtime());Serial.print("s ");Serial.print(now.unixtime() / 86400L);Serial.println("d");Since there are 60*60*24 86400 seconds in a day, we can easily count days since thenas well. This might be useful when you want to keep track of how much time has passedsince the last query, making some math a lot easier (like checking if it's been 5 minuteslater, just see if unixtime() has increased by 300, you dont have to worry about hourchanges) Adafruit ogger-featherwingPage 20 of 30
Using the SD CardThe other half of the adalogger FeatherWing is the SD card. The SD card is how we storelong term data. While the Feather may have a permanent EEPROM storage, its only acouple hundred bytes - tiny compared to a 2 gig SD card. SD cards are so cheap and easyto get, its an obvious choice for long term storage so we use them for the 'Wing!The FeatherWing kit doesn't come with an SD card butwe carry one in the shop that isguaranteed to work (http://adafru.it/aIH). Pretty much any SD card should work but beaware that some cheap cards are 'fakes' and can cause headaches.4GB Blank SD/MicroSD Memory CardPRODUCT ID: 102Add mega-storage in a jiffy using this 4 GB micro-SD card. It comes with a SD adapter soyou can use it with any of our shields or adapters! Preformatted to FAT so it works out ofthe box.http://adafru.it/eZR 7.95IN STOCKYou'll also need a way to read and write from the SD card. Sometimes you can use yourcamera and MP3 player - when its plugged in you will be able to see it as a disk. Or youmay need an SD card reader (http://adafru.it/939). The Wing doesnt have the ability todisplay the SD card as a 'hard disk' like some MP3 players or games, the Feather does nothave the hardware for that, so you will need an external reader! Adafruit ogger-featherwingPage 21 of 30
USB MicroSD Card Reader/Writer - microSD / microSDHC / microSDXCPRODUCT ID: 939This is the cutest little microSD card reader/writer - but don't be fooled by its adorableness!It's wicked fast and supports up to 64 GB SDXC cards! Simply slide the card into theedge.http://adafru.it/ree 5.95IN STOCKFormatting under Windows/MacIf you bought an SD card, chances are it's already pre-formatted with a FAT filesystem.However you may have problems with how the factory formats the card, or if it's an old cardit needs to be reformatted. The Arduino SD library we use supports both FAT16 and FAT32filesystems. If you have a very small SD card, say 8-32 Megabytes you might find it isformatted FAT12 which isnt supported. You'll have to reformat these card. Either way, itsalways good idea to format the card before using, even if its new! Note that formatting willerase the card so save anything you want firstWe strongly recommend you use the official SD card formatter utility - written by the SDassociation it solves many problems that come with bad formatting!The official SD formatter is available fromhttps://www.sdcard.org/downloads/formatter 4/ (http://adafru.it/cfL)Download it and run it on your computer, there's also a manual linked from that page foruseDownload the official SD Formatter software for Windows Adafruit ogger-featherwingPage 22 of 30
http://adafru.it/cfLGet Card InfoThe Arduino SD Card library has a built in example that will help you test the Wing andyour connectionsOpen the file CardInfo example sketch in the SD library:This sketch will not write any data to the card, just tell you if it managed to recognize it, andsome information about it. This can be very useful when trying to figure out whether an SDcard is supported. Before trying out a new card, please try out this sketch! Adafruit ogger-featherwingPage 23 of 30
Go to the beginning of the sketch and make sure that thechipSelect line is correct.On ESP8266, the SD CS pin is on GPIO 15On Atmel M0 or 32u4 it's on GPIO 10On Teensy 3.x it's on GPIO 10OK, now insert the micro SD card into the FeatherWing and upload the sketch Adafruit ogger-featherwingPage 24 of 30
Open up the Serial Monitor and type in a character into the text box (& hit send) whenprompted. You'll probably get something like the following: Adafruit ogger-featherwingPage 25 of 30
Its mostly gibberish, but its useful to see theVolume type is FAT16 part as well as the sizeof the card (about 2 GB which is what it should be) etc.If you have a bad card, which seems to happen more with ripoff version of good brands,you might see: Adafruit ogger-featherwingPage 26 of 30
The card mostly responded, but the data is all bad. Note that theProduct ID is "N/A" andthere is no Manufacturer ID or OEM ID. This card returned some SD errors. Its basically abad scene, I only keep this card around to use as an example of a bad card! If you getsomething like this (where there is a response but its corrupted) you should toss the cardFinally, try taking out the SD card and running the sketch again, you'll get the following, Adafruit ogger-featherwingPage 27 of 30
It couldn't even initialize the SD card. This can also happen if there's a soldering error or ifthe card is really damagedIf you're having SD card problems, we suggest using the SD formatter mentionedabove first to make sure the card is clean and ready to use! Adafruit ogger-featherwingPage 28 of 30
DownloadsDatasheets and FilesEagleCAD PCB files on GitHub (http://adafru.it/rek)Fritzing object in Adafruit Fritzing library (http://adafru.it/c7M)PCF8523 product page (http://adafru.it/reb)SchematicFabrication Print Adafruit ogger-featherwingPage 29 of 30
Adafruit IndustriesLast Updated: 2016-09-07 06:18:57 PM UTCPage 30 of 30
21 21 22 22 23 29 29 29 29 Guide Contents Guide Contents Overview Pinouts Power Pins RTC & I2C Pins SD & SPI Pins . into the chip that can keep track of longer time periods like minutes or days. So why would you want to have a separate RTC chip? Well, the biggest reason is that millis() only keeps . RTClib.cpp and RTClib.h