Transcription
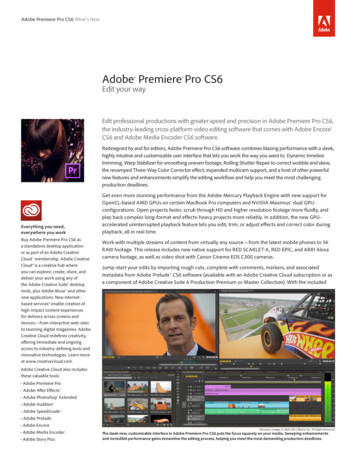
Editing Videos in Adobe Premiere Pro CC 2015We recommend that you use iMovie or Live Movie Maker to cut/trim the video footage first before you doother editing such as blurring faces or adding subtitles in Adobe Premiere. This will make the processmuch easier.1. Trimming/Cutting Footagea. Create a new project in Adobe Premiere: After you have launched Adobe Premiere select New Project from the welcome window. Name your project in the next window, keep the default project settings and browse to choosethe location that you want to save your project. Next the New Sequence window appears. Keep the default sequence settings and name thesequence.Created by Aaditya Rajbhandari, Joleen Watson, Melissa Walker & Doris Grasserbauer (dgrasserbauer@ccny.cuny.edu)Last updated on May 6, 2019Page 1 of 9
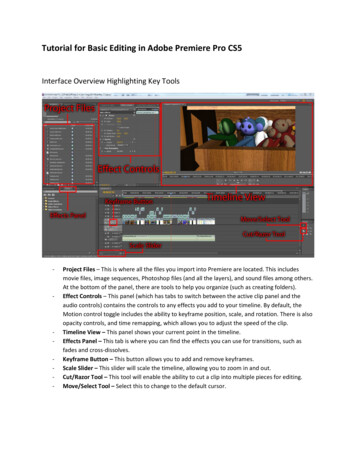
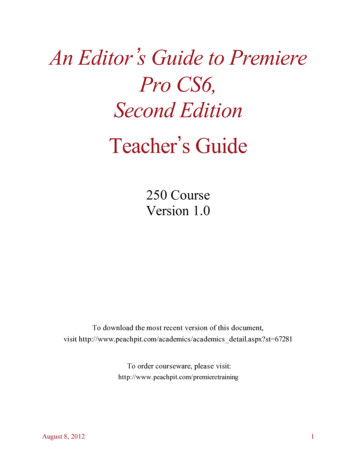
The Work Area will appear and it is divided into four sections/panels: Source (top left) panel,Program (top right) panel, Project (bottom left) panel and Timeline (bottom right) panel.b. Import your footage into Adobe Premiere. Click on the Media Browser tab found in the Project panel and navigate to where your footageis located on the computer. The footage will show to the right in the same panel once you clickon the footage folder or file.Note: If you do not see your footage appear, check that All Supported Files is selected fromthe Files of Type drop down menu.Created by Aaditya Rajbhandari, Joleen Watson, Melissa Walker & Doris Grasserbauer (dgrasserbauer@ccny.cuny.edu)Last updated on May 6, 2019Page 2 of 9
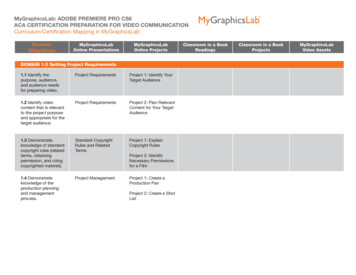
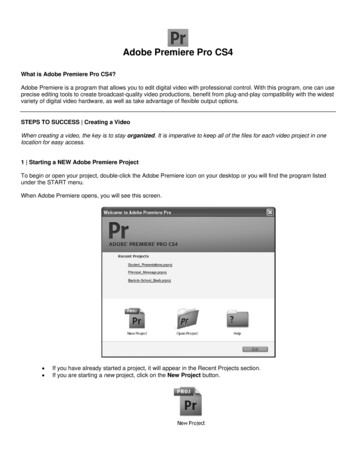
Now you need to import the footage to the Timeline in order to trim or do any other form ofediting.To import to Timeline, drag the footage from the Media Browser panel onto the Timeline. Thefootage takes up both a video and an audio track. You can choose which track you want yourfootage to appear in the Timeline by dragging it to that track.Note: When you drag to the timeline, you may get a Clip Mismatch Warning pop-up windowwith the default option Keep Existing Settings. Always click and choose Change SequenceSettings to match the clip’s settings which are the default settings of your camera. This ensuresthat your footage is not altered by Adobe Premiere e.g. if you filmed in portrait Adobe Premieremight try to stretch or zoom your video to landscape which is the default settings.c. Start trimming: Double click on the video in your Media browser that you want to trim. The video will appearin the Source panel. If you want to cut out a portion of the video, the easiest way to do so is to place in and outmarkers and then extract. You will work with the controls at the bottom of the Source panel totrim your footage. Place the Position indicator where you want your sequence to begin and click the Mark Inbutton (looks like a left curly bracket). Then place the position indicator where you want theCreated by Aaditya Rajbhandari, Joleen Watson, Melissa Walker & Doris Grasserbauer (dgrasserbauer@ccny.cuny.edu)Last updated on May 6, 2019Page 3 of 9
sequence to end and click the Mark Out button (looks like a right curly bracket). You will see that the portion of the footage you want to keep is selected. Click on the Insertbutton (the third button from the bottom right of Source panel controls) to insert the selectedfootage to the Timeline.d. Exporting the video: Click File -- Export -- Media. If that option is grayed out, deselect the Timeline by clickingat a blank area of the Timeline and try again. Always make sure Timeline is selected whenexporting your video so that the edited clip is exported and not the source clip.The recommended export format is Quicktime. Use the default settings and make sure the ExportVideo and the Export Audio boxes are checked. Then click Export and wait for your video torender.Created by Aaditya Rajbhandari, Joleen Watson, Melissa Walker & Doris Grasserbauer (dgrasserbauer@ccny.cuny.edu)Last updated on May 6, 2019Page 4 of 9
2. TransitionsA transition is the way one segment changes to the next. By default, if two clips are placed next toeach other in the timeline, the transition is a cut. If there is space or timeframes in between clips itwill render as a black background between clips.To make more interesting transitions such as dissolves, wipes and effects, use the transitions availablein the Effects window on the bottom left panel of the screen and follow the following steps:a. Open the Effects window by clicking on the Effects tab in the Project panel. There are two typesof transition: Video and audio. To apply a transition, expand the Video Transitions or AudioTransitions bin under the Effects Tab. Then choose a transition to use.b. Drag the desired transition to the timeline at the point where the two clips join. Make sure it isplaced in the correct video or audio track.c. The Timeline will show where the transition will be placed.d. When you release the mouse, the transition is applied.3. Blurring FacesCreated by Aaditya Rajbhandari, Joleen Watson, Melissa Walker & Doris Grasserbauer (dgrasserbauer@ccny.cuny.edu)Last updated on May 6, 2019Page 5 of 9
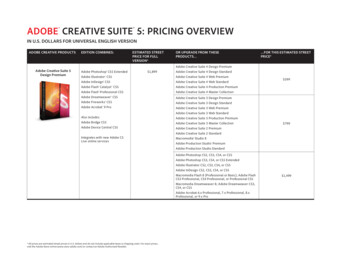
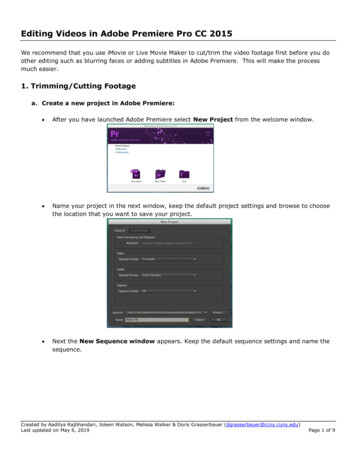
If you want to disguise children’s faces you might consider blurring them with Adobe Premiere.a. To begin, choose clip from Media Browser panel on the bottom left of the screen in which youwant the face blurred and place the video clip on the timeline in Video track 1. Make an exact copyof the clip by clicking ALT key and click on Video 1 track and drag up. Place it on a video trackdirectly above the original clip i.e. video track.b. Double click on the track in Video track 2. You will see the clip appear in the source panel to thetop left of the screen.c.From the Effects palette on the bottom left panel, click on Video Effects Stylize Mosaicand drag this on top of the clip in Video track 2 to add to the clip (you will see a little plus signappear when you hover over the clip you want to add the effect to). Also from Video Effects clickon Blur & Sharpen Gaussian blur and drag and drop onto clip in Video track 2 to add. Lastlyfrom Video effects click on Transform Crop and drag and drop onto clip in Video track 2 toadd.d. Once these effects are added to the clip in Video track 2, you can adjust the settings for Mosaic,Crop and Gaussian blur. To do this click of Effects Control tab in source panel at the top left ofthe screen.Created by Aaditya Rajbhandari, Joleen Watson, Melissa Walker & Doris Grasserbauer (dgrasserbauer@ccny.cuny.edu)Last updated on May 6, 2019Page 6 of 9
e. First adjust the horizontal and vertical settings of Mosaic to make pixels smaller. Then adjust theblurriness setting of Gaussian blur. Under the Crop settings toggle/select all settings to create keyframes and then click on the square box icon next to Crop. You can now adjust pixels to cover justthe face you want to blur.f.Make sure the clip in Video track 2 is selected and the clip is at the point where you want to startyour blur and adjust the blur to cover the targeted face.g. To move the blur box as the subject’s face moves, click on source panel and hold down the Shiftkey and click the Right arrow (on the computer keyboard) to move forward in the clip. As thesubject face moves in the clip, move the blur box to cover the face.h.When finished, playback the video to make sure the face is completely covered at all times in theclip. You can then export your clip preferably as a Quicktime video. Please keep in mind thatalthough you might only blur one minute of your footage, Adobe Premiere renders the whole videosegment and will take more than one minute to export the video. The time taken to render thevideo depends on the length of the video. The video saves in the Adobe Premier folder found indocuments.4. Adding SubtitlesThis process involves selecting a starting video frame, typing in the subtitle text string, positioning iton-screen, and setting its ending frame.a. In the Timeline, drag the current time indicator to the first frame in which you want to add asubtitle.b. Click Command & T and this will bring up an edit window with text tools to createsubtitles/captions. Name the subtitle in the New Title window that appears and keep defaultsettings.Created by Aaditya Rajbhandari, Joleen Watson, Melissa Walker & Doris Grasserbauer (dgrasserbauer@ccny.cuny.edu)Last updated on May 6, 2019Page 7 of 9
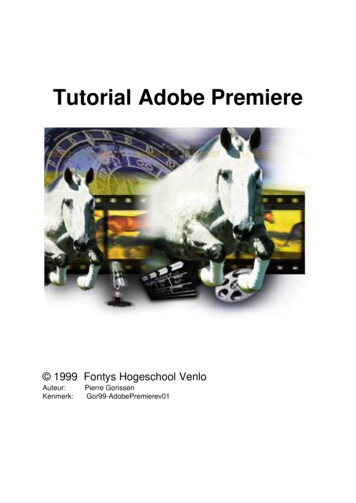
c. Use the text tools in the Tools panel to the left of the screen and type your subtitle. The SafeArea which is two rectangular guides will appear so you can know where to enter your text. Onceyou select a text tool (single line or area text tool) and move the cursor into the Monitor, note thatthe pointer changes to an I-beam within an area box in which to type the subtitle. Position thebaseline of the I-beam pointer where you want the subtitle to begin, and click to set the insertionpoint for the type. When you are finished typing the subtitle, close the window.d. Once finished close the window and the subtitle will appear in the project window along with videoclips in the bottom left of the screen.e. You can double click on the subtitle clip to edit.f.Once you are satisfied with the subtitle text and positioning, drag the clip to the position in theTimeline where you want it to appear.Created by Aaditya Rajbhandari, Joleen Watson, Melissa Walker & Doris Grasserbauer (dgrasserbauer@ccny.cuny.edu)Last updated on May 6, 2019Page 8 of 9
g. In the Timeline you can stretch the clip to cover as many frames as necessary for that subtitle.You would create other subtitles by repeating the above steps.When exporting your video that has subtitles/closed caption, it is best to export as a Quicktime moviebecause you are given the option to embed the subtitle in the video. When you open your movie inQuicktime you can then turn on the View Subtitle/Caption option, if subtitles do not show up.Created by Aaditya Rajbhandari, Joleen Watson, Melissa Walker & Doris Grasserbauer (dgrasserbauer@ccny.cuny.edu)Last updated on May 6, 2019Page 9 of 9
Editing Videos in Adobe Premiere Pro CC 2015 , We recommend that you use iMovie or Live Movie Maker to cut/trim the video footage first before you do other editing such as blurring faces or adding subtitles in Adobe Premiere. This will make the process much easier. 1. Trimming/Cutting Footage , a. Create a new project in Adobe Premiere: ,