Transcription
Tray 2 Pick-up Assembly Removal and ReplacementHP LaserJet P3015/M525MFP PrintersInformation was missing in the service manual on how to remove and replace the Tray 2 Pick-upAssembly.Service manual Tray 2 Pick-up Assembly Removal and Replacement InstructionsCassette pickup (Tray 2) solenoid or Tray 1 (multipurpose tray) pickup solenoid1. Before proceeding, remove the following components: ADF & Scanner Assemblies for M525MFP only DIMM cover Formatter cover and formatter PCA Rear-door assembly Left cover Top-right cover Control panel Front-right and right-side cover assembly Lower-right cover Top cover Power switch assemblyNOTE:Removing the power-switch assembly makes it easierto disconnect the connectors at the front of the ECU. Engine control unit (ECU)
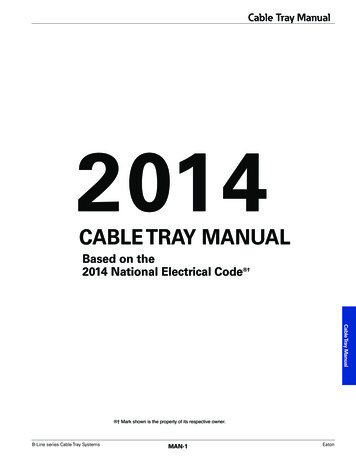
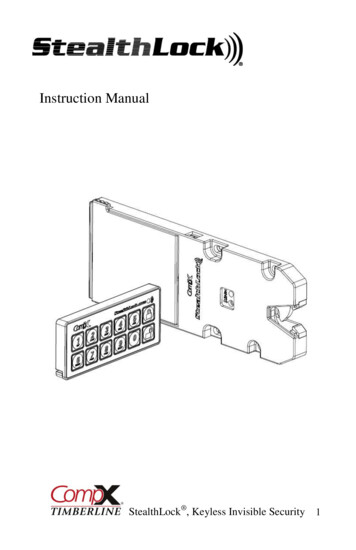
2. Release the wire harness from the guides (callout 1), and then removethree screws (callout 2).CAUTION:Do not try to remove the gear cover after the screws are removed(it is still attached to the solenoid-wire harness).Figure: Cassette pickup (Tray 2) or Tray 1 (multipurpose tray)solenoid3. Carefully unwind the wire harness (callout 1) from the retainer on thegear cover (callout 2), and then remove the cover.NOTE:When you reinstall the rear cover, make sure that you wrap thesolenoid-wire harness around the retainer on and on-half times ina clockwise direction.Figure: Cassette pickup (Tray 2) or Tray 1 (multipurpose tray)solenoid
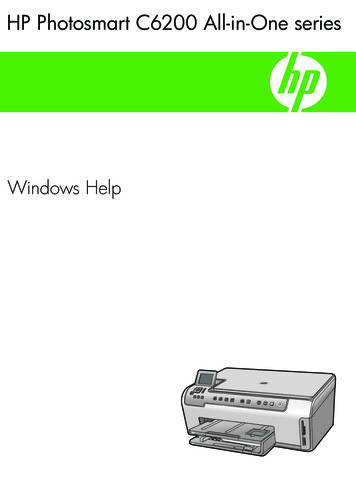
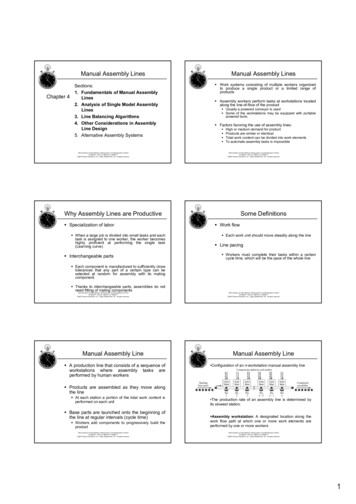
4. For the cassette (Tray 2) pickup solenoid: Remove one screw (callout1), and then remove the solenoid (callout 2).For the Tray 1 (multipurpose tray) pickup solenoid: Remove onescrew (callout 3), and then remove the solenoid (callout 4).Figure: Cassette pickup (Tray 2) or Tray 1 (multipurpose tray)solenoidPickup Unit1. Follow the removal procedure step 1 to 3 for the cassette pickupsolenoid and remove the gear cover.2. Close the cartridge door unit.3. Release one tab (callout 1) and remove the gear unit (callout 2).
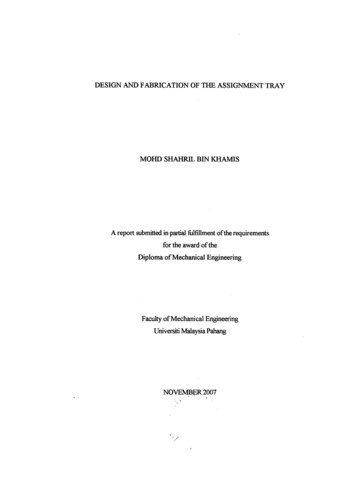
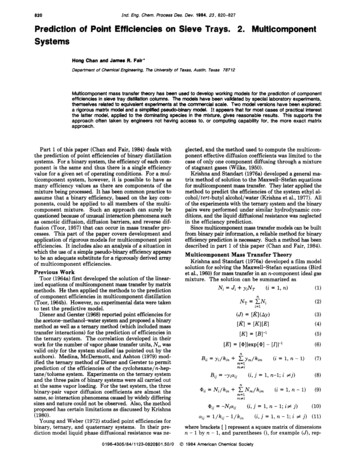
4. Remove one screw (callout 3).Figure: Pickup unit removalNOTE:Do not attempt to disassemble the gear unit because it is difficultto reassemble.5. Remove one screw (callout 1) and the base plate (callout 2).6. Remove one screw (callout 3) and the guide (callout 4).Figure: Pickup unit removal7. Remove one screw (callout 1) and the guide (callout 2).Figure: Pickup unit removal
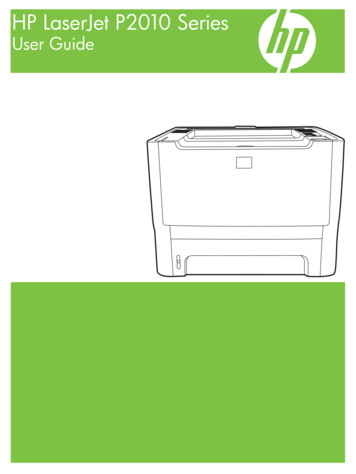
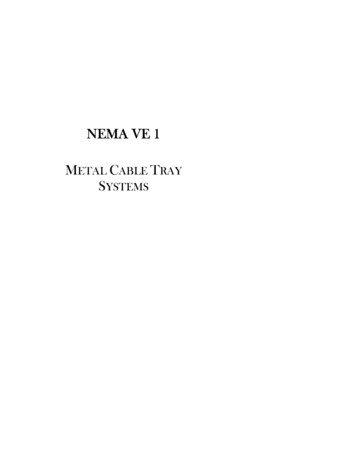
8. Remove two screws (callout 1) and the feed sub roller unit (callout 2).9. Duplex model only:Push the jam clearing button (callout 3).10. Remove four screws (callout 4) and the pickup unit (callout 5).Figure: Pickup unit removalDuplex Media Feed Unit (Duplex model)1. Remove the fixing unit.2. Push the jam clearing button on the front side of the printer and movethe duplex media feed unit to the jam clearing position.3. Release two bosses (callout 1) in the order of left to right toward theprinter and remove the duplex media feed unit (callout 2).Figure: Duplex media feed unit removal
HP LaserJet P3015/M525MFP Printers Information was missing in the service manual on how to remove and replace the Tray 2 Pick-up Assembly. Service manual Tray 2 Pick-up Assembly Removal and Replacement Instructions Cassette pickup (Tray 2) solenoid or Tray 1 (multipurpose tray) pickup solenoid 1. Before proceeding, remove the following components: