Transcription
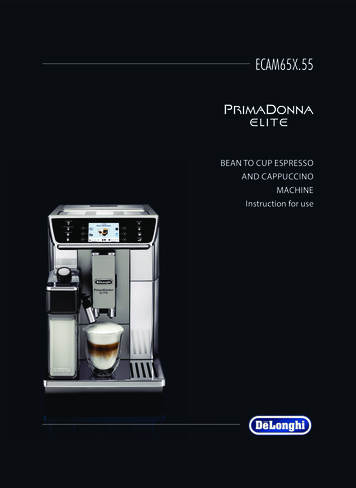
ECAM65X.55BEAN TO CUP ESPRESSOAND CAPPUCCINOMACHINEInstruction for use
ENpage 6BB2B3B10B1B4B2B1410:00SELECT BEVERAGEB11B15PROFILE 1B12B16B13QUANTITYB9B17AROMAB8 B7 B6B5D1DCC1C2D2D5D4C4C3D3C5C7C6C82
A17A143
1234567891011121516MILK13144
CLEAN171819202122232428A262728B303132PUSHPUSH25295
CONTENTS1. FUNDAMENTAL SAFETY WARNINGS .72. SAFETY WARNINGS .89.6 Making coffee using pre-ground coffee.1510. MAKING CAPPUCCINOS AND MILK-BASEDCOFFEES . 1510.1 Filling and attaching the milk container.1510.2 Regolare la quantità di schiuma .1610.3 Making cappuccinos and milk-based coffeesautomatically .1610.4 Cleaning the milk container after every use 162.1 Symbols used in these instructions .82.2 Designated use.82.3 Instruction for Use .83.INTRODUCTION .83.1 Letters in brackets .83.2 Troubleshooting and repairs.83.3 Download the App! .811. DELIVERING HOT WATER . 1612. STEAM DELIVERY . 174. DESCRIPTION.912.1 Tips for using steam to froth milk .1712.2 Clean the hot water/steam spout after use .174.1 Description of the appliance.94.2 Description of the homepage (main screen)(page 2 - B) .94.3 Description of the accessories.94.4 Description of the milk container .913. CUSTOMISING THE BEVERAGES . 1714. MEMORISING YOUR PERSONAL PROFILE . 1815. CLEANING. 1815.1 Cleaning the machine .1815.2 Cleaning the machine’s internal circuit .1815.3 Cleaning the coffee grounds container .1815.4 Cleaning the drip tray.1915.5 Cleaning the inside of the coffee machine .1915.6 Cleaning the water tank .1915.7 Cleaning the coffee spouts .1915.8 Cleaning the pre-ground coffee funnel .1915.9 Cleaning the infuser .1915.10 Cleaning the milk container .2015.11 Cleaning the hot water/steam connectionnozzle.205. BEFORE USE.95.15.25.35.4Checking the appliance .9Installing the appliance.9Connecting the appliance.10Setting up the appliance .106. TURNING THE APPLIANCE ON. 107. TURNING THE APPLIANCE OFF . 108. MENU SETTINGS . .158.168.178.18Rinsing .11Descaling .11Water filter .11Beverages settings .11Setting the time .11Auto-start .11Auto-off (standby) . 12Cup warmer.12Energy saving .12Coffee temperature .12Water hardness .12Selecting the language .12Beep .13Cup lighting .13Bluetooth .13Demo mode .13Default values .13Statistics .1316. DESCALING . 2017. SETTING WATER HARDNESS . 2117.1 Measuring water hardness .2117.2 Setting water hardness .2218. WATER SOFTENER FILTER . 2218.1 Installing the filter .2218.2 Replacing the filter.2318.3 Removing the filter .2319.20.21.22.23.9. MAKING COFFEE . 149.19.29.39.49.5Selecting the coffee aroma.14Selecting the coffee quantity .14Adjusting the coffee mill .14Tips for a hotter coffee.14Making coffee using coffee beans .146TECHNICAL DATA . 23DISPOSAL . 23DISPLAYED MESSAGES. 24TROUBLESHOOTING . 28ELECTRICAL CONNECTION (UK ONLY) . 30
1. FUNDAMENTAL SAFETY WARNINGS The appliance is not intended for use by persons (including children) with reducedphysical, sensory or mental capabilities, or lack of experience and knowledge, unlessthey have been given supervision or instruction concerning use of the appliance by aperson responsible for their safety. Children should be supervised to ensure that they do not play with the appliance. Cleaning and user maintenance shall not be made by children without supervision. Never clean by immersing the appliance in water. This is an household appliance only. It is not intended to be used in: staff kitchenareas in shops, offices and other working environments; farm houses; by clients inhotels, motels and other residential type environments; bed and breakfast typeenvironments. If the plug or cord is damaged, it must be replaced by Customer Services only to avoidall risk.FOR EUROPEAN MARKETS ONLY: This appliance can be used by children aged from 8 years and above if they have beengiven supervision or instruction concerning use of the appliance in a safe way andunderstand the hazards involved. User cleaning and maintenance shall not be madeby children unless they are above 8 years old and supervised. Keep the appliance andpower cord away from children under 8 years of age. The appliance can be used by persons with reduced physical, sensory or mental capabilities or lack of experience and knowledge if they are supervised or have been giveninstruction concerning use of the appliance in a safe way and if they understand thehazards involved. Children shall not play with the appliance. Always unplug the appliance when left unattended and before assembly, taking apartor cleaning.Surfaces marked with this symbol become hot during use (the symbol is present incertain models only).7
Any other use is considered improper and thus dangerous. Themanufacturer is not liable for damage deriving from improperuse of the appliance.2. SAFETY WARNINGS2.1 Symbols used in these instructionsImportant warnings are identified by these symbols. It is vital torespect these warnings.2.3Danger!Failure to observe the warning may result in life threateninginjury by electric shock.Important!Failure to observe the warning could result in injury or damageto the appliance.Please note:Keep this Instruction for Use. If the appliance is passed to otherpersons, they must also be provided with this Instruction forUse.Danger of burns!Failure to observe the warning could result in scalds or burns.Please note:This symbol identifies important advice or information for theuser.3.INTRODUCTIONThank you for choosing this bean to cup espresso and cappuccino machine.Take a few minutes to read this Instruction for Use. This willavoid all risks and damage to the appliance.Danger!This is an electrical appliance and may cause electric shock.You should therefore follow these safety warnings: Never touch the appliance with damp hands or feet. Never touch the plug with damp hands. Make sure the socket used is freely accessible at all times,enabling the appliance to be unplugged when necessary. Unplug directly from the plug only. Never pull the cord asyou could damage it. To disconnect the appliance completely you must unplug itfrom the mains socket. If the appliance is faulty, do not attempt to repair.Turn it off, unplug from the mains socket and contact Customer Services. Before cleaning the appliance, turn it off, unplug from themains socket and allow to cool.3.1Letters in bracketsThe letters in brackets refer to the legend in the description ofthe appliance on pages 2-3.3.2Troubleshooting and repairsIn the event of problems, first try and resolve them by readingthe information given in the sections “21. Displayed messages”and “22. Troubleshooting”.If this does not resolve the problem or you require further information, you should consult Customer Services by calling thenumber given on the annexed “Customer Service” sheet.If your country is not among those listed on the sheet, call thenumber given in the guarantee. If repairs are required, contactDe’Longhi Customer Services only. The addresses are given inthe guarantee certificate provided with the machine.Important:Keep all packaging (plastic bags, polystyrene foam) away fromchildren.3.3Danger of burns!This appliance produces hot water and steam may form whileit is in operation.Avoid contact with splashes of water or hot steam.When the appliance is in operation, the cup shelf could becomevery hot.2.2Instruction for UseRead this Instruction for Use carefully before using the appliance. Failure to follow this Instruction for Use may result inburns or damage to the appliance.The manufacturer is not liable for damage deriving from failureto respect this Instruction for Use.Download the App!Designated useThis appliance is designed and made to prepare coffee and milkand heat beverages.A number of functions can be controlled remotely using theDe’Longhi Coffee Link App.8
”In the App, you can also find information, tips and curious factsabout the world of coffee, together with information on yourmachine at your fingertips.B9. Quantity selectionDirectly selected beverages:B10. CAPPUCCINOB11. LATTE MACCHIATOB12. CAFFELATTEB13. MILKB14. ESPRESSOB15. COFFEEB16. LONGB17. DOPPIO This symbol highlights the functions you can control orconsult using the App.You can also create up to 6 new beverages and save them in yourappliance.Please note:Check compatible devices on “PrimaDonnaElite.delonghi.com”.4.34. DESCRIPTION4.1 Description of the appliance(page 3 - A )A1. Beans container lidA2. Pre-ground coffee funnel lidA3. Beans containerA4. Pre-ground coffee funnelA5. Grinding adjustment dialA6. Cup warmer shelfbutton: to turn the appliance on and off (standby)A7.A8. Coffee spouts (adjustable height)A9. Hot water/steam connection nozzleA10. Coffee grounds containerA11. Cup trayA12. Drip tray water level indicatorA13. Drip tray grilleA14. Drip trayA15. Water tank lidA16. Water tankA17. Water softener filter housingA18. Infuser doorA19. InfuserA20. Power cord connector socketA21. Main switch (ON/OFF)4.24.4Description of the milk container(page 2 - D )D1. Froth adjustment and CLEAN dialD2. Milk container lidD3. Milk containerD4. Milk intake tubeD5. Frothed milk spout (adjustable)5. BEFORE USE5.1 Checking the applianceAfter removing the packaging, make sure the product is complete and undamaged and that all accessories are present. Donot use the appliance if it is visibly damaged. Contact De’LonghiCustomer Services.Description of the homepage (main screen)(page 2 - B)5.2B1. DisplayB2. Selection arrowsB3. Beverage selection menu (other than directly selectedbeverages): CAPPUCCINO , FLAT WHITE, CAPPUCCINO MIX,ESPRESSO MACCHIATO, HOT WATER, X2 ESPRESSO, STEAM;B4. Customisable profiles (see section “14. Memorising yourpersonal profile”)B5. Aroma selection: menu to customise the beverage settingsB6.B8.Description of the accessories(page 2 - C )C1. “Total Hardness Test” indicator paperC2. Pre-ground coffee measureC3. DescalerC4. Water softener filter (certain models only)C5. Cleaning brushC6. Hot water/steam spoutC7. Spout release buttonC8. Power cordInstalling the applianceImportant!When you install the appliance, you should respect the following safety warnings: The appliance gives off heat. After positioning the appliance on the worktop, leave a space of at least 3 cm between the surfaces of the appliance and the side and rearwalls and at least 15 cm above the coffee maker. Water penetrating the coffee maker could cause damage.Do not place the appliance near taps or sinks. The appliance could be damaged if the water it containsfreezes.: appliance settings menu9
Do not install the appliance in a room where the temperature could drop below freezing point.Arrange the cord in such a way that it cannot be damagedby sharp edges or contact with hot surfaces (e.g. electrichot plates). 5.3Connecting the applianceImportant!Check that the mains power supply voltage corresponds to thatindicated on the rating plate on the bottom of the appliance.Connect the appliance to a correctly installed and efficientlyearthed socket with a minimum current rating of 10A only.If the power socket does not match the plug on the appliance,have the socket replaced with a suitable type by a qualifiedelectrician.5.4 Please note!When setting up the appliance, you need to make 4-5 cupsof coffee or 4-5 cappuccinos before the appliance starts togive satisfactory results.When making the first 5-6 cappuccinos, it is normal to hearthe noise of boiling water. After this, the noise becomesless.To improve the performance of your appliance, we recommend installing a water softener filter (C4) as describedin section “18. Water softener filter”. If your model is notprovided with a filter, you can request one from De’LonghiCustomer Services.6. TURNING THE APPLIANCE ONPlease note!Before turning the appliance on, make sure the main switch(A21) is pressed (fig. 2).Each time the appliance is turned on, it performs an automaticpreheat and rinse cycle which cannot be interrupted. The appliance is ready for use only after completion of this cycle.Setting up the appliancePlease note!Coffee has been used to factory test the appliance and it istherefore completely normal for there to be traces of coffee in the mill. The machine is, however, guaranteed to benew. You should customise water hardness as soon as possiblefollowing the instructions in section “17. Setting waterhardness”.1. Plug the power cord (C8) connector into the socket (A20) atthe back of the appliance and connect the appliance to themains electricity supply (fig. 1). Make sure the main switch(A21) at the back of the appliance is pressed (fig. 2);2. “SELECT LANGUAGE”: Press the selection arrow (B2) corresponding to the required language;then follow the instructions which appear on the appliancedisplay:3. “FILL TANK WITH FRESH WATER”: remove the water tank(A16) (fig. 3), open the lid (A15) (fig. 4), fill to the MAX linewith fresh water (fig. 5), close the lid and put the tank backin the appliance (fig. 6);4. “INSERT WATER SPOUT”: Check that the hot water/steamspout (C6) is inserted on the connection nozzle (A9) (fig. 7)and place a container holding a minimum of 100 ml underneath (fig. 8);5. “WATER CIRCUIT EMPTY PRESS OK TO START” appears onthe display;6. Press the selection arrow corresponding to “OK ” toconfirm. The appliance delivers hot water from the hotwater spout (fig. 8) then goes off automatically.The coffee machine is now ready for normal use. Danger of burns!During rinsing, a little hot water comes out of the coffee spouts(A8) and is collected in the drip tray (A14) underneath. Avoidcontact with splashes of water.button (A7-fig. To turn the appliance on, press the9). The message “HEATING UP UNDERWAY PLEASE WAIT”appears on the display.As well as heating the boiler, this also heats the internal circuitsby circulating hot water. The appliance is at temperature whenthe main screen (homepage) appears.7. TURNING THE APPLIANCE OFFWhenever the coffee machine is turned off after being used tomake coffee, it performs an automatic rinse cycle.Danger of burns!During rinsing, a little hot water flows from the coffee spouts(A8). Avoid contact with splashes of water. To turn the appliance off, press thebutton (A7-fig.9). The message “TURNING OFF UNDERWAY, PLEASE WAIT”appears on the display, then (if envisaged) the applianceperforms a rinse cycle and goes off (standby).Please note!If you will not be using the appliance for some time, unplugfrom the mains socket: first turn the appliance off by pressing thebutton(fig. 9);10
”” release the main switch (A21) at the back of the appliance(fig. 2).2. Scroll through the menu items by pressing the selectionBEVERAGESarrow corresponding to “NEXT ” until “SETTINGS” appears on the display;3. The values for the first beverage appear on the display;4. The reference user profile is highlighted on the display. Thevalues are displayed on vertical bars. The default value isImportant!Never press the main switch while the appliance is on.8.8.1symbol, while the current value isindicated by thehighlighted by the solid part of the vertical bar;5. To go back to the settings menu, press the selection arrowcorresponding to “ ESC”. To scroll through and displaythe beverages, press the selection arrow corresponding to“NEXT ”;6. To reset the default values for the beverage displayed,RESET”;press the selection arrow corresponding to “7. “CONFIRM RESET?”: to confirm press the selection arrowcorresponding to “OK ” to cancel, press the selectionarrow corresponding to “ ESC”);8. “DEFAULT VALUES SET”: press “OK ” .The beverage has been reset to the default values. Proceed withthe other beverages or go back to the homepage by pressing thearrow corresponding to “ ESC” twice.MENU SETTINGSRinsingUse this function to deliver hot water from the coffee spouts(A8) and hot water/steam spout (C6), if inserted, to clean andheat the appliance’s internal circuit.Place a container with a minimum capacity of 100ml under thecoffee and hot water spouts (fig. 8).To enable the function, proceed as follows:1. Press the selection arrow (B2) corresponding to the “” symbol (B8) to enter the menu;2. Press the selection arrow corresponding to “ RINSING”;Important! Danger of burns.Do not leave the appliance unattended while hot water is beingdelivered.3. After a few seconds, hot water is delivered first from thecoffee spouts, then from the hot water/steam spout (ifinserted) to clean and heat the appliance’s internal circuit.“RINSING UNDERWAY” appears on the display, together witha progress bar which fills gradually as preparation proceeds;4. To interrupt rinsing, press the selection arrow correspondingto “STOP ” or wait for rinsing to stop automatically.8.5Setting the timeFor instructions on descaling, see section “16. Descaling”.To adjust the time on the display (B1), proceed as follows:”1. Press the selection arrow (B2) corresponding to the “symbol (B8) to enter the menu;2. Scroll through the menu items by pressing the selectionSET TIME”arrow corresponding to “NEXT ” until “appears on the display;3. Press the selection arrow corresponding to “ SET TIME”;The time setting panel appears on the display;4. Adjust the time by pressing the selection arrows corre(increase) or(decrease) for thesponding tohours (H) and minutes (MIN);5. To confirm, press the selection arrow corresponding to “OK” (to cancel, press the selection arrow corresponding to “ESC”)and press the selection
A9. Hot water/steam connection nozzle A10. Coffee grounds container A11. Cup tray A12. Drip tray water level indicator A13. Drip tray grille A14. Drip tray A15. Water tank lid A16. Water tank A17. Water softener filter housing A18. Infuser door A19. Infuser A20. Power cord connector so


