Transcription
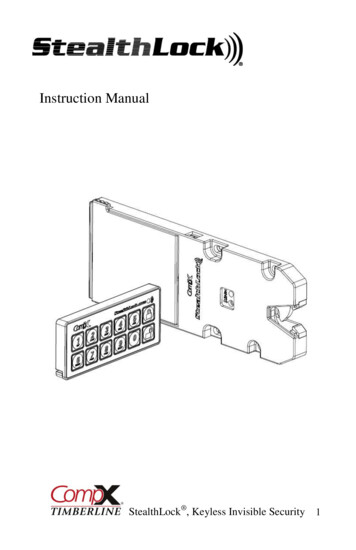
Instruction ManualStealthLock , Keyless Invisible Security 1
Thank you for purchasing StealthLock . StealthLock is an innovative solution forkeyless invisible security. Using radio frequency technology, StealthLock allows you tosecure almost any wood cabinet door or drawer with little or no changes to the cabinetdesign.StealthLock is battery operated and works with a user established 4 to 8 digit code.Operation is simple: input your code and press lock or unlock. The Latch can operate anyReceiver Latch within a 15 foot range which allows it to be placed anywhere, leaving notrace of visible hardware. In addition, the Latch can operate multiple Receiver Latches tosecure an entire room or bank of cabinets.StealthLock is designed to install and program easily and offers:Programmable user and supervisor codesProgrammable modes of operationProgrammable reset featuresStealthLock is recommended for use on cabinets made from:WoodWood productsPhenolic resinGlassStealthLock is NOT intended for:Metal furnishings or cabinetsExterior furnishings or cabinetsApplications where temperatures fall below 50 F or above 120 FStealthLock may be used in households to help protect minors from unsafe materials.It is strongly recommended that all batteries used by the StealthLock be replaced on anannual basis. Please mark this date on your calendars to insure replacement. In the eventyou have allowed the batteries to die, you will need to forcefully enter the cabinet. TheStealthLock strike plate is designed to shear away at 80lbs of force. A new strike platewill then be needed to operate the lock.StealthLock , Keyless Invisible Security 2
SL-100 StealthLock Contents1 – RL-100Receiver LatchScrews Included6.7852.5002.670ACR0SSREAR TABS.350.4371 – SP-600Cabinet Strike PlateScrews Included1.2503.3751.500.3251 – TP-100Transmitter PadCR2032 Battery Included1 – TL-600Installation ToolStealthLock , Keyless Invisible Security 3
Battery Installation – Receiver LatchThe Receiver Latch uses 4 AAA batteries thatare expected to last 2 years in normal operation(4 open/close cycles per day).Batteries should be replaced on an annual basisto insure continued reliability.The LED will begin to blink after 5,500 operationsto warn that batteries need to be replacedWhile gripping the reartabs, slide the batteryhousing in and up asshownSlide the batteryhousing back until it iscompletely free of theReceiver LatchInstall four AAA batteries inthe slots indicated on the backof the battery housing.StealthLock , Keyless Invisible Security 4
Battery Installation - Transmitter PadThe Transmitter Pad uses a CR2032 batterythat is expected to last 2 years in normaloperation (4 open/close cycles per day).The LED will begin to blink after5,500 operations to warn thatbatteries need to be replacedBatteries should be replaced on an annual basisto insure continued reliability.During initial installation, removethe red ribbon to activate theinstalled batteryTo replace the battery, insert asmall flat blade screwdriver intothe battery tray slot as shownRotate the Screwdrive up(clockwise) as shown to releasethe battery tray.Replace old battery with fresh CR2032making sure that the positive ( ) side of thebattery is facing down in the battery traySlide the battery tray back into the transmitterhousing and snap into placeStealthLock , Keyless Invisible Security 5
Installation Instructions – Receiver LatchThe StealthLock is designed to operate within non-metallic cabinetry. Use with othermaterials may limit or prohibit operation of the lock. We recommend testing the lock ifusing in a material other than wood. Batteries should be installed before installation.The SL-100 StealthLock kit is designed formounting in cabinets with solid panelconstruction and full overlay doors. AnINSTALLATION VIDEO and tips formounting this kit in other cabinet types canbe found at www.stealthlock.comStep #1 - Position the Receiver Latch withstrike plate and installation tool attached asshown. The front tabs on the installation toolshould contact the front edgeof the cabinetInstallation Tool TabsFront Edge of CabinetStep #2 - Screw the Receiver Latch in place using2 of the #6 x ½” screws supplied, in the front sideof the oval holes. If attaching to material less than¾” thick, alternate fasteners may be required.Start with Screws in FrontSide of Oval HolesStealthLock , Keyless Invisible Security 6
Step #3 – Press the learn buttonon the Receiver Latch until theyellow LED lights to insure thatthe Latch is in the open positionLearnButtonStep #4 – Remove release paperfrom the back of the strike plateRelease PaperStep #5 – Close door firmly and open itagain. The strike plate will becomeaffixed to the door in the propermounting position. Remove and discardred installation toolStep #6 - Screw the strike plate inplace using 2 of the #6 x ½” screwssupplied. If attaching to materialless than ¾” thick, alternatefasteners may be required.Step #7 – Check the fit after any bumpers are installed. Door shouldlatch into the Receiver Latch and still have a little free play. AdjustReceiver Latch forward on oval holes as required.Finish by installing the remainingscrews at the front of the Receiver LatchStealthLock , Keyless Invisible Security 7
Installation Instructions – Transmitter PadThe Transmitter Pad has a functional range of 15 feet from the Receiver Latch and can bemounted virtually anywhere on any non-metallic panel. To mount, simply remove therelease paper from the tape on the back side of the Transmitter Pad, and press into place.Suggested mounting areas Cabinet door face or drawer faceWall above switch plateInside unlocked cabinet door or drawer to be hiddenRemove releasepaper from tapeStealthLock , Keyless Invisible Security 8
Programming – IntroductionStealthLock is very easy to use and operate. Once installed, the user enters the usercode (factory default 0000) and presses Lockto lock the cabinet. To unlock thecabinet, the user enters the user code and presses Unlockand the cabinet will open.StealthLock is fully programmable allowing the user or supervisor the ability to changecodes, modes, and restore lock settings. While the StealthLock is easy to program, wehighly recommend reading the complete programming instructions prior to making anychanges. Remember to keep track of any changes made in a secure location.Key locations and indicator lights referenced in the programming instructions are shownbelow.RL-100 Receiver LatchYellow and GreenLED IndicatorLearn Button – Use pen tip orpaper clip to depressStealthLock , Keyless Invisible Security 9
Programming – IntroductionTP-100 Transmitter PadGreen LEDIndicatorLock ButtonUnlock ButtonPlease note the following: StealthLock will reset to an unlocked position whenever the learn button ispressed. Only one Transmitter Pad should be used for programming in a given area atany one time. The StealthLock is a radio frequency device and the use ofmultiple Transmitter Pads in the same area may result in interference andimproper programming. After pressing Lock or Unlock, the Green LED on the Transmitter Pad willlight for about 2 seconds indicating that a transmission is in progress. While the Green LED on the Transmitter Pad is lit, the keypad will not respondto any other entries until the transmission is completed. If the Green LED on the Transmitter Pad flashes rapidly after pressing Lock orUnlock, this indicates that an improper code has been entered. Codes mustalways be 4 to 8 digits in length. If the LED indicator on the Receiver Latch flashes Green/Yellow, this indicatesthat an improper code as been received. Start the learning function over takingcare to enter the correct codes.StealthLock , Keyless Invisible Security 10
Programming the User CodeUse these steps to change your current user code. The factory default code is 0000. Usercodes must be 4 to 8 digits in length. To view a video of these steps, go towww.StealthLock.com Note that the user code can not be changed if the Receiver Latchhas been set to Single Use Mode.There is a 60 second programming time limit to each step. If you time out or make anerror, programming will end and you will need to restart from step 1.1.We suggest reading through the instructions prior to beginning programming2.Press and hold the Receiver Latch learn button until the yellow LED lightbegins a one blink pattern, then release3.Using the Transmitter Pad enter the current user code and press theUnlock4.buttonWait for green light on Transmitter Pad to turn off then enter the new usercode and press the Lock5.buttonWait for green light on Transmitter Pad to turn off then re-enter the new usercode and press the Lockbutton to secure code6.If successful, the green LED light on the Receiver Latch will stay illuminatedfor 3 seconds7.Once the green LED light has turned off, the Receiver Latch will automaticallyexit the learn mode8.Test lock function with new code9.We recommend writing down your new code in the back of these instructionsand storing in a safe areaStealthLock , Keyless Invisible Security 11
Programming the Supervisor CodeUse these steps to change the current supervisor code. The supervisor code allows theowner of the StealthLock to overwrite the user code and change operational modes. Thefactory default supervisor code is 071856. It is highly recommended that thesupervisor code be changed. Supervisor codes must be 4 to 8 digits in length. To viewa video of these steps, go to www.stealthlock.com .There is a 60 second programming time limit to each step. If you time out or make anerror, programming will end and you will need to restart from step 1.1.We suggest reading through instructions prior to beginning programming.2.Press and hold the Receiver Latch learn button until the yellow LED begins atwo blink pattern3.Enter the current supervisor code using the Transmitter Pad and press theUnlock4.buttonWait for green light on the Transmitter Pad to turn off then enter the newsupervisor code and press the Lock5.buttonWait for green light on the Transmitter Pad to turn off then re-enter your newsupervisor code and press the Lockbutton to secure code6.If successful, the green LED light on the Receiver Latch will stay illuminatedfor 3 seconds7.Once the green LED light has turned off, the Receiver Latch will automaticallyexit the learn mode8.Test lock function with new code9.We recommend writing down your new code in the back of these instructionsand storing in a safe area. The supervisor code is not resettable if it has beenforgotten.StealthLock , Keyless Invisible Security 12
StealthLock features several modes of operation and reset ability. These functions canbe changed using the following instructions by users who have rights to the supervisorcode. Modes and reset can only be modified with knowledge of the supervisor code.Programming Single Use Mode / Non Single ModeNon Single Mode allows the user to set the user code to be used by a single person only.Single Use Mode allows for a revolving user code so the lock maybe used by multiplepeople without having to reprogram the Receiver Latch each time.There is a 60 second programming time limit to each step. If you time out or make anerror, programming will end and you will need to restart from step 1.1.We suggest reading through instructions prior to beginning programming2.Press and hold the Receiver Latch learn button until the yellow LED begins athree blink pattern3.Enter the Supervisor pin code and press the UnlockbuttonThen eithera.Set Single Use Mode, enter 1111 and press the LockNote that this will cancel self lock mode if it has been setbuttonOrb.Set Non Single Use Mode, enter 1111 and press the UnlockNote that the user code resets to 0000 when Single Use Mode isexited4.If successful the green LED will flash twice on the Receiver Latch5.Continue programming or enter 9999 followed by pressing the Lockbutton to exit Learn Mode6.Test lock function for proper operationStealthLock , Keyless Invisible Security 13
Programming Self Lock Mode / Passage ModeSelf Lock Mode automatically relocks the Receiver Latch after pressing the unlockbutton when a valid user or supervisor code is presented. The delay time before relocking the Receiver Latch can be set between 2 and 60 seconds. Passage Mode keepsthe Receiver Latch in an unlocked position after unlocking.There is a 60 second programming time limit to each step. If you time out or make anerror, programming will end and you will need to restart from step 1.1.We suggest reading through instructions prior to beginning programming2.Press and hold the Receiver Latch learn button until the yellow LED begins athree blink pattern3.Enter the Supervisor pin code and press the UnlockbuttonThen eithera.Set Self Lock, enter 2222XX and press the LockbuttonNote that this command is ignored if Single Use mode is setXX represents the number of seconds of delay time before relockingFor example entering 222215 would result in a 15 second delayOrb.Set Passage Mode, enter 2222 and press the Unlock4.If successful the green LED will flash twice on the Receiver Latch5.Continue programming or enter 9999 followed by pressing the Lockbutton to exit Learn Mode6.Test lock function for proper operationbuttonStealthLock , Keyless Invisible Security 14
Programming Learn Disable / Learn EnableLearn Disable / Learn Enable Mode allows the supervisor to either allow or not allow auser to program a new user code. In Learn Disable Mode, only the users with knowledgeof the supervisor code can make any programming changes.There is a 60 second programming time limit to each step. If you time out or make anerror, programming will end and you will need to restart from step 1.1.We suggest reading through instructions prior to beginning programming2.Press and hold the Receiver Latch learn button until the yellow LED begins athree blink pattern3.Enter the Supervisor pin code and press the UnlockbuttonThen eithera.Set Learn Disable, enter 3333 and press the LockbuttonOrb.Set Learn Enable, enter 3333 and press the Unlockbutton4.If successful the green LED will flash twice on the Receiver Latch5.Continue programming or enter 9999 followed by pressing the Lock button toexit Learn Mode6.Test lock function for new mode operation. If Learn Disable has been set, theReceiver Latch should automatically go to a three blink pattern when the learnbutton is pushed and held.StealthLock , Keyless Invisible Security 15
Reset Factory Default SettingsThis feature returns the lock to its original factory settings. This will place the ReceiverLatch into a Non Single Use Mode, Passage Mode, and Learn Enable Mode. It does notreset the user or supervisor code.There is a 60 second programming time limit to each step. If you time out or make anerror, programming will end and you will need to restart from step 1.1.We suggest reading through instructions prior to beginning programming2.Press and hold the Receiver Latch learn button until the yellow LED begins athree blink pattern3.Enter the Supervisor pin code and press the Unlock4.Enter 4444 and press the Lock5.If successful the green LED will flash twice on the Receiver Latch.Note that if Single Use mode was exited, the user pin code will default to 00006.Continue programming or enter 9999 followed by pressing the Lockbuttonbuttonbutton to exit Learn Mode7.Test lock function to make sure default settings are restoredStealthLock , Keyless Invisible Security 16
Clear User Pin CodeThis feature returns the user code back the factory default setting of 0000. It does notreset any other mode or feature of the lock.There is a 60 second programming time limit to each step. If you time out or make anerror, programming will end and you will need to restart from step 1.1.We suggest reading through instructions prior to beginning programming2.Press and hold the Receiver Latch learn button until the yellow LED begins athree blink pattern3.Enter the Supervisor pin code and press the Unlock4.Enter 8888 and press the Lock5.If successful the green LED will flash twice on the Receiver Latch6.Continue programming or enter 9999 followed by pressing the Lockbutton to exit Learn Mode7.Test lock function to make sure user default setting is restored. Lock can nowbe programmed with a new user codebuttonbuttonStealthLock , Keyless Invisible Security 17
Auxiliary PowerIf desired, the StealthLock Receiver Latch maybe connected to 120 VAC power using theoptional RL-AP1 Power SupplyPowerPortRL-APCPower CordsUp to 10 Receiver Latches maybe powered from the samePower Supply using the optionalRL-APC Power Cords as shownRL-AP1Power SupplyRL-APC-3 Power Cord – 3 footRL-APC-5 Power Cord – 5 footRL-APC-10 Power Cord – 10 footRL-AP1 Power Supply(Includes 5-1/2 foot cord)cordStealthLock , Keyless Invisible Security 18
Transmitter Pad Mounting AccessoriesMP-700 Mounting Plate Satin Nickel FinishAllows mounting to material5/8” – 7/8” ThickMounting screws andtemplate includedWall mountingscrews not includedMP-700-WM Mounting Plate Satin Nickel FinishAllows mounting to anyflat surface or wallMounting Platescrews includedStealthLock , Keyless Invisible Security 19
Regulatory InformationThe user is cautioned that changes or modifications not expressly approved by CompXTimberline could void the user’s authority to operate the equipment.This device complies with Part 15 of the FCC Rules. Operation is subject to the followingtwo conditions: (1) This device may not cause harmful interference, and (2) this devicemust accept any interference received, including interference that may cause undesiredoperation.This equipment has been tested and found to comply with the limits for a Class B digitaldevice, pursuant to Part 15 of the FCC Rules. These limits are designed to providereasonable protection against harmful interference in a residential installation. Thisequipment generates, uses and can radiate radio frequency energy and, if not installed andused in accordance with the instructions, may cause harmful interference to radiocommunications. However, there is no guarantee that interference will not occur in aparticular installation. If this equipment does cause harmful interference to radio ortelevision reception, which can be determined by turning the equipment off and on, theuser is encouraged to try to correct the interference by one or more of the followingmeasures: Reorient or relocate the receiving antenna.Increase the separation between the equipment and receiver.Connect the equipment into an outlet on a circuit different from that to whichthe receiver is connected.Consult the dealer or an experienced radio/TV technician for help.StealthLock , Keyless Invisible Security 20IS-600-KCopyright 2016 CompX Security Products
To replace the battery, insert a small flat blade screwdriver into the battery tray slot as shown Rotate the Screwdrive up (clockwise) as shown to release the battery tray. Replace old battery with fresh CR2032 making sure that the positive ( ) side of the battery is facing down in the battery tray Slide the battery tray back into the transmitter