Transcription
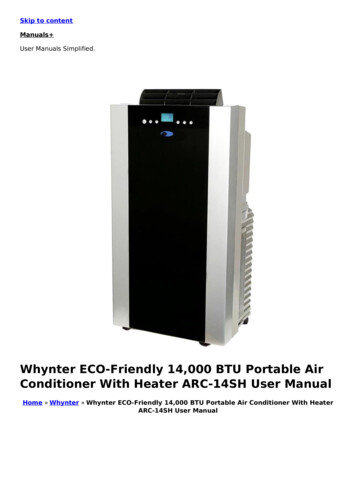
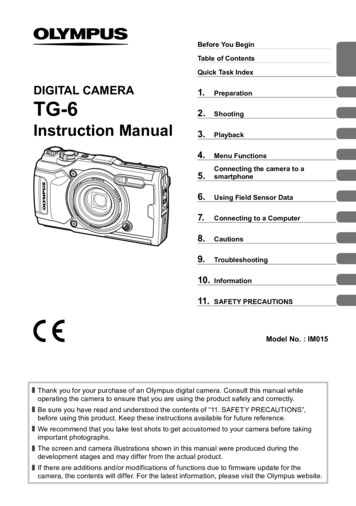
Before You BeginTable of ContentsQuick Task IndexDIGITAL CAMERA1.PreparationTG-62.ShootingInstruction Manual3.Playback4.Menu Functions5.Connecting the camera to asmartphone6.Using Field Sensor Data7.Connecting to a 1.SAFETY PRECAUTIONSModel No. : IM015Thank you for your purchase of an Olympus digital camera. Consult this manual whileoperating the camera to ensure that you are using the product safely and correctly.Be sure you have read and understood the contents of “11. SAFETY PRECAUTIONS”,before using this product. Keep these instructions available for future reference.We recommend that you take test shots to get accustomed to your camera before takingimportant photographs.The screen and camera illustrations shown in this manual were produced during thedevelopment stages and may differ from the actual product.If there are additions and/or modifications of functions due to firmware update for thecamera, the contents will differ. For the latest information, please visit the Olympus website.
Before You BeginBefore You BeginRead and Follow Safety PrecautionsTo prevent incorrect operation resulting in fire or other damage to property or harm toyourself or to others, read “11. SAFETY PRECAUTIONS” (P. 148) in its entirety beforeusing the camera.While using the camera, consult this manual to ensure safe and correct operation. Besure to keep the manual in a safe place once it is read.Olympus will not be held liable for violations of local regulations arising from use of thisproduct outside the country or region of purchase.Wireless LAN and GPSThe camera features built-in wireless LAN and GPS. Use of these features outside thecountry or region of purchase may violate local wireless regulations; be sure to checkwith local authorities before use. Olympus will not be held liable for the user’s failure tocomply with local regulations.Disable wireless LAN and GPS in areas where their use is prohibited.g “5. Connecting the camera to a smartphone” (P. 106), “6. Using Field SensorData” (P. 111)User RegistrationVisit the OLYMPUS website for information on registering your OLYMPUS products.2 EN
Instruction Manual (this pdf)A how-to guide to the camera and its features. The InstructionManual can be downloaded from the OLYMPUS website or directlyusing the “OLYMPUS Image Share” (OI.Share) smartphone app.Before You BeginProduct ManualsIn addition to the “Instruction Manual” (this pdf), the documentation available for thisproduct includes “Maintaining Water Resistance” (supplied). Consult these manualswhen using the product.Maintaining Water ResistanceThis document lists precautions regarding water resistance. Readthese instructions together with “Important Information about Waterand Shock Resistant Features” (P. 123).Indications used in this manualThe following symbols are used throughout this manual. NotesgPoints to note when using the camera.Reference pages describing details or related information.EN 3
Table of ContentsTable of ContentsBefore You Begin2Quick Task Index8Names of parts101. Preparation12Unpacking the Box Contents .12Inserting and Removing theBattery and Card .13Removing the battery .14Removing the card .15Usable cards.15Shooting at Very Close Range(k mode) .33Matching Settings to UnderwaterScenes ( mode) .34Letting the Camera SelectAperture and Shutter Speed(P mode) .35Selecting Aperture (A mode) .36Turning the Camera On.17Custom Modes (Custom modeC1/C2) .37Saving settings .37Recalling settings .37Initial Setup .18Recording Movies .38Camera Displays Unreadable/not in the Selected Language .20Recording Movies in PhotoShooting Modes .38Formatting the Card .21Recording Movies in Movie Mode(n mode) .39Charging the Battery .162. Shooting22Information Displays whileShooting .22Switching the informationdisplay .24Basic Photography.25Taking photographs(AUTO mode) .25Using the zoom.26Selecting a Shooting Mode .27Types of shooting modes.274 ENMatching Settings to the Scene(SCN mode) .28[Live Composite]:Live composite photography.31Panorama .32Using Various Settings .40Settings Accessible via DirectButtons .41Controlling exposure(Exposure F) .41Zoom (Digital teleconverter) .42Performing the sequential/self-timer shooting .42Pro Capture .44Using a flash(Flash photography) .45Focus lock .46Using the LED illuminator .47
3. Playback62Information Display duringPlayback .62Playback image information .62Switching the informationdisplay .63Viewing Photographs andMovies .64Index display/Calendardisplay .65Close-up playback .65Movie playback .66Erasing images duringplayback .66Using the Playback Menu .67Play H .67RAW Data Edit/JPEG Edit .68Play Movie .69Movie Edit .69Share Order .710 .71R .72Rotate .72y .73Image Overlay .74 .75Erase .75Table of ContentsSettings Accessible via LiveControls.48Processing options(Picture mode) .50Changing ISO sensitivity(ISO) .52Adjusting color(White balance) .53Selecting a focus mode(AF mode).55Setting the image aspect .55Selecting image quality(Still image quality) .56Selecting image quality(Movie quality) .57Reducing camera shake(Image stabilizer) .59Adjusting flash output(Flash intensity control) .59Selecting how the camerameasures brightness(Metering) .60Automatic face detection(Face priority) .60Using optional accessories(Accessory).61Selecting images(0, Erase Selected,Share Order Selected).76Scrolling Panoramas.774. Menu Functions78Basic menu operations .78Using Shooting Menu 1/Shooting Menu 2 .80Restoring default settings/saving settings(Reset/Assign Custom Modes) .80Processing options(Picture Mode) .81Selecting the focusing area(AF Area) .82Shooting automatically witha fixed interval(Intrvl. Sh./Time Lapse) .84Varying focus little-by-littleover a series of pictures(Focus BKT) .85Increasing depth of field(Focus Stacking Settings).86Date stamps (Date Stamp) .86EN 5
Using the Video Menu .87Table of ContentsUsing the Playback Menu .88Displaying images rotated(R) .88Retouching pictures (Edit) .88Creating movie stills(In-Movie Image Capture).92Trimming movies(Movie Trimming) .93Canceling all protections .93Using the Setup Menu.94Deleting all images(Card Setup) .95Selecting a language (W) .95Using the Custom Menus .96a AF/MF.96M Disp/8/PC .96C Exp/ISO .97D # Custom .98b K/WB/Color .98W Record.99X Field Sensor .100c K Utility .100Improving focus in darksurroundings(AF Illuminator) .101MF Assist .101Adding information displays.102Viewing camera imageson TV .104Combinations of JPEG imagesizes and compressionrates.1056 EN5. Connecting the camerato a smartphone106Adjusting Settings forConnection toa Smartphone .107Transferring Images toa Smartphone .108Shooting Remotely witha Smartphone .108Changing ConnectionMethod.109Resetting Wireless LANSettings .109Changing the Password . 110Cancelling a Share Order . 1106. Using Field SensorData111GPS: Precautions for use . 111Before using GPS function(A-GPS data) . 111Using GPS . 112Displaying tracked movement ofGPS logs . 112Recording and Saving Logs . 113Using Buffered and SavedLogs . 114Viewing Location Data . 115Location data displays . 115
7. Connecting toa Computer10. Information116Copying Pictures toa Computer . 117Installing the PC Software . 1178. Cautions118List of Settings Available ineach Shooting Mode .136Default/Custom Settings.140Specifications .14511. SAFETYPRECAUTIONS148SAFETY PRECAUTIONS .148Batteries . 118Using Your Charger Abroad . 118IndexTable of ContentsConnecting the Camera to aComputer . 116136161Number of Images (Stills)/Length of Footage (Movies)per Card. 119Cleaning and Storing theCamera .121Cleaning the camera .121Storage .122Pixel Mapping - Checking theimage processing functions .122Important Information aboutWater and Shock ResistantFeatures .123Using Separately SoldAccessories .125Attaching optional siliconejackets .125Taking pictures with the OlympusWireless RC Flash System .125Optional Accessories .1269. Troubleshooting130Some Common Issues and TheirSolutions .130EN 7
Quick Task IndexQuick task index8 ENgShootingJust shoot without making any difficultsettingsAUTO mode (B)25Photographing light trails (lightenblending)Live Composite (SCN)31Taking close-ups of small objects/macro (close range) photographyMicroscope mode (k)33Keeping both foreground andbackground in focusFocus Stacking33Taking stylish pictures/taking monotone picturesART (Picture mode)50Adjusting settings for underwaterphotographyUnderwater mode ( )34Adjusting the brightness of highlightsand shadowsExposure compensation41Recording GPS location data, air andwater temperature, altitude (depth),and headingField sensors111Taking pictures with colors at the sameshade as they appearWhite balance53Changing an aspect ratioAspect ratio55When the camera will not focus onyour subject/Focusing on one areaAF target settings82Keeping a moving subject in focusTracking83Taking photos in the dark/taking photos under low light conditionsLED illuminator47AF Illuminator101Capturing fleeting momentsPro Capture44Checking horizontal or verticalorientation before shootingLevel Gauge24, 102Shooting with deliberate compositionDisplayed Grid96Optimizing the monitor/adjusting monitor hueMonitor brightness adjustment94Increasing the number of pictures thatcan be takenStill image quality mode56Using a remote controlShooting remotely with asmartphone108
Viewing images on a TV/viewing images with high picturequality on a highdefinition TVHDMI97Viewing camera images on TV104Brightening shadowsShadow Adj (JPEG Edit)68, 90Dealing with red-eyeRedeye Fix (JPEG Edit)68, 90Printing made easyCreating a print order75Erasing the sound recorded to a stillimageR72Changing the number of frames oradding frames to the index playbackdisplayG/Info Settings102Quick task indexgPlayback/RetouchgCamera SettingsSynchronizing the date and timeSetting the date/timeRestoring default settingsReset18, 9480Changing the menu display languageW95Turning off the auto focus sound8 (Beep sound)97Saving settingsCustom mode (C1/C2)37Putting date stamps on photosDate Stamp86Hiding menu guidesBasic menu operations78EN 9
Names of partsNames of partsSelf-timer lamp / LED Illuminator /AF illuminator(P. 42 / P. 47 / P. 101)Internal flash (P. 45)Connector cover(P. 16)Connector cover lock(P. 16)LOCK knob (P. 16)LensLens ring (removable)(P. 127)SpeakerLens ring release button(P. 127)HDMI micro connector (P. 104)Micro-USB connector (P. 16, 116)Battery/card compartment cover(P. 13)MonitorBattery/card compartmentcover lock (P. 13)LOCK knob (P. 13)10 ENStrap eyelet (P. 12)Tripod socket
LOG switch (P. 113)GPS antenna (P. 112)ON/OFF button (P. 17)Indicator lamp (P. 16)Shutter button (P. 25)Names of partsZoom lever (P. 26, 65)Stereo microphoneControl dial (P)R (Movie) / select button(P. 38 / P. 76)Mode dial (P. 27)INFO button(P. 24, 63, 115)q (Playback) button(P. 64)MENU / Wi-Fi button(P. 78 / P. 107)Arrow pad* (FGHI)F (Up) / F (Exposure compensation) button (P. 41)H (Left) / u (mode function)button (P. 30, 33, 34)I (Right) / # (Flash) button(P. 45)Q button / Live Control (P. 48)G (Down) / jY (Sequential shooting/Self-timer) (P. 42) / (Erase) button (P. 66)* In this manual, the FGHI icons represent operations performed using the arrow pad.EN 11
1PreparationUnpacking the Box Contents1PreparationThe following items are included with the camera.If anything is missing or damaged, contact the dealer from whom you purchased thecamera.Camera(with removable lens ring)StrapUSB cable CB-USB12USB-AC adapter F-5AC Basic Manual Maintaining Water Resistance Warranty cardorLithium-ion battery LI-92BContents may vary depending on purchase location.Attaching the strap21345 Lastly, pull the strap firmly, making sure that it is fastened securely.12 EN
Inserting and Removing the Battery and CardTurn off the camera before opening the battery/card compartment cover.1Opening the battery/card compartment cover.3LOCK knob1PreparationIn this manual, all storage devices are referred to as “cards.”The following types of SD card (commercially available) can be used with this camera:SD, SDHC, and SDXC.Cards must be formatted with this camera before first use or after being used withother cameras or computers. g “Formatting the Card” (P. 21)12Battery/card compartment cover2Battery/card compartment lockLoading the battery. Use only LI-92B batteries (P. 12, 147). Insert the battery as illustrated with the Cmark toward the battery lock knob. If you insert the battery in the wrongdirection, the camera is not turned on. Besure to insert it in the correct direction.Battery lock knob3Loading the card. Slide the card in until it is locked intoplace. g “Usable cards” (P. 15)Terminal area Do not forcibly insert a damaged or deformed card. Doing so may damage the cardslot.EN 13
4Closing the battery/card compartmentcover.1 When using the camera, be sure to closethe battery/card compartment cover.312PreparationRemoving the batteryTo remove the battery, first push the battery lock knob in thedirection of the arrow and then remove. Do not remove the battery while the card write indicator isdisplayed.Card write indicatorS-IS ONISO-A200LNFHD F30pP125 F5.60.001:02:031023 Contact an authorized distributor or service center if you are unable to remove the battery.Do not use force. Notes It is recommended to set aside a backup battery for prolonged shooting in case thebattery in use drains. Also read “Batteries” (P. 118).14 EN
Removing the cardPress the inserted card lightly and it will beejected. Pull out the card. Do not remove the card while the card writeindicator is displayed (P. 14).1PreparationUsable cardsIn this manual, all storage devices are referred to as “cards.” Thefollowing types of SD card (commercially available) can be used withthis camera: SD, SDHC, and SDXC. For the latest information, pleasevisit the Olympus website.SD card write protect switchThe SD card body has a write protect switch. Setting the switch to“LOCK” prevents data being written to the card. Return the switch tothe unlock position enable writing.LOCK Cards must be formatted with this camera before first use or after being used with othercameras or computers. g “Formatting the Card” (P. 21) The data in the card will not be erased completely even after formatting the card ordeleting the data. When discarding, destroy the card to prevent leakage of personalinformation.File storage locationsData on the card are stored in the following folders:Folder nameDCIMGPSLOG:GPS logsSNSLOG:Sensor logsFolder name: Data type100OLYMP: Images999OLYMP: ImagesAutomatic file numberingEN 15
Charging the BatteryThe battery is not fully charged at shipment. Charge the battery before use, notstopping until the indicator lamp has turned off to show that the battery is fully charged.11Check that the battery is in the camera, and connect the USB cable andUSB-AC adapter.PreparationUSB-AC adapter(supplied)AC outlet2Micro-USB connectoror13USB cable (supplied)Connector cover2Highlight [Charge] using the FG buttons on the arrow pad and press the Qbutton.USBStorageMTPChargeExitSet The indicator lamp will light and charging will begin. The indicator lamp turns off when charging iscomplete. Charging takes about 3 hours. Charging times mayincrease at high ambient temperatures.Indicator lamp Be sure to unplug the power plug of the USB-AC adapter from the wall outlet whenthe charging is complete. For charging the battery abroad, see “Using Your Charger Abroad” (P. 118). Never use any cable other than supplied or Olympus-designated USB cable. This maycause smoking or burning. The included F-5AC USB-AC adapter (hereafter referred to as USB-AC adapter) differsdepending on the region where you purchased the camera. If you received a plug-in typeUSB-AC adapter, plug it directly into AC outlet. For details on the battery, see “SAFETY PRECAUTIONS” (P. 148). For details on theUSB-AC adapter, see “SAFETY PRECAUTIONS” (P. 148).16 EN
If the indicator lamp does not light, reconnect the USB cable and USB-AC adapter to thecamera. If the message “No Connection” is displayed in the monitor, disconnect and reconnect thecable. A charger (UC-92: sold separately) can be used to charge the battery.When to charge the batteriesIf the camera displays the message shown in the illustration, charge the battery.Error messageS-IS ONISO-A200LNBattery EmptyFHD F30pP125 F5.60.01PreparationFlashes in red01:02:031023Turning the Camera On1Press the ON/OFF button to turn on the camera. The camera will turn on and the indicator lamp and monitor will light.ON/OFF buttonMonitorBattery levelThe battery level icon will be displayed.7 (green): The camera is ready to shoot.8 (green): The battery is not full.9 (blinks red): Charge the battery.S-IS ONISO-A200LNFHD F30pP125 F5.60.001:02:031023Camera sleep operationIf no operations are performed for a minute, the camera enters “sleep” (stand-by) mode toturn off the monitor and to cancel all actions. The camera activates again when you touchany button (the shutter button, q button, etc.). The camera will turn off automatically ifleft in sleep mode for 5 minutes. Turn the camera on again before use. You can select howlong the camera remains idle before entering sleep mode. g [Sleep] (P. 100)EN 17
Initial SetupAfter turning the camera on for the first time, perform the initial setup by selecting alanguage and setting the camera clock.1Preparation Date and time information is recorded on the card together with the images. The file name is also included with the date and time information. Be sure to set thecorrect date and time before using the camera. Some functions cannot be used if the dateand time have not been set.1Press the Q button when the initial setup dialogis displaying prompting you to select a language.Please select your language.Veuillez choisir votre langue.Bitte wählen Sie Ihre Sprache.Por favor, selecciona tu idioma.2Highlight the desired languageusing the control dial or theFGHI buttons on the arrowpad. The language-selection dialog has two pages ofoptions. Use the control dial or the FGHI buttonson the arrow pad to move the cursor between YLǐ N �ɪɚʀɧɫɶɤɚViet NamSetare18 EN
3Press the Q button when the desired languageis EnglishNederlands45Set the date, time, and date format. Use the HI buttons on the arrow pad to highlightitems. Edit the highlighted item using the control dial or theFG buttons on the arrow pad. Press the Q button to set the clock. The clock can be adjusted at any time from thee setup menu. g [X Settings] (P. 94)Highlight a time zone using the control dial or theFG buttons on the arrow pad and press the Qbutton. Daylight saving time can be turned on or off using theINFO Eesti If you press the shutter button before pressing the Q0DJ\DUǼȜȜȘȞȚțȐDeutschbutton, the camera will exit to shooting mode and noItalianoIndonesialanguage will be selected. You can perform the initial/LHWXYLǐ N LatviskiPortuguês(Pt)PolskiNorsksetup by turning the camera off and then on againSetto display the initial setup dialog and repeating theprocess from Step 1. The language can be changed at any time from the e setup menu. g “Selecting alanguage (W)” (P. 95)CancelThe time is displayed using a24-hour clock.Time ZoneUTC 09:00 (12:30)SeoulTokyoSet If the battery is removed from the camera and the camera is left for a while, the date andtime may be reset to the factory default setting. You may also need to adjust the frame rate before shooting movies. g [Video FrameRate] (P. 87)EN 19
Camera Displays Unreadable/not in the Selected LanguageIf the camera displays are in an unfamiliar language or use characters you are unableto read, you may have accidentally selected the wrong language in the languageselection dialog. Follow the steps below to change languages.11Press the MENU button to display the menus.PreparationѯєьѬщѥҕ ѕѓѥё 11іѨѯоѶ ш ҟ ъѨдёѪьѷ іѠэ )2шкзҕѤҟ ѥдј Ѥэ2IHighlight the e tab using the FGH buttons on the arrow pad and press theQ button.ѯєьѬшкзҕѤҟ ѥ1шкзҕѤҟ ѥдѥіҙчX дѥішкзҕѤҟ ѥ WsчѬѓѥёэ ѤьъѩдWi-Fi дѥішкзҕѤҟ ѥ2дј Ѥэ3ѳъѕk 00.5 њѧьѥъѨшкзҕѤҟ ѥHighlight [W] using the FG buttons on the arrow pad and press the Qbutton.ѯєьѬшкзҕѤҟ ѥ1шкзҕѤҟ ѥдѥіҙчX дѥішкзҕѤҟ ѥ WsчѬѓѥёэ ѤьъѩдWi-Fi дѥішкзҕѤҟ ѥ2дј Ѥэ4ѳъѕk 00.5 њѧьѥъѨшкзҕѤҟ ѥHighlight the desired language using the FGHI buttons on the arrow padand press the Q țȐIndonesiaItalianoNorskBack20 EN0DJ\DULatviski/LHWXYLǐ N PolskiPortuguês(Pt)Set
Formatting the Card1Press the MENU button to display the menus.Shooting Menu 1112Reset/Assign Custom ModesPicture ModeAF AreaBack2I1PreparationCards must be formatted with this camera before first use or after being used withother cameras or computers.All data stored on the card, including protected images, is erased when the card isformatted.When formatting a used card, confirm there are no images that you still want to keepon the card. g “Usable cards” (P. 15)SetHighlight the e tab using the FGH buttons on the arrow pad and press theQ button.Setup Menu12Card SetupX SettingsWsRec ViewWi-Fi SettingsBack3Englishk 00.5 secSetHighlight [Card Setup] using the FG buttons on the arrow pad and pressthe Q button. If there is data on the card, menu items appear.Highlight [Format] and press the Q button.Card SetupAll EraseFormatBack4SetHighlight [Yes] and press the Q button. Formatting is performed.EN 21
2ShootingInformation Displays while ShootingMonitor display during still photography2126789a2HDR BKTShooting34 5JIHGFEDCBADatede0HDRFD-1g1.4 x 2.0 x2bc fi1.4 x2S-IS ONISO-A200WBAUTOAF4:3FocusLNLOGFHD F30pC1P01:02:03125 F5.6 2.0zy xwv1023utMonitor display during movie modeK1.4 xLRM-IS ONISO-A200WBAUTOAF16:9LNFHD F30pn22 EN 2.0h1:02:03jklmnopqrs
nopqrstuvwxyzABCDEFGHIJKAF mode .P. 55Aspect ratio .P. 55Image quality (still images) .P. 56Record mode (movies) .P. 57Available recording time .P. 119Number of storable still pictures .P. 119Level gauge (horizon) .P. 24, 102Top: Flash intensity control .P. 59Bottom: Exposure compensation .P. 41Exposure compensation value.P. 41Aperture value .P. 36Shutter speed .P. 35Histogram .P. 24Grid guide .P. 96Shooting mode.P. 27 – 39Custom mode .P. 37LOG icon/warning .P. 113GPS icon. P. 111Metering mode .P. 60Sequential shooting/Self-timer .P. 42Pro Capture shooting .P. 44Flash intensity control .P. 59Flash mode .P. 45Image stabilizer.P. 59Battery level .P. 17Recording level meter .P. 392Shooting1 Card write indicator .P. 142 Wireless LAN connection status. P. 106 – 1103 Date stamp .P. 864 AF fine-tuning guide.P. 46, 555 Af target .P. 25, 826 HDR .P. 29, 347 Bracketing icon .P. 33, 858 Handheld starlight .P. 289 Focus stacking .P. 330 Accessory .P. 61, 126a Digital teleconverter*1 .P. 42b Time lapse shooting.P. 84c Face priority .P. 60d Movie sound .P. 38, 72, 87e Wind noise reduction .P. 87f Level gauge (tilt) .P. 24, 102g Optical zoom ratio/magnification*1 .P. 26, 33h Internal temperature warning .P. 134i Flash .P. 45(blinks: charging in progress, lights up:charging completed)j AF confirmation mark.P. 25k Picture mode.P. 50, 81l ISO sensitivity .P. 52m White balance .P. 53*1 Displayed at all times if [n Microscope Control] (P. 33) is in use.EN 23
Switching the information displayYou can switch the information displayed in the monitorduring shooting using the INFO button.2S-IS ONISO-A200INFOShootingLNFHD F30pPINFO250 F5.60.001:02:031023Image OnlyBasic Information*S-IS ONS-IS ONISO-A200PINFO250 F5.60.0INFO01:02:031023Level Gauge display(Custom2)ISO-A200P250 F5.60.001:02:031023Histogram display(Custom1)* Not displayed in n mode (movie mode) unless recording is in progress. You can change Custom1 and Custom2 settings. g [G/Info Settings] [LV-Info](P. 102) The information display screens can be switched in either direction by rotating the controldial while pressing the INFO button.Histogram displayA histogram showing the distribution ofbrightness in the image is displayed. Thehorizontal axis gives the brightness, the verticalaxis the number of pixels of each brightness inthe image. During shooting, overexposure isindicated in red, underexposure in blue, and therange metered using spot metering in green.MoreLessDarkBrightLevel gauge displayThe orientation of the camera is indicated. The “tilt” direction is indicated on the verticalbar and the “horizon” direction on the horizontal bar. The camera is level and plumbwhen the bars turn green. Use the indicators on the level gauge as a guide. Error in the display can be corrected via calibration (P. 100).24 EN
Basic PhotographyJust press the shutter button and let the camera adjust settings to suit the scene.Taking photographs (AUTO mode)1Rotate the mode dial to B.2Frame the shot.3Adjust the focus.Shooting2 Be careful that your fingers or the camerastrap do not obstruct the lens or AFilluminator.Landscape positionPortrait position Display the subject in the center of the monitor, and lightly press the shutter buttondown to the first position (press the shutter button halfway).The AF confirmation mark (() will be displayed, and a green frame (AF target) wil
In addition to the “Instruction Manual” (this pdf), the documentation available for this product includes “Maintaining Water Resistance” (supplied). Consult these manuals when using the product. Instruction Manual
