Transcription
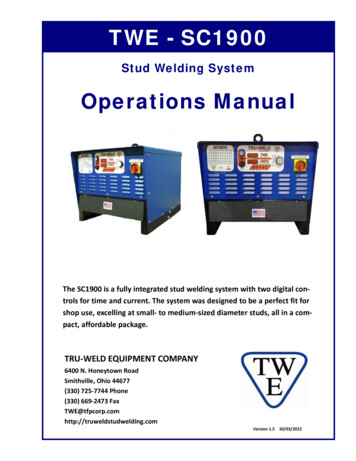
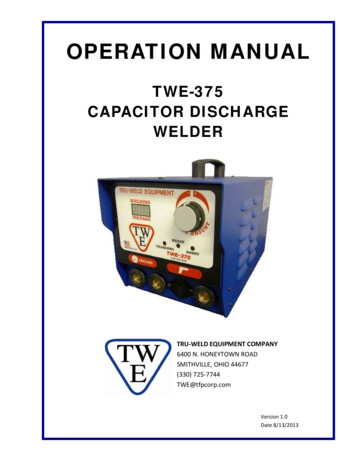
OPERATOR’S MANUALTW-i SERIESCapacitor Discharge Stud WelderMODELS:TW-i 250TW-i 250CPTW-i 321TW-i 375TRU-WELD EQUIPMENT COMPANYwww.truweldstudwelding.com(330) 725-7744
CONTENTSDescriptionPagesWarranty Information1Safety2Specifications and Features3Product Components4-5Screen Operation6-8Setup and Welding9-11CD Stud Gun Exploded View12
WARRANTY INFORMATIONTRU-WELD EQUIPMENT LIMITED WARRANTYAll goods produced by Tru-Weld Equipment shall be warranted against defects including workmanship and components. No other warranties whether expressed, verbal, or implied will apply. Warranties only apply to the original equipment purchaser.Warranty claims will be limited to either repair or replacement of the defective materials by Tru-Weld Equipment. The location ofwhere the warranty evaluation and repairs are made will be determined at the option of Tru-Weld Equipment . All warranty claim itemsreturned to Tru-Weld Equipment will be at the customer’s expense. At the option of Tru-Weld Equipment the defect will either be repaired or replaced. Notice must be provided to Tru-Weld Equipment of a warranty defect within 30 days that the defect or failure isincurred. Warranties are not transferable.This warranty does not apply for equipment which is used improperly in any fashion including but not exclusive to the following: Equipment which has been modified Equipment which has not been installed properly Equipment which has been used for purposes other than which it had been designed Equipment which has not been properly maintained Equipment which has been used after a defect had been found Equipment which has been damaged in any wayTru-Weld Equipment will never be liable for consequential damages, loss, or expense occurring directly or indirectly from the use of theequipment covered in this warranty.All cables, cable sets, and connectors are not covered under warrantyTwo (2) year warranty period from date of purchase TWE250 Power Supply SC900 Power Supply SC2400 Power Supply TWE250CP Power Supply SC950 Power Supply SC2402 Power Supply TWE321 Power Supply SC1400Power Supply SC2420 Power Supply TWE375 Power Supply SC1450 Power Supply SC3400 Power Supply TW-i250 Power Supply SC1600 Power Supply SC3402 Power Supply TW-i250CP Power Supply SC1650 Power Supply SC3422 Power Supply TW-i321 Power Supply SC1900 Power Supply TW-i375 Power Supply SC1950 Power SupplyOne (1) year warranty period from date of purchase TWESPC Power Supply TWP-2 Power Supply ACE-P100 Power SupplyNinety (90) day warranty period from date of purchase TWEGP CD stud gun TWE17000 HD arc stud gun TWEG MD CD stud gun TWE18500 MD arc stud gun TWEHDG HD CD stud gun TWE19000 LD arc stud gun1
SAFETYRead the safety notices before operating welderElectrical Due to potential dangerous electrical input and output theequipment must be disconnected from all incoming powerwhen servicing. Do not operate the equipment with the outercover removed or with the case open.Capacitors store electrical energy, completely discharge before performing any maintenance.Do not use fluids to clean electrical components as these may penetrate the electrical systemand cause shorts.Connection of the unit into service must be in accordance with the setup procedures as detailed in this manual. Operation of this equipment must be in accordance with all local, regional, and national safety codes.Fire During welding, small particles of hot metal can be expelled. Ensurethat no combustible materials are near the welding area.Personal Safety Arc rays can burn eyes and skin. Wear protective clothing and eye pro- FIRE HAZARDtection when welding.FROM SPARKSLoud noises from welding can damage hearing. Wear earplugs or other protective gear, if applicable.Fumes and gases expelled during welding can be health hazards. Make sure welding is done ina well-ventilated area.Hot metal splatter can cause fires and burns. Wear protective clothing, work in an area free ofcombustible materials, and have a fire extinguisher nearby.Maintenance All cables must be inspected regularly to ensure that no danger exists from damaged insulation or unsafe electrical connections. Take special note of the cables near the stud gun, this iswhere maximum wear occurs.Training Use of this equipment must be limited to authorized personnel only. They must be adequatelytrained, and have read and understood everything in this manual.The manual must be available to operators at all times.Installation 2Select a site which is capable of supporting the weight of the equipment.Select a site which is clear from heavy foot traffic areas to avoid tripping hazards.Select a site that prevents cable damage from equipment and vehicles.Do not hang connecting cables over sharp edges or place near heat sources.
SPECIFICATIONS AND FEATURESTW-i Capacitor Discharge Stud Welder SeriesThe TW-i series of capacitor discharge stud welders incorporates the latest solid state technology intoa compact, lightweight, and rugged CD stud welder. This full line of equipment is capable of weldingpins, cup head pins, and CD studs ranging from 14-gauge up to 3/8” full-flanged stainless steel studs.SpecificationsSPECSTW-i 250WEIGHTDUTY CYCLE18 studs per minute(1/4” settings)Features 18 lbs. (8.1Kg)14Ga - 1/4” StainlessCHARGE VOLTAGETW-i 375356mm x 267mm x 292mmWELD RANGEPRIMARY POWERTW-i 32114” L, 10.5” W, 11.5” HSIZE(Power Supply Only)TW-i 250CP18 lbs. (8.1Kg)20.8 lbs. (9.4Kg)23.4 lbs. (10.6Kg)14Ga - 1/4” Stainless14Ga - 5/16” Stainless 14Ga - 3/8” Stainless(including cup head pins)18 studs per minute(1/4” settings)14 studs per minute(5/16” settings)10 studs per minute(3/8” settings)110 VAC @ 50/60Hz 15 Amp circuit220 VAC @50/60Hz 7.5 Amp circuit35-200 VDC* Specifications are subject to change without prior notificationIntuitive Touchscreen Interface with preset values for fast, accurate, and repeatable weld settingsSet-Point Discharge: Unit discharges directly to a new set point without needing to discharge completelyUniversal Input Voltage: Plug and play, no need to re-tap the machine for 110V or 220V input voltagesLow input voltage capability enables operation with long extension cordsContact and Trigger indicators for fast troubleshooting of hand tool and weld cable maintenanceissuesThermal and Voltage protection indicators to protect the unit from damage due to overheating orpoor input powerRigid internal construction minimizes the possibility of components coming loose during rough handling or operationHand tool has been ergonomically designed to reduce operator fatigue for increased welding efficiencyHand tool has an adjustable internal spring to apply the correct spring pressure for every weldingapplicationHand tool can be configured for B collets, CI (Collet Inserts), Euro collets, or standard taperedchucks3
PRODUCT COMPONENTSFront ViewBack View167823459Components1. Touch Screen Interface2. Weld Ground Connector3. Cup Pin Weld Ground Connector (Model 250CP only, on all other TW-i models this connector is asecondary Weld Ground Connector)4. Stud Gun Control Cable Connector5. Stud Gun Weld Cable Connector6. ON/OFF Switch7. 10A Fuse8. Manufacturer Model Number and Serial Number Plate9. Power Cord Socket4
PRODUCT COMPONENTSInternal View129348765Components1. Ventilation Fan2. ON/OFF Switch3. 10A Fuse4. AC Inline Filter/Power Cord Socket5. Capacitor Bank6. Freewheeling Diodes7. SCR/Clamp8. Discharge Resistor9. Control Board5
SCREEN OPERATIONStud Preset ScreenContact IndicatorMode SelectionWelding VoltageTrigger IndicatorStud CounterVoltageAdjustmentVoltageAdjustmentCharge IndicatorStud PresetsMetric Stud ModeVoltage Preset ScreenMode SelectionVoltagePresets6
SCREEN OPERATIONStud Counter ScreenStud CountStud Counter ResetResetting the Stud Counter While on the stud counter screen, press the RESET tab located at the bottom of the screen. The screen will then prompt the user for a confirmation to clear the stud counter. To cancel the resetting of the stud counter, simply press NO on the screen. To confirm the resetting of the stud counter, simply press YES on the screen.7
SCREEN OPERATIONScreen Status IndicatorsStatus Indicator8StatusIndicatorDescriptionOVERTEMPUnit Has ExceededTemperature ThresholdUNDERVOLTAGEInsufficient InputPowerDC LIMIT ONDuty Cycle LimiterActivatedERR: CHRG TIMEMax Charge TimeExceededUnit has taken too long to charge and there may be anissue with the capacitor. With unit powered down ensure that all connectors and connections are tight.ERR: OUTPUTCapacitor ShortDetectionCapacitor is not charging properly and the outputsmay be shorted. Check the unit for damage as well asthe SCR for a short circuit.SolutionUnit needs to cool down before more welds can bemade. Please allow the unit to cool down and clearthe overtemp warning.Unit has detected insufficient supply power. Connectthe unit to a more stable power supply.Protects capacitor from overheating by limiting theuser to a maximum average duty cycle. This protection only activates when the set point of the welderis above 85V. Below 85V there is no limitation to theduty cycle of the unit.
SETUP AND WELDINGConnecting the Welding Leads1. Connect the stud gun weld cable into the gun terminal socket on the front of the welding unit. Thecable end plug has a flat which aligns with a dot on the panel mount socket. Secure the connectorinto the panel mount socket, and then turn it clockwise until it locks into proper position. Failureto properly make these connections could result in damage to the connectors.2. Connect the weld gun control cable into the center socket connector. The control cable plug has alarge pin and a small pin that match the socket on the unit. Push the plug firmly into the socketand twist clockwise to secure the plug into the correct position.3. Connect the ground clamp into the ground terminal socket on the front of the unit, this connection is identical to step 1.Stud Gun ControlCable ConnectionGround Cable ConnectionStud Gun WeldCable ConnectionConnecting the Ground Clamp1. Prior to securing the clamp, make certain thatthe contact area is free of rust, paint, grease, orany other impurities to ensure a good groundconnection.2. Attach the clamp of the welding ground lead tothe work piece.3. Most applications will require only one groundclamp, but certain applications will require anadditional dual clamp.9
SETUP AND WELDINGSelecting the Proper Stud Collet (Stud Holder)Listed below are the common collet styles, the choice between these setups is usually a matter of personal preference1. The B collet which is a two-piece assembly (collet and insert). The insert determines how much ofthe stud is engaged in the collet.2. The CI (Collet Insert) which is a single part and the amount of the stud that is engaged is predetermined.3. Standard Adjustable Chucks have an adjustable internal screw to manually adjust for the engagement of the stud.The collet sizes are based on the diameter of the stud to be welded.Collet AdapterCD Stud Gun Setup1. Place the collet into the colletFoot Pieceadapter of the stud gun and set thelocking screws to hold the collet inColletplace.2. Mount the two legs and foot pieceonto the stud gun. The colletLeg Pieceshould be centered through theopening of the foot piece.3. Insert the stud to be welded intothe collet.4. Adjust the leg and foot piece by sliding it into position until approximately 1/8” of the stud protrudes from beyond the foot piece. Lock legs in place with the set screws.5. The tension setting is adjusted by turning the adjustment cap on the back of the stud gun. On theside of the stud gun is the tension setting indicator, this displays the tension setting of the internalspring.6. The spring tension setting of the stud gun will vary depending on the application. Generally, mildsteel and stainless steel should be set in the 1 to 2 range. Aluminum and other nonferrous metalswill require settings in the 3 to 5 range.Adjustment CapTension Indicator10
SETUP AND WELDINGPowering On the WelderWhen all of the previous setup steps in this manual are complete the welder can be powered on.1. Ensure that the power cord is connected to the power cord socket and the supply power.2. Check the 10A fuse below the ON/OFF switch located on the back of the unit.3. Use the ON/OFF switch to power the unit on.Voltage Selection The voltage is determined by the diameter of the stud and the base material thickness. The unit isprogrammed with the recommended voltage settings for various stud sizes. Fine tuning the voltage for each application from this starting point is recommended.Setting the required weld voltage is achieved by selecting the desired stud size on the screen ormanually setting the voltage by using the or - arrows.Fast voltage selection can be done from the voltage mode screen. This will replace the preset values on the screen with voltages in increments of 10V and can be manually adjusted by using thearrows.Testing the Weld Settings1. After performing all of the setup steps listed in this manual, it is recommended that several testwelds be performed with the same diameter stud and base material used for the application. Thiswill verify that all of the settings are correct to achieve the desired results.2. Welding is done by placing the stud into the collet and pressing the stud gun to the work piece.3. Hold the gun perpendicular to the work piece, align the stud to the desired location, press downso that the foot piece is flush with the base material, and squeeze the trigger.4. Spreading the collet tines when lifting the stud gun from the welded stud will shorten the life ofthe collet and will eventually create an undesirable weld. For maximum collet life remove thestud gun from the welded stud by pulling the stud gun straight off of the welded stud.5. Properly welded studs are tested by either torqueing or bending the stud. Using either methodthe threaded portion of the stud may break. However, the welded flange of the stud should stayin place. Additionally, if the base material is very thin, a full slug the diameter of the flange willpull from the base metal.Inspecting the Weld1. Visually inspect the weld. If there is a significant amount of splatter then the weld is too hot, lowerthe voltage. If there is no splatter then the weld is too cold, increase the voltage.2. A good weld will result in a small, visible, and 360 flashing surrounding the flange of the stud. Ifthere is weld flash on only one side of the base of the flange, this is called “arc blow,” and can besolved by repositioning the ground clamp or using a dual ground clamp.11
CD GUN EXPLODED VIEW12
TRU-WELD Equipment Company6400 N. Honeytown RoadSmithville, Ohio 44677(330) 725-7744 Phone(330) 669-2473 sion 1.0Date 5/01/2017
onnecting the Welding Leads 1. onnect the stud gun weld cable into the gun terminal socket on the front of the welding unit. The cable end plug has a flat which aligns with a dot on the panel mount socket. Secure the connector into the panel mount socket, and then turn it clockwise until it locks into proper position.