Transcription
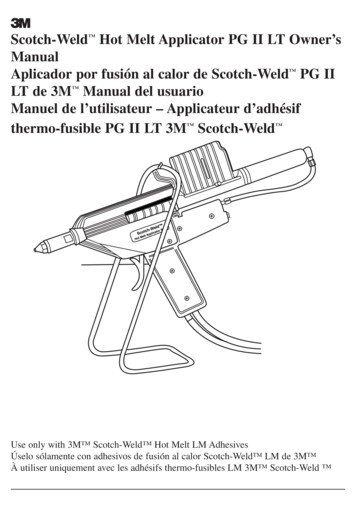
3Scotch-Weld Hot Melt Applicator PG II LT Owner’sManualAplicador por fusión al calor de Scotch-Weld PG IILT de 3M Manual del usuarioManuel de l’utilisateur – Applicateur d’adhésifthermo-fusible PG II LT 3M Scotch-Weld Use only with 3M Scotch-Weld Hot Melt LM AdhesivesÚselo sólamente con adhesivos de fusión al calor Scotch-Weld LM de 3M À utiliser uniquement avec les adhésifs thermo-fusibles LM 3M Scotch-Weld
General InformationImportant Safety Instructions.1General Information.2Set Up and Installation.3Operation.5Preventive Maintenance .7Troubleshooting .9Repair Part Kits .11Repair Procedures .13General Assembly (Schematic).20Electrical Control/Wiring Arrangement.21Flow Control .22Accessories.23Repair Service .24Important Notice .24Warranty and Limitation of Remedies.24Limitation of Liability.243M Sales Branches.Back Cover
Important Safety InstructionsSAVE THESE INSTRUCTIONSRead instructions thoroughly before operating or performing any maintenance on 3M Scotch-Weld HotMelt Applicator PG II LT.! DangerDo not modify the plug provided with the 3MScotch-Weld Hot Melt Applicator PG II LT.Improper grounding connection of the plug maycause electrical shock. Check with a qualifiedelectrician or service person to determine whetherthe plug is properly grounded.!CautionUse only an approved extension cord with 3MScotch-Weld Hot Melt Applicator PG II LT. Use ofimproper extension cord may cause electrical shock.Use an extension cord that complies with NECrequirements and state and local electricalrequirements.!Caution! CautionContact with molten adhesive or hot applicator tipor metal components may cause burns. Wear heatresistant gloves and safety glasses when operatingor repairing the 3M Scotch-Weld Hot MeltApplicator PG II LT.! ImportantDo not connect 3M Scotch-Weld Hot MeltApplicator PG II LT to air supply with air pressuregreater than 80 psi. Damage to the applicator mayresult.!ImportantUse 3M Scotch-Weld Hot Melt LM Adhesivesonly. Use of other adhesives may damage theapplicator or result in hazardous conditions.Disconnect air and electrical power and make sureapplicator is at room temperature before servicing3M Scotch-Weld Hot Melt Applicator PG II LT.Failure to disconnect air and electrical power beforeservicing may cause electrical shock or damage tothe applicator.1 3M 2006
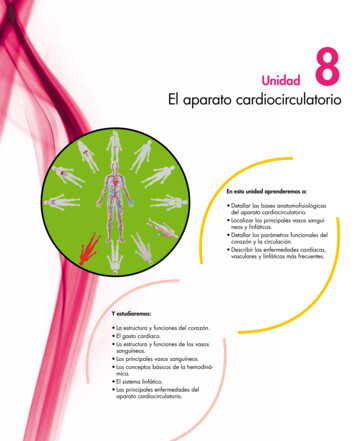
General InformationREAD INSTRUCTIONS THOROUGHLY BEFORE OPERATING OR PERFORMING ANYMAINTENANCE ON 3M SCOTCH-WELD HOT MELT APPLICATOR PG II LT.The 3M Scotch-Weld Hot Melt Applicator PG IILT is designed to be a simple, reliable tool fordispensing 3M Scotch-Weld Hot Melt LMAdhesive Sticks.!ImportantUse 3M Scotch-Weld Hot Melt LM Adhesives only.Use of other adhesives may damage the applicator orresult in hazardous conditions.It is self-contained and hand held, designed for multistation or intermittent manual adhesive application.The 3M Scotch-Weld Hot Melt Applicator PG II LTuses electric heat to melt the adhesive, and airpressure to deliver the adhesive. Adhesivetemperature is automatically maintained by a fixedthermostat on the heat block. The system is furtherprotected by a thermal cutout (TCO), which acts as athermal fuse.Please take time to properly fill out and returnyour 3M Scotch-Weld Hot Melt Applicator PG IILT Warranty Card. 3M 2006When trigger (1) is pulled, the variable regulator (2)allows air pressure into rear of the Speedloader stickfeed (3). Air pushes the piston (4), which advancesadhesive stick through applicator. As adhesiveadvances, it passes through hard plastic insulatingsleeve (5) which acts as thermal barrier to keepmolten adhesive and heat in forward portion of theapplicator. The rest of the applicator stays cool.As adhesive advances into the heat block, it is meltedand liquefied. With pressure from the solid adhesivesticks and the piston, the liquid adhesive is forced outof the applicator through the nozzle tip (6). When thetrigger is released, air pressure is released from therear of the loading chamber. Pressure on the moltenadhesive in the front of the applicator is then alsorelieved. Spring tension in the nozzle valve retractsthe valve, neatly cutting off the adhesive flow.The delivery rate of molten adhesive for the 3MScotch-Weld Hot Melt Applicator PG II LT isapproximately six pounds per hour with 3M Scotch-Weld Hot Melt Adhesive 3762-LM utilizingthe standard tip 9921. Adhesive flow rates will varywith the different 3M adhesives in the line and thenozzle tip you choose.2
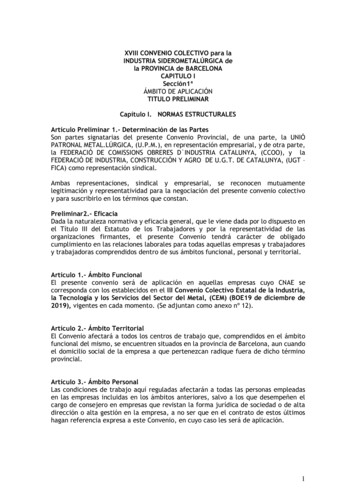
Setup and Installation1. Remove the 3M Scotch-Weld Hot MeltApplicator PG II LT from itsshipper and inspect for obviousdamage.2. Connect Air and ElectricalServiceSelect a work station where 120 VAC groundedreceptacle and compressed air service areavailable.Grounding InstructionsThe 3M Scotch-Weld Hot Melt Applicator PG II LTmust be grounded. If it should malfunction or breakdown, grounding provides a path of least resistancefor electric current to help reduce the risk ofelectrical shock. This applicator is equipped with acord having an equipment-grounding conductor andgrouding plug. This plug must be used withappropriate outles that are properly installed andgrounded in accordance with all local codes andordinances.The 3M Scotch-Weld Hot Melt Applicator PG II LTis designed for use on a nominal 120-volt circuit andhas a grounding plug as shown in illustration above.Make sure the applicator is connected to an outlethaving the same configuration as the plug. Noadaptor should be used.3!DangerDo not modify the plug provided with the 3MScotch-Weld Hot Melt Applicator PG II LT.Improper grounding connection of the plug maycause electrical shock. Check with a qualifiedelectrician or service person to determine whetherthe plug is properly grounded.Electrical outlet should be as close to air supplyas possible. Filtered air regulated to 80 psimaximum is vital to optimum operation.Important!Do not connect 3M Scotch-Weld Hot MeltApplicator PG II LT to air supply with airpressure greater than 80 psi. Damage to theapplicator may result.Refer to step 3 on page 4 for air filter andregulator installation procedure.Connect air hose using two 1/2’’ open-endwrenches. Remove the steel swivel portion of theconnector and insert the steel swivel into 1/8’’female pipe thread air source. Insert and tightenthe brass fitting into the swivel and snug up allfittings. 3M 2006
Setup and Installation3. Install Air Filter andRegulatorAn air filter and moisture trap must be installed at theapplicator connection point of the air system. Installan air filter WATTS #602-2S Model M4 or equivalentat the air outlet or as close as possible to it. The hoseconnection at the end of the 3M Scotch-Weld Hot Melt Applicator PG II LT air hose is 1/8’’standard male pipe fitting. 3M 20064. Install Bench StandPrior to start up in operation, set the bench stand onwork surface so that tip of the applicator points awayfrom work area when applicator is not in use. Whenbench stand is in most desirable position, fastenpermanently using the screws provided. (Ifportability of the bench stand is desired, simplyattach the stand to a piece of scrap woodapproximately 7’’ x 16’’ using either screws or byadhering the stand to the wood.)4
OperationWarm UpSet the off/on switch to the “on” position and setthe 3M Scotch-Weld Hot Melt Applicator PGII LT in the bench stand for approximately 15minutes. During this warm-up period you maynote a slight dripping from the nozzle tip. Thisdripping is due to expansion of the adhesiveduring warm-up.! CautionContact with molten adhesive or hot applicator tip ormetal components may cause burns. Wear heatresistant gloves and safety glasses when operating orrepairing the 3M Scotch-Weld Hot Melt ApplicatorPG II LT.Loading! ImportantUse 3M Scotch-Weld Hot Melt LM Adhesivesonly. Use of other adhesives may damage theapplicator or result in hazardous conditions.After warm-up, load applicator with the 3MScotch-Weld Hot Melt LM Adhesive you’ll be usingon the job.To do this, fully retract the Speedloader piston bypulling one of the retract knobs located on either sideof the loading chamber. Insert up to three 3M ScotchWeld Hot Melt LM Adhesive Sticks into the chamberthrough the rear loading port. The applicator is nowready for operation.NoteDo not depress trigger on the applicator unlessthere is adhesive in the loading chamber. Damageto the applicator may result.5As adhesive is extruded, the piston will moveforward. This will be visually evident by the forwardmovement of the retract knobs. As the pistonapproaches the front of the chamber, a whistlingsound will be heard. At this point the piston may beretracted and another adhesive stick will fall intoplace. The applicator is again ready for operation.Adhesive may be loaded into the chamber via therear port at any time during operation thus savingtime and increasing productivity.If it is desired to remove adhesive once it is in theloading chamber, simply roll the applicator to oneside and then point up. This will allow the adhesiveto roll up and out of the chamber.In order to keep the Speedloader stick feed operatingat maximum efficiency, the chamber should besprayed inside while the piston is in the full forwardposition with 3M Silicone Lubricant or equivalentonce a week.ApplicationGet a feel for your new 3M Scotch-Weld Hot MeltApplicator PG II LT. Start by applying smallamounts of adhesive in puddles on a piece of scrap orpaper. Try feathering the trigger. The 3M ScotchWeld Hot Melt Applicator PG II is unique in thisrespect. Pull the trigger back slowly and note a smalldischarge of adhesive; pull the trigger back more andnote increasing adhesive flow. When the trigger isfully depressed; you will get maximum flow. If moreor less flow is desired, refer to page 22 of thismanual.NoteDo not operate the applicator without a nozzletip. Damage to the applicator may result. 3M 2006
OperationChanging Tips!CautionContact with molten adhesive or hot applicator tip ormetal components may cause burns. Wear heatresistant gloves and safety glasses when operating orrepairing the 3M Scotch-Weld Hot MeltApplicator PG II LT.Tips can be changed only when the applicator ishot. You will need a 5/8’’ and a 1/2’’ open-endwrench. Hold the nozzle valve hex firmly with the5/8’’ wench, while removing the nozzle tip with the1/2’’ wrench. The accessory tip is mounted using thereverse procedure. Snug the tip lightly.NoteDo not tighten the tip. Overtightening coulddamage the valve assembly.The 3M Scotch-Weld Hot Melt Applicator PG II LTincludes a 9921 (.093’’) tip as standard equipment.Other tips, available from your 3M Scotch-Weld HotMelt Adhesive distributor, are shown on page 22 ofthis manual.NoteDisconnect air supply before changing tips. 3M 20066
Preventive MaintenanceBefore Operation1. Make sure filtered compressed air is available,regulated to a maximum of 80 psi or to aminimum of 40 psi. DO NOT OPERATE 3M SCOTCH-WELD HOT MELTAPPLICATOR PG II LT BELOW 40 PSI. Iflow flow is experienced at 40 psi see page 9,Troubleshooting.!CautionContact with molten adhesive or hot applicator tipor metal components may cause burns. Wearheat-resistant gloves and safety glasses whenoperating or repairing the 3M Scotch-Weld HotMelt Applicator PG II LT.4. Be sure there is adhesive in the loading chamber.5. Under normal conditions, allow at least 15minutes for the applicator to warm up.NoteIf proper shutdown procedure has not beenfollowed (see Preventive Maintenance, "AfterOperation," page 8), up to one hour heat up priorto use may be required.2. Make sure that the 3M Scotch-Weld Hot MeltApplicator PG II LT is plugged into 120 VAC andthat the switch is in the “on” position. eld-W or Ptch plicatScoelt ApHo3. Inspect nozzle tip daily. Make sure tip is cleanand clear of foreign matter. Using a coarse cloth,wipe off any accumulated adhesive or otherforeign matter on the tip.7tM6. Under normal operations the in-line air filtershould be removed and cleaned every six months(some air systems may require more periodicchanging). Simply remove the filter from the airsupply line and blow compressed air through thefilter in reverse of normal air flow to removeparticular matter.7. Periodically inspect the applicator to ensure thatassembly is proper (i.e. watch for loose screws,worn pins, etc). See page 9 through 19 forTroubleshooting and Repair Procedures. 3M 2006
Preventive MaintenanceDuring Operation eld Ph-W orotc licatSc t AppHotMelAfter OperationBefore shutting down the 3M Scotch-Weld Hot MeltApplicator PG II LT, put the electrical switch in the“off” position. Continue using the applicator untilapproximately one adhesive stick has beendischarged.NoteIf proper shutdown procedure has not beenfollowed, up to one hour heat up prior to use maybe required.Always use the bench stand provided when 3M Scotch-Weld Hot Melt Applicator PG II LT is notin use. Do not lay the applicator on its side. Thisimpedes cooling process and may cause pluggingproblems.Lubricate inside loading chamber with 3M SiliconeLubricant or equivalent once a week.Open adhesive cartridge stick only when necessary.Keep sticks clean and free from airbornecontaminants. 3M 20068
TroubleshootingProblemLow or no adhesive flowProbable Cause(In order of priority)1. Hung adhesive stickCorrectionTurn on the 3M Scotch-Weld HotMelt Applicator PG II LT and allow it toheat for at least 60 minutes.!CautionContact with molten adhesive or hotapplicator tip or metal componentsmay cause burns. Wear heatresistant gloves and safety glasseswhen operating or repairing the3M Scotch-Weld Hot MeltApplicator PG II LT.With incoming air at 80 psi extrudeadhesive. If unsuccessful remove nozzleassembly and extrude one stick ofadhesive. Readjust incoming air todesired pressure.2. Low air pressureCheck to see if there is sufficient airpressure. Test by setting pressure at 80psi. Check in-line filter to ensure that it isnot plugged with contaminants.Disconnect in-line filter from air hose.Using a compressed air line, blowcompressed air through the filter in thereverse flow position. If this does notincrease air flow through the filter, swivelfilter should be replaced.3. No electricityCheck to see that electrical service islive, and that lighted switch is in “on”position.4. Dirty nozzle valve assemblyRemove nozzle valve and clean. Runone adhesive stick out. Replace cleanedvalve assembly. This step should only bedone while tip is hot!CautionContact with molten adhesive or hotapplicator tip or metal componentsmay cause burns. Wear heatresistant gloves and safety glasseswhen operating or repairing the3M Scotch-Weld Hot MeltApplicator PG II LT.5. Regulator malfunction9Squeeze trigger and try to pull retractknobs. If they can be pulled back easily,install new regulator kit. 3M 2006
TroubleshootingProblemLow or no adhesive flow (cont.)Probable Cause(In order of priority)6. Burned out heater(s)CorrectionWith Volt/Ohm Meter, run electricalcontinuity check on each heater (seepage 17 for repair procedure). If opencircuit exists, install new heater kit.!CautionDisconnect air and electrical powerand make sure applicator is at roomtemperature before servicing 3M Scotch-Weld Hot Melt ApplicatorPG II LT. Failure to disconnect airand electrical power before servicingmay cause electrical shock ordamage to the applicator.No heatDripping Nozzle 3M 20067. Jammed adhesive sticksIf the piston is retracted before reachingthe point where the whistle is heard, ajam-up of the adhesive may occur. Tofree this, simply retract the piston fullyand roll the applicator to one side sothat the adhesive in the magazine willfree itself. Now push the knobs forwarduntil the adhesive stick still in thechamber is contacted by the piston. Rollthe applicator back to its normaloperating position and continueextruding adhesive until the whistle isheard or until the piston has traveled itsfull length as indicated by the orangeretract knobs.1. Blown thermal cutoffReplace with new Thermostat/TCO kit.Refer to page 18, paragraph J.1. Regulator malfunctionWith finger off of trigger, attempt toretract piston. If piston is very difficult topull back, air regulator may not beshutting off entirely. Replace regulator.2. Expanded adhesive stickExtrude one adhesive stick.3. Worn nozzle valveReplace with new nozzle valveassembly. Refer to page 14,paragraph C.10
TroubleshootingRepair Parts KitFor ease and convenience in repair, 3M ScotchWeld Hot Melt Applicator PG II LT repair part kitsare available from your authorized 3M Scotch-WeldAdhesive distributor. When ordering part kits,provide the name and number of the repair part kit.# ofItems/KitKit #Repair Part Kit9200Trigger Kita. Trigger Pinb. Trigger AssemblyHeat Shield Kita. Heat ShieldRegulator Kita. Regulator AssemblyRegulator HoseSub-Assembly Kita. Hose AssemblyPower Cord Kita. Power Cord Assemblyb. Cable TiesThermostat/TCO Kita. Thermal Cutout Assemblyb. Machine Screw Largec. Machine Screw Smalld. Thermostat Sub-Assembly99329204922092079931Repair Part Kit9221Handle Kita. Right Handle Sub-Assemblyb. Left- Handle Sub-Assemblyc. Machine Screwd. Machine ScrewSwitch Kita. Switch Sub-AssemblyHose Kit, Maina. Hose Sub-Assemblyb. Cable TiesHose Kita. Hoseb. Elbowc. Swivel Filterd. Cable TiesHeater Kita. 125 W Heaterb. Machine Screwc. Cable TieValve Kita. Nozzle Tipb. Valve Assembly192191922019220159222922311# ofItems/KitKit #111121Part kits can also be ordered directly from the nearest3M Sales Branch listed on the back cover.Kit #Repair Part Kit9224Miscellaneous Parts Kita. Heat Shield Screw, Topb. Heat Shield Screw, Sidec. Heat Shield Screwd. Shime. Electrical Connector Screwf. Connector Stripg. Handle Screwh. Regulator Screwi. Ground Wire Screwj. Hinge Pink. Bail Screwl. Lock Washer for Bailm. BailDump Valvea. ValveSpeedloader Hose Assemblya. Hose AssemblyScotch-Weld SL MagazineExtension Kita. Magazine ExtensionSpeedloader Assemblya. Speedloaderb. Hosec. Pind. Bail1143115111548111# ofItems/Kit922692609936993512429243232221111111 3M 2006
TroubleshootingYour 3M Scotch-Weld Hot Melt Applicator PGII LT has been engineered for durability andreliability. However, as with any electricalmechanical device, parts will wear with use andrequire replacement for optimum performance. Wehave listed below certain part kits that you may wantto have available in case the immediate need forreplacement arises. All part kits listed are availablefrom your authorized 3M Scotch-Weld Hot MeltAdhesive distributor or from the nearest 3M SalesBranch location listed on the back cover of thismanual. Please note the serial number of your 3MScotch-Weld Hot Melt Applicator PG II LT beforeordering part kits.No. of Scotch-Weld Hot MeltApplicators in Use2-56-1011-1516-20KitNumberName9200Trigger Kit 62-9200-6921-800119932Heat Shield Kit 62-9783-9932-701129204Regulator Kit 62-9204-6922-811229207Power Cord Kit 62-9207-6947-800019931Thermostat/TCO Kit 62-9783-9931-912239219Switch Kit 62-9219-2798-400119220Hose Kit 62-9220-2797-400019221Handle Kit 62-9221-2651-100019222Heater Kit 62-9222-6930-300119223Valve Kit 62-9223-6930-112349226Dump Valve Kit 62-9226-6990-800119260S/L Hose Assem. Kit 62-9260-2945-50011 3M 200612
Repair Procedures!Handle Disassembly InstructionsCautionDisconnect air and electrical power and make sureapplicator is at room temperature before servicing3M Scotch-Weld Hot Melt Applicator PG II LT.Failure to disconnect air and electrical power beforeservicing may cause electrical shock or damage to theapplicator.ProcedureA. Handle KitPart KitA.Handle KitB.Regulator KitC.Valve KitD.Hose KitE.Power Cord KitF.Switch KitG.Trigger KitH.Heat Shield KitI.Heater KitJ.Thermostat/TCO KitK.Heat Block KitRemove heat shield (see procedure H, page 16). Withthe nozzle of the applicator pointing away from you,remove the seven Phillips head cap screws in thehandle. These screws are located in the left hand sideof the handle grip, two in the pistol grip itself, two justforward of the wire terminal and three to the rear of thewire terminal. Without removing the wires from thewire terminals, lift the handle up and to the front of theapplicator. This operation will allow for subsequentrepair steps.To replace applicator handles, first follow “HandleDisassembly Instructions.” Next remove the electricalwiring from the terminal strip on the left handle,replacing them to the same terminals on thereplacement. The right half of the handle is removed byremoving the four Phillips head cap screws. Nextremove the electrical wiring from the terminal strip andre-assemble these to the replacement right half handle.Lift the switch out of its slot in the handle and replaceit in the new handle. Replace the trigger and trigger pinat this time. Using reverse procedure, reassemble theright handle half, then the left. Be sure all the electricalwires are in place and are not being pinched.13 3M 2006
Repair ProceduresC. Valve KitB. Regulator Kit!Caution!CautionDisconnect air and electrical power and make sureapplicator is at room temperature before servicing3M Scotch-Weld Hot Melt Applicator PG II LT.Failure to disconnect air and electrical power beforeservicing may cause electrical shock or damage to theapplicator.Contact with molten adhesive or hot applicator tip ormetal components may cause burns. Wear heatresistant gloves and safety glasses when operating orrepairing the 3M Scotch-Weld Hot Melt ApplicatorPG II LT.First follow “Handle Disassembly Instructions,”Procedure A on page 13. Then remove the two largePhillips head screws to the rear of the wire terminals onthe right hand side of the handle. This allows theregulator assembly to swing free, connected only bythe hose going from the brass rear of the regulator tothe loading chamber assembly, and then main hoseassembly. Remove the main hose by unscrewing theelbow fitting from the regulator. Use a 5/16’’ wrenchto remove the loading chamber hose from the regulator.Reassemble with a new regulator using reverseprocedure. Be sure hose fittings are quite snug. Checkfor air leaks by activating the regulator. Once this isdone, reassemble the handle and heat shield.3M Scotch-Weld Hot Melt Applicator PG II LTmust be warm prior to repairing nozzle valve.Nozzle valve assembly consists of the nozzle tip andthe nozzle valve. Remove the old valve assembly usinga 5/8’’ open-end wrench. Replace with new assembly.Gently snug up the valve assembly. With a 1/2’’wrench, also snug up the new tip.D. Hose Kit!CautionDisconnect air and electrical power and make sureapplicator is at room temperature before servicing 3MScotch-Weld Hot Melt Applicator PG II LT. Failure todisconnect air and electrical power before servicingmay cause electrical shock or damage to theapplicator.Follow “Handle Disassembly Instructions,” ProcedureA on page 13. Remove the main hose by unscrewingthe elbow fitting from the air regulator. Cut the cableties holding the power cord and hose assemblytogether. Remove the hose and reconnect the new hoseusing reverse procedure. Add new cable ties to the hoseand power cord. 3M 200614
Repair ProceduresE. Power Cord Kit!CautionDisconnect air and electrical power and make sureapplicator is at room temperature before servicing3M Scotch-Weld Hot Melt Applicator PG II LT.Failure to disconnect air and electrical power beforeservicing may cause electrical shock or damage to theapplicator.Follow “Handle Disassembly Instructions,” ProcedureA on page 13. The power cord wire from the switch isremoved from the bayonet connector. The black andwhite wires are removed from their respectiveterminals. Remember which wire came off whichterminal for reassembly. Consult the electrical wiringarrangement on page 21. Reassemble, followingreverse procedure.F. Switch KitFollow “Handle Disassembly Instructions,” ProcedureA on page 13. Lift the switch from the slot in the righthalf of the handle. The power lead can be unpluggedfrom the power cord receptacle. The other wiresterminating in ring lugs should be removed from theirrespective terminals, noting that the black lead isconnected to the Thermal Cut Out Assembly and thewhite lead to the heaters. Install the new switch usingreverse procedure.G. Trigger Kit!CautionDisconnect air and electrical power and make sureapplicator is at room temperature before servicing 3MScotch-Weld Hot Melt Applicator PG II LT. Failure todisconnect air and electrical power before servicingmay cause electrical shock or damage to theapplicator.Follow “Handle Disassembly Procedures,” Procedure Aon page 13. Lift the trigger assembly off the trigger pinand replace. Reassemble, following reverse procedure.!CautionDisconnect air and electrical power and make sureapplicator is at room temperature before servicing 3MScotch-Weld Hot Melt Applicator PG II LT. Failure todisconnect air and electrical power before servicingmay cause electrical shock or damage to theapplicator.15 3M 2006
Repair ProceduresHeat Shield DisassemblyI. Heater KitH. Heat Shield Kit!!CautionDisconnect air and electrical power and make sureapplicator is at room temperature before servicing3M Scotch-Weld Hot Melt Applicator PG II LT.Failure to disconnect air and electrical power beforeservicing may cause electrical shock or damage to theapplicator.Remove the heat shield assembly by removing the twoPhillips head screws from either side of the heat shieldand the one Phillips head screw on the heat shieldimmediately above the loading chamber. Reassemble,following reverse procedure. 3M 2006CautionDisconnect air and electrical power and make sureapplicator is at room temperature before servicing 3MScotch-Weld Hot Melt Applicator PG II LT. Failure todisconnect air and electrical power before servicingmay cause electrical shock or damage to theapplicator.Follow “Heat Shield Disassembly, “per procedure H.All heater wires must be disconnected from theirrespective terminal strips. With a suitable drift punch,drive the old heaters out through the top of the heatblock.All four heaters should be replaced making sure toreconnect the wires in the proper places. Refer to the“Wiring Arrangement” and “Electrical Control”diagrams, page 21. Be sure that heaters are bottomedout in the heat block. They should not stick out abovethe block more than 1/4’’. It may be necessary togently tap the heaters into place, but be careful not tocrack the ceramic.To ensure that heaters remain in place, gather all thewires together approximately 1/2’’ below the heat blockand tightly attach the cable tie provided with the kit.16
Repair ProceduresHeater Check-Out!Use Volt/Ohm Meter to check electrical continuity ofeach heater. If continuity exists, heater is okay. Firstremove heat shield. Heaters need not be removed fromthe block. Check in the following sequence: left front,right front, right rear, left rear. To start the check,remove only one wire from its connection on theterminal strip.CautionDisconnect air and electrical power and make sureapplicator is at room temperature before servicing3M Scotch-Weld Hot Melt Applicator PG II LT.Failure to disconnect air and electrical power beforeservicing may cause electrical shock or damage to theapplicator.Place one probe from the meter on the connector of thewire that has been removed, and with the other probe,touch the matching connector on opposite side of theapplicator. If needle on Volt/Ohm Meter swings, heateris okay.Reconnect wire that was removed first, and continuesequence. If one or more heaters are burned out, referto Repair Procedure, pages 13 through 19.17 3M 2006
Repair ProceduresJ. Thermostat/TCO KitRemove the heat shield assembly by removing the twoPhillips head screws from either side of the heat shieldand the one Phillips head screw on the heat shieldimmediately above the loading chamber.The thermostat and TCO are assembled as a unit andare replaced as such no matter which component hasfailed.The Quick-Slide clips should be removed from thethermostat. Remove the two screws holding thethermostat, and pry the thermostat from the block.!CautionDisconnect air and electrical power and make sureapplicator is at room temperature before servicing3M Scotch-Weld Hot Melt Applicator PG II LT.Failure to disconnect air and electrical power beforeservicing may cause electrical shock or damage to theapplicator. 3M 2006Insert new thermostat. Make sure the rear rim of thethermostat is slipped into the slot in the heat blockbefore affixing screws.The thermal cutout assembly is then removed bydisconnecting the Phillips head screw, holding thethermal cutout to the head block on the stand off strip.Remove the other end of
Aplicador por fusión al calor de Scotch-Weld PG II LT de 3M Manual del usuario Manuel de l'utilisateur - Applicateur d'adhésif thermo-fusible PG II LT 3M Scotch-Weld Use only with 3M Scotch-Weld Hot Melt LM Adhesives Úselo sólamente con adhesivos de fusión al calor Scotch-Weld LM de 3M