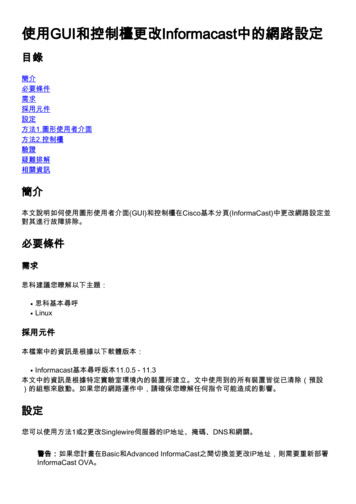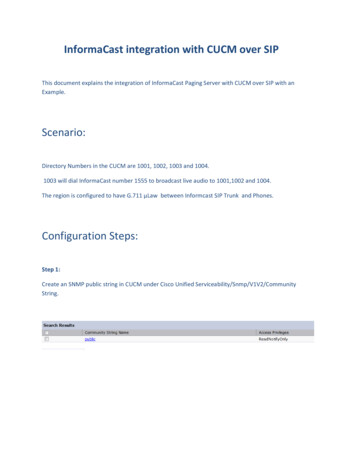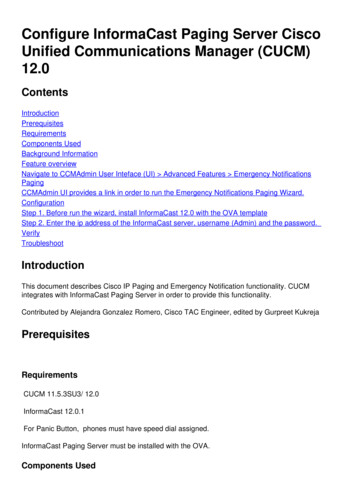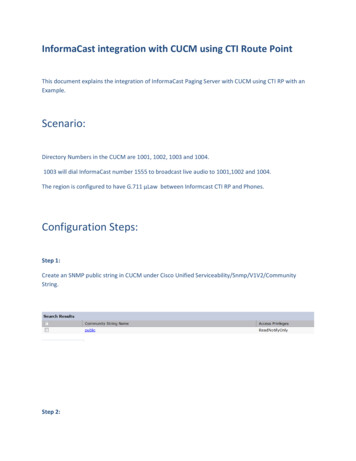
Transcription
InformaCast Virtual Appliance Basic Paging Version 12.5.1Quick Start Guide for a Cisco Unified Communications Manager EnvironmentNovember 16, 2018Cisco Systems, Inc.www.cisco.comCisco has more than 200 offices worldwide.Addresses, phone numbers, and fax numbersare listed on the Cisco website atwww.cisco.com/go/offices.
THE SPECIFICATIONS AND INFORMATION REGARDING THE PRODUCTS IN THIS MANUAL ARE SUBJECT TO CHANGE WITHOUTNOTICE. ALL STATEMENTS, INFORMATION, AND RECOMMENDATIONS IN THIS MANUAL ARE BELIEVED TO BE ACCURATE BUTARE PRESENTED WITHOUT WARRANTY OF ANY KIND, EXPRESS OR IMPLIED. USERS MUST TAKE FULL RESPONSIBILITY FOR THEIRAPPLICATION OF ANY PRODUCTS.THE SOFTWARE LICENSE AND LIMITED WARRANTY FOR THE ACCOMPANYING PRODUCT ARE SET FORTH IN THE INFORMATIONPACKET THAT SHIPPED WITH THE PRODUCT AND ARE INCORPORATED HEREIN BY THIS REFERENCE. IF YOU ARE UNABLE TOLOCATE THE SOFTWARE LICENSE OR LIMITED WARRANTY, CONTACT YOUR CISCO REPRESENTATIVE FOR A COPY.The Cisco implementation of TCP header compression is an adaptation of a program developed by the University of California, Berkeley (UCB) as part ofUCB’s public domain version of the UNIX operating system. All rights reserved. Copyright 1981, Regents of the University of California.NOTWITHSTANDING ANY OTHER WARRANTY HEREIN, ALL DOCUMENT FILES AND SOFTWARE OF THESE SUPPLIERS AREPROVIDED “AS IS” WITH ALL FAULTS. CISCO AND THE ABOVE-NAMED SUPPLIERS DISCLAIM ALL WARRANTIES, EXPRESSEDOR IMPLIED, INCLUDING, WITHOUT LIMITATION, THOSE OF MERCHANTABILITY, FITNESS FOR A PARTICULAR PURPOSE ANDNONINFRINGEMENT OR ARISING FROM A COURSE OF DEALING, USAGE, OR TRADE PRACTICE.IN NO EVENT SHALL CISCO OR ITS SUPPLIERS BE LIABLE FOR ANY INDIRECT, SPECIAL, CONSEQUENTIAL, OR INCIDENTALDAMAGES, INCLUDING, WITHOUT LIMITATION, LOST PROFITS OR LOSS OR DAMAGE TO DATA ARISING OUT OF THE USE ORINABILITY TO USE THIS MANUAL, EVEN IF CISCO OR ITS SUPPLIERS HAVE BEEN ADVISED OF THE POSSIBILITY OF SUCHDAMAGES.Cisco and the Cisco logo are trademarks or registered trademarks of Cisco and/or its affiliates in the U.S. and other countries. To view a list ofCisco trademarks, go to this URL: www.cisco.com/go/trademarks. Third-party trademarks mentioned are the property of their respective owners. The useof the word partner does not imply a partnership relationship between Cisco and any other company. (1110R)Any Internet Protocol (IP) addresses and phone numbers used in this document are not intended to be actual addresses and phone numbers. Any examples,command display output, network topology diagrams, and other figures included in the document are shown for illustrative purposes only. Any use of actualIP addresses or phone numbers in illustrative content is unintentional and coincidental. 2018 Cisco Systems, Inc. All rights reserved. 2018 Singlewire. All rights reserved.InformaCast is a trademark of Singlewire Software.All other referenced trademarks are trademarks of their respective owners and our reference to them does not imply or indicate any approval, endorsement,sponsorship or affiliation with such owners unless such approval, endorsement, sponsorship or affiliation is expressly indicated.Singlewire Software products would not be what they are without the use of open source software. Singlewire takes its open source compliance obligationsseriously, and towards this end, the open source information for each product release is published here.Last Updated: November 16, 2018
CONTENTSOverview . . . . . . . . . . . . . . . . . . . . . . . . . . . . . . . . . . . . . . . . . . . . . . . . . . .1-1Environments. . . . . . . . . . . . . . . . . . . . . . . . . . . . . . . . . . . . . . . . . . . .1-1Prerequisites . . . . . . . . . . . . . . . . . . . . . . . . . . . . . . . . . . . . . . . . . . . . .1-1Troubleshooting. . . . . . . . . . . . . . . . . . . . . . . . . . . . . . . . . . . . . . . . . .1-2Install InformaCast Virtual Appliance. . . . . . . . . . . . . . . . . . . . . . . . . . . .2-1Ensure Multicast is Enabled . . . . . . . . . . . . . . . . . . . . . . . . . . . . . . . . .2-1Deploy InformaCast . . . . . . . . . . . . . . . . . . . . . . . . . . . . . . . . . . . . . . .2-1Set the Initial Configuration . . . . . . . . . . . . . . . . . . . . . . . . . . . . . . . . .2-3Access InformaCast Virtual Appliance. . . . . . . . . . . . . . . . . . . . . . . .2-5Integrate Unified Communications Manager . . . . . . . . . . . . . . . . . . . .2-5Configure InformaCast . . . . . . . . . . . . . . . . . . . . . . . . . . . . . . . . . . . . . . . .3-1Log into InformaCast for the First Time. . . . . . . . . . . . . . . . . . . . . . .3-1Configure InformaCast’s Telephony. . . . . . . . . . . . . . . . . . . . . . . . . .3-1Use InformaCast . . . . . . . . . . . . . . . . . . . . . . . . . . . . . . . . . . . . . . . . . . . . .4-1Add a Recipient Group . . . . . . . . . . . . . . . . . . . . . . . . . . . . . . . . . . . . .4-1Allow/Disable SIP Access to InformaCast. . . . . . . . . . . . . . . . . . . . .4-1Add a Broadcast Dialing Configuration . . . . . . . . . . . . . . . . . . . . . . . .4-2Send a Broadcast. . . . . . . . . . . . . . . . . . . . . . . . . . . . . . . . . . . . . . . . .4-2Upgrade InformaCast from Basic to Advanced. . . . . . . . . . . . . . . . . . . . .5-1Note the Differences . . . . . . . . . . . . . . . . . . . . . . . . . . . . . . . . . . . . . . .5-1Upgrade InformaCast . . . . . . . . . . . . . . . . . . . . . . . . . . . . . . . . . . . . . .5-3Enter Your New License Key . . . . . . . . . . . . . . . . . . . . . . . . . . . . . . . .5-4Troubleshooting. . . . . . . . . . . . . . . . . . . . . . . . . . . . . . . . . . . . . . . . . .5-5InformaCast Virtual Appliance Basic PagingVersion 12.5.1i
C H A P T E R1OverviewFor virtualized environments, InformaCast Virtual Appliance Basic Paging (InformaCast or BasicInformaCast) is Singlewire Software’s IP telephony broadcast system that allows you to send a liveaudio stream to Cisco IP phones. InformaCast is designed to get messages quickly to large groups ofpeople; when these messages are sent through InformaCast, they are called broadcasts.This guide is designed to get you started quickly by explaining how to complete some of the mostcommon tasks you’ll need to get the most out of InformaCast. It is not a substitute for the larger, morein-depth “InformaCast Virtual Appliance Installation and User Guide.”EnvironmentsThere are three versions of this guide: one for installations using Basic Paging, one for installationsusing Advanced Notification in conjunction with Cisco’s Unified Communications Manager, and onefor installations using Advanced Notification in conjunction with a Hybrid Runtime Environment(HRE). Please make sure you have the right version by looking at the cover page, or by looking at theenvironment type printed at the bottom of every page.The versions are both separate and overlapping. Where versions overlap, InformaCast will be used.Where versions differ, Advanced InformaCast or Basic InformaCast will be used.For more information, see “Licensing Information” in the “InformaCast Virtual Appliance Installationand User Guide.”PrerequisitesInformaCast has the following system prerequisites: Compliance with the hardware requirements and port configurations as defined in the“InformaCast Virtual Appliance Installation and User Guide” A static IP address configured on the InformaCast Virtual Appliance Use of supported IP phones if you intend to use them as recipients Use of one of the following supported browsers: Firefox 62, Chrome 70, MS Edge 44, and InternetExplorer 11 Multicast routing for all network segments between InformaCast and its phonesInformaCast Virtual Appliance Basic PagingVersion 12.5.11-1
Chapter 1Overview A Cisco Unified Communications Manager server (including Business Edition 6000); the followingversions are supported: 10.0.1, 10.5.2, 11.0.1, 11.5.1, 12.0.1, and 12.5.1NoteIf you are running Unified Communications Manager in mixed mode, ensure that calls toand from InformaCast are not using encrypted media. Web access enabled on any Cisco IP phones working with InformaCast SNMP enabled on all nodes in a Unified Communications Manager cluster The AXL service running on at least one server in the Unified Communications Manager cluster The CTIManager service running on at least one node that’s also running the CallManager service.The CTIManager service can run on up to eight nodes in a cluster, and you should use more thanone node with this service for redundancy.You must also know how to access to the command-line interface (bash prompt) of InformaCast,perform basic UNIX commands, and use nano for editing files.TipSinglewire recommends a screen resolution of at least 1024x768.TroubleshootingYour first line of support is the Help icon. Clicking it takes you to the online help system. Accessingits dropdown menu allows you to access:–The online help system–Its FAQ section–API documentation–An API quick start guide–InformaCast’s Support pageFor information on obtaining documentation, obtaining support, providing documentation feedback,security guidelines, and also recommended aliases and general Cisco documents, see the monthlyWhat’s New in Cisco Product Documentation, which also lists all new and revised Cisco technicaldocumentation.InformaCast Virtual Appliance Basic PagingVersion 12.5.11-2
C H A P T E R2Install InformaCast Virtual ApplianceMany of the concepts involved in installing InformaCast Virtual Appliance require familiarity withVMware ESXi and Unified Communications Manager.Ensure Multicast is EnabledMulticast is communication between a single sender and multiple receivers on a network, and you musthave it enabled across your network in order for your recipients to receive the audio portion ofInformaCast broadcasts. InformaCast has no special requirements for how multicast is enabled, andyou should use your network vendor’s best practices and design considerations.The design and configuration of multicast in your environment is outside the scope of this document,but you may find the following resources helpful:Caution Multicast whitepaper Multicast Testing ToolJust because music on hold works on your phones does not mean that it is using multicast. Music onhold can be used with either unicast or multicast.Deploy InformaCastSinglewire supports InformaCast Virtual Appliance on the VMware ESXi platform, which is managedthrough the vSphere web client. This section describes how to import InformaCast Virtual Applianceusing the vSphere web client. Your client can be downloaded from your VMware server.Step 1Download the OVA file from Cisco’s website.NoteIf you are using InformaCast on the Unified Communications Manager Business Edition 6000,you will be supplied with a DVD in a package with an OVA on it (physical media).Step 2Open a web browser and log into your vSphere web client.Step 3Click the Hosts and Clusters icon and go to Actions Deploy OVF Template.Step 4Click the Local File radio button, click its Browse button, navigate to where you saved the OVA file(or to the OVA file on the supplied DVD), select it, and click the Open button.InformaCast Virtual Appliance Basic PagingVersion 12.5.12-1
Chapter 2Install InformaCast Virtual ApplianceStep 5Click the Next button and enter a name for your virtual machine in the Name field, e.g.InformaCastWest.Step 6Select a deployment location for your virtual machine from the Browse tab and click the Next button.TipIt is good practice to place the Virtual Appliance on the same VLAN as your UnifiedCommunications Manager.Step 7Select a location from which to run your deployed template from the Browse tab and click the Nextbutton. vSphere will validate that location.Step 8Click the Next button.Step 9Select a format and storage location for your deployed template and click the Next button.Step 10Review your information and click the Finish button. InformaCast Virtual Appliance will beginimporting.Step 11Go back to your vSphere Web Client window and in the left pane, click the server hosting yourInformaCast Virtual Appliance virtual machine.Step 12Click the Configure tab.Step 13Click the VM Startup/Shutdown link under Virtual Machines, then its Edit button.Step 14Ensure the Automatically start and stop the virtual machines with the system checkbox isselected.Step 15Select your virtual machine in the table and click the Up arrow to move it from Manual Startup toAutomatic Startup.Step 16Click the OK button in the Edit VM Startup and Shutdown pop-up window to save your changes. TheInformaCast Virtual Appliance will now start and stop automatically with the server on which it’shoused.Step 17Right click your virtual machine in the vSphere Web Client window's left pane and select Edit Settings.Step 18Click the Network adaptor 1 dropdown arrow on the Virtual Hardware tab.Step 19Ensure the Connect At Power On checkbox is selected.Step 20Click the OK button in the Edit Settings pop-up window to save your changes.Step 21Go back to your vSphere Web Client window, right click your virtual machine in the left pane and selectOpen Console.Step 22Click the green arrow button to turn on the virtual machine.NoteDepending on the hardware resources available to the InformaCast Virtual Appliance, it willlikely boot in less than a minute.When the InformaCast Virtual Appliance is done booting, you should see a request to select yourproduct.Step 23Leave your Singlewire InformaCast VM console window open and continue with “Set the InitialConfiguration.”InformaCast Virtual Appliance Basic PagingVersion 12.5.12-2
Chapter 2Install InformaCast Virtual ApplianceSet the Initial ConfigurationOnce you have completed the steps in “Deploy InformaCast” on page 2-1, you will need to setInformaCast’s initial network configuration.Step 1Return to your Singlewire InformaCast VM console window. You should see a request to select yourproduct.Step 2Press the Tab key followed by the Spacebar to select Cisco Paging Server.Step 3Press the Tab key once to highlight the Continue button, then press the Spacebar to select it. You willbe prompted to accept Cisco’s End User License Agreement (EULA).Step 4Press the Tab key to highlight the Accept checkbox, then press the Spacebar to accept the EULA.Step 5Press the Tab key twice to highlight the Next button, then press the Spacebar to select it. You will beprompted to accept Singlewire’s End User License Agreement.Step 6Press the Tab key to highlight the Accept checkbox, then press the Spacebar to accept the EULA.Step 7Press the Tab key twice to highlight the Next button, then press the Spacebar to select it. You will beprompted to assign a hostname to your server.Step 8Enter a hostname for your InformaCast Virtual Appliance in the Enter Hostname field, e.g.InformaCastWest. This hostname will appear in Webmin’s user interface.Step 9Press the Tab key to highlight the Next button, then the Spacebar to select it. The InformaCastVirtual Appliance then attempts to use DHCP to find suitable IP addresses on your network. TheSinglewire InformaCast VM console window refreshes.Step 10Accept these IP addresses or provide valid ones of your own in the IPv4 Address, Subnet Mask, andDefault Gateway fields.Step 11Press the Tab key to highlight the Next button, then the Spacebar to select it. The SinglewireInformaCast VM console window refreshes.Step 12Enter at least one DNS server IP address in the field provided or accept the one provided to you andenter a DNS domain name. Press the Tab key to highlight the Next button, then the Spacebar to selectit. The Singlewire InformaCast VM console window refreshes.Step 13Use the arrow keys to select a time zone for your InformaCast Virtual Appliance server.Step 14Press the Tab key to highlight the Next button, then the Spacebar to select it. The InformaCastVirtual Appliance then attempts to find an NTP server on your network. The Singlewire InformaCastVM console window refreshes.Step 15Accept the suggested NTP server IP address or provide a valid one of your own in the NTP Server 1IP or Hostname field.Step 16Press the Tab key to highlight the Next button, then the Spacebar to select it. The SinglewireInformaCast VM console window refreshes.InformaCast Virtual Appliance Basic PagingVersion 12.5.12-3
Chapter 2Install InformaCast Virtual ApplianceStep 17Enter the information necessary for a signed certificate (while the information is required, signing thecertificate is not). A signed certificate, which can protect against Man-in-the-Middle (MITM) attacks, isan electronic document that proves ownership of a public key; it includes information about the key,its owner’s identity, and the digital signature of a certificate authority (CA).You must enter the information dictated by your certificate authority in its required form: Your organization’s name, e.g. Acme Company Your organizational unit, e.g. Security Your city, e.g. Madison Your state or province, e.g. WI The alphabetic abbreviation for your country, e.g. US for United States An email address (optional)Step 18Press the Tab key to highlight the Next button, then the Spacebar to select it. The SinglewireInformaCast VM console window refreshes.Step 19Accept the common name of your server, which should be a combination of your hostname and yourDNS domain name, or provide one of your own in the Certificate DNS Name (hostname anddomain) field, then continue entering information for your signed certificate by entering any SubjectAlternative Names (SANs) in the fields provided. SANs allow you to secure multiple domain nameswith one certificate, e.g. www.example.com, www.exchange.example.com, and www.example.net can allbe secured through SANs.Step 20Press the Tab key to highlight the Next button, then the Spacebar to select it. The SinglewireInformaCast VM console window refreshes.Step 21Enter a password in the Enter OS Admin Password field, press the Tab key, and enter the passwordagain in the Re-enter OS Admin Password field. Your OS credentials are used to enter Webmin andControl Center and when using SSH to access the InformaCast Virtual Appliance.NoteYour password must be at least six characters in length, and contain at least one lowercase letter,one number, and one of the following characters: !\"# %''() * ,-./ :; ?@[] . Also, whensetting your password, you cannot use “changeMe.”Step 22Press the Tab key to highlight the Next button, then the Spacebar to select it. The SinglewireInformaCast VM console window refreshes.Step 23Enter a password in the Enter InformaCast and PTT Password field, press the Tab key, and enterthe password again in the Re-enter Password field. Your application credentials are used to enterInformaCast and PushToTalk.NoteYour password must be at least six characters in length, and contain at least one lowercase letter,one number, and one of the following characters: !\"# %''() * ,-./ :; ?@[\\] . Also,when setting your password, you cannot use “changeMe.”NotePushToTalk is only available to Advanced InformaCast users.InformaCast Virtual Appliance Basic PagingVersion 12.5.12-4
Chapter 2Install InformaCast Virtual ApplianceStep 24Press the Tab key to highlight the Next button, then the Spacebar to select it. The SinglewireInformaCast VM console window refreshes.Step 25Enter a security passphrase in the Enter Security Passphrase and Re-enter Security Passphrasefields. This passphrase is used to secure your backups of the InformaCast Virtual Appliance. You mustremember this passphrase. Singlewire Support personnel cannot recover it for you if it’s lost.NoteYour passphrase must follow the same character requirements as your OS admin password.Step 26Press the Tab key to highlight the Next button, then the Spacebar to select it. The SinglewireInformaCast VM console window refreshes.Step 27Press the Tab key to highlight the Finish button, then the Spacebar to select it. The SinglewireInformaCast VM console window refreshes.NoteThere may be a short wait while your changes are written to disk.Once your changes have been saved, the Singlewire InformaCast VM console window refreshes.Step 28Make a note of the displayed IP address. This is the IP address of the InformaCast Virtual Appliance’slanding page, which you will use to access the InformaCast Virtual Appliance, Control Center, andWebmin web user interfaces.Step 29Close your open console window.Access InformaCast Virtual ApplianceOpen a web browser, enter the IP address of the InformaCast Virtual Appliance (which you made noteof in Step 28 on page 2-5, and press the Enter key. The Singlewire landing page appears and you caneasily access all of your Virtual Appliance user interfaces. You may find it helpful to both keep thistab/window open during the time that you’re working with the Virtual Appliance and bookmark it forfuture use.Integrate Unified Communications ManagerBefore you can begin using InformaCast in a telephony environment, you must configure your versionof Unified Communications Manager.TipStep 1When naming your Unified Communications Manager components, it is recommended to use astandardized name or abbreviation so that the components will display together. For example, thisdocumentation will use the abbreviation of ICVA for InformaCast Virtual Appliance.Open a web browser and log into the administration interface of the Unified Communications Managerserver (the address will be similar to https:// Unified Communications Manager IPAddress /ccmadmin).InformaCast Virtual Appliance Basic PagingVersion 12.5.12-5
Chapter 2Install InformaCast Virtual ApplianceStep 2Select Cisco Unified Serviceability from the Navigation dropdown menu and click the Go button.Step 3Go to Tools Service Activation and enable the following services on your Unified CommunicationsManager cluster node(s): Cisco CallManager, Cisco CTIManager, Cisco AXL Web Service, andCisco CallManager SNMP Service.Step 4Determine which version of SNMP you’re using and following the appropriate steps: SNMP v2. Go to SNMP V1/V2c Community String and create an SNMP community stringnamed ICVA with the access privilege of ReadOnly. Select the Apply to All Nodes checkbox, ifpossible. SNMP v3. Go to SNMP V3 User and create a user named ICVA. Select the AuthenticationRequired checkbox, enter an authentication password for your user in the Password and ReenterPassword fields, and select the SHA radio button. Then, select the Privacy Required checkbox,enter a privacy password for your user in the Password and Reenter Password fields, and selectthe AES128 radio button. Select ReadOnly from the Access Privileges dropdown menu andselect the Apply To All Nodes checkbox, if possible.Step 5Select Cisco Unified CM Administration from the Navigation dropdown menu and click the Gobutton.Step 6Go to System Region and create a region. Name it ICVA, select all of your regions in the Regionsarea, and select 64kbps (G.722, G.711) from the Maximum Audio Bit Rate dropdown menu. Also,select the None radio button in the Max Video Call Bit Rate (Includes Audio) area.Step 7Go to System Device Pool and create a device pool. Name it ICVA, add the ICVA region you justcreated to it, select Disable from the SRST Reference dropdown menu, and select On from the JoinAcross Lines dropdown menu.Step 8Go to Device Device Settings SIP Profile, display all the SIP profiles, and click the StandardSIP Profile link.Step 9Click the Copy button. Name the profile ICVA SIP Profile and select Best Effort (no MTPinserted) from the Early Offer support for voice and video calls dropdown menu (in UnifiedCommunications Manager 10.0.1, the dropdown menu is instead the Early Offer support for voiceand video calls (insert MTP if needed) checkbox).Step 10Click the Save button.Step 11Go to Device Trunk and click the Add New button.Step 12Select SIP Trunk from the Trunk Type dropdown menu, ensure that SIP appears as the DeviceProtocol dropdown menu selection, and click the Next button.Step 13Enter a name for your SIP trunk, select the device pool you created in Step 7, and scroll down to theSIP Information area and enter the IP address of your InformaCast server in the Destination Addressfield.Step 14Ensure that the value in the Destination Port field is 5060, select Non Secure SIP Trunk Profilefrom the SIP Trunk Security Profile dropdown menu, and select the SIP profile you created in Step 9from the SIP Profile dropdown menu.Step 15Click the Save button.Step 16Go to Call Routing Route Hunt Route Pattern to create a route pattern that uses the SIP trunkyou just created.InformaCast Virtual Appliance Basic PagingVersion 12.5.12-6
Chapter 2Install InformaCast Virtual ApplianceStep 17Click the Add New button, enter a route pattern in the Route Pattern field, select a route partitionthat is reachable from the phones to which you will be sending DialCasts, enter a description of yourroute pattern, select the SIP trunk you just created from the Gateway/Route List dropdown menu,select the Route This Pattern radio button, select OnNet from the Call Classification dropdownmenu, and deselect the Provide Outside Dial Tone checkbox.Step 18Click the Save button.Step 19Go to User Management User Settings Access Control Group and create an access controlgroup, name it ICVA User Group, and add the Standard AXL API Access role to it. Alternately, youmay already have an access control group named Standard AXL API Access with the Standard AXLAPI Access role added to it, which you can also use.Step 20Create an application user for InformaCast broadcasts, name it ICVA InformaCast, and add this userto the following user groups: ICVA User Group (or Standard AXL API Access) Standard CTI Allow Control of All Devices Standard CTI Allow Control of Phones supporting Connected Xfer and conf Standard CTI Allow Control of Phones supporting Rollover Mode Standard CTI EnabledStep 21Click the Save button.Step 22Enable web access for your Cisco IP phones by: Changing their enterprise phone configurations–Go to System Enterprise Phone Configuration.–Scroll down to the Web Access dropdown menu and select Enabled.–Click the Save button.Changing their profiles–Go to Device Device Settings Common Phone Profile.–Click the Find button to display all the phone profiles of which Unified CommunicationsManager knows or use the filter fields at the top of the page to narrow your list of profile resultsbefore clicking the Find button.–Click the Name link of the profile in which you want to enable web access. Make sure youselect the profile that applies to the phones where web access needs to be enabled. Scroll downto the Product Specific Configuration Layout area and select Enabled from the Web Accessdropdown menu.–Click the Save button.Step 23Go to System Enterprise Parameters and scroll down the page to the Phone URL Parameters area.Step 24Make a note of the URL in the URL Authentication field. You may need this in Step 8 on page 3-2.InformaCast Virtual Appliance Basic PagingVersion 12.5.12-7
Chapter 2Install InformaCast Virtual ApplianceStep 25Enter http:// InformaCast Virtual Appliance IP Address :8081/InformaCast/phone/auth inthe URL Authentication field, where InformaCast Virtual Appliance IP Address is replaced withyour Virtual Appliance’s actual IP address.NoteStep 26The URL is case sensitive, so make sure that the I and C in the word InformaCast arecapitalized.Scroll to the Secured Phone URL Parameters area and enter http:// InformaCast Virtual Appliance IPAddress :8081/InformaCast/phone/auth in the Secured Authentication URL field as well.NoteIf you’re using Unified Communications Manager 11.5.1 and later, scroll down the page to theSecurity Parameters area and select Basic from the Authentication Method for API BrowserAccess dropdown menu.Step 27Click the Save button.Step 28Reboot your phones. Enabling web access for your phones and setting your authentication URL bothrequire you to reboot your phones. There are many methods that can be used to reboot your phones.Use your best judgment for how and when this can be done in your environment. Some possibleoptions for rebooting your phones include: Bulk Administration Tool (BAT), which allows you to schedule your reboots for off hours and notdeal with manually executing the reboot Enterprise parameters, which allows you to reboot all devices in a cluster Device pools, which allow you to reboot phones on a site-by-site basis Device defaults, which allows you to reboot phones by their model type Individual phones, which allows you to do phone-by-phone rebootsStep 29Test that your phones have picked up their new settings by going to Device Phone and using thedropdown menus and fields to filter for a phone that should have picked up your new settings. Clickthe Find button.Step 30Click the IP address link in the IPv4 Address column. The Device Information page should open ina new window/tab. If the webpage does not display, you most likely do not have web access enabledfor this phone (see Step 22 on page 2-7 for more information).Step 31Click the Network Configuration link and scroll down the page until you come to AuthenticationURL. It should list the IP address you entered in the URL Authentication field in Step 25 on page 2-8.InformaCast Virtual Appliance Basic PagingVersion 12.5.12-8
C H A P T E R3Configure InformaCastConfiguring InformaCast involves logging in for the first time and setting up your phones’communication with InformaCast; they will become the recipients of your broadcasts.Log into InformaCast for the First TimeOnce the Virtual Appliance is started and you’ve accessed the Singlewire landing page, you can log intoInformaCast.Step 1Click the InformaCast link on the Singlewire landing page. A separate tab/window opens toInformaCast’s Startup page. Depending on your system, there may be a delay of several minutes whileInformaCast initializes. Once InformaCast initializes, you will be presented with InformaCas
For virtualized environments, InformaCast Virtual Appliance Basic Paging (InformaCast or Basic InformaCast) is Singlewire Software's IP telephony broadcast system that allows you to send a live audio stream to Cisco IP phones. InformaCast is designed to get messages quickly to large groups of
