Transcription
CTC Desktop 3D Printer ManualFDM SeriesCompany Name: CTC Co., Ltd.Website: www.ctcprint.com1
Catalogue1.Instructions . 31.1 Introduction . 31.2 Precautions . 31.2.1 Safety Precautions . 31.2.2 Contact . 31.3 Accessories List . 32. Product Category . 42.1 Product Overview. 42.2 Appearance . 42.3 Product Specifications . 52.3.1 Parameters . 52.3.2 recommended environment . 63.Operating Instructions . 63.1 Unpacking and preparation before printing. 63.1 Computer preparations . 93.1.1 Install the Replicatorg driver software . 93.2.2 Software Description . 123.2.3 Install the driver software of Makerware . 183.3 The instructions of the key of LCD screen . 284. Take out model . 335.2tighten the belt . 345.3 maintenance of the optical axis and the screw rod . 356 .Troubleshooting . 367. Common Problems and Solutions . 368. Warranty and License Agreement affirms . 372
1.Instructions1.1 IntroductionThis Instructions consist of the product overview, operating instructions, printing testmodel, maintenance and troubleshooting. Please read it carefully and operate the 3d printeraccording to the brochure.1.2 PrecautionsSince different area have different voltage, please make sure how much is yourvoltage (110v and 230v generally)After using this product over a period of time ,it is necessary to maintain it .Propermaintenance can often extend the life of the printer1.2.1 Safety PrecautionsIt is not suggested that using other brands of printing-supplies . To get the best resultsof 3D printing, please use the supplies of our company . The maintenance and repair causedby using other supplies ,are not included in the Company's warrantyTouch is prohibited when the printer is working or the moment after finishing theprinting since the temperature is quite high in the model, the head ,the printing platform orthe other parts of the printer .1.2.2 ContactIf you need after-sales service, you can directly add our business group, whichnumber is 102304634. SD Card User's Guide: the information on using and troubleshootingthe 3D printer is available in our enclosed instructions. Online technical support is alsoprovided by adding our group(102304634).You can also add Sina microblog of our company so as to have a better understand ofthe update of new technology as well as the upgrade of software in our company. Besides ,random rewards would be got by adding our microblog .The luckiest one would get oneTablet PC. Enter into the Sina microblog then search 西通 3D 打印未来.The more attentionand forwarding, the more opportunities you will get the prize .1.3 Accessories ListNoMaterial nameQuantityUnit13D printer1set2Power line1stick3USB Data Cable1stick3
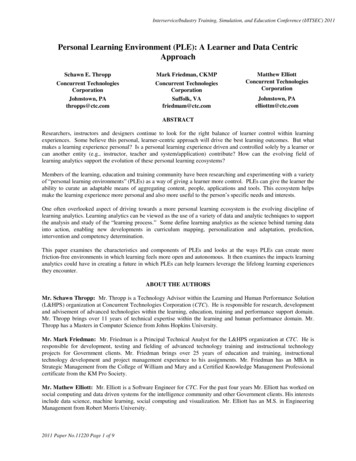
4Kit1set5SD card1single6Printing Supplies1reel7Hanging materialcolumn2strip2. Product Category2.1 Product OverviewCTC 3D printer is a rapid prototyping device based on the fuse depositionmanufacturing process (FDM), which prints by connecting to the computer via USB cableonline or SD card offline and just an ordinary computer can finish printing. A STL 3D fileformat can complete a variety of print job of complex three-dimensional solid model. Thedevice is easy to operate, so even if you have never used 3D printer, CTC 3D printer is alsoa good choice for your to finish types of printing of 3D models.2.2 AppearanceThird generation4
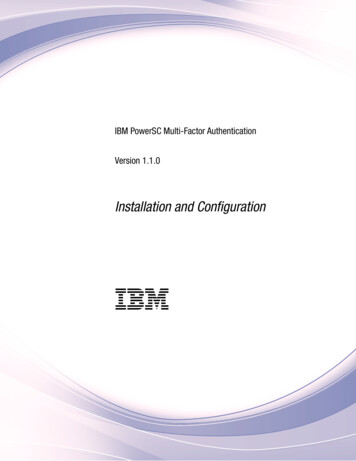
First generationSecond generation2.3 Product Specifications2.3.1 ParametersThe total volume of printers :320*467*381mmPackage Size:565*430*535mmWeight (with packaging) : 13.5KGBuild Size :225*145*150mmPower:210VBuild platform’s temperature: about 110 (proper winter heating and summer cooling)Extrusion nozzle flow: about 24cc / h5
Supported operating systems: Windows XP Windows7 / 8 (32 bits / 64)Software: ReplicatorG or CTC Chinese version (compatible on MakerWare software)Print materials: ABS, PLAMaterial properties: 3D printing special ABS and PLA (exclusive qualities recipe)Layer accuracy: 0.1mm-0.5mmPositioning accuracy: XY axis 0.011mmFilament diameter: Z axis 0.0025mmNozzle diameter: 0.4mmMotion axis speed: 30mm/s 100mm/sRecommended head movement speed : 35-40 mm / sInput file types: stl, gcode2.3.2 recommended environmentOperating environment: clean install in a well ventilated area. Temperature: 15 C to 35 C.Humidity: 20-80% (non-condensing).Storage environment: Temperature: 0 C to 40 C Humidity: 10-80% (non-condensing).The presence :non-corrosive gases and cleaning place3.Operating Instructions3.1 Unpacking and preparation before printing(1) Check whether there are some scratches and other defects on the appearance of 3Dprinters outside the box bumps6
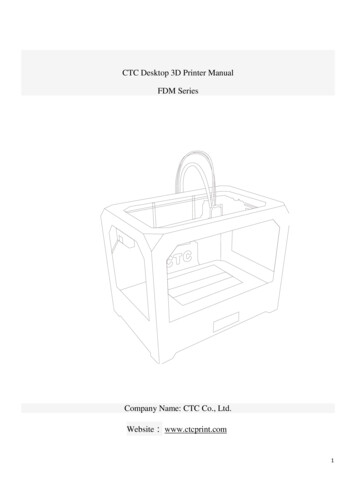
Check whether there are some deformations caused by squeezing or rupture in the corners ofthe box.(2) Open the box and remove the printer then cut the nozzle and fix tie (tied to the front leftside of the Z-axis X-axis Y-axis.Cut fixed print head straps with water-nose pliers.(3) Open the foam of the surface of print head (Note: Try not to use the face of knife so as toprevent the print head was hanged up ) Mount the print head to a bracket on the X-axis,installation direction as shown ,then tighten the two screws.(Picture1)(Picture2)(4)Take out the hanging tube and then install it in the hole of the hanging tube at the back ofthe printer, load the printing supplies into the hanging tube, then pull printing supplies, insertone of a printing supplies section into the round role of the print head (Note: insert in theleft when use the left print head while insert in the right then use the right one )7
(5)Check whether the Limit switch cable of the printer losing or falling off the surface.(Z-axis limit)(Y-axis limit)(X-axis limit)(6) Check whether the voltage match to the printer’s (110 or 220, judged by the powerat the bottom of the printer)(7) Take out the SD card , read printer driver inside the SD card, then install the driver.(8) Turn on the printer and manipulate the control panel so that the Z axis went to the top ofthe printer, check whether the distance of printer nozzle and print platform meets the criteria(optimal distance test method: Put a piece of A4 paper in printing platform surface, controlpanel so that it went to the top of the Z-axis, then pull A4 paper. The printing paper can bepulled out with a little effort so that the paper will not be scratched) Note: the blue paper ofthe surface of the platform cannot be torn, otherwise it will affect the printing quality.(9)Prepare for files of STL format ,open the file through the software already installed inthe printer .Then adjust the parameters and you can start printing8
3.1 Computer preparations3.1.1 Install the Replicatorg driver software(1) take out SD card and read printer driver inside it . Looking for the 3dsetup folder(2) Open the 3dsetup folder and then search for the file of software(3) open the file of software by Right-clicking then enter into the software installationmanager(4) Click Replicatorg software installation (both English and Chinese is available toinstall depending on your preferences )9
(5) Click “ automatic installation” in Replicatorg software .When a icon be shownthen click the “Next ”button.(6)Another icon will be shown after click the “Next” button ,then click the “install”button.(7) A window will jump out after the install button, please wait a minute at this time.10
(8) After clicking the Install button ,there is a dialog box, then click the next button.(9) After clicking, the computer will appear five Prompts . Please click "Install thisdriver software anyway."(10)After Clicking "Install this driver software" button five times, the installationprocedure is completed basically,while a dialog box will pop up . Please checkcarefully if all the programs are installed. (check method: examine the bar of DriverNane , if all things are matching that means the software is installed successfully, ifthere are X number or! number that means installation is unsuccessfully.Finally,click "Finish."11
(11) Click the Finish button, then the "Next" button in the main page begin to lit.Left-click the "Next" button, then the Replicatorg printing software installation wascompleted.3.2.2 Software Description(1) Connect the machine to the electricity supply., then connect USB and openreplicator, (Choose The Replicator Dual machine for the first double nozzles and theReplicator Single for the first single nozzle)12
(2) Next is to choose the correct serial port (Please note the machine's serial number isoften not com1)(3) Click online(4) And then select the file you want to print:13
Then there will be the design of the file:(5) Open the Control Panel14
Set the nozzle temperature : set enter key in the box of Target TempritureDue to different temperature conductivity of different machines, there are a relativelylarge differences between the temperature. It would be best to try out the wire from215 degrees,. The temperature rises rapidly, reaching 190 degrees, indicating the largeheating allowance, otherwise the small heating allowance. If there is some trouble inthe process of wire, the temperature may not be enough. If the wire hasbubbling noises, that means the temperature is high. From low to high, set a suitabletemperature according to the actual situation. If you click the “reverse”, Extrusionhead motor will reverse, the almost completely used materials will be sent back. Shearnew material flatly,stuff it into the hole .After that, click stop, then click forward.Extrusion head motor is transferred, it is needed to insert a little tight so that thematerial is bitten, then send the nozzle until the spinning. Please note, it won'tcontinue to down to the bottom of the surface until the temperature arrive at apredetermined value when we print.How to start printing:Move the figure to the appropriate location, click on the button below15
Selection:Please note that the above options, click Generate Gcode then Gcode is generated . Aftergenerating gcode, move the print head to the home position16
You can modify Feedrate (mm / s) to 20, Tralvel Feedrate 20 to have a higher accuracyprinting.How to calibrate (normally do not need calibration):Move the nozzle to the place just stick to the platform through the control panelTips after running:Click OK, then the machine will calibrate the procedure automatically.Click OK, and then disconnect, reconnect and the correction is completed.Generate gcode print:Click,then the machine will start printing.17
Please note, it won't continue to down to the bottom of the surface at the place of 10mm untilthe temperature arrive at a predetermined value when we print.3.2.3 Install the driver software of Makerware(1) take out SD card and read the printer driver inside it , looking for the folder of3dsetup(2) Open 3dsetup folder and look for the file of software(3) Right-click the file of the software and then enter into the software installation manager(4)Click “ Makerware ”.There will be software-driven system that match to differentcomputer. To find suitable printer drivers that correspond to your own computer system.Then click automatic installation18
(5) Click automatic installation of the Makerware software.After a icon appears,then click"Next" button.(6) And then click "Next" button19
(7)Then click the “I Agree” button.(8)After clicking the “I Agree”button ,there will be a dialogue box ,please click Next20
(9) After clicking, the computer will appear five Prompts . Please click "Install thisdriver software anyway."(10)After Clicking "Install this driver software" button five times, the installationprocedure is completed basically,while a dialog box will pop up . Please checkcarefully if all the programs are installed. (check method: examine the bar of DriverNane , if all things are matching that means the software is installed successfully, if21
there are X number or! number that means installation is unsuccessfully.Finally,click "Finish."(11) Click the Finish button, then the "Closet" button in the main page begins tolit. Left-click the "Close" button, then the Makerware printing software installationwas completed.22
3.2.4 Software Description(1) Makerware software function interface.(2) Function keys Description:Viewer ToolRotary toolobject toolFile slicing generation toolPlaced Tool of File LocationAdjustment tool of File RatioAdding toolSave tool23
。 (Note: Before all tools are used, left-click the file until the outline color is changedExamples are as follows and the picture 2 is the correct one.Picture I (opened but not click the Select button)Select button)Picture2 (opened and clicked the(3)When the slice generates into parameters,useusetool and open a STL file,thentool and place the file onto the level panel.usetool to adjust it to thebest angle for printing.When the file exceeds the maximum printing size and can not beplaced,you can usetool to reduce or enlarge proportionally.After finishing theabove operation,please usetool to decide which print head you want to use ,theleft one or the right one .After that ,click thetool and detailed parameters willshow.Reference Photo:24
In this interface you must select the printer model of "The Replicator (Dual)".in the option of“Export for ”then,select Left or Right according to your materials.The tool “Raft” is used to render on the material-bearing printer before you print.Supports tool is used for adding support materials automatically by the software of thefloating graphic so as to make sure to finish the printing successfully.There are three options in the resolution tool.You can select differentprinting precisions according to yourrequirement.coarsestandardhighOfficially recommended the standard printClick Advanced options to set the parameter.25
There are also three options :low, standard,high. Make a selection accordingto your requirement.Officially recommended the standard printThere are three options in thethey arequality is the detailed precision parametersis the thicknessandis the fill rateis the accuracyEvery data can be adjusted according to your requirements.Parameters Officially suggestedare as followthe temperatureLeft nozzleRight nozzledifferent temperatures as your materials .Build plate ,selectOfficially recommended :materials of ABS nozzle’s temperature : 220-230 degreefloor’s temperature: 110degree26
materials of PLAnozzle’s temperature :205-210 degree floor’stemperature:40-60degreerecommended that the maximum speed would not exceed 80Officially recommended speed: ABS up:30-35 down:40-45PLA up:50-55After setting all above,please clickup,please choose a address to save the file.down:55-60when a dialog box of path selection pop27
After pressing the save bottom, a progress bar will show at the lower right of the softwareWhen the progress bar disappears,you can copy the file generatedinto the X3hG format with SD card in the place of saving the file。And then you can insertit into the printer and start printing.3.3 The instructions of the key of LCD screen" ": For moving the cursor; " ": for moving the cursor to the right; " ": for cursor down;" ": for moving the cursor to the left and returning to the previous menu; "M" (middlebutton): for the item’s confirmation, selection and settingMenu Item DescriptionMenu OptionsFunctionExplanationBuild from SDSD Card PrintPreheatUtilitiesMonitor ModePreheatToolMonitor ModeSelect the files of s3g or x3g toprint from SD cardStart preheatingEnter the submenu aidsEnter into the control interface andmonitor the temperature of thenozzle and the bottomReplace Silk material according tothe screen promptsLevel the print platform accordingto the screen promptsMake the nozzle to the origin of X,Y, Z axisJog control X, Y, Z axis motorRun your first boot wizardEnable / disable all motorLED switch (not used)Return to main menuEnter the parameter setting menuView equipment uptime statisticsGeneral parameter settingsPreheat parameter settingsView the version numberRestore the factory defaultChange FilamentChange FilamentLever Build PlateLever Build PlateHome AxesReturn to originJog modeRun Startup ScriptEnable SteppersBlink LEDsExit menuInfo and SettingsBot StatisticsGeneral SettingsPreheat SettingsVersion NumberRestore DefaultJog modeRun Startup ScriptEnable SteppersBlink LEDsExit menuInfo and SettingsBot StatisticsGeneral SettingsPreheat SettingsVersion NumberRestore Default28
Exit menuExit menuparameter settingsReturn to main menuMain menuConnected to electricity ,the main menu will show http://translate.google.cn/, just like thepicture 1.By "and" "key to move to move the cursor, then press the"M"key to enter theselected item.Picture 1 Main menuPrint with SD cardSelect "Build from SD" and then enter into the SD card file to skim (see picture 2).By " "and " " key to move the cursor, press the "M" button to select the file you want to print andstart printing.Picture 2 SD card file selectionSelect "Preheat" and start an operation of pre-heating (Picture 3),By " " and " " key to move the cursor to select the nozzle or floor, press "M" button toturn on / off the warm-up operation, and finally move the cursor to "Start Preheat!", Clickthe "M" button,and the machine starts warming .Picture 3 Preheat29
Submenu of the accessibility toolsSelect the "Utilities" and then enter into the submenu of the accessibility tools(picture 4,picture 5),use " " and " " keys to move cursor and to select the tool item,.Press "M" keyto confirm the selection.Picture4 the first submenu of the accessibility toolsPicture5 the second submenu of the accessibility toolsMonitor ModeSelect the "Monitor Mode" and then enter the monitoring interface (Figure 6), monitor thecurrent temperature of the nozzle and the platformPicture 6 the monitoring interfaceSilk material replacementSelect"Change Filament" to replace silk material, exit the material of nozzle according tothe prompts on the screen, and then insert the new silk material.30
Printing platform adjustmentSelect"Lever Build Plate"to level the print platform and then follow the prompts on thescreen.Return to originSelect"Home Axes"to control the nozzle so as to return the position of mechanical originJog modeSelect"Jog mode"to enter the jog control interface(Figure 7),use the" "and" "button toselect X, Y, Z axis as well as " "and" "keys to control the front and rear direction ofmovement of the selected axisThe interface of the Jog modeRun Startup StripSelect the “Run Startup Stript” the printer will operate the wizard the first time you turn on it.Enable SteppersSelect “Enable Steppers”,it will enable three axis motorParameters and settings submenuSelect "Info and Settings" and then enter into the sub-menu (Figure 8), use the " " and" " keys to move the cursor so as to select tool item, press "M" button to confirm theselection.Figure 8 parameters and settings submenu31
Device InformationSelect "Bot Statistics" to enter into the device information screen (Figure 9), check the totallength of the printing as well as the last printing.Figure 9 Device information screenGeneral parameter settingsSelect "General Settings" to enter the general parameters setting interface (Figure 10).Usethe " " and " " keys to move the cursor to select the parameters, press the "M" key tomodify the parameters.Figure 10 Conventional parameter setting interfacePreheat parameter settingsSelect "Preheat Settings"and then enter into the interface of parameter settings (Figure 11),use the " " and " " keys to move the cursor to select the parameters, press the "M" key tomodify the parameters.11 The interface of preheat parameter setting32
The version numberSelect "Version Number", then you can view the version number.of the operation of thesoftwareRestore Default SettingsSelect "Restore Default", you can restore the factory parameter settings4. Take out modelUse the rasp to gently tilt the bottom of the object, so that the printed article can slowlyleave the heating platform.Try not to move it with your hand5.Maintain5.1 clean the print headThe print head has to be cleaned after the printer is used for a period of time, the33
appearance of the print head as shown in Figure 1, in the bottom of the print head you cansee two white screws , at both ends of the print head, as shown in Figure 2, the two screwscan be taken down after taking out from the print head, as shown in figure 3.After removingthe two black within six angle 2.5 screws which are in the front of the print head and belowthe fan, please move away the fan and heat sink, as shown in Figure 4. Removing the fanand the radiating surface and the motor you can see a piece of aluminum strip, as shown inFigure 5.The stepping motor is also removed after the fan is lifted down, and on the above ofit is the glue extruding gear of the print head, as shown in Figure 6 .disassembling andcleaning extruding gear, after cleaning the plastic in the tooth of glue extruding gear and itcan be installed to use.(Figure1)(Figure2)(Figure 4)(Figure 5)(Figure3)(Figure 6)5.2tighten the beltAttention : 1. tight belt need to make the belt silk contact with the pulley dovetail.2. the left and right force of Y axis pulley needs to be consistent.3. X axis and Y axis must form into a right angle.34
(Y-axis on the right belt)(X-axis belt)(Y-axis on the left belt)5.3 maintenance of the optical axis and the screw rodUsing much better lubricant, spread the lubricant on the above of XYZ bearing steel,coated measurement should not be too much, just a little on the surface to make lubricantoiling. Figure (2345)(Figure 1)(Figure 2)(Figure 3)35
(Figure 4)(Figure 5)6 .Troubleshooting6.1 Printing offset, or offset after the screw fastening, please check the printer pulleys,pulley to see whether they are staying in a parallel line.6.2 Temperature is displayed 0-1024 improperly, please check the thermocoupleconnection. If the connection is normal, you need to replace the thermocouple.6.3 If the Temperature is displayed NA, you need to check the thermocouple connection.If the connection is normal, you need to replace the thermocouple.6.4 X-axis move is not normal and there is chattering. It is to illustrate X-axis motor linehas problems and it needs to replace the X-axis motor cable.6.5 LCD blue screen does not display; the boot suddenly restart, the motor does not stopafter touching limit switch. Please check the sensor cable. If sensor cable is connectedproperly, the sensor cable may has a problem.6.6 Fan does not run, to make sure the temperature is above 50 degrees and place yourhands to dial to see whether it can run. If it still do not run, please reconnect the interfacewith a screwdriver under examination, or use battery test. If the problem do exists,please replace the fan.6.7 Motor does not run. Replacing the motor driver board.7. Common Problems and Solutions7.1 Kasi - wire is too thick - split nozzle7.2 skid - Silk meticulous - minus some silk material7.3 blocking the nozzle - heating pipe plug wire - heating element apart, heated to 220,silk material removed with tweezers7.4 temperature anomalies - thermocouple is damaged - replace the thermocouple7.5 Print dislocation - screw loose - Check the screws and tighten the screws7.6 Print sample Alice - floor height is too high - floor height adjustment7.7It cannot be turned into G code – not choose the number of sprinklers and models thestorage path is wrong - select and change it.36
7.8 sticky silk material is above the nozzle - support material is pulled by nozzle - re-setparameters7.9 no wire - the model in question - after repairing the model code and reset theparameters the code numbers7.10 driver or software could not install - system configuration problem - reinstall thesystem7.11 print sample does not stick platform - too much distance between the nozzle and theplatform – readjust the platform7.12 blue tape is difficult to take down - Platform heating and when it is heated into are20-degrees or 30 degrees , you can take down completely.8. Warranty and License Agreement affirmsQuality Assurance:CTC has committed to you behind each product. CTC has strict processing standardsand assembly parts inspection process to ensure that every product is qualified highquality products.After-sales warranty1 After receiving the product within 7 days due to product quality problem , we willbear the return shipping for you free replacement or repair.2 Receiving the goods within 7-30 days, we will help you free replacement or repair,repair freight should be born half because of quality problems3 From 30 to 90 days of receipt of the goods, we will help you free replacement orrepair, but please bear the return shipping cost because of the quality problems.4.90 days after the issue of all products, you can be provided for free advice. If youneed replace the accessories, you need to pay it and the return shipping costReturns Policy1. Returns basic conditions: (1) to ensure that the product packaging, productaccessories, manuals and keep the original products and it does not affect thesecondary sales. Just missing one, you cannot accept returns of service, such as areplacement, the pro-retention gifts, such as return, please return the gifts together.2. Replace the products with quality problems. After receiving the product, pleasecarefully review the integrity of the product. If you find any quality problems, pleasetake a photo within 5 days and get in touch with us.3. We will not provide you the return service for the following conditions: (1) Youhave met the requirements of the returned goods when you receive the goodspackaging, accessories, manuals, etc. Missing one cannot be provided for return. (2)After purchasing goods and it has obvious stains, or vandalism could not providereturn. (3) The scope of the gift does not engaged in after-sales service. (4) If a nonWest-brand consumables, or supplies using PLA nozzle sum game lead product, not37
covered by warranty. (5) The products will be issued an invoice cannot be returned,only quality replacement.4 .Care the product: the end (1) After the printing job has been done, you should tryemptying nozzle and residual printing supplies extruder to avoid the next print nozzleswill sum game, which is a basic 3D printer maintenance. Note: If you use othermanufacturers and distribution of supplies caused by the nozzle sum game, will nolonger be within the scope of the warranty. (2) Rail can be added the preservativelubricant each month. (3) Do not print directly in the printing process or ending theprinter’s conductor assembly by using metal objects.38
CTC 3D printer is a rapid prototyping device based on the fuse deposition manufacturing process (FDM), which prints by connecting to the computer via USB cable online or SD card offline and just an ordinary computer can finish printing. A STL 3D file format can complete a variety of print job of complex three-dimensional solid model. The