Transcription
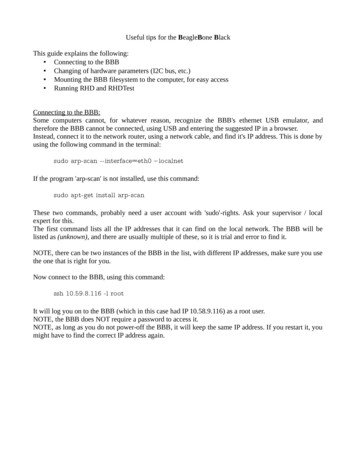
Useful tips for the BeagleBone BlackThis guide explains the following: Connecting to the BBB Changing of hardware parameters (I2C bus, etc.) Mounting the BBB filesystem to the computer, for easy access Running RHD and RHDTestConnecting to the BBB:Some computers cannot, for whatever reason, recognize the BBB's ethernet USB emulator, andtherefore the BBB cannot be connected, using USB and entering the suggested IP in a browser.Instead, connect it to the network router, using a network cable, and find it's IP address. This is done byusing the following command in the terminal:sudo arp-scan --interface eth0 – localnetIf the program 'arp-scan' is not installed, use this command:sudo apt-get install arp-scanThese two commands, probably need a user account with 'sudo'-rights. Ask your supervisor / localexpert for this.The first command lists all the IP addresses that it can find on the local network. The BBB will belisted as (unknown), and there are usually multiple of these, so it is trial and error to find it.NOTE, there can be two instances of the BBB in the list, with different IP addresses, make sure you usethe one that is right for you.Now connect to the BBB, using this command:ssh 10.59.8.116 -l rootIt will log you on to the BBB (which in this case had IP 10.58.9.116) as a root user.NOTE, the BBB does NOT require a password to access it.NOTE, as long as you do not power-off the BBB, it will keep the same IP address. If you restart it, youmight have to find the correct IP address again.
Changing Hardware Parameters:As each BBB might be different, due to different manufacturers and operating systems installed, thiscan be tricky. The difference is in how the OS boots and when and where it sets up it's hardwareparameters. On the BBB in question, we're running a Debian Linux distribution, which loads it'shardware parameters from a file called 'am335x-boneblack.dtb'. The name of this file is pretty selfexplanatory, as the BBB runs an AM3358 microprocessor. There should also be files for other boards,like the regular Beaglebone and the Beaglebone XM. In the Debian distribution, these files are locatedin the /boot/uboot/dtbs directorty. To see them run the following commands (each line is onecommand):cdcd ./boot/uboot/dtbslsThis should list the different .dtb files. Now before modifying 'am335x-boneblack.dtb', make a backup(while in the dtbs directory):cp am335x-boneblack.dtb am335x-boneblack.dtb.backupNow, we need to “decompile” the original .dtb file, to change the parameters. This is done by:dtc -I dtb -O dts -o am335x-boneblack.dts am335x-boneblack.dtbThis creates a .dts file, which you can open with an editor and modify the contents. Open the .dts fileusing the following command:vim am335x-boneblack.dts“vim” is a build-in editor. Using the arrow-keys, navigate to the field you wish to edit, and Press 'insert'in the keyboard to enable editing mode. When you are done editing, press 'esc' to exit editing mode andhold down 'shift' and press 'z' twice, which saves and exits. The fields are pretty self-explanatory.NOTE: The BBB has 3 i2c buses, located at different addresses. I2C bus 1 is used for communicationwith the power management IC and CPU and is not available on the header. I2C bus 2 is disabled bydefault. I2C bus 3 is enabled and available on header P9, pins 19 and 20.NOTE: The OS enumerates only the buses that are enabled and with zero-based indexing. Thus i2c-1show up as i2c-0, and i2c-3 will show up as i2c-1.
I2C Bus 1 (AKA i2c-0):i2c@44e0b000 {compatible "ti,omap4-i2c";#address-cells 0x1 ;#size-cells 0x0 ;ti,hwmods "i2c1";reg 0x44e0b000 0x1000 ;interrupts 0x46 ;status "okay";clock-frequency 0x61a80 ;pinctrl-names "default";pinctrl-0 0x6 ;linux,phandle 0x1e ;phandle 0x1e ;};I2C Bus 2 (Disabled, notice the 'status' field):i2c@4802a000 {};compatible "ti,omap4-i2c";#address-cells 0x1 ;#size-cells 0x0 ;ti,hwmods "i2c2";reg 0x4802a000 0x1000 ;interrupts 0x47 ;status "disabled";linux,phandle 0x26 ;phandle 0x26 ;I2C Bus 3 (AKA i2c-1):i2c@4819c000 {};compatible "ti,omap4-i2c";#address-cells 0x1 ;#size-cells 0x0 ;ti,hwmods "i2c3";reg 0x4819c000 0x1000 ;interrupts 0x1e ;status "okay";pinctrl-names "default";pinctrl-0 0x7 ;clock-frequency 0x61a80 ;linux,phandle 0x27 ;phandle 0x27 ;To change the speed of a bus, simply change the 'clock-frequency' field to a valid hex number.NOTE : Valid I2C speeds are: 100 kHz (100000), 400 kHz (0x61a80 400000), 1000 kHz (1000000),3400 kHz and 5000 kHz (depending on the device).
Now, once everything is changed, according to purpose, to exit edit mode, press 'esc' and then holdshift and press 'z' twice. This saves changes and exits vim.In order to recreate the .dtb file, run the following command:dtc -I dts -O dtb -o am335x-boneblack.dtb am335x-boneblack.dtsThis will overwrite the original file (which is why you made a backup). In order to make the changestake effect, a reboot has to be carried out:rebootAfter the reboot, the hardware changes should be in effect. To check the i2c, write:dmesg grep i2cOr you can check with an oscilloscope that the actual frequency match.Mount BBB filesystem on computer:If you want to modify files on the BBB, such as codefiles etc., and you wish to utilize an editor on alinux computer, you can mount the BBB's filesystem, such that it looks like it is on the computerlocally. Go to the terminal and write:sshfs -o idmap user root@ BBB-ip-address : BBB-folder computer-folder Where BBB-ip-address is the IP address of the BBB, without brackets, and BBB-folder is thefolder (within the root directory) that you wish to mount, and computer-folder is the name of thedirectory on the computer (in your home folder), that you would like the BBB-folder to appear in.Similarly you can unmount it again using this command:fusermount -u computer-folder The unmount will also happen automatically by restarting the BBB.
Running RHD and RHDTest:Not that if the path to the RHD and RHDTest programs are not added to the PATH variable, thesystem will say that they do not exist. Further, the programs must be run from the directory thatcontains the 'rhdconfig.xml' file (which is within each plug-in: rhd/trunk/plugins/ pluginname /)Thus, in order to run the RHD and RHDTest from the directory that contains 'rhdconfig.xml', you willneed to access RHD and RHDTest like this:././build/bin/./rhd././build/bin/./rhdtestYou can however, add the address of RHD and RHDTest to the PATH variable. To keep this setting, itis necessary to add it to the 'basrc' file, which is located in the 'root' folder. To go there and see the file:cdls -aWhich will show a file named '.bashrc'. Open the file in vim (like with the hardware, above), and addthe following lines (case sensitive) to the end of the file:PATH PATH:/root/rhd/trunk/build/binexport PATHNOTE: In this example, the RHD was installed in /root/rhd. It might be in a different directory.NOTE: # is used for uncommenting lines. Do not put this in front of the two recently added lines.Save and quit vim, log off and then log on again to make the changes take effect.NOTE: You still need to be in the correct plug-in directory, where 'rhdconfig.xml' is located, but nowyou can just write:rhdrhdtest
can be tricky. The difference is in how the OS boots and when and where it sets up it's hardware parameters. On the BBB in question, we're running a Debian Linux distribution, which loads it's hardware parameters from a file called 'am335x-boneblack.dtb'. The name of this file is pretty self-explanatory, as the BBB runs an AM3358 microprocessor.


