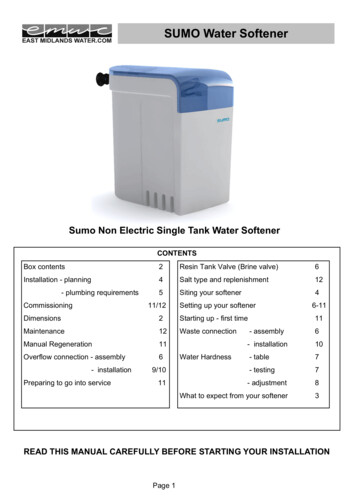
Transcription
Water SoftenerInstallation and User ManualENGvisit www.kinetico.co.uk
2For more information about Kinetico:visit www.kinetico.co.ukKinetico UK LtdBridge House, Park Gate Business Centre, Hants SO31 1FQKinetico Premier Compact Water Softener Installation Instructions
3ContentsSafety information4Contents of box6Specifications6Getting to know the softener7Pre-installation check list8Installation instructions10Installation review12Commissioning instructions13Useful information16www.kinetico.co.uk
4Safety informationRead all information carefully prior to installing and using thewater softener.Qualified InstallerWater Pressure3245610barINSTALLERKinetico recommends that a qualifiedinstaller performs the installation. Failureto install the system as instructed couldinvalidate the Limited Warranty.Do not install if the supply water pressureexceeds 6 BAR (87 psi), unless a suitablepressure regulating valve has beeninstalled on the softener water supply.Water TemperatureOverflowVERY IMPORTANT:Where a cabinet overflow could causedamage, you must install a 1/2” I.D.hose to the barbed fitting on thecabinet and run to a suitable outletthat is visible and capable of taking theDo not install the Kinetico softener inan area where the water temperaturecan exceed 35 C or cause the unitto freeze. Freezing temperatures willdamage the system.overflow (i.e. through the outside wall).Make sure the hose does not go higherthan the barbed fitting as the waterwill flow away using gravity.Kinetico Premier Compact Water Softener Installation Instructions
5Copper/Plastic PipeworkIntended UseWhere copper and plastic pipework isused, Kinetico advises adherence tothe regulatory requirements to ensureadequate earth bonding is provided.Not intended to be used for treatingwater that is micro-biologically unsafeor water that has an unknown quality,without adequate disinfection before orafter the system.WRAS ApprovalPlumbing SchematicInlet OnlyOutletWRAS approval for the Kinetico PremierCompact Water Softener applies to coldwater (below 23 c) installations only.InletPlease refer to the plumbing schematicon page 8 before commencing aninstallation.www.kinetico.co.uk
6Contents of boxIdentify the following parts before proceeding.1 x in/out retainingbracket and pin4 x o-ring1 x 2cc silicone tubeJubilee clip2 x ¾” screened washers2 x ¾” BSPin/out adaptor1 x blanking plateSpecificationsMeter DiscType12Max hardness(in mg/L)HE57120HF63125Litres 69490392327280245TypeHEHFCabinet dimensions (h x w x d)498 x 219 x 468 mm498 x 219 x 468 mmSalt used per regeneration0.34 kg0.34 kgRegeneration time11 minutes11 minutesFlow rate @ 15 psi drop16.6 L/m33.3 L/mPipe connections - in/out¾” BSP¾” BSPMin/max operating pressure1.8 - 6 bar1.8 - 6 barMin/max operating temperature2 - 23 C2 - 23 CKinetico Premier Compact Water Softener Installation Instructions
ARE THE PROPERTY OF KINETICOLOANED TO YOU FOR A LIMITED TIME ANDD OR DUPLICATED WITHOUT THE WRITTENMPLOYEE OF KINETICO INCORPORATED.HOD, DESIGN AND DATA CONTAINED HEREIN,ERTY OF KINETICO INCORPORATED AND MAYERSON OR COMPANY NOR USED TO7Getting to know the softenerTHIS DRAWING AND ITS CONTENTS ARE THE PROPERTY OF KINETICOINCORPORATED. THEY HAVE BEEN LOANED TO YOU FOR A LIMITED TIME ANDPURPOSE, AND MAY NOT BE COPIED OR DUPLICATED WITHOUT THE WRITTENPERMISSION OF AN AUTHORIZED EMPLOYEE OF KINETICO INCORPORATED.ADDITIONALLY, THE PROCESS, METHOD, DESIGN AND DATA CONTAINED HEREIN,ARE CONSIDERED TO BE THE PROPERTY OF KINETICO INCORPORATED AND MAYNOT BE DIVULGED TO ANY OTHER PERSON OR COMPANY NOR USED TOKINETICO'S DISADVANTAGETop lidFront nking plate(see page 10 for useand installation ofblanking plate)Salt compartmentwww.kinetico.co.uk
8Pre-installation check listWhen determining the location of the softener, the followingshould be considered:21OutletInlet Only3Inlet41Drain line to air gap with internal trap2Mains water (see WRAS guidance note 09-07-01)3By-pass assembly4Overflow to outside/visable locationDimensions - h 498mm x w 219mm x d 468mmKinetico Premier Compact Water Softener Installation Instructions
9Installation will vary but should consist of:a:A pressure regulating valve on the water supply to the softener where theincoming pressure exceeds 6 bar.b:A non-return valve on the water main supply to the softener. If using a Kineticosupplied installation kit, a non-return valve is built into the Inlet Tee.c:A by-pass assembly which enables the softener to be isolated from the watersupply for maintenance and service. This also maintains the water supply whenthe system is disconnected.d:A drain line from the softener to a waste pipe through an appropriate air gap.The drain must comply with the water regulations. Please consult WRAS guidancenote 09-07-01 for advice.e:An overflow run to a suitable outlet that is visible.Ensure you have the following:b:Connections for the inletand outlet, either by means offlexible pressure rated hoses orby direct pipework.Connections on the softener are3/4” BSP male threaded fittings.c:1/2” ID hose for both the overflowand the drain.d:Jubilee clip for the drain line.InletOutletMeans of constructing a by-passwhich consists of:3 valves,Tee pieces,Single check valveInlet Onlya:www.kinetico.co.uk
10Installation instructions1Locate:a: Ensure the unit can bepositioned on a flat surface.b: If sand, silt or turbidity ispresent in the water supply,a separate prefilter shouldbe installed before the watersoftener.Please note:The softener can be installed with theconnections on the left or right side of thecabinet by reversing the components.3 Insert theblanking plate:Insert the blanking plate into theoutlet which is not in use.Lift up into position, thencarefully drop the plate downinto the slot.4 Test water pressure:Test incoming pressure to theunit. A pressure regulating valvewill be required if the pressureis above 6 bar.2 Remove cardboard:234150Ensure all cardboard is removedfrom the inside of the softener.b: Remove top lid and support bar(see page 7).c: Carefully remove the two piecesof cardboard, then replace thesupport bar and lid.Kinetico Premier Compact Water Softener Installation Instructions6bar
11Caution:Do not solder any fitting while connected to the unit adaptors. Care should betaken during the installation process to ensure solder and flux do not come incontact with any of the components.5 Install:7 Fit in/out adapters:Plumb pipework as necessary toaccommodate a by-pass assembly.a: Fit 2 o-rings to each in/outadaptor then lubricate with thesupplied silicone grease.Inlet OnlyOutletInletPlease note:Verify installation complies with regionalwater regulations before continuing. ConsultWRAS Guidance Note 09-07-01 for advice.6 Flush:b: Connect the inlet/outletadapters to the supply andreturn hoses remembering touse the screened washers.c: Install adapters into controlvalve in/out ports, ensuring thatthey are fitted into the correctports (see flow arrows on valvefor reference).d: Attach the retaining bracket andpin to the control valve.After all the plumbing has beencompleted, but before connectingto the water softener, flush bothinlet and outlet lines allowing waterto rinse out any debris.www.kinetico.co.uk
12Review8 Run drain line:a: Run a drain line to adischarge point, checking forany obstructions or possiblekinks.FOLLOW REGIONAL WATERREGULATIONS. 1Pressure:Where a pressure regulating valvehas been fitted, ensure it has beencorrectly set to 6 bar.2 Drain line:Ensure the drain line is securelyattached, has no restrictions or kinks,uses an airgap and is fully compliant.3 Overflow:Ensure the overflow has no kinks, issecurely attached and that water isable to fall away with gravity.4 Inlet/Outlet ConnectionsKinetico Premier Compact Water Softener Installation InstructionsInlet OnlyPlease note:Drain lines must not run more than2.4m up or exceed a total of 9m. Thedrain line must not be restricted orkinked.Ensure the inlet and outlet valvesare closed and that the by-passvalve is open.Outletc: Push the drain line onto thebarbed fitting and tighten thejubilee clip securely.5 By-pass assembly:Inletb: Before connecting the drain lineto the unit, slide on the stainlesssteel jubilee clip.Ensure the hoses/plumbing areattached securely, using thescreened washers provided, andare firmly held in place using theretaining bracket and pin.
13Commissioning instructions1Pressurise:With the water to the property restored, slowly open the inlet valve and allowthe softener and pipework to pressurise. Water may run to drain until the unit isfully pressurised.2 Fill the brine tankwith water:Allow the brine tank to fill withwater until the brine valve shuts off.The water level should beapproximately 25mm over thegrid plate.TIP:If the cabinet does not fillwith water please refer to the“Useful Information” section(page 16).Water level3 Initiate a backwash:a: Using a Phillips head screwdriverpush down on the actuator, andslowly turn CLOCKWISE until theindicator dot reaches the letterW in the word “BACKWASH” onthe clear cap.b: You will hear a rush of water andair going to the drain.c: When the cycle has finished(approx 4 mins), repeat theprocedure, turn the indicator dotto the next backwash cycle andallow to finish (approx 4 mins). BRINSE BACKRINE* BRINGrid plateSE BACKRINE*H ASWH ASW25mmActuatorIndicatorwww.kinetico.co.uk
ADDITIONALLY, THE PROCESS, METHOD, DESIGN AND DATA CONTAINED HEREIN,ARE CONSIDERED TO BE THE PROPERTY OF KINETICO INCORPORATED AND MAYNOT BE DIVULGED TO ANY OTHER PERSON OR COMPANY NOR USED TOKINETICO'S DISADVANTAGE144 Add salt:For convenience, the water softener has been designed to accommodate bothblock and tablet/pellet salt.Block Salt:To use salt blocks, simply place them in the salt storage compartment with theindents facing forwards.Tablet and Pellet Salt:Simply pour into the salt compartment.IMPORTANT: Only use salt manufactured for use in water softeners.Do not use rock or granular salt in your system. They contain impurities whichcan interfere with performance and could invalidate the Limited Warranty.Kinetico Premier Compact Water Softener Installation Instructions
155 Put the softenerinto service:a: After the unit has finished thesecond backwash and haspressurised, open the outletvalve and ensure by-passvalve is closed.6 Fit the lid:Replace the lids and checkplumbing for any leaks.The installation is now complete.b: Open a tap in the house torelease trapped air from thelines rinse out any debris.Inlet OnlyOutletInletwww.kinetico.co.uk
16Useful information1Should water be present in the salt compartment?Yes, it is normal to see water at a level of 25mm above the salt grid(see page 13). If water is not present to this level:a: Fill softener with water until the level is 25mm over the salt grid, thenconduct a manual regeneration.b: To manually regenerate using a Phillips head screwdriver push down onthe actuator, and slowly turn CLOCKWISE ONLY until the actuator tab hasadvanced the indicator dot to the word “BRINE”.c: You will hear a rush of water and air going to the drain.d: When the vessel has finished its cycle (approx 12 mins), repeat the procedure,advance the indicator dot to the word “BRINE” in the next cycle and allow tofinish (approx 12 mins).Actuator BRINH ASWSE BACKRIN*E BRINSE BACKRINE*H ASWIndicatorKinetico Premier Compact Water Softener Installation Instructions
172 How do I correct the water level if it sits higher thanthe recommended 25mm above the salt grid?Check that the brine valve is correctly held in place by the support bar and isseated firmly on the base of the cabinet.www.kinetico.co.uk
183 Why am I experiencingvarying levels ofhardness?The softener will provide softwater immediately, however, untilmains water has been displacedfrom the pipework, storage tanksand hot water system, you willexperience varying degrees ofhardness.Depending on your water systemand water usage, this may take afew weeks to clear.It is also advisable to check thatthe by-pass valve is closed.4 How do I protect thesoftener from coldweather?If your Kinetico Premier CompactWater Softener is installed outsideor in an area that is not heated, youmay want to take precautionarymeasures to prevent damage toyour unit from freezing. Kineticooffers cabinets specificallydesigned to protect your softenerfrom freezing temperatures.Please contact Kinetico for moreinformation.NOTE:Kinetico’s Limited Warranty doesnot cover damage caused to yoursystem due to freezing. If you haveany questions about your KineticoPremier Compact Water Softener,or you suspect that your system isn’tworking properly, please contactKinetico.Kinetico Premier Compact Water Softener Installation Instructions
19Noteswww.kinetico.co.uk
Kinetico UK Ltd, Bridge House, Park Gate Business Centre, Park Gate, Hants SO31 1FQwww.kinetico.co.uk Kinetico 2016.1.6/6#16240
www.kinetico.co.uk 9 Installation will vary but should consist of: a: A pressure regulating valve on the water supply to the softener where the incoming pressure exceeds 6 bar. b: A non-return valve on the water main supply to the softener. If using a Kinetico supplied installation kit, a non-return valve is built into the Inlet Tee.