Transcription
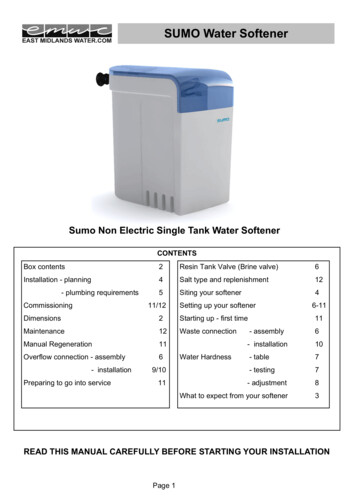
SUMO Water SoftenerSumo Non Electric Single Tank Water SoftenerCONTENTSBox contents2Resin Tank Valve (Brine valve)6Installation - planning4Salt type and replenishment125Siting your softener4- plumbing requirementsCommissioning11/12Setting up your softenerDimensions2Starting up - first timeMaintenance12Waste connectionManual Regeneration11Overflow connection - assembly6- installationPreparing to go into service9/10116-1111- assembly6- installation10- table7- testing7- adjustment8What to expect from your softener3Water HardnessREAD THIS MANUAL CAREFULLY BEFORE STARTING YOUR INSTALLATIONPage 1
SUMO Water SoftenerContents of your SUMO water softener box. Please check that you have all parts as soon as you receive yoursoftener.Water hardnesstest kit1/2” WASTE connectionhoseYour Sumo watersoftenerWaste connection parts(overflow elbow, nut and washer)Installation instructionsIF YOU PURCHASED A FITTING KIT - CHECK INSIDE YOURSOFTENER, AS THIS IS WHERE IT WILL BE PACKED5/8” OVERFLOWconnection hoseYour SUMO water softener is a high performance single tank non electric water softening product designed to eliminatelimescale (calcium and magnesium ) in residential environments. It is not a water purifier. It is recommended that you fitthis softener to a municipal water supply.Benefits include:Energy savings; Increased life of electrical appliances (dishwashers, washing machines); Cost savings dueto reduced usage of soap and detergents fabric softeners and chemical cleaning products; Low maintenancecosts; Simple and automatic control of equipment.Super fast regeneration - completed in 10 minutesEnergy efficient regenerationsEasy salt fillingNon Electric unitTested and Certified by WQA under NSF/ANSI 61 for Materials Safety RequirementsHeight 495 mmResin volume5.7 litresSalt/regeneration 0.27 kg saltPressure rating1.5 - 8 barElectrical connectionDepth 550 mmN/AWidth 277 mmYOUR WARRANTY DETAILS ARE STORED DIGITALLYPage 2
What to expect from your water softener?All water softeners work on the same basic principal. Hard water flows through a bed of resin and thecalcium and magnesium, the minerals that are responsible for hard water, are removed. This doesNOT affect the ph value of your water supply.Salt/Brine TankThis particular softener’s cabinet is also the brine tank. You lift the lid and add the tablet salt to themain cavity. When filling with salt make sure you don’t overfill it. The tank is fitted with an externaloverflow - never fill above this level. You will need to check the salt level on a regular basis and top upwhen required. You will find that you develop a routine and automatically top up after a set period oftime, either weekly or monthly. All households are different. If you notice the tank is completely emptyof salt, just perform a manual regeneration a few hours after refilling (see page 11 for instruction onhow to carry out a manual regeneration).Regeneration ProcessThe resin in your softener needs a regular clean. This is the regeneration process. The resin is literallywashed with a brine solution .You can think of it like a washing machine cycle in that it will performseveral different processes to clean the softener. Water is drawn from the brine tank and flushedthrough the system. At the end of the cycle, water is put back into the brine tank in order for the salt todissolve ready for the next time the machine needs to regenerate. The level of water in the tank willdepend on the type, size and water pressure feeding the softener. Dependent on the amount of salt inthe softener you may not even see the water level. Once the regeneration is complete the resin will beable to supply soft water to your property.How quickly will my softener start to work?Your softener will produce soft water as soon as water passes through it. However, the size of yourproperty, water usage and the type of water system you have will determine how quickly you will noticeresults. For example, if one person lives in a very large property with water fed from a storage tanksystem (gravity feed) they may not see the benefit for several months until all the hard water that waspresent in the storage tanks has been replaced with soft water. A large family in a smaller property witha direct feed system will notice the results much quicker.What happens in my softener?Your softener doesn't show any visible signs or make any noise during the water softening process.Water will only enter or leave the brine tank during regeneration. Salt is NOT used in the watersoftening process - only during regeneration. The only time you will see or hear your softener workingis during the regeneration process.Help?If you require any additional information regarding your particular water softener, please contact ourtechnical support team via email. They can be reached attech@emwc.uk.comPage 3
SUMO Water SoftenerPlanning your installation– the plumbing part.Always observe the water bylaws. Make sure there is only one rising main and that you are allowing space for access tothe unit, for filling with salt and possible maintenance in the future. Check the water pressure - see below Locate the rising main (stop cock), You will need a waste facility The softener needs to be levelSiting the softener This should be as close to the rising main as possible. Allow hard water take off points for a drinkingwater facility and /or an outside tap if required. With modern softeners this is not essential, due to thequality of the resin. For easy DIY installation we recommend the fitting of a hard or filter water kit. If the stopcock is located ina difficult position to create a hard water supply, you can fit a Reverse Osmosis system. The distance between the waste and the softener should be as short as possible. Ensure that both the waste and overflow are not subject to excessive temperatures (freezing or over 120 F). If you are siting the softener in a cupboard, ensure that the base of the cupboard is adequatelysupported. If the softener is being installed in a loft, it is recommended that you place the softener within a wellinsulated 25-gallon tank. The overflow on the tank should be below the softener overflow and be aminimum of ¾” in size.Non Return ValveIn single dwellings, a single check valve should be fitted. This is supplied with our 15mm installation kits andcan be ordered separately.Check listIf you purchased an EMWC fitting kit with your softener, all valves required for installation will be included.Combi boilers require a Combi Kit. Pressurised systems require a 22mm Fitting Kit. Check you have orderedthe correct fitting kit for your installation, before you start.Water Pressure TestIt is important that you carry out a pressure test. High and low water pressure can result in damage to/failure ofthe softener. Although the softener is tested to a pressure of 8 bar we recommend the fitting of a pressurelimiter should your pressure exceed 5 bar (70 psi). We also recommend that any household appliance usingIMPORTANT INFORMATIONBefore starting the installation of the valves, ensure your STOP COCK IS IN ACLOSED position.NEED HELP? Check our installation videoh ps://www.eastmidlandswater.com/Fi ngVideosPage 4
SUMO Water SoftenerInstalling your softener (the plumbing part)Installations will vary. Ensure you have set up your inlet and outlet valves as per these configurations. Werecommend that you use a competent tradesman if you are unsure about any aspect of your installation.Typical SoftenerInstallation ValveConfiguration whenusing a 15mm fitting kitTypical softener installation valveconfiguration when using a 22mm fittingkit (pipework position indicated) Note:22mm t-pieces and non return valves arenot included in the fitting kit.Outletvalve22mmpipework(position)Bypass valveDrinking (hard)water diverter kit(available separately)22mm pipework(position)Inlet valveNEED HELP? Check our installation video.Page 5h ps://www.eastmidlandswater.com/Fi ngVideos
SUMO Water SoftenerSETTING UP YOUR SUMO SOFTENERFITTING THE WASTE AND OVERFLOW CONNECTIONSThe waste and overflow connections need to be fitted by the end user. They are not preinstalled. This is toprotect the connections during transit.Step 1 Remove the resin tank from the softener cabinet.LIFT THE RESIN TANK FROM THE NECK - DO NOT TRY AND LIFT USING THEWASTE CONNECTION AT THE TOP OF THE RESIN TANK.LIFT FROM HEREResin tankBrine valve showing large tubeEnsure that the bottom ofthis valve is seated firmly.Push it firmly into place ifis has loosened duringtransitSoftener cabinetStep 2Inspect the brine valve to ensure that the large tube is correctly fitted and hasn't moved during shipping. Ensure it is firmly in place. This is really important as the brine line will be under pressure when your Sumo softener is in service. Failure to check this element may result in leaks.Step 3 Waste ConnectionConnect the 1/2” tube to the waste elbow on the valve (Figure 2). Make sure that the waste tube is pushedwell into the elbow arbour (Figure 3). Placing the tube in hot water for a few minutes to warm it will make thiseasierThe waste tube must bend around the valve - anti-clockwise to prevent kinks or blockagesFigure 2 - looking down onthe top of the brine tankFigure 3WASTE HOSE (anti clockwise direction)Page 6
SUMO Water SoftenerFITTING THE WASTE AND THE OVERFLOW CONNECTION (continued)Step 3 Installation of the waste and the overflow (continued from previous page)Make sure there are no kinks or restrictions on the waste tube. Keep the tube as straight as possible to avoidbottlenecks or syphoning. The waste installation must have suitable aeration to prevent waste water fromreturning back to the softener. If you need to elevate the waste tube, it is possible to raise it a maximum of1.5metres provided that the minimum inlet pressure is 4 bar. Double check that the waste is fitted around thevalve in an anti clockwise direction - failure to achieve this will result in damages in the waste pipe and toyour new softener.Step 4 - Testing your incoming mains water for level of hardness.Your Sumo water softener is supplied with a water test kit. Follow the simple instructions supplied with the kitin order to establish the hardness of your water. It is measured in parts per million (ppm).It is important that your softener is set up correctly in order to cope with the hardness of your water. Municipalwater supplies across the UK vary in degrees of hardness. Not all areas are the same. If you do not adjust orcheck your hardness level setting, your softener might not operate correctly.Step 5 Setting your hardness levelSee diagrams and images on page 8. Familiarise yourself with the elements of the brine tank beforeyou start any adjustments.1.Remove the small blue plastic locking clip on the adjustment knob. It is simply removed by gently usingyour fingernail or a small screwdriver. It is plastic so over zealous removal may result in damage. Putthis clip to one side. The clip prevents any tampering or misuse of the settings.2.By depressing the adjustment knob, you can rotate the dial to show the desired setting. The viewer forthe programmer has a small arrow which indicates which setting you have selected. The adjustmentknob is easily turned using a small flat head screwdriver with light downward pressure.Ensure you line up your required softened water setting with this arrow. The schematic diagram shows theletters A-H. Your Sumo softener will show a range of settings from 100 through to 525.The dial will ‘click’ for each turn and increment the setting by varying units on each click.Simply select the correct number to match your hardness setting as per the table below. For example if yourwater hardness test shows your water at 360ppm - we recommend that you select 350 plus one click. If yourhardness is 270ppm select 250plus one clickOnce you have selected the correct level, replace the blue plastic locking clip to prevent accidental movement of the adjustment knob.HardnessreadingSumo SoftenerSettingHardnessreadingSumo SoftenerSetting190150 8 clicks300-320250 3 clicks200200330-340250 4 clicks210200 1 click220200 2 clicks350-400350 1 click230200 3 clicks400-450350 2 clicks240200 4 clicks450-500350 3 clicks250250500-525350 4 clicks260-270250 1 click280-290250 2 clicks350525 Page 7350525
SUMO Water SoftenerSETTING YOUR HARDNESS LEVELHardness adjustment knob(with blue clip)RegenerationactivatorViewer for programmingMeter dialClose up of the hardness settings (meter dial) through the viewer. This isset at 260 (250 plus one increased position).Page 8
SUMO Water SoftenerFITTING THE OVERFLOW CONNECTIONTo connect the overflow you need the overflow hose (5/8” diameter) the rubber washer, the overflow elbowand the securing nut (see box contents page 1)Overflowposition onthe brinetankStep 1Put the rubber washer over the overflowelbow threads.Step 1Step 2Position the overflow elbow on the outsideof the cabinet with the washer betweenthe cabinet and the elbow. Leave theoverflow in an upward position for now.Step 2Step 3Step 3Thread the nut onto the elbow so the nutis on the inside of the cabinet. With theelbow facing upwards, ensure the nut onthe inside is a snug finger tight tightnessStep 4Holding the nut with your fingers on theinside, turn the elbow so it points in adownward direction.Step 5Now push the 5/8” overflow hose onto the overflow elbow, as far as it will go. The hose will be a snug fit.Warming the end of the hose in hot water will make the fitting easier.Reassembling the softenerPlace the resin tank back into the brine cabinet. The plastic collar will only allow the resin tank to sit in one position.Ensure that you do not disturb the brine valve as you put the softener back together. You are now ready to connect yoursoftener to your water supply.Page 9
SUMO Water SoftenerCONNECTING YOUR SOFTENER TO YOUR WATER SUPPLYStep 1 Connecting the hoses to your plumbing installationOnce you have completed the installation of the valves, put the valves into thepositions as shown in image 1 (here to the right).OPENIf you have also installed a hard water supply kit and have only so far installedthe valve, make sure that this is also in the closed position.You can now safely return the stopFlow directionBYPASS VALVE SOFTENER INLET ANDOUTLET CLOSEDcock to the open position.Using the hoses provided (if you purchased a fitting kit) connect the straight endof the hoses to the valves. Make sure you insert the provided washers to the softener inlet and outletvalves.Image 1Step 2 Connecting the hoses to the softenerConnect the angled end of the hoses to thesoftener. The softener inlets and outlets areindicated with an embossed directional arrow onthe top. MAKE SURE YOU CONNECT THEHOSES THE CORRECT WAY ROUND. Incorrectconnection could result in damage.Now ensure that your softener is in the correctposition to finalise the installation.MAKE SURE YOU HAVE CONFIGURED THESOFTENER FOR YOUR WATER HARDNESS(see page 7)Water INWaterOUTStep 3 Waste Hose InstallationFor this part of the installation you need to locate the softener waste hose into your waste connection. You havealready assembled the 1/2” waste hose (page 6) and the 5/8” overflow hose (page 6) to the softener.All you need to do is run the hose to either an up stand or an outside waste. A minimum air gap of 20mm mustexist at the end of this waste/waste line.If you need to extend this waste hose, it can be done by connecting to a 15mm copper tube for a maximum runof 8 meters with a minimum daytime pressure of 40psi. Ensure that the waste hose is not kinked in any wayas this could lead to an overflow of the machine.Step 4 Overflow InstallationThe overflow hose must be run downhill to an internal or external waste without kinks or restrictions. It isrecommended that the overflow hose be visible when it exits an outside wall. You should not allow the contentsof the brine tank to impede the overflow (salt and brine) in any way. If this happens, it could cause water tooverflow and flood.Page 10
SUMO Water SoftenerSTARTING UP FOR THE FIRST TIME(or when the softener has been out of service for any length of time)Before starting up the system, please check that all steps prior to installation, assembly and programming havebeen followed according to these instructions. Not all water softeners are the same and some of the finer detailmay be overlooked.Do not put any salt in the softener until the end of the start up. To prevent any air pressure on the water softenerand the pipes please follow these instructions.1.Leave the bypass valve in the bypass position.2.Fully open two or more cold and treated taps located after the water softener. This is to remove all the airtrapped inside the installation and to check there are no water leaks. Close these taps after about 20seconds.3.Add 10cm/4inches of water to the brine tank4.Slowly open the bypass to allow water to flow into the system. Keep the bypass partially open at this point.5.The softener will automatically start a regeneration process and the water in the brine tank should start todescend slowly. If the system does not go into an automatic regeneration at this point, start a manualregeneration. See box below.6.When the water starts to flow continuously to waste, fully open the water inlet valve to the system. At thispoint you may notice that the waste water may have a slight yellowy/brownish tinge. This is completelynormal as the resin is being used for the first time. Preservatives in the system are being washed away.7.Let the softener finish this regeneration process. After a few minutes more the softener will cut the flow ofwater to the waste and refill the brine tank8.Leave the softener in this position until water stops flowing into the tank. At this point the water levelshould be approximately 7-10cm above the bottom of the tank.9.Check the brine line (page 6) and make sure there are no leaks after the refilling process has finished.10.Now add salt to the brine tank, taking care not to exceed the level of the overflow. We recommend thatyou use water softener specific tablet salt. Do not use other forms of salt as these will damage yoursoftener.HOW TO INSTIGATE A MANUAL REGENERATIONUsing a number 2 Phillips screwdriver, press the regeneration activatorand turn slowly CLOCKWISE until you hear four ‘clicks’. This will instigatethe regeneration. At this point the flow of the water inside the unit will beaudible. If you cannot hear water moving through the system, you need tocheck that you have advanced the dial sufficiently.Regeneration activatorPage 11
SUMO Water SoftenerMAINTENANCENow that your water softener is installed and up and running it requires very little maintenance. The key thing isensure that it always has a supply of salt in the brine tank.Salt replenishmentEnsure that you check the tank on a regular basis. If you allow the salt to run down before refilling, the systemwill produce hard water until the salt is replenished.Check that you replace the brine tank cover correctly after inspection or refilling with salt.Sometimes it is possible that a ‘salt bridge’ forms inside the brine tank where an empty space is left betweenthe water and the salt, which prevents it from dissolving. This means that the water softener will not beregenerating correctly and will be supplying hard water.If you think you have a salt bridge, simply take a rigid tool like a wooden spatula and gently push down in several places until it breaks. In addition, salt sometimes sticks to the side of the brine tank and is left high and dry.Again simply take a blunt wooden spatula and gently push the salt into the brine. Do not use a sharp implementin any instance as this will result in damage to the brine tank.Anti scalingThe resin in your softener is what keeps your water soft so it is important that you take the best care you can ofthis important part of your investment.We recommend that you carryout an anti scaling process every few months. This will help lengthen the life ofyour softener, especially in extremely hard water areas.You can purchase this softener cleaner from many online retailers. This product is available under manydifferent names but it is basically a water softener resin cleaner. For further advice please contact our salesdepartment on 0116 276 3334. This product is available on our website as Neat Work resin mate-4-sachet-12-month-supply/781Re-commissioning a softener that has been disconnected for a period of timeFrom time to time, it may be necessary to decommission your water softener for a number of reasons. This iswhy its necessary to install a bypass facility to enable straightforward removal of the softener.We recommend you take the following precautions to protect your investment;Remove as much of the brine and salt from the cabinet as possible. If you have advance warning that youare removing the softener, then you might choose to run the salt down as much as possible.Disconnect the softener from the water supply.Remove any remaining salt and brine from the brine tankThoroughly clean and dry the unit both inside and out.Protect from dirt and dust by using a large plastic bag and a suitable cardboard box. If you hare havingrenovations carried out at your property, it will be worthwhile to ensure that the unit is removed from site.If you are transporting the softener, ensure that you protect all connections such as the overflow, waste and theinlet and outlet from damage. Make sure the softener is well padded and protected and that you keep it upright.When you are ready to re-install, connect up as per these instructions and ensure you carry out a fullregeneration process. If you are moving area, ensure that you check the level of water hardness in the newarea and adjust the hardness settings on the softener accordingly.Welcome to the world of soft water!Page 12
SUMO Water Softener . Manual Regeneration 11 Overflow connection - assembly 6 - installation 9/10 Preparing to go into service 11 Resin Tank Valve (Brine valve) 6 Salt type and replenishment 12 Siting your softener 4 Setting up your softener 6-11 Starting up - first time 11 Waste connection - assembly 6 .