Transcription
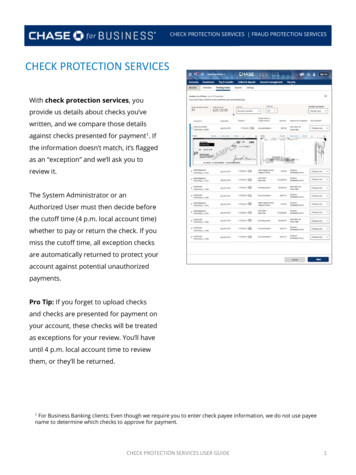
CHECK PROTECTION SERVICES FRAUD PROTECTION SERVICESCHECK PROTECTION SERVICESWith check protection services, youprovide us details about checks you’vewritten, and we compare those detailsagainst checks presented for payment1. Ifthe information doesn’t match, it’s flaggedas an “exception” and we’ll ask you toreview it.The System Administrator or anAuthorized User must then decide beforethe cutoff time (4 p.m. local account time)whether to pay or return the check. If youmiss the cutoff time, all exception checksare automatically returned to protect youraccount against potential unauthorizedpayments.Pro Tip: If you forget to upload checksand checks are presented for payment onyour account, these checks will be treatedas exceptions for your review. You’ll haveuntil 4 p.m. local account time to reviewthem, or they’ll be returned.1 For Business Banking clients: Even though we require you to enter check payee information, we do not use payeename to determine which checks to approve for payment.CHECK PROTECTION SERVICES USER GUIDE1
CHECK PROTECTION SERVICES FRAUD PROTECTION SERVICESYOUR CHECK DATAIt’s important that you send Chase accurate information about each of your checks so we cancompare it against checks presented for payment. If the information provided isn’t right, theservices won’t flag things appropriately for review.There are two ways to give us the information:(1) Manual entry – Just type in each check’s information individually online(2) File upload – Upload a file with all your check data. Instructions are included in the nextsection.Pro tip: You can include future-dated checks up to two weeks out.CHECK PROTECTION SERVICES USER GUIDE2
CHECK PROTECTION SERVICES FRAUD PROTECTION SERVICESHOW TO UPLOAD A FILE1Prepare your file using the standard Excel formatYour file must be formatted according to certain specifications or it won’t load properly.Below are instructions for the standard Excel format we accept. This is easiest way toupload your checks. If your provider supplies an alternative format, you can use thecustomized file format instructions in the Appendix. Do not include a header row – the first row must be the first check you’ve writtenand each subsequent check follows on its own row. Include the following information for each check – it’s important that you code andformat each column as shown belowColumns:1. Column 1: Check type (Coded as I or C)“I” is for issued check; “C” is for canceled check.2. Column 2: Account number for each check written3. Column 3: Check number for each check written4. Column 4: Check date (MMDDYY)Formatted as MMDDYY. Do not include any punctuation and make sure thatleading zeros are included (e.g., “January 1, 2020” should be “010120”).5. Column 5: Check AmountYou can include a decimal point. Do not include any commas.6. Column 6: Payee line 1 (40 character max)7. Column 7: Payee line 2 (Optional—40 character 0400John DoeJohn DoeSimjoStephen MorrisSimjoSimjoDonald ClarkPro tip: If you work with an Enterprise Resource Planning (ERP) provider, see if they canprovide automated file exports for your business, so you can avoid having to create fileson your own.CHECK PROTECTION SERVICES USER GUIDE3
CHECK PROTECTION SERVICES FRAUD PROTECTION SERVICES2Save your fileUse comma-separatedvalue CSV format (CSVdelimited) when you saveyour file. Mostspreadsheets do thisautomatically, but it’simportant to confirm.3Access the toolLog into your account andclick Security from the homescreen and select Submitchecks.4Upload your fileClick Choose file and find thefile on your computer.Confirm that the file name isaccurate and choose Upload.File validation will begin. If itfails, a message will appearwith further details.5Submit your fileConfirm that everything looksOK and click Submit.CHECK PROTECTION SERVICES USER GUIDE4
CHECK PROTECTION SERVICES FRAUD PROTECTION SERVICESAPPENDIX: HOW TO UPLOAD A CUSTOMIZED FILE1Prepare your file – customized formatIf you’d prefer to use a different format for your file upload, a few extra steps areneeded. Keep in mind six columns are required for any file upload – files can becustomized to allow for a different column order. Do not include a header row – the first row must be the first check you’ve writtenand each subsequent check follows on its own row. Include the following information for each check – you can put the columns inthe order preferred and format some fields according to your specifications.Columns:1. Column 1: Check type (Coded as I or C)“I” is for issued check; “C” is for canceled check.2. Column 2: Account number for each check written3. Column 3: Check number for each check written4. Column 4: Check date (customizable)5. Column 5: Check amount (customizable)6. Column 6: Payee line 1 (40 character max)7. Column 7: Payee line 2 (Optional—40 character max)2Save your fileUse comma-separatedvalue CSV format (CSVdelimited) when you saveyour file. Mostspreadsheets do thisautomatically, but it’simportant to confirm.CHECK PROTECTION SERVICES USER GUIDE5
CHECK PROTECTION SERVICES FRAUD PROTECTION SERVICES3Access the toolLog into your account andclick Security from the homescreen and select Submitchecks.4Begin customizationFrom the upload file screen,choose Customize file format.5Name your file formatEnter a name for your customformat and choose whether youwant this to be the format you’lluse for most of your file uploads.Keep CSV selected unless youwant to specify exact start andend positions for every field.CHECK PROTECTION SERVICES USER GUIDE6
CHECK PROTECTION SERVICES FRAUD PROTECTION SERVICES6Select your column orderOrder the columns shown at thefar left however you’d like. Youcan even choose the format forsome fields. Just be sure your fileexactly matches the formatyou’ve chosen.7Save your customized formatClick Save format. Make surethe format is exactly how youwant it, and then click Submit.CHECK PROTECTION SERVICES USER GUIDE7
CHECK PROTECTION SERVICES FRAUD PROTECTION SERVICES8Upload your fileClick the down arrow onChoose format and selectyour desired customizedformat.Click Choose file and find thefile on your computer.Confirm your selections areaccurate and click Upload.File validation will begin. If itfails, a message will appearwith further details.9Submit your fileConfirm that everything looksOK and click Submit.CHECK PROTECTION SERVICES USER GUIDE8
CHECK PROTECTION SERVICES FRAUD PROTECTION SERVICESMANAGE CUSTOMIZED FILE FORMATYou can update any of the customized formats you’ve saved at any time.1From the upload file screen, select2We’ll list all of the formats you’veManage file formats.saved. You can edit, test or deleteyour custom files. To makeupdates, click Edit and follow thesteps in the previous CustomizeFile Format section.CHECK PROTECTION SERVICES USER GUIDE9
CHECK PROTECTION SERVICES FRAUD PROTECTION SERVICES CHECK PROTECTION SERVICES With check protection services, you provide us details about checks you've written, and we compare those details against checks presented for payment1. If the information doesn't match, it's flagged as an "exception" and we'll ask you to review it.