Transcription
Installation Guide 1.8ForSielox Class & Sielox AnyWare 2014 Sielox LLC www.sielox.com 800-424-2126 info@sielox.com 10/9/14
Overview – Sielox Class Copyright 2012-2014 Sielox LLC, All Rights ReservedSielox Anyware Installation Guide 1.8Page 2 of 37
Overview – Sielox Class Sielox Anyware Installation Guide 1.8Table of Contents1.Overview – Sielox Class . 52.Overview – Sielox AnyWare . 73.Sielox AnyWare & Sielox Class Concepts . 84.Browser Security . 105.Installing the Appliance . 116.Networking Setup . 147.Configuring the Browser . 198.Network Infrastructure Requirements . 229.AC-1700 Controller (Access Control Panel) Setup . 2310.Advanced Client Computer Configuration . 2511.Diagnostic Tools. 2612.Notes on Performance . 3013.Sielox AnyWare & Sielox Class Network Architecture . 3114.List of Events. 3215.Licensing . 3316.Legal Notices . 3517.System Specification . 36Copyright 2012-2014 Sielox LLC, All Rights ReservedPage 3 of 37
Overview – Sielox Class Copyright 2012-2014 Sielox LLC, All Rights ReservedSielox Anyware Installation Guide 1.8Page 4 of 37
Overview – Sielox Class Sielox Anyware Installation Guide 1.81. Overview – Sielox Class Sielox Class - Crisis Lockdown Alert Status System - is a scalable flexible solution for crisis management withreal-time visibility when every second counts. Having a planned response and reliable solution that addressesthe crisis quickly can make the difference between chaos and stability, and loss of lives or lives saved. Relyingon educated guesses when so much is at stake is not a plan. Sielox Class enables responsible parties tomonitor, assess and act to save the day.Sielox Class , Crisis Lockdown Alert Status System is an effective solution for response in emergencies.Developed by Sielox, a leading manufacturer of security management systems since 1979, Sielox Class provides real-time status, notifications and updates to facility administrators and first responders with agraphical map via email or text to make split-second decisions. The system is secure and easy to install –simply add to your existing network.Initiators send color-coded alerts to facility administrators and first responders through networked devices,RFID readers, or push buttons. Officials, law enforcement, and first responders receive a dynamic floor planwith real-time, accurate updates on their mobile phone, tablet, or laptop.Benefits: Accessible from anywhere, anytime - iPad, Android, Smartphone, Desktop, LaptopWAN, LAN, WIFI, High-speed Cell (3G or 4G)Available stand alone or integrated with access control, paging and mass notificationEmail and text alerts and notificationsTwo-way chat between Initiators and RespondersCustomizable to meet your lockdown rulesAlerts Initiated from the facility or anywhereNo visible status indicators to draw the attention of an intruder or active shooterCritical situational awarenesso First responders have instant status for response and deployment from command centers andpatrol carso First responders not walking blindly into harm’s wayo Provides for timely accurate decisionso Clear lockdown and/or color statusCopyright 2012-2014 Sielox LLC, All Rights ReservedPage 5 of 37
Overview – Sielox Class Sielox Anyware Installation Guide 1.8Features: System defaults are Safe/Secure; Unaccounted individual; Medical; Room Disturbance; CrisisReal time location status5 unique colors – programmable descriptionsEmail text alerts to responders and authoritiesTwo –Way chat between classrooms/locations and responders4 communication methods - simultaneouso WAN, LAN, WIFI, High Speed Cell (3G, 4G, LTE)Hard wired or wireless panic buttonsWireless readers with color coded RFID cardsLockdown access control doorsAllow teacher to initiate lockdown without having to call SRO or officeo Real time saverTrigger any other system via output wiringTrigger any other system thru Action URL’s such as IP camera from pop-upPop- up alarms on Lockdown, Shelter or EvacuateNo wiring necessary if using existing infrastructureNo Hosting or Managing feesExtremely Cost effectiveFull audit trail on the following with date and timeo Location status changeo Chat messages from initiator or respondero Email/text alertso Alert level changeso Clear location status (room clearing)Allows for the ability to recreate the sequence of eventsCopyright 2012-2014 Sielox LLC, All Rights ReservedPage 6 of 37
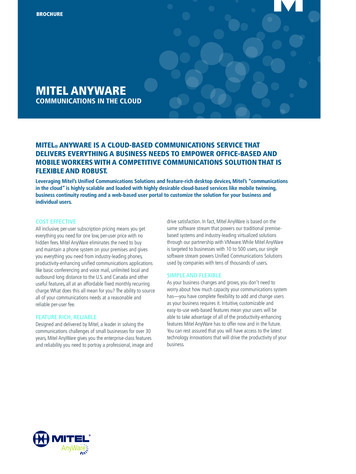
Overview – Sielox AnyWare Sielox Anyware Installation Guide 1.82. Overview – Sielox AnyWare Browser based access control security managementControl and manage your security requirements from your desktop, tablet or mobile device – from AnyWare.You’re in control – you can easily deploy, manage and expand your access control requirements on the fly.Sielox AnyWare is a plug-and-play, browser-based access control solution affordable to small and mid-sizedorganizations.AnyWare is a simple, scalable design suitable for a variety of security environments. AnyWare manages accesscontrol applications with up to eight doors and can connect to any IP camera on an alarm event to displayvideo.Using an IT-friendly network appliance, AnyWare is ready to configure in a matter of minutes. And used inconjunction with Sielox’s industry leading IP 1700 controllers, AnyWare provides a cost-effective, easy-to-useyet robust access control feature set.Features: 8 or 40 door configurationsPowerful, fast and easy to useDesktop, tablet or mobile deviceUtilizes existing Sielox 1700 controllersMulti‐window / Custom event viewerTake action on any event to display IP Camera, NVR, Popup Alarms, and User InstructionsLeverages browser capabilitiesQuick and simple backup & restoration from any deviceBenefits: Cost effective solution – no software to installSimple yet scalable access control monitoring and managementInstant flexible filters (who, what, when, where)Save time & money with templates. Pre‐Built Systems and Configurations allow you to build yoursystem out ahead of time.Quick reports of most needed activityImport Cardholder records in seconds with Excel (.csv) importProven security foundationMade in USACopyright 2012-2014 Sielox LLC, All Rights ReservedPage 7 of 37
Sielox AnyWare & Sielox Class ConceptsSielox Anyware Installation Guide 1.83. Sielox AnyWare & Sielox Class Concepts3.1 Template based systemSielox Class and Sielox AnyWare use a “Template” methodology for creating new records within thesystem. In other words, when a new device (e.g. Door) is added, the device settings assigned are based on thedefault template record or device to create another device or record. In addition to default templates, youcan copy an existing record. This capability expedites configuration, reduces the number of manual entrymistakes and reduces installation and programming time.3.2 User PermissionsSielox Class and Sielox AnyWare employ group based permissions. In other words, rights to various parts ofthe system are granted or denied based on what user group the user is a member of. Although a user can beonly part of one group, by creating and customizing user group rights, the system provides flexibility to grantor deny users, based on login, the ability to administer, configure, or view only.Copyright 2012-2014 Sielox LLC, All Rights ReservedPage 8 of 37
Sielox AnyWare & Sielox Class ConceptsSielox Anyware Installation Guide 1.83.3 Table like record managementSielox Class and Sielox AnyWare provide a table like editing system consistent throughout the application.Once an editing technique is learned for one of the types of records (e.g. Users, Locations), the rest of thesystem records can be edited accordingly.Copyright 2012-2014 Sielox LLC, All Rights ReservedPage 9 of 37
Browser SecuritySielox Anyware Installation Guide 1.84. Browser SecuritySielox AnyWare and Sielox Class are designed with security at its core. With this in mind, client browsersrequire appropriate security settings to work properly. This process is as simple as accepting certificates orenabling pop-ups when prompted by your browser.4.1 Security Certificates – SSLSSL is used to secure communications between end-user browsers and the Sielox appliance. SSL requires acertificate acceptance process when initially connecting to the system or possibly after a software upgrade.Each browser (and operating system) has a specialized way to add the certificate credentials to the system.Where possible it is recommended that certificates be added permanently.Note: A few browser configurations are presented here for reference. Please refer to the specific browserdocumentation on how to accomplish this step.4.2 Enabling Pop-UpsPop-ups via browser window launching are used for a variety of features. In order for the system to workproperly, pop-ups must be enabled for the Sielox web application.Note: Instead of disabling pop-up blockers completely, it is recommended to add an exception for thesystem.Note: If linking to other web sites or applications via Action URLs, such as YouTube or IP Camera Feeds, youwill need to add exceptions to those as well.4.3 Antivirus Program SettingsIf an antivirus program is installed on the computer, one thing that needs to be verified is whether or notthere is a popup blocker built into it. You may need to check with the IT\Network department to confirm this.If it does include a pop-up blocker, it either needs to be turned off or exceptions need to be put in place sothat it does not affect the functionality of the application.Copyright 2012-2014 Sielox LLC, All Rights ReservedPage 10 of 37
Installing the ApplianceSielox Anyware Installation Guide 1.85. Installing the ApplianceThe appliance works similar to a web server. It sits on the network as an embedded “host” and is accessible viamost common web browsers. The appliance also communicates with AC-1700 controllers across the network.5.1 Basic Network ArchitectureA basic installation would require connecting the appliance to the router or hub, connecting the clientcomputer, and, optionally, connecting an AC-1700 controller.Note: The AC-1700 controller is required for Sielox AnyWare and optional for Sielox Class installations.Copyright 2012-2014 Sielox LLC, All Rights ReservedPage 11 of 37
Installing the ApplianceSielox Anyware Installation Guide 1.85.2 Initial Steps – IPV4 Settings on your ComputerThe first step is to connect your computer to the appliance for initial configuration. Click on the Start icon of your Windows operating system. Type Network and Sharing Center in the “Search programs and files” field and then click Network andSharing Center. Click on Local Area Connection or Ethernet. Click on Properties. Select Internet Protocol Version 4 (TCP/IPv4) and then click on Properties.Note: Take note of the current settings of your computer before changing the IPV4. Use the following IP address and enter 192.168.1.100 in the IP Address. Set the Subnet Mask to 255.255.255.0, leave the Gateway blank and click OK.5.3 Initial Steps – Connecting to the Appliance Connect a network cable from the computer to the NIC on the appliance directly or through a hub orrouter. Plug the power into the appliance and turn on the power by pressing the button on the front panel andwait approximately 5 minutes for initial setup and configuration. Verify connectivity between the appliance and computer. Make sure you can ping the appliance at address192.168.1.251 and that you get a reply. If that doesn’t work, try the other NIC connection.Desktop:Public(10.0.0.251)Copyright 2012-2014 Sielox LLC, All Rights ReservedPrivate(192.168.1.251)PowerPage 12 of 37
Installing the ApplianceSielox Anyware Installation Guide 1.81U Rack:Private(192.168.1.251)Public(10.0.0.251)5.4 Logging into Sielox Class or Sielox AnyWare Open a compatible browser on the computer. Type in the IP address 192.168.1.251. The system displays a “Certificate .” page. Accept or continue (the specific details depend on thebrowser and system you are using). The system displays the Login Screen. Login using the default credentials.o Username : admino Password : admin The system displays the administrative dashboard.Note: the username and password can be changed from the Users page. The admin account will be the onlyuser in the system when you first log in.Copyright 2012-2014 Sielox LLC, All Rights ReservedPage 13 of 37
Networking SetupSielox Anyware Installation Guide 1.86. Networking SetupThe Networking Setup is where the IP settings of the appliance (site) are configuring to work within theintended facility infrastructure. The platform supports accomplishing this task in a number of ways,depending on the facilities specific requirements.6.1 Dual Network Interface Cards (NICs)The appliance comes standard with Dual NICs and, by factory default, is configured to support a private andpublic configuration. The private NIC is typically used to communicate with AC-1700 controllers. The publicNIC is typically used to communicate with the client browsers.6.1.1 Factory Default SettingsDescriptionIP AddressNetmaskGatewayBroadcastNetworkPrimary DNSSecondary DNSNIC 1 – 8.1.255192.168.1.08.8.8.88.8.4.4NIC 2 – 0.0.08.8.8.88.8.4.46.2 Factory Default Network ConfigurationsTwo factory default network configurations are possible without making any changes to the system. The firstis a “private / private” configuration with and without internet access. The second is a “public/private”configuration with and without internet access.Copyright 2012-2014 Sielox LLC, All Rights ReservedPage 14 of 37
Networking SetupSielox Anyware Installation Guide 1.86.3 Advanced Network ConfigurationsAlternative network configurations are possible for advanced network environments. The NIC and routingconfigurations may be changed to support a variety of system installations.6.4 Network SettingsThere are a set of network settings shared by both NIC cards. Click on the Network then Site Icon. Select Edit from the modificationsdrop down. Modify the Gateway, DNS, and Internet NIC selection. Click “Save Settings”. Restart the system from the actions drop down for the settingsto take effect.Copyright 2012-2014 Sielox LLC, All Rights ReservedPage 15 of 37
Networking SetupSielox Anyware Installation Guide 1.86.5 Factory Default Configuration – Shared PrivateAs the following diagram demonstrates, it is possible to configure a system to support both browser clientsand controller (AC-1700) communications on the same internal network. Each appliance and controllerrequires its own IP address.Copyright 2012-2014 Sielox LLC, All Rights ReservedPage 16 of 37
Networking SetupSielox Anyware Installation Guide 1.86.5.1 Changing the private site SettingsCurrently the Private Site IP and Netmask are fixed values and cannot be changed. Under specialcircumstances, Sielox Technical Support has the ability to modify these. With private installations, the “UseThe Public NIC for internet Gateway” checkbox must be unchecked. Click on the Network then Site Icon. Select Edit from the modifications dropdown. Uncheck the “Use The Public NIC for internet Gateway”. Click “Save Settings”. Restart the system from the actions drop down for thesettings to take effect.6.6 Factory Default Configuration – Segmented / IsolatedAs the following diagram demonstrates, it is possible to configure a system with an isolated controller (AC1700) network that uses private IP addressing separate from general public access.Copyright 2012-2014 Sielox LLC, All Rights ReservedPage 17 of 37
Networking SetupSielox Anyware Installation Guide 1.86.6.1 Changing Public Site SettingsIt is possible to change the public site settings to accommodate facility requirements. For example, theinternal public network may be subnet 10.0.1.xxx/255.255.0.0. Click on the Network Icon. Click on the Site Icon. Select Edit from themodifications drop down. Change the Public IP address and Netmask. Check the “Use The Public NIC for internet Gateway”checkbox. Click “Save Settings”. Restart the system from the actions drop down for thesettings to take effect.Copyright 2012-2014 Sielox LLC, All Rights ReservedPage 18 of 37
Configuring the BrowserSielox Anyware Installation Guide 1.87. Configuring the Browser7.1 Browser CompatibilityAlthough the platform is designed to work with most HTML5/CSS3 compliant browsers, there are differencesbetween these browsers that can impact functionality (e.g. Map refresh, Pop-Up Alerts).We recommend using the Firefox browser.7.2 Configuring FirefoxFirefox browser download - http://www.mozilla.org/en-US/firefox/new/7.2.1 Adding CertificatesSo that Firefox doesn’t ask the certificate exception every on-untrusted-error-message7.2.2 Enabling Pop-UpsRight-click a blank spot on the Tab bar, and select Menu Bar. Then, click on ‘Tools’, click ‘Options’ and on the‘Content’ Tab – make sure ‘Block all pop-ups’ is unchecked.Click on the ‘Firefox’ dropdown in the top left corner. Then, click on ‘Options’ and on the ‘Content’ Tab. Afterentering the ‘Content’ tab, select ‘Exceptions ’ and type in the IP address of your system, then press ‘Allow’.Copyright 2012-2014 Sielox LLC, All Rights ReservedPage 19 of 37
Configuring the BrowserSielox Anyware Installation Guide 1.87.3 Configuring ChromeChrome browser download - https://www.google.com/intl/en/chrome/browser/We recommend not minimizing Chrome when the system is in use. It is ok to run other applications withchrome in the background.7.3.1 Adding CertificatesSo that Chrome doesn't ask the certificate exception question ity-certificateis-not-trust7.3.2 Enabling Pop-UpsIn ‘Settings’, select ‘Advanced Settings, select ‘Content settings ’ under the ‘Privacy’ section. Then, select ‘Allow all sitesto show pop-ups’ under ‘Pop-ups’.In ‘Settings’, select ‘Advanced Settings’ select ‘Content settings ’ under the ‘Privacy’ section. Then, select ‘Manageexceptions ’ under ‘Pop-ups’. In the text box, type the IP address of the system and press enter.7.4 Configure Internet Explorer (IE)7.4.1 Adding CertificatesSo that Internet Explorer doesn’t ask the certificate exception question ked-in-ie87.4.2 Enabling Pop-UpsUnder ‘Tools’ go into ‘Internet Options’. Then, click on the ‘Privacy’ tab and make sure that ‘Turn on pop-upblocker’ is unchecked.Under ‘Tools’ go into ‘Internet Options’. Then, click on the ‘Privacy’ tab and click on ‘Settings’. Once the ‘Popup blocker’ settings window pops up, type in the IP address of your system and click ‘Add’.7.5 Browser compatibility and limitationsBecause of limitations and restrictions with mobile and tablet devices, we recommend using email or SMSnotification to indicate alerts to these devices.Copyright 2012-2014 Sielox LLC, All Rights ReservedPage 20 of 37
Configuring the BrowserSielox Anyware Installation Guide 1.87.5.1 Apple Product LimitationsApple mobile (iPhone) and tablet (iPad) devices prohibit automatically playing audio through the web browser.In order for the audio to be loaded and played, they require a touch event, such as clicking a button on thescreen.7.5.2 Mobile Device LimitationsMany mobile devices prohibit automatically playing audio through the web browser. In order for the audio tobe loaded and played, they require a touch event, such as clicking a button on the screen.7.5.3 Tablet Device LimitationsMany tablet devices prohibit automatically playing audio through the web browser. In order for the audio tobe loaded and played, they require a touch event, such as clicking a button on the screen.7.5.4 Pop-up and Audio Limitations TableDevice - BrowserApple iOS iPhone – SafariApple iOS iPad – SafariMobile Android – AnyTablet Android – AnyMobile Windows – AnyCopyright 2012-2014 Sielox LLC, All Rights ReservedPop-upsOnly if browser is inforeground.Only if browser is inforeground.Only if browser is inforeground.Only if browser is inforeground.Only if browser is inforeground.Auto Play AudioNo – requires push ofbutton.No – requires push ofbutton.No – requires push ofbutton.No – requires push ofbutton.No – requires push ofbutton.Page 21 of 37
Network Infrastructure RequirementsSielox Anyware Installation Guide 1.88. Network Infrastructure RequirementsIn order to fully function, a number of networking infrastructure settings must be properly configured at thefacility. The following table lists those settings:CapabilityService / ProtocolPort settingsBrowser ConnectivityHTTP80Secure Browser ConnectivityHTTPS443Automatic System Synchronization ofTime via NTPNTP / UDP123Controller communicationsTCP/IP2100-2110Default E-mail notificationsSMTP – smtp.gmail.com465E-Mail notificationsSMTP – Facility SpecificFacility SpecificDiagnostic AccessHTTPS2222,10000-10010Copyright 2012-2014 Sielox LLC, All Rights ReservedPage 22 of 37
AC-1700 Controller (Access Control Panel) SetupSielox Anyware Installation Guide 1.89. AC-1700 Controller (Access Control Panel) SetupDepending on the installation requirements, you may need to establish connectivity with the AC-1700 accesscontrol panel. There are two IP addressing requirements related to achieving connectivity. The first is toconfigure the IP address on the AC-1700.For Sielox Class installations without controllers, skip this section.9.1 AC-1700 special notesWith any installation using Sielox browser-based systems, the AC-1700 uses a flat architecture where eachcontroller is directly connected to the appliance via Ethernet. In contrast, legacy controllers may have beenconnected via rs-485 wiring as a subnet of controllers from the main controller.The dip switch on the AC-1700 must be set to MC configuration with an address of 0 for all controllers. TheAnyWare platform uses the IP address as the unique identifier for the controller.Please refer to the AC-1700 user manual for more information on configuring the AC-1700.9.2 Controller SettingsOnce the IP settings are configured on the AC-1700 according to the AC-1700 manual, the same setting mustbe configured in the access control system. Click on the Network Icon. Click on the Controller Icon. Click the Add Controller Icon. A copy of the default controller template is made and the system presents its properties for editing.Copyright 2012-2014 Sielox LLC, All Rights ReservedPage 23 of 37
AC-1700 Controller (Access Control Panel) SetupSielox Anyware Installation Guide 1.8Note that once a copy is made, it must be deleted to remove it from the system. Enable the controller via the checkbox. Change the name and description as desired. Modify the IP address and Netmask to match the intended network architecture. Click on the “Save Settings” button. The system automatically schedules a synchronization of the controller.9.3 Verify ConnectivityOne way to verify connectivity with the controller is to look at the events to see if the refresh/sync wassuccessful. Click on the Events Icon. Type the name of the newly added terminal controller in the quick search box. Look for the refresh succeeded terminal controller event.If the “Refresh Succeeded, Terminal Controller, New Controller” is present than communications are solid.If the “Refresh Succeeded, Main Controller, New Controller” is present and the Terminal Controller event isnot present, then there is an indication that networking issues (e.g. Bandwidth, duplicate controller IP address,IP conflicts) exist on the network.Copyright 2012-2014 Sielox LLC, All Rights ReservedPage 24 of 37
Advanced Client Computer ConfigurationSielox Anyware Installation Guide 1.810. Advanced Client Computer Configuration10.1 Open on StartupMost programs are not automatically set up to open when a user first logs in. This article will show how toadd a program to the Startup folder, which will allow the program to launch upon starting up Windows 7. Inthis example, C: is the drive letter of your computer's System Drive, where the Windows folder is located. Windows Guide to Automatically Run a Program on Startup For a Single User on a Specific soft\Windows\Start Menu\Programs\Startup For All Users on a Specific Computer:C:\ProgramData\Microsoft\Windows\Start Menu\Programs\Startup10.2 Creating a Shortcut to your Site Firefox: Resize firefox window so you can see both your computer’s desktop and the firefox window onthe same screen. Click the icon on the left of the address bar (this should be a ‘lock’ icon). Drag the‘lock’ icon to the desktop to create the shortcut. Chrome: Click the chrome menu on the browser toolbar. Select ‘tools’, select ‘Create applicationshortcuts’. In the dialog that appears, choose where you’d like the shortcuts to be placed on yourcomputer. Click ‘Create’. Internet Explorer: Right click on a non-clickable area of the webpage and click on ‘Create Shortcut’.10.3 Add a Program to the Startup Folder Locate the ‘Startup folder’ and right-click, and select ‘Open’. Select the shortcut of your Sielox Class/AnyWare page that was placed on the Desktop, and drag intothe ‘Startup folder’. The program will now automatically start every time the user logs into Windows.Note: To stop this program from launching at startup in the future, right click on the shortcut, within theStartup folder and select Delete.Copyright 2012-2014 Sielox LLC, All Rights ReservedPage 25 of 37
Diagnostic ToolsSielox Anyware Installation Guide 1.811. Diagnostic Tools11.1 Ping Network DiagnosticsThe ping tool is a front-end feature to the well-known ping command common on many operating systems.Ping provides a method for testing network connectivity from the Class software. Click on the Network Icon. Click on the Network Diagnostics Icon. The system displays the ping screen. Type in an IP address or Domain name. Press the “Ping” button. The system will perform a network ping to the specified address/domain. While the ping is being performed, the browser displays its busy status on the tab. The system then display the results of the ping . Try pinging 127.0.0.1 (the local host). If the system succesfully pinged the site, thepicture to the right will be displayed. If the system did not succeed ping the site– after a about 30 seconds, the systemdisplays the unreachable message shownto the right.A failed ping may be indicative of a connectivity problem.Copyright 2012-2014 Sielox LLC, All Rights ReservedPage 26 of 37
Diagnostic ToolsSielox Anyware Installation Guide 1.811.2 Show / Hide QueryThis enables / disables visibility to queries associated with display elements within the system.This is a useful diagnostics tool for resolving complex ad-hoc query situations. For example, theevent query used for showing events would be displayed.11.3 Report Diagnostic Networking EventsThis setting is found within the Site Settings screen and enabling this feature will add events in the Event logthat will report on any change in network communications. This diagnostic tool is used to determine if thereare any intermittent issues regarding the communications between the appliance and any controllersconfigured to the system.Copyright 2012-2014 Sielox LLC, All Rights ReservedPage 27 of 37
Diagnostic ToolsSielox Anyware Installation Guide 1.811.4 Offline/Deactivate LimitsOffline and Deactivation Limits are a set of parameters the system reads in order to determine how manytimes a controller may be pinged by the system to verify communication before the system deactivates thecontroller. These parameters can be changed depending on the requirements of your network and systemadministrator.Copyright 2012-2014 Sielox LLC, All Rights ReservedPage 28 of 37
Diagnostic ToolsSielox Anyware Installation Guide 1.811.5 System StatisticsSystem Statistics is a diagnostic report that is recorded on the Event log that reports the disk space available
Sielox lass , risis Lockdown Alert Status System is an effective solution for response in emergencies. Developed by Sielox, a leading manufacturer of security management systems since 1979, Sielox lass provides real-time status, notifications and updates to facility administrators and first responders with a