Transcription
Basic Image Processing with FIJI/ImageJKristopher Kubow, Ph.D., James Madison UniversityCONTENTS (CLICK TO JUMP TO SECTION)123456789No matter what you are doing, READ THIS FIRST . 1Downloading FIJI/ImageJ . 2Getting started . 2Improving intensity visualization . 3Working with multi-dimensional images opened as hyperstacks . 4Shading correction . 5Common modifications for preparing a figure . 6Adding a scale bar to a figure . 7Selected additional Resources . 91 NO MATTER WHAT YOU ARE DOING, READ THIS FIRST1.1 IMPORTANT CONSIDERATIONS Images are data. NEVER overwrite an original image file. If you make adjustments to the image,save it as a new file.Keep track of the manipulations you’ve made to each image, e.g. in a simple text file that youplace in the same folder as the image.Because image processing changes an image’s appearance, you must carefully consider theethical implications of what you are doing. How do the changes you are making affect theinterpretation and presentation of your data? A full discussion of the ethical implications ofimage processing is beyond the scope of this guide. See this paper from Douglas Cromey at theUniversity of Arizona for a brief overview. When in doubt, talk with your advisor and/or the lightmicroscopy facility director.Except for ethically applied simple linear histogram (intensity) adjustments, reducing bit depth,and cropping, ALL image processing procedures MUST be disclosed in your Methods sectionand/or figure legend.1.2 CONVENTIONS USED IN THIS DOCUMENT For a quick introduction to the layout of the ImageJ program, see here.Navigation through menus and sub-menus is notated using ‘ ’. For example, “Image Type”tells you to go to access the Image menu and then the Type sub-menu.True-color images are images of specimens with color (e.g. histological stains). Fluorescenceimages are NOT color images; they are monochrome (black and white) and the color is added bythe computer. (In rare cases, you may have taken a fluorescence image with a color camera; inthis case, you should convert the image to monochrome. See Section 3.)1
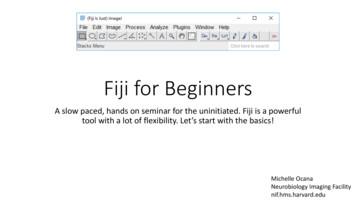
2 DOWNLOADING FIJI/IMAGEJFIJI is a pre-packaged version of ImageJ that is pre-configured with numerous useful plugins. Mostimportantly, it allows you to open image files generated by nearly any microscope/camera software. Thebasic version of ImageJ cannot do this without loading additional plugins. Although I usually refer to theprogram as “ImageJ” in the following instructions, I am assuming you are actually using the FIJI versionof ImageJ and NOT the basic version.To install FIJI, download the version appropriate for your operating system here. Save the “installationfile” anywhere convenient (except in the Program Files folder if you are running Windows). Uncompressthe file and the application is ready to use; there is no installation procedure. To start the program,double-click the fiji.app file.3 GETTING STARTED3.1 OPENING AN IMAGE FILEOpen an image file by dragging and dropping it onto the ImageJ main control panel. Most simple images (.jpg and .tif files) will open immediately.More complex files (.jp2, .nd2, .zvi files) will display a large panel called “Bio-Formats ImportOptions.” Select hyperstack in the first drop-down and be sure that all boxes are unchecked.o If you have a true-color image (e.g. histology), once the image opens, select Image Type RGB Color. Close the old image and work with the new one.o See Section 5 for how to work with multi-dimensional images (i.e. with 1 channel, zslice, time-point, etc.)If your image is a color image (RGB), but there is no important color information in the image (e.g.fluorescence; non-stained DIC), then it’s best to convert the file to monochrome (black and white): go toImage Type 8-bit. The color information is unnecessary.Does the image look completely dark or very dim? You need to adjust the intensities. See Section 4.3.2 NAVIGATING YOUR IMAGE Zooming: Press “ ” to zoom-in; press “-“ to zoom-out.Panning (moving the image around): hold-down the spacebar while clicking and dragging (or usethe hand tool on the toolbar).2
4 IMPROVING INTENSITY VISUALIZATIONThis is most critical with fluorescence images. If you are adjusting a true-color image (e.g. histology), besure that it is in RGB Color (go to Image Type RGB Color).4.1 LINEAR HISTOGRAM ADJUSTMENTS1. Go to Image Adjust Brightness/Contrast (or press SHIFT-C). You’ll see a panel with ahistogram of all the intensities in this image.2. Dragging the “Maximum” slider to the left will increase the brightness of the image. Do notincrease the brightness so much that you saturate (wash-out) features in your image.3. Dragging the “Minimum” slide to the right will increase the contrast of the image. Do notincrease the contrast so much that dim features in the background disappear.4. All of your changes are temporary unless you click “Apply.” Note that there is NO undo.Remember to save this image as a new file and DO NOT overwrite the original file.4.2 GAMMA ADJUSTMENTSometimes an image contains a wide range of intensities and it is difficult to find a display range thatshows the dimmest objects while not saturating the brightest. Adjusting the gamma setting may help.1. First, adjust the brightness and contrast (see Section 4.1, above).2. Next, try adjusting the gamma setting. This setting basically changes how intensities are scaledbetween the two limits (min and max) that you set in the B&C panel. Gamma 1.0 is normal.Values 1.0 accentuate differences between low intensities while values 1.0 accentuatedifferences between high intensities.a. Go to Process Math Gamma b. Be sure that “Preview” is checkedc. Try adjusting the gamma value.3. Hit “Apply” on the B&C panel and save this image. Note that there is NO undo. Remember tosave this image as a new file and DO NOT overwrite the original file.4.3 SINGLE-CHANNEL FLUORESCENCE IMAGESIn general, you should always display single-channel fluorescence images in black and white. If there is alarge range of intensities in the image and it is difficult to find a display range that allows visualization ofthe dimmest objects while not saturating the brightest, you can consider applying a look-up-table (LUT).(See the above sub-section for an alternative strategy.) In addition, if you really need to color yoursingle-channel image, you can also do this with a LUT.To see a listing of the available LUTs, go to Image Color Display LUTs. The multi-color LUTs are tohelp you visualize a large range of intensities. The single-color LUTs are to color a monochrome image.To apply a LUT to your black and white image (or to change you color image to monochrome):1. Click on the LUT button on the main ImageJ toolbar2. Select a LUT (choose “Grays” for black and white)3
5 WORKING WITH MULTI-DIMENSIONAL IMAGES OPENED AS HYPERSTACKSMulti-dimensional images will be displayed in a window with scroll bars at the bottom that allow you toscroll through each of the available dimensions (c channel, z z-slice, t time-point).How to extract a single image from a multi-dimensional series:1.2.3.4.Be sure the image is displayed exactly as you desire.Edit CopyFile New Internal ClipboardThis procedure only works for single-channel images. If you have a multi-channel image, youmust be in Color or Grayscale mode or convert it to RGB first (see Section 5.1, below).5.1 IMAGES WITH MULTIPLE CHANNELSOpen the Channels Tool: press SHIFT-Z or go to Image Color Channels Tool How to control how the channels are displayed using the pull-down menu: Composite allows you to see all channels at the same time (overlayed). Use the check boxes todetermine which channels are displayed.Color displays only one channel at a time. Use the check boxes to switch between channels (youcan also use the scroll bar in the image window)Grayscale is the same as Color except it shows the channels in grayscale.How to control the intensity and/or color of each channel:1.2.3.4.Switch to Color mode using the pull-down menu.Select the channel you want to change.Change the brightness and contrast as described in Section 4.Change the color by clicking the “More ” button and selecting the desired color from thedrop-down menu.How to convert a Composite (overlay) image to RGB for importing into PowerPoint, Photoshop, etc.: Click the “More ” button and select “Convert to RGB”It is difficult to undo this process, so be sure to save your new image as a new document; do notoverwrite the original.5.2 IMAGES WITH MULTIPLE Z-SLICES (I.E. A Z-STACK)There are a large number of z-stack manipulations that can be performed with ImageJ. The mostcommon operation with z-stacks is to generate a z-projection:1. Image Stacks Z-project 2. Select the beginning and ending slices to be included in the projection (default is to use theentire stack).3. Select the projection type. Maximum is commonly used for fluorescence images.4
6 SHADING CORRECTIONThis kind of correction is especially important for DIC but is also useful for any time when illumination isuneven or there is dirt in the optics that you want to remove. In the Flat-Field Correction process, abackground image (i.e. nothing in the field-of-view) is divided from your image to “cancel-out” anyvariation in background intensity. What if you didn’t take any background images? Use the Pseudo-FlatField Correction – it works almost as well.6.1 FLAT-FIELD CORRECTION1. Take your image.2. Take your background image: without changing any settings, move to a blank area of the slideand take an image. If you’re having trouble finding a completely empty area, try de-focusing toblur-out the objects. Alternatively, you can carefully remove your slide and put in an empty slideto get a background image.3. Open both images in ImageJ.4. Select the background image and hit Ctrl-A to select the entire image. Press “m” to measure themean intensity of the image.5. Go to Process Calculator plus.6. Set the following parameters, then hit OK:a. i1 the imageb. i2 the background imagec. Operation Divide ( k1*(i1/i2) k2 )d. k1 the mean intensity you just measurede. k2 07. A new window appears with you corrected image.6.2 PSEUDO-FLAT-FIELD CORRECTIONIf you didn’t take a background image.1. Open your image that you want to correct.2. Duplicate it: Image Duplicate 3. Blur-out the duplicate image: Process Filters Gaussian blur a. Be sure “Preview” is checkedb. Enter a radius value of 5 and see how the image changes (but don’t hit OK yet!). Youwant the image to show the background but not the objects.c. If you can still see the object you imaged, increase the radius value.d. Once you’re satisfied, click OK.4. Perform the same flat-field correction procedure outlined above, but using the blurred duplicateimage instead of the background image you acquired.5
7 COMMON MODIFICATIONS FOR PREPARING A FIGURE7.1 REDUCING BIT-DEPTHOur eyes are not sensitive to 8-bit intensity levels. If your black and white image has a higher bitdepth, you will want to reduce it to 8-bit for publication to reduce your file size. (Note this does notapply to RGB images, which are already 8-bit.)1.2.3.4.Go to Image Type.16-bit is checked (even if your image is 12-bit or 14-bit, it is still “packaged” in a 16-bit file).Click on 8-bit.That’s it! Your eyes won’t notice a difference. Keep in mind, though, that the quantitativeintensity data captured in your original image HAS changed. Be sure to keep the original image.7.2 OVERLAY MULTIPLE FLUORESCENCE IMAGESBasic rules for displaying fluorescence images: If you are only displaying one channel, display it in monochrome (black and white), NOT in color.If you are displaying a multi-channel overlay (in color), you should also display the individualchannels in monochrome next to the overlay.Do not use green and red in the same image since it will be difficult for most colorblindindividuals to differentiate the two channels. Use magenta instead of red.Blue is often difficult to see; try using cyan instead.If you are working with a multi-channel image, you simply need to switch to Composite view and thenconvert the image to RGB (see Section 5.1).If you are working with multiple, independent files 1.2.3.4.5.Open all images that you want to combine.Image Color Merge Channels Assign each image to the desired colorBe sure that all three boxes are checkedA multi-channel composite image is generated. You can now manipulate it as described inSection 5.1.7.3 SCALING/REDUCING THE IMAGE DIMENSIONSOnly do this inside the program you’re using to assemble your figure.7.4 CROPPING1. Use the box tool to draw a square around the area you want to isolate.2. Image Crop.6
8 ADDING A SCALE BAR TO A FIGURE8.1 SCALE BAR GUIDELINES Yes, you need a scale bar.If you feel like it’s not necessary to include a scale bar, see the previous point.The length of the scale bar should be sized to provide a good reference for the features ofinterest in the image. Don’t make the scale bar very short or very long.Scale bars should be white or black, depending on what stands-out the best in the image. Blackwith a white outline or white with a black outline are also appropriate.Scale bars should ordinarily be located in a bottom corner of the image, but can be located inother corners to avoid obstructing objects in the image.If there are multiple images with identical pixel sizes and image dimensions being displayed nextto each other in a figure, you only need to include a scale bar in one of the images.According to long-standing tradition, you are not supposed to write the size of the scale bar(text) next to the scale bar. However, I feel like this is an antiquated practice and only serves tomake the reader have to search your figure legend to find the size. My personal feeling is thatyou should always include the size in presentation visuals and, if you can get away with it, inyour published figures.8.2 DETERMINE THE IMAGE’S PIXEL SIZEBefore you can add a scale bar, you need to know your image’s “pixel size” – the size of a single pixel,typically in microns (μm).Sometimes the scale is automatically recorded in the image’s metadata and is displayed in ImageJ. Theconfocal and several of the other microscopes in the facility do this. You can tell if your image iscalibrated by checking the text at the top of the image window. Among other things, the text displaysthe dimensions of the image (e.g. 512x512). Check the units listed after the numbers: if the units are“pixels” or anything non-metric, then your image is not calibrated.How to determine the pixel size in a calibrated image:1.2.3.4.Open the image in ImageJGo to Image Properties Set “Unit of length” to um (micron; for most microscopes) or mm (for the Macroscope)Read the pixel size from the “Pixel height” or “Pixel depth” boxes (they should be identical). Thisis the pixel size in units of microns/pixel (or mm/pixel if you set that).How to determine the pixel size in a non-calibrated image: If you’ve done some image processing, it’s possible that the calibration was lost along the way.Check to see if the original image is calibrated.Otherwise, if you used any other scope in the microscopy facility, you can check thespecification sheet posted near the instrument. Note that the pixel sizes do NOT apply toconfocal; you must check the image’s metadata to determine the pixel size.7
How to determine the pixel size in images acquired with the Macroscope or stereoscopes1. You will need to have a ruler included alongside your specimens in your images. You don’t needto actually display the ruler in your final images (you can crop it out), but you do need it todetermine the scale.2. Open the image in ImageJ3. Use the line segment tool to draw a line of known length on the ruler (e.g. draw a line betweenthe 0 mark and the 1 cm mark). Using longer lengths will improve the measurement precision(e.g. it’s better to measure 20 mm than 1 mm).4. Analyze Set Scale 5. The “Distance in pixels” will be automatically set to the length of the line you just drew.6. Specify the “Known distance” and “Unit of length” (e.g. ‘10’ and ‘mm’, respectively if you drew a10 mm line).7. “Pixel aspect ratio” should be 1.0 and the “Global” box should NOT be checked.8.3 ADDING A SCALE BAR IN IMAGEJThis is one way to add a scale bar. Basically, you make the scale bar in ImageJ and then cover it with anicer-looking scale bar in whatever program you’re using to assemble your figure. The reason forcovering the original scale bar is a little technical and I don’t want to explain it right now. Just trust me.1. If the image is not already calibrated, determine the pixel size and calibrate the image.a. Image Propertiesb. Set Units to “microns” or “mm” as applicable.c. Set the width and height (numbers are expressed in µm/px or mm/px depending onwhat units you set). The width and height should be identical.2. Analyze Tools Scale Bara. Set the desired width (in microns or mm depending on your calibration)b. Set the height in pixels so that the bar is skinny, but still visible.c. Set “Color” and “Location” as desired (see guidelines in Section 8.1).d. Set “Background” to none.e. Select the “Hide Text” box. This will hide the scale bar size. Don’t worry, you can add itback in the program you’re using to assemble your figure.f. Be sure that Overlay is unchecked.3. This is a permanent change! When you save this image, do not overwrite the original! You mightwant to include the scale bar size in the file name.4. When you import your image into your figure preparation program and resize it, the scale barprobably won’t look very good anymore. You can solve this problem by drawing a new scale bar(a thin box) that covers-up the original.8.4 ADDING A SCALE BAR USING A FIGURE-PREPARATION PROGRAMThis protocol is more involved, but gives you a bit more freedom to design your figure. You don’t have todecide where to place the scale bar when you’re working with the image in ImageJ, but instead can waituntil you are finished assembling the figure. The protocol provided here for PowerPoint will be similar inother programs (e.g. Inkscape, GIMP), but the actual commands and menus will, of course, be different.8
1. Determine the size of your image in pixels.a. Often this is displayed in Windows Explorer or the Finder if you select the image file.b. Otherwise, try right-clicking the image and choosing “Image Properties” or “Get Info.”2. Calculate the image’s width in “real” space (i.e. the width of the imaged area in your sample,usually in μm or mm).a. Multiply the width of the image in pixels by the pixel size of your image.b. For example, if your image is 2000 pixels wide and the pixel size is 0.1 μm/pixel, thewidth of your image in microns is 2000 x 0.1 200 μm.3. Import the image into PowerPoint and resize it as desired, but DO NOT crop. You may crop theimage after you’re finished with this procedure. Better yet, crop the image BEFORE importing it.4. Determine the size of your image as it appears in your figure document.a. For most versions of PowerPoint, if you click on the image, its height and width willappear on the Format Picture ribbon at the top-right of the screen.b. Otherwise, right-click on the image, select “Format Picture” and look under the “Size”tab. You want to find the image’s size in inches (or cm if your computer uses metric).5. Calculate the scale bar size.a. Use the width of the image in “real” space (in μm) and the width of the image in thefigure (in inches or cm) to set-up a proportion: “real” width / figure width.b. For example, if the image is 200 μm wide in real life and 1 inch wide in the figure, yourproportion will be 200 μm / 1 in.c. Decide how big you want the scale bar to be.d. Use the proportion to calculate how big your scale bar should be in the figure.e. For example, if you want a 20 μm scale bar and your proportion is 200 μm / 1 in., set-upand solve this equation: 200 μm / 1 in. 20 μm / ?. Your answer will be 0.1 inches –that’s how long your scale bar needs to be.6. Draw a thin box that has a width equal to what you just calculated.9 SELECTED ADDITIONAL RESOURCES ImageJ User Guide: comprehensive reference for all basic ImageJ functionsImageJ Cookbook: selected basic and advanced topicsPeter Bankhead’s fluorescence microscopy in ImageJ book: basic to advanced topics, primarilygeared toward fluorescence image analysis; also includes background information on nearlyevery topic discussed – very informativeCopyright 2019Kristopher KubowLight Microscopy and Imaging FacilityJames Madison University9
To install FIJI, download the version appropriate for your operating system here. Save the installation file anywhere convenient (except in the Program Files folder if you are running Windows). Uncompress the file and the application is ready to use; there is no installation procedure. To start the program, double-click the fiji.app file.