Transcription
Exporting images from Zeiss CZI format to TIF files using ZEN 2.xDouglas Cromey, MS and Patty Jansma, MS (ARL Imaging Cores)Zeiss Microscopy makes available online a free version of their ZEN 2.x software (current version is ZEN Black 2.3Sp1, Zen Blue 2.5) that users can install on Windows PCs in their labs. The Marley & Life Sciences North facilitieswill have a copy available since the 64bit download is huge (6.6GB). If you would like to obtain the file directlyfrom Zeiss, see: www.zeiss.com/zen-lite (Note, you will be asked to provide contact information) Please see ourhandout regarding installing the free ZEN software, the installation includes roughly 50 Windows device driversthat are completely unnecessary for users who do not have Zeiss hardware attached to their PC. The handout canbe found here: rials#instrumentsZEN Black or Blue?Zeiss’ ZEN software comes in two colors, Black (for controlling Zeiss microscopes that use lasers)and Blue (for controlling Zeiss widefield microscopes). The software may look similar, but thefeature sets are quite different. The most obvious difference between the two is that the iconsand user interface (particularly the bar at the top of the program) of each make use of the colorsin the names. According to Zeiss, at some future date these two software programs will becombined, but for now there are two “flavors” of the ZEN software. Black will likely be morefamiliar most users, since it is the software that is used to control the main campus Zeiss LSM880microscopes, as well as the Zeiss Elyra S.1 located at the UAHS campus.The main virtue of Blue for users is that it is the better of the two for exporting images. While it is possible toexport CZI files into TIF using Black, Blue is much more flexible. Our Zeiss technical representative has said thatwe should “always” use ZEN Blue to export images.During the installation of the ZEN software you will be asked if you want to associate the CZI file extension withBlue or Black. Associating the CZI file with ZEN Blue will ensure that when you double click on a CZI file on yourlab or personal computer, ZEN Blue will open. We recommend that you agree to the file association.Installing ZEN includes a PDF copy of the user guide. While lengthy (1119 pgs for ZEN Blue 2.5), in the appropriatesections the user guide will provide additional detail about how to best use the software. Note: it is possible thatsome specific functions in the software will require the purchase of a license from Zeiss and therefore will not beavailable in the Lite version. The ones referenced here are all freely available.Alternative - Using the FIJI version of ImageJSince the Zeiss ZEN Lite software is for MS Windows only, Macintosh users need an alternative way to open CZIfiles. We recommend the FIJI version of the free image analysis software, ImageJ (https://fiji.sc/, available forMacOS, Windows, Linux). The two key advantages to FIJI are that it includes many pre-installed plugins (includingthe one that allows users to open CZI files) and it regularly checks to ensure that you are running the latestversion. Please note that opening and exporting large image data files (e.g., Z-stacks, time-lapse data, stitchedimages), can slow down even powerful computers. We recommend that you close down other software beforeworking with large data using FIJI. Opening files using Bio-Formats (part of FIJI): ats5.3/users/imagej/load-images.htmlSaving and exporting files from FIJI (ImageJ): http://imagej.net/Saving and ExportingExporting images from ZENPage 1
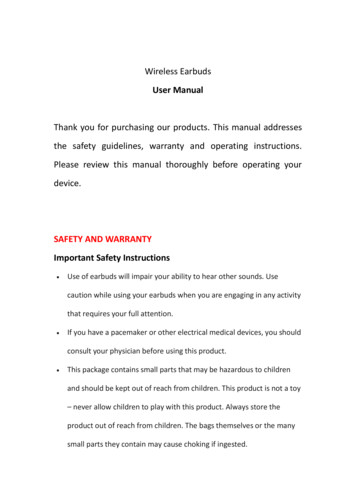
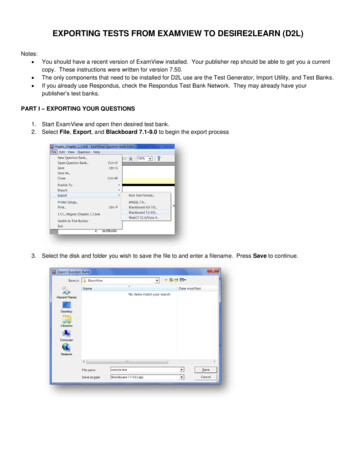
Note: MS Windows users should be aware that FIJI installs differently than most Windows programs. Users(Windows, MacOS, Linux) will also need to install JAVA on their computer. See the simple installation instructionshere: http://imagej.net/Fiji/DownloadsWorking with CZI files in ZEN Blue 2.5The ZEN user interface has three tool areas (left, center, right). Click the Processing tab (top of the left tool area)to access the available functions such as file export and sub-set functions. The other two tool areas will looksimilar to ZEN Black, but they are not identical.Make sure the CZI file that you want to work with is open in the rightside tool area. You can do this by using the software’s FILE OPEN dialogor by locating a CZI data file on your disk and double-clicking on the file.If you have multiple files open, you can select one by double clicking onit (this will put a thin blue line around the selected file).NOTE: CZI files can be quite large. Ifyou are opening your data files from anexternal hard disk or flash drive, theywill open much faster if you use a USB3.0 device connected to a USB 3.0 port.If you have the space to copy the filesdirectly to your computer’s hard diskdrive, the files will open even faster (inmost cases).With the Processing tab open, (using Single) click the Method tool andyou can select a large number of functions. This handout will focus onthe commonly used Export/Import Image Export and the Utilities Create Image Subset functions. For instructions on using Batch mode (performing functions on multiple CZI files),see section 5.7 of the ZEN 2.5 user guide that was included with the software installation.More information on the Zeiss CZI file format: scopesoftware/zen/czi.htmlExporting images from ZENPage 2
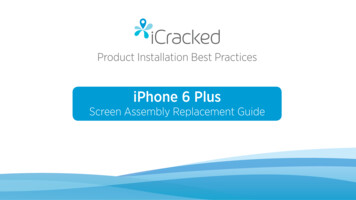
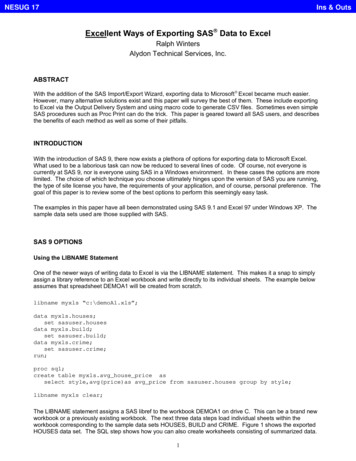
Reducing the number of images to export (see ZEN Blue 2.5 user guide 5.10.12.7)Often a large Z stack or time-lapse will only have a few images thatNOTE: Users of the Zeiss Elyra S.1, oryou need or want. Rather than exporting everything, you can create ausers of the LSM880 who are using theAiryscan, should really only need to exportnew CZI file that is a sub-set of the larger file, and then furtherthe image data that has been postprocess or export the sub-set file as needed. You can also use thisprocessed by ZEN Black. The rawmethod (in ZEN Blue) to crop an image to a smaller area.(unprocessed) data from these techniqueshas very limited use for publication images.Select the processing tab found in the left tool area. Select and dropdown (use the ) the blue Method menu in the same area. Choose Utilities and then from the sub-menu chooseCreate Image Subset. You should now see a Method Parameters and Image Parameters (input and output) menuin the left tool area.Create Image Subset – options Channels – if you have more than one wavelength, you canexport all or just some of the channels. To deselect a channelclick on the colored box and it will reduce in size to indicatethat you do not want that channel to export. Z-position, Time, Block (data set dependent) – allows you toexport a single image, a range of data, several non-contiguousranges, or at specified intervals (e.g., every 5th z step). Region – Full gives you the entire screen’s worth, whilerectangle allows you to crop every image in the stack (or timecourse) to a smaller size. You will need to use the rectangledrawing tool (lower left of Center Screen Area, Graphics tab)to indicate how the image should be cropped. NOTE: if you open unprocessed Elyra data you will also beable to export specific Rotation or Phase image subsets,however this would only be useful in specific troubleshootinginstances.Image Parameters Output gives you a number of flexible options regarding the output name.Once you have pressed APPLY near the top of the left tool area, you will need to save the sub-set (which will nowshow up in the file list found in the right tool area) to an appropriate location on disk.Conserving bit depth informationA particularly useful advantage to using the ZEN Blue subset tool is if you want your exported images to retaintheir full bit depth. Exporting multiple channels to a single TIFF image turns the exported file into a 24bit colorimage (8 bits of Red, 8 bits of Green, 8 bits of blue). If you have four channels then this is a significant loss of bitdepth information, since the original channel images are 16 bit. 16 bit images have over 65,000 grey shades, whilethe number of grey shades per color (R,G,B) in a 24bit color image is only 256, and if you export 4 channels into a24bit image you reduce that even more.If you export each 0f the channels individually you will have much greater adjustment flexibility using the higherbit depth images. This can be particularly useful if you do not have access to the ZEN software (to open the CZIfiles) at some later date.Exporting images from ZENPage 3
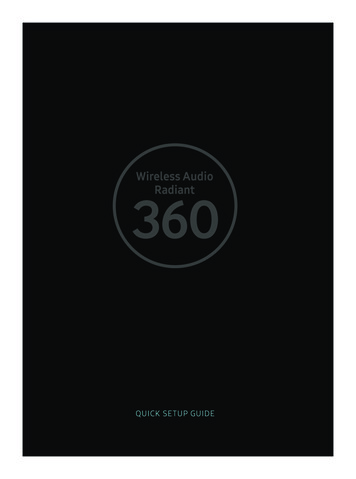
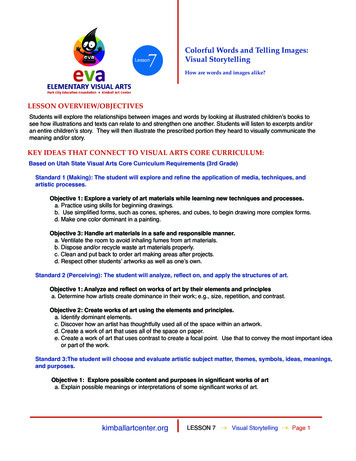
Image Export of CZI files (see ZEN Blue 2.5 user guide 5.10.13, 7.0.0)Select the processing tab found in the left tool area. Select and drop down (use the ) the blue Method menu inthe same area. Choose Export/Import and then from the sub-menu choose Image Export. You should now see aMethod Parameters and Image Parameters menu in the left tool area.For most file export needs you should choose either Tagged Image File Format (TIFF) or TiffFormat (64Bit) (BigTiff) from the drop down menu in the Method Parameters. Please make sureto have SHOW ALL selected on the upper right corner of the blue parameters bar.Export options JPEG – we strongly discourage the use of JPEG for scientific images. BMP – Windows bitmap, not recommended. TIFF – Recommended. Tiff Format (64Bit) (BigTiff) – May be needed when working with very large files (e.g., large tiled areas). PNG – The portable network graphics format can be useful for posting images online as it includes lossless (non-destructive) file compression and is compatible with all web browsers. JPEG XR (WDP) – again, not recommended. SUR – as near as we can tell, this file format is primarily useful for people doing surface measurementsand metrology, and is probably of no use to biologists.Exporting to TIFF – options Convert to 8 Bit – Be very careful and aware of this setting. Ifthis is checked it will permanently reduce the number ofgreyscales in the image. It appears as if the only way you canuncheck this box is to ensure that the “Original Data” box ischecked first. Compression – your choices are None, LZW, or ZIP. If youchoose to use compression either choice is non-destructive.The only issue between them is if the software back in yourlab is able to open a compressed TIFF file of that type. Resize – Unless you are exporting a very large tiled (stitched,montage) type image, do not resize your image. You workedhard to get good optical resolution, why throw it away insoftware? Original Data – allows you to export to 16bit images (be sureto uncheck “convert to 8 Bit”). The “Shift Pixel” option willupscale 10bit or 12bit images into 16bit, and for most usersthis should not be used. Apply Display Curve and Channel Color – Again, a setting tobe careful with. If this is “unchecked” you will export theoriginal data, if this is “checked” you will apply theadjustments you made in the center tool area’s displayhistogram. NOTE: it appears that this will need to be checked(temporarily) to be able to select multiple and individualchannel images, then uncheck (if you want the raw,unadjusted data).Exporting images from ZENPage 4
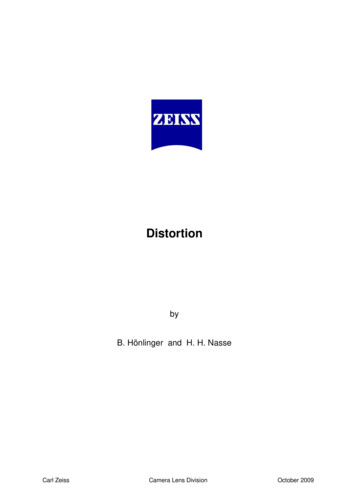
o Burn-in Graphics – any letters, boxes, arrows, etc. displayed on the image in the center tool areawill permanently become part of the exported images.o Merged Channels Image – combines the channels into a single 24bit color image for each Z stacklayer or time point.o Individual Channels Image – exports the individual channels for each Z stack layer or time point.Use Full Set of Dimensions – exports everything.Define subset – you can also define a subset of your data directly within this dialog box. See thediscussion above about exporting subsets.Export to – click the button to select the folder where your exported images will be sent.Prefix – by default the software will use name of the CZI file as the prefix for the exported file names,adding on channel and/or z slice information.Exporting to BigTiff – options BigTIFF – suitable for exported image files that will need tolarger than 4GB. For most users this is not necessary. Pyramid – Takes large, high-resolution images and createssmaller versions so that you can zoom in and out (somewhatsimilar to how Google Earth works, or if you have ever seenthe output from most microscope slide scanners). Tiff Tiles (taken directly from the user guide)o Activated: Generates new rectangle tiles for internal datahandling.o Deactivated: Combines tiles as stripes for internal datahandling. Merge all Scenes – (taken directly from the user guide)Activated: Generates one image including all scenes. Singlescene images will be generated, if the checkbox isdeactivated. Compression – your choices are None, Loss-less or Lossy. Ifyou need a compressed file we recommend the loss-lessoption (uses LZW). Lossy is a version of JPEG XR and we don’trecommend that for science images. Other settings (see the descriptions under the TIFF export)The Image Parameters window will show the input file you haveselected. Once you are satisfied with the configuration of all theoptions, click the APPLY button near the top of the left tool area tobegin your export.Exporting images from ZENPage 5
Exporting to Movies (see ZEN Blue 2.5 user guide 5.10.13.2, 7.2.0)Based on recommendations we have seen online, the current “best quality” movie file format would be eitherMPEG-4 or MOV. The H.264 codec is what is used in Blu-ray disks. Either H.264 or MPEG-4 are considered thestate-of-the-art in 2018. See the ZEN Blue 2.5 user guide regarding the need for installing the open source FFmpegapplication (https://ffmpeg.org/) to use these two codecs.The other formats are OK, it somewhat depends on your needs and the limitations of the format (and theexporter). Remember that almost every option will use lossy file compression (somewhat similar to JPEG) to makethe movie file size more manageable.Exporting to OME-TIFF (see ZEN Blue 2.5 user guide 5.10.13.3)The Open Microscopy Environment OME-TIFF format is an attempt to standardize the TIFF file format so that itcan retain the metadata created by acquiring multi-dimensional data sets (e,g, XYZ, XYTime, XYLambda, etc). e-tiff. This format will allow you to open these specializedTIFFs in other programs for further analysis. The exported images are available as a multipage TIFF file.To export to OME-TIFF select that method in ZEN (a separate export image option from the one used above) andyou will find many similar parameter settings to those under BigTiff.Mr. Cromey is grateful for the support he receives from the SWEHSC (P30-ES006694) and the UACC (P30-CA023074).From the UA Microscopy Alliance - rials 2018 The University of Arizona, Tucson, AZ(original 03/2017, updated 09/2018)Exporting images from ZENPage 6
Since the Zeiss ZEN Lite software is for MS Windows only, Macintosh users need an alternative way to open CZI files. We recommend the FIJI version of the free image analysis software, ImageJ (https://fiji.sc/, available for MacOS, Windows, Linux). The two key advantages to FIJI a