Transcription
Graitec Advance PowerPack for Revit 2016 R2This document describes the improvements in Graitec Advance PowerPack for Revit 2016R2.GRAITECWhat’s new in Graitec Advance PowerPack 2016 – R2
Table of contentsNEWS.41: Ribbon Customization . 4REINFORCEMENT . 52: Rebar Visibility . 63: Transversal Distribution . 7REBAR SET .134: Explode Rebar Set . 135: Split Rebar Set . 146: Isolate Rebar Set . 147: Unite Rebar Sets . 15REBAR IN ELEMENT . 158: Copy Rebar .169: Delete Rebar . 17TRIM / EXTEND . 1710: Rebar to Face . 1711: Area to Element . 1812: Cut Openings in Rebar Set . 1813: Cut Openings in Area . 1914: Assign to Sheet . 2015: Set Rebar Number . 2116. Renumber Reinforcement . 2117: Browse Reinforcement . 2218: Select by Rebar Number . 2319: Delete by Rebar Number . 2420: Bending Detail . 25SYMBOLS AND DIMENSIONS . 2721: Dimension Rebar . 2722: Tag Rebar .2823: Detail Rebar . 2924: Show Rebar . 2925: Automatic Symbols . 2926: Automatic Update . 30MODELING .3027: Categoriy Visibility . 3028: Shared Parameters for Foundations . 3129: Join Openings . 31ANNOTATIONS . 3330: Center of Gravity . 33GRAITECWhat’s new in Graitec Advance PowerPack 2016 – R2
31: Text Case .36WINDOWS .37FILES .3832: File Updater . 3833: Family Exporter . 3934: Watermark Manager . 40BIM CONNECT . 4135: Advance Design . 4136: Import Load Combinations from Advance Design . 4137: Import FEM Results at Synchronization . 4238: New Options for Models Comparison at Sync . 4239: New Symbols and Titleblocks . 43IMPROVEMENTS . 44FAMILY MANAGER . 44VIEW SHEET GENERATOR . 44GEOMETRY PARAMETERS . 44BIM CONNECT . 44GRAITECWhat’s new in Graitec Advance PowerPack 2016 – R2
News1: RIBBON CUSTOMIZATIONGRAITEC PowerPack for Revit 2016 R2 presents the user with a large variety of new,powerful functionalities, for better control and automation while working in Revit .Due to the great number of developments provided in this version, a tool for managing andorganizing the workflow was necessary.Using the Ribbon Customization command, customers can decide on and select thecommands they would like to be available in the PowerPack.Predefined configurations: All – the ribbon is populated with all the commands Modeling & Tools Connectivity & Tools Reinforcement & Tools Annotate & ToolsGRAITECWhat’s new in Graitec Advance PowerPack 2016 – R2
Customization dialog:REINFORCEMENTThe major development brought by this PowerPack for Revit version is represented by acollection of tools designed to save time and increase productivity when creatingreinforcement drawings in Revit .The commands apply for both generating and manipulating 3D reinforcement and detailingdrawings.GRAITECWhat’s new in Graitec Advance PowerPack 2016 – R2
2: REBAR VISIBILITYThe Rebar Visibility tool allows users to change the view's visibility state in order to showreinforcement bars unobscured and/or as solids in 3D views, or to hide certain bars.These settings are applicable for the fine level of detail, and can be used in a very practicalway for the active view or for the whole project. Once the visibility state is defined, the usercan at any time change the status to whatever combination suits him best.The 3D solid option applied for reinforcement displays its true volumetric representationwhen the view level of detail is set to ‘fine’.The Obscured (hide rebar) option applied for reinforcement, displays the rebar so that it willnot be obscured by other elements and remain visible in front of all obscuring elements.The selection of the rebar affected by the settings can be applied in two different ways: Select bars – allows the user to select single or multiple rebar. Select by filter – allows the user to choose a certain category of rebar based on oneor more criteria at a time. In the dialog that appears, the user can then enable thedesired filters and choose the value upon which the rebar will be selected.GRAITECWhat’s new in Graitec Advance PowerPack 2016 – R2
The Reinforcement Visibility field changes the state of the reinforcement to visible orinvisible and can be applied in the following categories of reinforcement: Structural Rebar Structural Area Reinforcement Structural Fabric Area Structural Path ReinforcementBoth Rebar Appearance and Rebar Visibility sections can be set to apply either to theactive view or to the whole document.3: TRANSVERSAL DISTRIBUTIONThis newly-added feature increases productivity whilst working in Revit , due to theautomatic generation of transversal rebar sets with multiple spacing for linear elements. Withonly one command, the user has the option to quickly create different configurations of thetransversal reinforcement in a cage.The command can be applied using two different methods: By selecting the element to be reinforced (in which case the Rebar Shape choice islimited) By selecting a rebar previously defined to a host element (in which case the user hasmore control over the Rebar Shape)Note:The tool can be used to create reinforcement for Structural Columns andStructural Framing.GRAITECWhat’s new in Graitec Advance PowerPack 2016 – R2
After the selection is performed, the following dialog appears in order for the user tocustomize the parameters that will define the distribution of reinforcement.DimensionsIn this section, the selected element’s dimensions appear only as information: length (L) andcross-section (BxH). The units of the values are those established in Project Units.Stirrup shapeIn the drop-down list, three options are available for the stirrup shape:Note:This option is applicable only when selecting the host element. For the selection ofthe rebar, the shape of the definition bar was created before accessing the dialog.GRAITECWhat’s new in Graitec Advance PowerPack 2016 – R2
Reinforcement parametersThe user is allowed to modify the rebar diameter, the concrete cover and the hooks angle.The available options for hooks angle are:DefinitionThe user is able to define the rebar with:Quantity: user can define the number of spacings (N). Quantity and length: the user can define not only the number of spacings, but also thepartial distribution length (N and L). Spacing: the user can define the spacing between bars (S). Spacing and length: the user can define not only the spacing between bars, but also thepartial distribution length (S and L).GRAITECWhat’s new in Graitec Advance PowerPack 2016 – R2
The Exceeding length option is available when defining the distribution by Spacing orSpacing and length. The user can decide where the exceeding length is added: Affect end offset Affect both offsetsGRAITECWhat’s new in Graitec Advance PowerPack 2016 – R2
Affect spacing between sets Affect center spacingIn the Start/End offset edit-box, the user can define the lateral distance from the centre ofthe bar to the formwork at both ends: Os and Oe.GRAITECWhat’s new in Graitec Advance PowerPack 2016 – R2
Distribution typeThere are five distribution types from which the user can choose: 3 Zones Distribution - three rows appear in the Distribution table 2 Zones Distribution (to left) / 2 Zones Distribution (to top) - two rows appear in theDistribution table and the distribution starts from the left/top of the beam/column. 2 Zones Distribution (to right) / 2 Zones Distribution (to bottom) - two rows appear in theDistribution table and the distribution starts from the right/bottom of the beam/column. Uniform Distribution - one row appears in the Distribution table (equal spacing betweenbars). Custom Distribution - by selecting this option, the user can customize the rebardistribution. The Distribution table becomes empty and the user can populate the list bypressing the Add button.By using the syntax Quantity x Spacing and clicking Add, the distribution is automaticallycreated. To generate more distributions, the same syntax with space between eachdistribution can be applied several times.The Save configurations as default button allows the user to save current values as defaultvalues, which are loaded for when the command is next used.GRAITECWhat’s new in Graitec Advance PowerPack 2016 – R2
REBAR SETGRAITEC PowerPack for Revit 2016 R2 offers several tools for adjusting reinforcement tothe desired parameters. One of the groups contains editing commands applicable to thereinforcement sets: Explode Rebar Set, Split Rebar Set, Isolate Rebar Set, and Unite RebarSets.4: EXPLODE REBAR SETThe Explode Rebar Set tool divides a rebar set into single reinforcement bars, which can beindependently modified further. The most common modifications are move, copy, rotate,stretch and trim, delete, changing shape, and diameter.Settings, such as visibility states, are kept for the individual bars that result from an explodedrebar set.GRAITECWhat’s new in Graitec Advance PowerPack 2016 – R2
5: SPLIT REBAR SETAn alternative for editing rebar sets is to divide the set into two similar parts in order to modifythem separately.The Split Rebar Set tool cuts a rebar set at the desired location into two separate rebar sets,therefore it can be used to quickly set an unequal stirrups distribution.Settings, such as visibility states, are kept for the rebar sets that result from a split rebar set.6: ISOLATE REBAR SETThe particular case of the Split Rebar Set is to isolate a bar between two sets at a desiredlocation.Settings, such as visibility states, are kept for the rebar sets and the individual bar resultingafter applying the command.GRAITECWhat’s new in Graitec Advance PowerPack 2016 – R2
7: UNITE REBAR SETSUsers can also unite two or more sets using the Unite Rebar Sets command, in order tocreate a single set, which can then be more easily manipulated. It is the opposite operationto the Split Rebar Set and Isolate Rebar Set tools.The tool can also be applied to create a rebar set from individual rebar, if the selectedreinforcement bars have the same rebar number.The resulting rebar set will have only one spacing, depending on the order of selection of thesources sets.REBAR IN ELEMENTGRAITEC PowerPack for Revit 2016 R2 also contains two options that were added in orderto increase productivity whilst working with identical or similar host elements that need to bereinforced/already have reinforcement assigned to them.Displayed under the Rebar in Element group, the Copy Rebar and Delete Rebarcommands can be easily applied to obtain a different number of identical reinforcementcages.GRAITECWhat’s new in Graitec Advance PowerPack 2016 – R2
8: COPY REBARThe Copy Rebar tool allows the user to copy the entire reinforcement of an element to anidentical or similar element that has no reinforcement assigned to it. The entire reinforcementcage can now be copied to one or more elements at a time.The copied rebar will be assigned to the new element. The reinforcement will be rotatedautomatically into the position of the new target host. Also, the cage will automatically adjustto the dimensions of the destination element, keeping the concrete cover.Also, the cage can be copied between straight and slanted elements.The reinforcement cage can be entirely copied, but, if desired, certain elements can beexcluded from selection. Also, the source is unique, but the destination can be a single ormultiple choices.GRAITECWhat’s new in Graitec Advance PowerPack 2016 – R2
9: DELETE REBARThe reverse command of Copy Rebar is the Delete Rebar tool, which offers the possibilityto delete the entire reinforcement of the selected host element or certain parts of it.The command can be applied to one or more objects at a time (single or multiple selections).It is also possible to exclude one or more bars from the selection that is to be deleted.TRIM / EXTENDThe user is now able to adjust the reinforcement created to the shape and particularities ofthe host element in a quick and intelligent manner, using the tools that can be found underthe Trim/Extend group.Reinforcement created in hosts with an irregular shape or with depressions and openings isadapted to the formwork using one or more of the following tools: Rebar to Face, Area toElement, Cut Openings in Rebar Set, Cut Openings in Area.10: REBAR TO FACEAnother editing tool, Rebar to Face, makes it possible to stretch/trim the reinforcement setsto a chosen edge of the concrete element.The part of the rebar shape closest to this face becomes stretched or trimmed. The face towhich the rebar are stretched/trimmed can belong to the same or a different concreteelement (the user can stretch the bars from a column to the exterior face of a beamsupported by the column).The tool can be applied for rebar sets or for individual bars (bars that come from an explodedrebar set) and multiple rebar selection is allowed.GRAITECWhat’s new in Graitec Advance PowerPack 2016 – R2
The stretch tool can also be applied if the face of the host element is slanted.11: AREA TO ELEMENTThe Area to Element tool allows the user to stretch the reinforcement of the created area, tothe dimensions of the host concrete element.The command increases productivity whilst working with irregular shapes, circular edges,obtuse angles or large number of edges. It can be applied for Structural AreaReinforcement, or Fabric Area Reinforcement.12: CUT OPENINGS IN REBAR SETThe Cut Reinforcement tools offer the possibility to adjust the reinforcement cage in thefollowing situation - the cage is already modeled and the user needs to create someopenings in the concrete element without deleting the reinforcement.The rebar set can now be modified in order to cut the actual reinforcement to the edges ofthe openings, keeping the concrete cover.Reinforcement bars that intersect the opening will be split into two rebar sets on both sides ofthe opening. The newly-created rebar will receive new rebar numbers and the ones that donot intersect the opening will keep the original rebar number.GRAITECWhat’s new in Graitec Advance PowerPack 2016 – R2
Rebar sets can be split for multiple openings at once. The cut operation will take into accountall the openings supported by the host element.13: CUT OPENINGS IN AREAThe Cut Openings in Area tool adjusts the reinforcement of a wall or a floor in the followingsituation: The reinforcement is already created and the user creates an opening in the hostelement that modifies its external geometry.The most common situation is a door opening in a wall. The area reinforcement can beselected and trimmed to the edges of the opening.The command can be applied for both Structural Area Reinforcement and Fabric AreaReinforcement.Note:The cut tool can be applied to all types of structural openings and to any shape, aslong as it modifies the external geometry of the host element.GRAITECWhat’s new in Graitec Advance PowerPack 2016 – R2
14: ASSIGN TO SHEETThe Assign to Sheet tool is used for assigning reinforcement to a specific sheet.The selection of the assignable reinforcement can be done in two different ways: Select reinforcement – allows the user to perform single or multiple selection of therebar; Select by filter – allows the user to choose a certain category of rebar based on one orseveral criteria at a time. In the dialog that appears, enable the desired filters andchoose the value on which the rebar will be selected.Note:If the user does not select reinforcement elements, the Assign to Sheet tool willapply to all visible reinforcement in the view.After completing the selection, the reinforcement can be identified as assigned to one sheetthrough the G.Sheet parameter value completed in the properties panel. The user can checkthe related sheet of the rebar set or fabric sheet on the properties palette with the newcreated parameter.GRAITECWhat’s new in Graitec Advance PowerPack 2016 – R2
15: SET REBAR NUMBERWith the Set Rebar Number tool, the user is allowed to manually change the rebar numberof a bar.If the chosen number is already assigned to a rebar, a warning message is displayed toinform the user of this situation and the corresponding rebar receives a different number.16. RENUMBER REINFORCEMENTThe Renumber Reinforcement tool automatically changes the numbers for allreinforcement in order to eliminate the gaps that may appear in numbering, or to create auniform count starting from a specific number.The numbers assigned to the rebar may be further used to filter rebar using this criterion.GRAITECWhat’s new in Graitec Advance PowerPack 2016 – R2
This operation will detect identical reinforcement regarding rebar shapes, dimensions,materials, bar diameters.Depending on the selected mode of operation, the command behaves in two different ways: It affects the entire project – in which case the other option is disabled and thereinforcement assigned to sheets is reset. It affects selected sheets – in which case two rebar assigned to different sheets canreceive the same rebar number.17: BROWSE REINFORCEMENTThis tool browses through rebar or fabric sheet marks and highlights all correspondinginstances in the view.The tool allows the user to choose a certain category of rebar, based on one or more criteriaat a time. In the dialog that appears, the user can enable the desired filters and choose thevalue upon which the rebar will be selected.In the picture below, only the rebar with a 13 mm diameter will be selected:GRAITECWhat’s new in Graitec Advance PowerPack 2016 – R2
Note:The Inverse checkbox excludes from the selection the filtered reinforcement.Following the example, all rebar, except the ones with a 13 mm diameter, will beselected.Note:The command can be applied per project as a whole (if nothing is selected), orpartially (if a group of elements is selected).18: SELECT BY REBAR NUMBERThe Select by Rebar Number tool allows the selection of all instances of a rebar or fabricsheet mark to consistently edit the properties (such as diameter, hooks, rebar shape, etc.)The user selects one rebar/rebar set from the project and all bars within the project will beautomatically included in the selection.Note:Selection can be performed by choosing either the reinforcement itself or its tag.GRAITECWhat’s new in Graitec Advance PowerPack 2016 – R2
19: DELETE BY REBAR NUMBERThe Delete by Rebar Number command is used to delete all reinforcement instances of abar number. This operation can be applied separately for rebar or fabric sheets.The selection can be applied in two different ways: Choose a rebar number from the corresponding dropdown list (at which point allinstances with the specified rebar number will be selected); Manually select one rebar in the project (use Fill form by selecting reinforcementin Revit ).The Enable selection to be modified before processing option allows the user to choosewhich bars to delete in the situation when a certain mark can be found more than once in theproject - exclude some bars from the delete selection, or delete all instances.Note:If the option is disabled, all instances of the selected rebar number willautomatically be deleted.GRAITECWhat’s new in Graitec Advance PowerPack 2016 – R2
20: BENDING DETAILGRAITEC PowerPack for Revit 2016 R2 offers the user the option to automatically createrebar shape details for multiple rebar at once, through the Bending Detail tool.The input of the command consists in the selection of multiple reinforcement, regardless oftheir shape or quantity.The partial lengths displayed on each segment can be calculated using three differentmethods: Exact Leg Sum Length Between AxesGRAITECWhat’s new in Graitec Advance PowerPack 2016 – R2
The details are created as groups with specific line types and annotations, which can beeasily modified to obtain the desired display of the reinforcement detail.The stirrups can be displayed in three different ways: Standard Offset UnfoldNote:The update of the bending details already created is applied only if the option“Update detail automatically” is enabled. Changes performed over the geometry orthe shape of the rebar are applied to the bending details if they are validated byclicking in the drawing area.GRAITECWhat’s new in Graitec Advance PowerPack 2016 – R2
SYMBOLS AND DIMENSIONSThis set of tools offers representation styles for rebar sets in addition to the ones that arenative to Revit .There are three separate tools offering different representations of the rebar sets: DimensionRebar, Tag Rebar, and Detail Rebar. Each of them can be customized individually, using theReinforcement Configuration dialog.21: DIMENSION REBARThe Dimension Rebar tool displays a symbolic representation of a rebar set to show onlyindividual single rebar together with a dimension line (this can be customized to not bedisplayed, if required). The rebar object is no longer visible in this view. This tool is especiallyrecommended for rebar sets in beams and columns.Note:The dimension line display is optional and can be set using the ReinforcementConfiguration – Symbols & dimensions tab. When displayed, the user can alsoset the dimension type from the dropdown list.The rebar presentation can also be set through the same configuration dialog: All bars No bars Extremity barsGRAITECWhat’s new in Graitec Advance PowerPack 2016 – R2
Two bars edge Three bars edge Central bar Two bars in the middle Three bars in the middle22: TAG REBARThe Tag Rebar tool displays a symbolic representation of a rebar set together with adimension line and annotation. The rebar object will no longer be visible in this view.Note:The dimension line and annotation display are optional and can be set using theReinforcement Configuration – Symbols & dimensions tab. When displayed,the user can also set the dimension type and annotation type from the dropdownlists.GRAITECWhat’s new in Graitec Advance PowerPack 2016 – R2
23: DETAIL REBARThe Detail Rebar tool places a rebar shape detail turned into the plane of the paper, adimension line and an annotation on top of a selected rebar set. Therefore, the rebar setbecomes hidden.Note:The dimension line, annotation and detail display are optional and can be set usingthe Reinforcement Configuration – Symbols & dimensions tab. When displayed,the user can also set the dimension type and annotation type from the dropdownlists.24: SHOW REBARThe Show Rebar tool deletes the symbolic representation of a rebar set and reveals therebar set.Note:This tool is the undo command for the Symbol and Dimensions set of tools.25: AUTOMATIC SYMBOLSChecking the Rebar automatic symbol updater effects the automatic creation of symbolsimmediately after the generation of the rebar.GRAITECWhat’s new in Graitec Advance PowerPack 2016 – R2
26: AUTOMATIC UPDATEChecking Rebar modification updater allows the user to choose what will happen to arebar after it has been edited: either it receives a new rebar number, or all instances of theselected bar are modified.MODELINGGRAITEC PowerPack for Revit 2016 R2 brings up two new modeling tools, in order to havea clearer image of the model and ease the design process within the project.27: CATEGORIY VISIBILITYThis tool offers the user the possibility to quickly switch the visibility selected categories ofobjects (floors, walls, windows, etc.) in the current view.It behaves like an interactive switching of elements’ visibility and can be applied separately foreach view. Its major advantage is that it is easy to use, and results can be seen in real-time.GRAITECWhat’s new in Graitec Advance PowerPack 2016 – R2
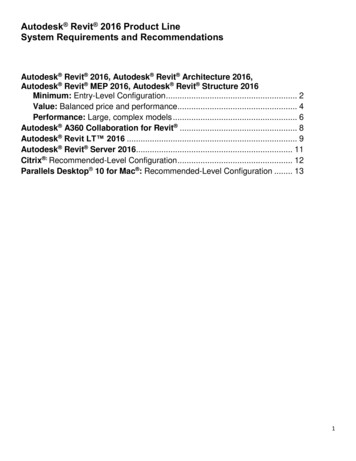
28: SHARED PARAMETERS FOR FOUNDATIONSThe Foundation Elevation option generates the G. Foundation Top Level and G.Foundation Bottom Level parameters, which interrogate the top and bottom elevation ofthe foundation.29: JOIN OPENINGSThe Join Openings tool allows the user to connect two or more selected openings from thesame host.Two options for the shape of the final opening are available: Join into optimal openings Join into one rectangular openingGRAITECWhat’s new in Graitec Advance PowerPack 2016 – R2
Join into optimal openingThis command joins selected openings and creates one or more new openings with theoptimal area. In most cases, openings are created with a smaller area than when applyingthe Join into one rectangular opening command.For three selected openings, the ones from the
GRAITEC What's new in Graitec Advance PowerPack 2016 - R2 REBAR SET GRAITEC PowerPack for Revit 2016 R2 offers several tools adjustfor ing reinforcement to the desired parameters.One of the groups contains editing command applicable to the s reinforcement sets: Explode Rebar Set, Split Rebar Set, Isolate Rebar Set, and Unite Rebar Sets.