Transcription
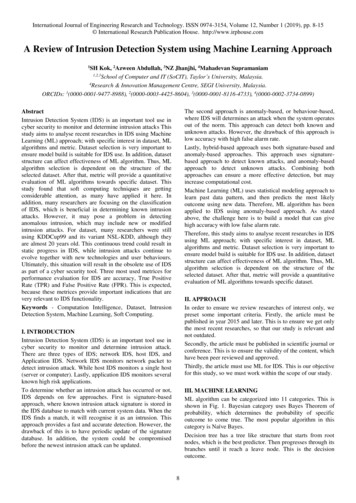
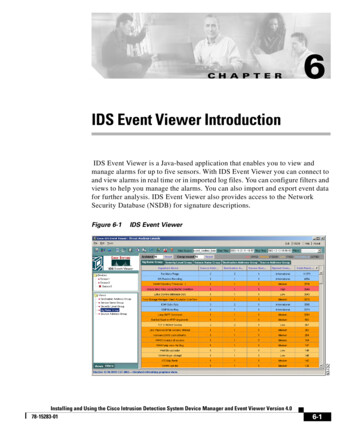
C H A P T E R6IDS Event Viewer IntroductionIDS Event Viewer is a Java-based application that enables you to view andmanage alarms for up to five sensors. With IDS Event Viewer you can connect toand view alarms in real time or in imported log files. You can configure filters andviews to help you manage the alarms. You can also import and export event datafor further analysis. IDS Event Viewer also provides access to the NetworkSecurity Database (NSDB) for signature descriptions.Figure 6-1IDS Event ViewerInstalling and Using the Cisco Intrusion Detection System Device Manager and Event Viewer Version 4.078-15283-016-1
Chapter 6IDS Event Viewer IntroductionSystem RequirementsSystem RequirementsIDS Event Viewer can be installed on the following platforms (English versiononly): Windows NT 4 Service Pack 6. Windows 2000 Service Pack 2.IDS Event Viewer installs and uses the following support applications: Java 2 Runtime Environment Version 1.3.1. MySQL server Version 3.23.IDS Event Viewer can be installed on a system that meets or exceeds the followingminimum hardware requirements: Pentium III 800 Mhz or greater. 256 MB Ram. 500 MB free disk space.Working with IDS Event ViewerIDS Event Viewer enables you to view and manage alarm feeds from up to fivesensors. The following task flow outlines the high-level tasks for configuring andworking with IDS Event Viewer.Step 1WarningInstall and start IDS Event Viewer.You cannot upgrade from version 3.1 to version 4.0. If you have IDS Event Viewer3.1, you must uninstall that version before installing version 4.0.For more information, see the following references:6-21.Installing IDS Event Viewer, page 6-42.Uninstalling IDS Event Viewer, page 6-53.Starting IDS Event Viewer, page 6-6Installing and Using the Cisco Intrusion Detection System Device Manager and Event Viewer Version 4.078-15283-01
Chapter 6IDS Event Viewer IntroductionWorking with IDS Event ViewerStep 2Specify the devices you will monitor with IDS Event Viewer.For more information, see the following references:Step 31.Adding a Device, page 6-72.Reviewing Device Status, page 6-103.Accessing the IDS Device Manager, page 6-12Configure filters and views to specify the alarms you want to view.For more information, see the following references:Step 41.Creating a Filter, page 6-132.Creating a View, page 6-18Configure refresh cycle settings and database archival settings and verifyapplication settings.For more information, see the following references:Step 51.Configuring Refresh Cycle Settings, page 6-212.Configuring Data Archival Settings, page 6-233.Specifying Web Browser Application Location, page 6-254.Specifying Ethereal Application Location, page 6-275.Specifying NSDB Folder Location, page 6-286.Changing the Auto Refresh View Setting, page 6-29View the events and individual alarms.For more information, see the following references:Step 61.Viewing Event Data, page 6-302.Working with Alarms, page 6-41Maintain the database by importing, exporting, and deleting event data.For more information, see Database Administration, page 6-44Installing and Using the Cisco Intrusion Detection System Device Manager and Event Viewer Version 4.078-15283-016-3
Chapter 6IDS Event Viewer IntroductionWorking with IDS Event ViewerInstalling IDS Event ViewerThe following procedure assumes that you have downloaded the IDS EventViewer executable file to the appropriate host.WarningYou cannot upgrade from version 3.1 to version 4.0. If you have IDS Event Viewer3.1, you must uninstall that version before installing version 4.0. Refer toUninstalling IDS Event Viewer, page 6-5, for more information.Before You BeginYou must be logged in to the host as a user with administrative privileges to installIDS Event Viewer.To install IDS Event Viewer, follow these steps:Step 1Locate and double-click the IDS Event Viewer executable to start the setupprogram.The Welcome panel of the IDS Event Viewer setup program appears.Step 2Click Next to proceed with the setup program.The Select Destination Location panel appears.Step 3To accept the default location for the IDS Event Viewer files, click Next.Otherwise, click Browse to locate a different folder, and then click Next.The Select Program Manager Group panel appears.Step 4Click Next to proceed with the setup program.The Start Installation panel appears.Step 5Click Next to proceed with the setup program.The Installing panel appears.Step 6Click Next to proceed with the setup program.The Installation Complete panel appears.6-4Installing and Using the Cisco Intrusion Detection System Device Manager and Event Viewer Version 4.078-15283-01
Chapter 6IDS Event Viewer IntroductionWorking with IDS Event ViewerStep 7Click Finish to complete the IDS Event Viewer setup program.The Install popup window appears.Step 8You must reboot this host to complete the IDS Event Viewer installation. ClickOK to reboot the host.Uninstalling IDS Event ViewerYou cannot upgrade from version 3.1 to version 4.0. Instead, you must uninstall3.1 before installing version 4.0.To uninstall IDS Event Viewer, follow these steps:Step 1Choose Start Programs Cisco Systems Cisco IDS Event Viewer Uninstall Cisco IDS Event Viewer.The Select Uninstall Method panel appears.Step 2Select Automatic, and then click Next.The Perform Uninstall panel appears.Step 3Click Finish to continue with the uninstallation.If you are uninstalling 3.1, the uninstallation program does not remove the pathsthat were created when 3.1 was installed. To complete the uninstallation of 3.1,you must manually remove the following paths from the Windows system PATHvariable: [drive letter:\.]Cisco IDS Event Viewer\MySQL\bin [drive letter:\.]Cisco IDS Event Viewer\JRE\bin [drive letter:\.]Cisco IDS Event Viewer\DataFeed\bin [drive letter:\.]Cisco IDS Event Viewer\IEV\bin [drive letter:\.]Cisco IDS Event Viewer\MySQL\lib\optThe Cisco IDS Event Viewer and MySQL services are stopped and removed alongwith the entire Cisco IDS Event Viewer directory.Installing and Using the Cisco Intrusion Detection System Device Manager and Event Viewer Version 4.078-15283-016-5
Chapter 6IDS Event Viewer IntroductionWorking with IDS Event ViewerStarting IDS Event ViewerTipEnsure the Windows NT services for IDS Event Viewer are running. You canreview the status of the Cisco IDS Event Viewer and MySQL services by selectingStart Settings Control Panel Services.To start IDS Event Viewer, follow these steps:Step 1Double-click the Cisco IDS Event Viewer shortcut on your desktop, orStep 2From the Windows Start menu, select Programs Cisco Systems Cisco IDSEvent Viewer Cisco IDS Event Viewer.Specifying Devices to MonitorIDS Event Viewer enables you to view alarms for up to five sensors at a time. Tospecify which five sensors IDS Event Viewer should monitor, you have to addeach sensor to the Devices folder. You can later change the properties associatedwith a device or delete a device from IDS Event Viewer. This section includes thefollowing procedures:6-6 Adding a Device, page 6-7 Editing Device Properties, page 6-10 Deleting a Device, page 6-10 Reviewing Device Status, page 6-10Installing and Using the Cisco Intrusion Detection System Device Manager and Event Viewer Version 4.078-15283-01
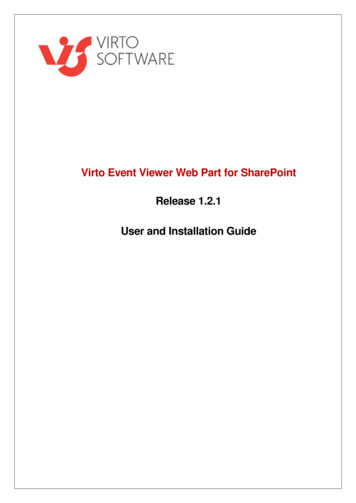
Chapter 6IDS Event Viewer IntroductionWorking with IDS Event ViewerAdding a DeviceTo add a sensor to the IDS Event Viewer Devices folder, follow these steps:Step 1From the IDS Event Viewer main menu, select File New Device.The Device Properties panel appears.Figure 6-2Step 2Device PropertiesComplete the following fields in the Device Properties panel: Sensor IP Address Sensor Name User NameInstalling and Using the Cisco Intrusion Detection System Device Manager and Event Viewer Version 4.078-15283-016-7
Chapter 6IDS Event Viewer IntroductionWorking with IDS Event Viewer Password Web Server PortThe information you provide in the Device Properties panel should matchthe settings you entered during initial configuration of the sensor. If youhave set up a user account with Viewer access for IDS Event Viewer,specify the username and password for that account.NoteStep 3To specify the communication protocol IDS Event Viewer should use whenconnecting to the sensor, select the Use encrypted connection (https) or Usenon-encrypted connection radio button.Step 4To specify what alerts to pull from the sensor, follow these steps:a.To pull the latest alerts from the sensor, select the Latest Alerts check box.IDS Event Viewer will receive alerts from the sensor, beginning with the firstalert the sensor receives after connecting with IDS Event Viewer.b.To pull alerts from the sensor eventStore, deselect the Latest Alerts checkbox and specify the following: Start Date Start TimeIDS Event Viewer will receive alerts from the sensor, beginning with the firstalert that matches the criteria you specified.Step 5To exclude alarms of a certain severity level, select one or more of the following: Informational Low Medium HighAlarms that match the severity level(s) you selected are not pulled from the sensorevent store and will not appear in the Statistical Graph.Step 6Click OK to close the Device Properties panel.IDS Event Viewer sends a subscription request to the sensor. This request remainsopen until you modify the device properties or delete the device.6-8Installing and Using the Cisco Intrusion Detection System Device Manager and Event Viewer Version 4.078-15283-01
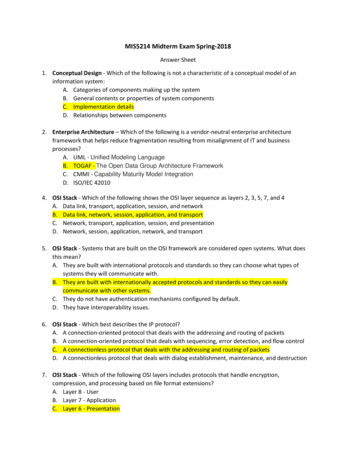
Chapter 6IDS Event Viewer IntroductionWorking with IDS Event ViewerNoteIf you specified https as the communication protocol, IDS Event Viewerretrieves the certificate information from the sensor and displays theCertificate Information dialog box. You must click Yes to accept thecertificate and continue the https connection between IDS Event Viewerand the sensor.Figure 6-3Step 7Certificate InformationRepeat Steps 1 through 3 for any additional sensors you want to monitor (up to 5).NoteIf IDS Event Viewer cannot connect to the sensor, a red X appears next tothe device name to indicate that no connection is present. IDS EventViewer continues trying to connect to the sensor every 20 seconds until aconnection is established or you delete the device from IDS Event Viewer.Installing and Using the Cisco Intrusion Detection System Device Manager and Event Viewer Version 4.078-15283-016-9
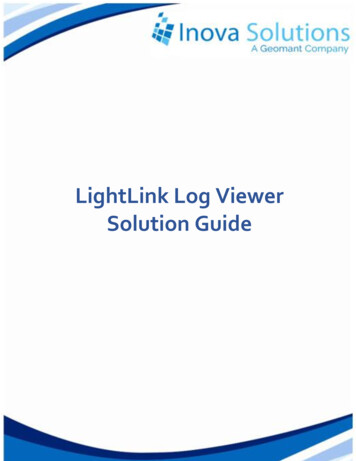
Chapter 6IDS Event Viewer IntroductionWorking with IDS Event ViewerEditing Device PropertiesTo edit properties for an existing device in the Devices folder, follow these steps:Expand the Devices folder to view the list of devices.Step 1Step 2Right-click the device you want to edit, and then click Properties.The Device Properties panel appears.Step 3Select and edit the properties you want change, and then click Update to saveyour changes.Deleting a DeviceTo delete a device from the Devices folder, follow these steps:Step 1Expand the Devices folder to view the list of devices.Step 2Right-click the device you want to delete, and then click Delete Device.The Device Deletion Confirmation dialog box appears.Step 3Click Yes to delete the device from the Devices folder.Reviewing Device StatusTo review the version information and connection status for a device, follow thesesteps:Step 1Expand the Devices folder to view the list of sensors.Step 2Right-click the sensor for which you want to review status information, and thenclick Device Status.The Device Status dialog box displays the Sensor Version, Device Status, WebServer Statistic Information, Event Server Statistic Information, and AnalysisEngine Statistic Information.6-10Installing and Using the Cisco Intrusion Detection System Device Manager and Event Viewer Version 4.078-15283-01
Chapter 6IDS Event Viewer IntroductionWorking with IDS Event ViewerFigure 6-4Device StatusIDS Event Viewer will return one of the following connection status responses: Subscription not open yet. Subscription successfully opened.Installing and Using the Cisco Intrusion Detection System Device Manager and Event Viewer Version 4.078-15283-016-11
Chapter 6IDS Event Viewer IntroductionWorking with IDS Event ViewerStep 3 Failed to open subscription. Check communication parameters. Network connection error. Is the web server running? Status unknown. IEV server program may not be running.To close the Device Status dialog box, click OK.Accessing the IDS Device ManagerYou can access IDS Device Manager for a particular sensor from IDS EventViewer.To access IDS Device Manager, follow these steps:Step 1Expand the Devices folder to view the list of sensors.Step 2Double-click the sensor you want to manage.The browser application opens and connects to the IP address for this sensor,using the port number and encryption specified in the Device Properties panel.Configuring FiltersFilters enable you to customize and refine your view of event data by specifyingalarms to exclude from your view. IDS Event Viewer ships with a default filter;however, you can create and store user-defined filters in the Filters folder. Thesefilters can later be applied to any default or user-defined view. This sectionincludes the following procedures:6-12 Creating a Filter, page 6-13 Editing Filter Properties, page 6-16 Deleting a Filter, page 6-17Installing and Using the Cisco Intrusion Detection System Device Manager and Event Viewer Version 4.078-15283-01
Chapter 6IDS Event Viewer IntroductionWorking with IDS Event ViewerCreating a FilterTo create a filter, follow these steps:Step 1From the IDS Event Viewer main menu, select File New Filter.The Filter Properties panel appears.Figure 6-5Filter PropertiesStep 2To name the filter, type an alpha or numeric text string (up to 64 characters) in theFilter Name field.Step 3To filter alarms by severity, select the By Severity check box under FilterFunctions and select one or more of the following severity level check boxes:Informational, Low, Medium, or High.Installing and Using the Cisco Intrusion Detection System Device Manager and Event Viewer Version 4.078-15283-016-13
Chapter 6IDS Event Viewer IntroductionWorking with IDS Event ViewerStep 4To filter alarms by source address or destination address, select the By SrcAddress or By Dst Address check box, respectively, under Filter Functions andperform the following steps:a.To include an IP address or range, select the Included radio button. Toexclude an IP address or range, select the Excluded radio button.b.To specify a single IP address, select the Unique radio button, enter a validIP address in the IP Address field, and then click Add.The IP address is added to the group of addresses excluded or included(depending on what you selected) by this filter.c.To specify a range of IP addresses, select the Range radio button, enter a validstarting IP address in the Start Address field and a valid ending IP address inthe End Address field, and then click Add.The IP address range is added to the group of addresses excluded or included(depending on what you selected) by this filter.d.Step 5To filter alarms by signature name, select the By Signature Name check boxunder Filter Functions and follow these steps:a.6-14Repeat Step 4 to continue adding IP addresses or ranges of IP addresses.To locate a signature, click one of the following tabs: Attack—Identifies the attack classification categories. You can select anattack category, such as Denial of Service, to exclude all signaturescontained in that category. L2/L3/L4 Protocol—Identifies the Layer 2, 3, and 4 protocol categories.You can expand each protocol category to view the individual signaturescontained in that category. You can select an entire protocol category,such as UDP signatures, to exclude all signatures contained in thatcategory. OS—Identifies the operating system categories. You can expand eachoperating system category to view the individual signatures contained inthat category. You can select an entire operating system category, such asWindows NT, to exclude all signatures contained in that category. Service—Identifies the service categories. You can expand each servicecategory to view the individual signatures contained in that category. Youcan select an entire service category, such as DNS, to exclude allsignatures contained in that category.Installing and Using the Cisco Intrusion Detection System Device Manager and Event Viewer Version 4.078-15283-01
Chapter 6IDS Event Viewer IntroductionWorking with IDS Event ViewerFigure 6-6b.Filter PropertiesTo exclude individual signatures, expand the appropriate signature categoryand select the desired signatures.The signatures you select are excluded by this filter.Step 6To exclude alarms by sensor, select the By Sensor Name check box under FilterFunctions and choose a sensor from the Devices folder.Step 7To exclude alarms by time and date, select the By UTC Time check box underFilter Functions and follow these steps:a.Enter a valid numerical start date, beginning with the 4-digit year, and thenthe 2-digit month and day in the Start Date field.b.Enter a valid start time, beginning with the 2-digit hour, and then minute andseconds in the Start Time field.Tip16:00:00 is the equivalent to 4:00 p.m.Installing and Using the Cisco Intrusion Detection System Device Manager and Event Viewer Version 4.078-15283-016-15
Chapter 6IDS Event Viewer IntroductionWorking with IDS Event Viewerc.Enter a valid numerical end date, beginning with the 4-digit year, and then the2-digit month and day in the End Date field.d.Enter a valid end time, beginning with the 2-digit hour, and then minute andseconds in the End Time field.22:30:00 is the equivalent to 10:30 p.m.Tipe.Step 8Step 9Repeat Step 7 to add additional time periods.To exclude alarms by status, select the By Status check box under FilterFunctions and select one or more of the following status level check boxes: New Acknowledged Assigned Closed DeletedTo save the filter, click OK.The filter is added to the Filters folder and can now be used in a view.Editing Filter PropertiesTo edit the properties for an existing filter in the Filters folder, follow these steps:Step 1Expand the Filters folder to view the list of defined filters.The Filter Properties panel appears.Step 26-16Right-click the filter you want to edit, and then click Properties.Installing and Using the Cisco Intrusion Detection System Device Manager and Event Viewer Version 4.078-15283-01
Chapter 6IDS Event Viewer IntroductionWorking with IDS Event ViewerStep 3Select and edit the properties, as appropriate, listed under Filter Functions, andthen click OK.A dialog box appears and warns you that you are about to overwrite the existingfilter with the edited filter.Step 4Click Yes to overwrite the existing filter and save your changes.Deleting a FilterTo delete a filter from the Filters folder, follow these steps:Step 1Expand the Filters folder to view the list of defined filters.The Filter Deletion Confirmation dialog box appears.Step 2Right-click the filter you want to delete, and then click Delete Filter.Step 3Click Yes to delete the filter from the Filters folder.Configuring ViewsViews enable you to analyze filtered event data from a specified source. IDSEvent Viewer ships with five default views; however, you can use the View Wizardto create and store user-defined views in the Views folder. This section includesthe following procedures: Creating a View, page 6-18 Editing View Properties, page 6-20 Deleting a View, page 6-21Installing and Using the Cisco Intrusion Detection System Device Manager and Event Viewer Version 4.078-15283-016-17
Chapter 6IDS Event Viewer IntroductionWorking with IDS Event ViewerCreating a ViewTo create a view, follow these steps:Step 1From the IDS Event Viewer main menu, select File New View.The View Wizard appears.Step 2To name the view, enter an alpha or numeric text string (up to 64 characters) inthe View Name field.Step 3To specify a filter, select the Use Filter check box and choose a filter from the list.Step 4To specify how alarms are grouped in the table, select a grouping style underSelect the grouping style on alarm aggregation table.Step 5To specify the columns that should appear in the table, select one or more checkboxes under Select the columns initially shown on alarm aggregation table.Step 6To specify sort order for the columns, select an option from the ColumnSecondary Sort Order list.Step 7Click Next to advance to the final panel of the View Wizard.The final panel of the View Wizard appears.6-18Installing and Using the Cisco Intrusion Detection System Device Manager and Event Viewer Version 4.078-15283-01
Chapter 6IDS Event Viewer IntroductionWorking with IDS Event ViewerFigure 6-7Step 8View WizardTo specify the alarms that should populate this view, select a source from theChoose a data source list box.NoteTo view alarms in real time, select event realtime table. IDS EventViewer also comes with a demo table. If the data source you want to usehas not yet been established, you can select the default source(event realtime table) and later edit the view to associate a different datasource.Installing and Using the Cisco Intrusion Detection System Device Manager and Event Viewer Version 4.078-15283-016-19
Chapter 6IDS Event Viewer IntroductionWorking with IDS Event ViewerStep 9To specify the columns that should appear in the alarm detail, select one or morecolumns from the Select the columns initially shown on alarm detail table list.You can rearrange the order of these columns by using the Up or Down buttons.Step 10To save your changes and create the view, click Finish.The view is added to the Views folder.Editing View PropertiesTipIf you only need to change the data source associated with this view, right-clickthe view and select Data Source. From the Change Data Source panel you canselect a new source for the current view. For more information, see Specifying aData Source, page 6-31.To edit the properties for an existing view in the Views folder, follow these steps:Step 1Expand the Views folder to view the list of defined views.The View Wizard appears.Step 2Right-click the view you want to edit, and then click Properties.Step 3Select and edit the view name, associated filter, grouping style, columns, or sortorder. Or, click Next to advance to the final panel from which you can edit the datasource and columns for the alarm detail.Step 4Click Finish to accept your changes.A dialog box appears and warns you that you are about to overwrite the existingview with the edited view.Step 56-20Click Yes to overwrite the existing view and save your changes.Installing and Using the Cisco Intrusion Detection System Device Manager and Event Viewer Version 4.078-15283-01
Chapter 6IDS Event Viewer IntroductionWorking with IDS Event ViewerDeleting a ViewTo delete a view from the Views folder, follow these steps:Step 1Expand the Views folder to view the list of defined views.The View Deletion Confirmation dialog box appears.Step 2Right-click the view you want to delete, and then click Delete View.Step 3Click Yes to delete the view from the Views folder.Configuring PreferencesFrom the Edit menu, you can specify how often contents in a graph or table vieware refreshed. You can also configure archival settings to optimize performance.This section includes the following procedures: Configuring Refresh Cycle Settings, page 6-21 Configuring Data Archival Settings, page 6-23Configuring Refresh Cycle SettingsTo configure the Refresh Cycle settings, follow these steps:Step 1From the IDS Event Viewer main menu, select Edit Preferences RefreshCycle.The Refresh Cycle tab of the Preferences panel appears.Installing and Using the Cisco Intrusion Detection System Device Manager and Event Viewer Version 4.078-15283-016-21
Chapter 6IDS Event Viewer IntroductionWorking with IDS Event ViewerFigure 6-8Step 26-22Refresh CycleTo set the automatic refresh, perform one of the following steps:a.To set the automatic refresh to occur every 1 to 59 minutes, select the EveryMinute(s) radio button, select a time interval from the list, and then clickApply.b.To set the automatic refresh to occur every 1 to 23 hours, select the EveryHour(s) radio button, select a time interval from the list, and then clickApply.Installing and Using the Cisco Intrusion Detection System Device Manager and Event Viewer Version 4.078-15283-01
Chapter 6IDS Event Viewer IntroductionWorking with IDS Event ViewerStep 3c.To set the automatic refresh to occur once a day, select the Every day at timeradio button, select a specific time from the list, and then click Apply.d.To stop the automatic refresh, select the Stop Auto Refresh radio button, andthen click Apply.To close the Preferences panel, click the Close button.Configuring Data Archival SettingsIDS Event Viewer includes a database archival feature that enables you to archivereal-time events and ensure available disk space for incoming events. Twothresholds control the archival process. The first is a time interval and the secondis a maximum number of records. Crossing either threshold triggers the archivalprocesses.If the time interval threshold is crossed, all records with a status matching thearchival settings are moved from event realtime table toarchive table.timestamp. Any alarms with a status set to Deleted are deleted.If the maximum records threshold is crossed, any alarms with a status set toDeleted are deleted from the event realtime table. Then, all records with a statusmatching the archival settings are moved from event realtime table toarchive table.timestamp. If, after the initial archival process, theevent realtime table still contains more than half of the maximum number ofrecords allowed, the archival process continues to archive and remove records(except those with a status set to New). If the number of records remainingexceeds the maximum number of records allowed, all remaining records arearchived, including those with a status set to New.To configure data archival settings, follow these steps:Step 1From the IDS Event Viewer main menu, select Edit Preferences DataArchival Setup.The Data Archival Setup tab of the Preferences panel appears.Step 2To specify the alarms that you want to archive, select one or more of the followingalarm status check boxes: New AcknowledgedInstalling and Using the Cisco Intrusion Detection System Device Manager and Event Viewer Version 4.078-15283-016-23
Chapter 6IDS Event Viewer IntroductionWorking with IDS Event ViewerStep 3 Assigned ClosedTo enable a time interval threshold, select Enable time schedule for archivingevents and follow these steps:a.To set the archival to occur every 1 to 59 minutes, select the EveryMinute(s) radio button and select a time interval from the list.b.To set the archival to occur every 1 to 23 hours, select the Every Hour(s)radio button and select a time interval from the list.c.To set the archival to occur once a day, select the Every day at time radiobutton and select a specific time from the list.Step 4To specify the maximum number of real-time events to allow in theevent realtime table, enter a numerical value (from 1000 to 1,000,000) in theMaximum number of events in ‘event realtime table’ field. When thisthreshold is met, IDS Event Viewer begins to archive events to make room for newevents in the event realtime table.Step 5To specify the maximum number of archived files, enter a numerical value (from10 to 400) in the Maximum number of archived files field. When this thresholdis met, IDS Event Viewer begins to compress half of the oldest archived files andmoves them to the compressed directory.Step 6To specify the maximum number of compressed archived files, enter a numericalvalue (from 10 to 400) in the Maximum number of compressed archived filesfield. When this threshold is met, IDS Event Viewer begins to purge half of theoldest compressed archived files.Note6-24To maintain available disk space for a full event realtime table, IDSEvent Viewer purges compressed and archived files on a first-in, first-outbasis until the available disk space is greater than three times the spaceneeded.Step 7To save your changes, click Apply.Step 8To close the Preferences panel, click the Close button.Installing and Using the Cisco Intrusion Detection System Device Manager and Event Viewer Version 4.078-15283-01
Chapter 6IDS Event Viewer IntroductionWorking with IDS Event ViewerConfiguring Application SettingsIDS Event Viewer relies on supporting applications to carry out database,retrieval, and communication functions. From the Edit menu, you can specify thelocation of these supporting applications. This section includes the followingprocedures: Specifying Web Browser Application Location, page 6-25 Specifying Ethereal Application Location, page 6-27 Specifying NSDB Folder Location, page 6-28 Configuring Refresh Cycle Settings, page 6-21Specifying Web Browser Application LocationNoteIDS Event Viewer detects the location of your web browser when you install IDSEvent Viewer. You only need to specify the location of the browser application ifyou later move the Internet Explorer or Netscape executable file to a differentdirectory.NoteIDS Event Viewer version 4.0 supports Internet Explorer versions 5.5 and laterand Netscape versions 4.7 and later.Installing and Using the Cisco Intrusion Detection System Device Manager and Event Viewer Version 4.078-15283-016-25
Chapter 6IDS Event Viewer IntroductionWorking with IDS Event ViewerTo specify the location of your browser, follow these steps:Step 1From the IDS Event Viewer main menu, select Edit Applications Settings.The Application Settings panel appears.Figure 6-96-26Application SettingsStep 2Enter the path, beginning with the drive letter, to the Internet Explorer or Netscapeexecutable file in the HTML Browser Location field, or click Browse to locate thefile.Step 3Click OK to accept your changes and close the Application Settings panel.Installing and Using th
Step 1 Locate and double-click the IDS Event Viewer executable to start the setup program. The Welcome panel of the IDS Event Viewer setup program appears. Step 2 Click Next to proceed with the setup program. The Select Destination Location panel appears. Step 3 To accept the default location for the IDS Event Viewer files, click Next.