Transcription
Creating a greeting cardCorel Photo Album includes templates that you can use to create special greetingcards containing your own photos and messages. Just select a style and layout, dragyour photo into the cell, and add text. Print and fold it, and you’re done!What you’ll need: a digital photoCorel Photo Albuma printerhigh-quality card stock paperWhen you complete this tutorial, you’ll be able to select a greeting card projectchoose a style and layoutdrag a photo into a celladd textsave your greeting cardprint your greeting cardfold your greeting cardCreating a greeting card1
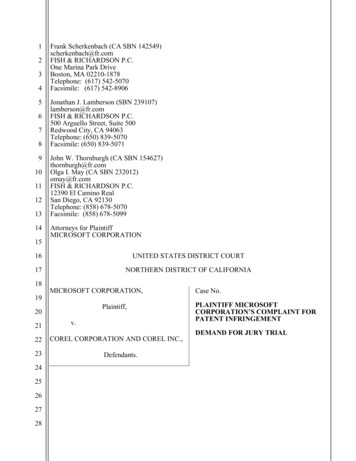
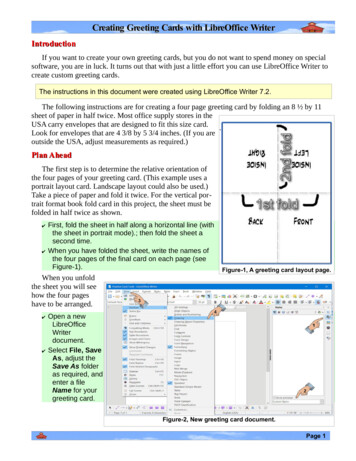
To create a greeting card1 Click the Find tab, and open the folder that contains the photo you want to use.2 When you have found your photo, click the Create tab to display the availableprojects, and select Greeting Card.3 On the Settings panel, choose an option from the Style drop-list to specify whetheryou want the card to be folded in half (Single-Fold) or folded in quarters (DoubleFold). We chose Double-Fold for our card, but you can choose whichever fold youlike.2
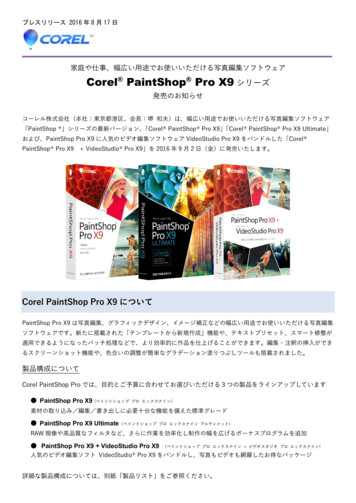
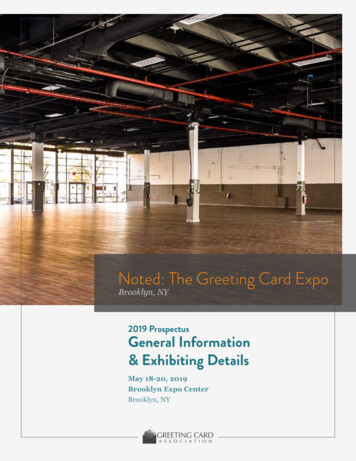
4 On the Settings panel, select a layout for your greeting card.We selected Layout H-1b, but you can choose whichever one you like. Be sure tochoose a page style that contains the correct cell orientation for your photos —either landscape or portrait.Tip: You can use the Steps panel to view instructions for creating your greetingcard. Click the Steps button on the toolbar to turn the Steps panel on or off.3
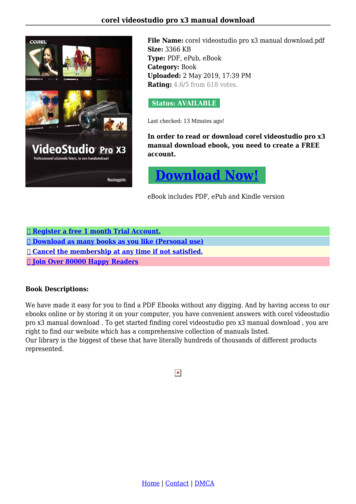
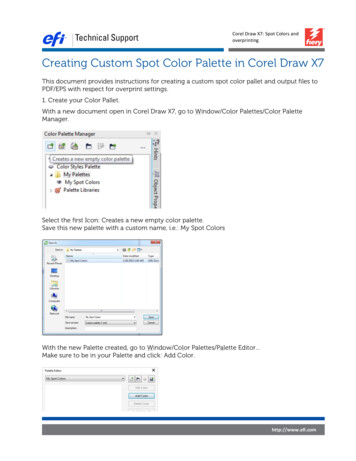
5 From the Photo Strip, click a photo, and drag it into the cell of the greeting card.If you make a mistake, you can remove a photo from a cell by simply dragginganother photo into the cell and placing it on top of the photo you want to remove.6 If you need to adjust a photo, click one of the following buttons on the Settingspanel: Fill to Frame button — enlarges the photo to fill the cell. You may notice thatsome parts of the photo are cropped. Fit Frame button — shows the entire photo in the cell. Some parts of the photomay be hidden. Rotate Right and Rotate Left buttons — changes the photo orientation Zoom Tool button — increases or decreases the size of the photo in the cell4
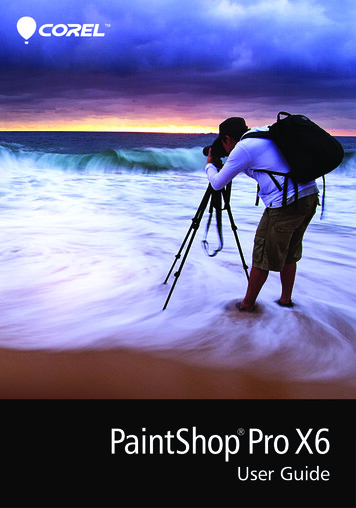
7 Click in the text field, and enter a message for your greeting card. On the Settingspanel, type your message in the Text field.Notice that the text automatically displays in the Text cell. To adjust textformatting, highlight the text on the Settings panel, and do any of the following: Select a text style from the Font drop-down list. Select the text point size from the Size drop-down list. Choose a color for the text from the Color drop-down list. Change the font style by clicking the Bold, Italic, or Underline button. Change the text alignment by clicking the Left, Center, or Right alignmentbutton.Tip: To get a better idea of how the greeting card will look when printed, click thePreviewbutton to turn off the cell borders.5
8 To print your greeting card, Click the Printbutton on the toolbar.9 To produce a high-quality printout, click the Properties button, select the type ofpaper, and select the highest possible setting for print quality, and then click OK.10 On the Print dialog box, click OK to print your card.6
If you are printing a single-fold card, the program pauses after the first side hasprinted. Reinsert the paper, and click OK to print the other side.If you have printed a single-fold card, simply fold the card in half. If you haveprinted a double-fold card, fold your card in half horizontally, and then fold thecard in half vertically.Next Steps: In this tutorial, you learned how easy it is to create your own greeting card!To learn how to choose and view your favorite photos, see the tutorial “Choosing andviewing your favorite photos.”7
If you are printing a single-fold card, the program pauses after the first side has printed. Reinsert the paper, and click OK to print the other side. If you have printed a single-fold card, simply fold the card in half. If you have printed a double-fold card, fold your card in half horizontally, and then fold the card in half vertically.