Transcription
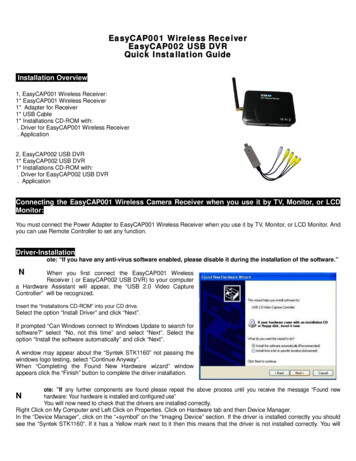
EasyCAP001 Wireless ReceiverEasyCAP002 USB DVRQuick Installation GuideInstallation Overview1, EasyCAP001 Wireless Receiver:1* EasyCAP001 Wireless Receiver1* Adapter for Receiver1* USB Cable1* Installations CD-ROM with:. Driver for EasyCAP001 Wireless Receiver. Application2, EasyCAP002 USB DVR1* EasyCAP002 USB DVR1* Installations CD-ROM with:. Driver for EasyCAP002 USB DVR. ApplicationConnecting the EasyCAP001 Wireless Camera Receiver when you use it by TV, Monitor, or LCDMonitor:You must connect the Power Adapter to EasyCAP001 Wireless Receiver when you use it by TV, Monitor, or LCD Monitor. Andyou can use Remote Controller to set any function.Driver-Installationote: “If you have any anti-virus software enabled, please disable it during the installation of the software.”NWhen you first connect the EasyCAP001 WirelessReceiver ( or EasyCAP002 USB DVR) to your computera Hardware Assistant will appear, the “USB 2.0 Video CaptureController” will be recognized.Insert the “Installations CD-ROM”into your CD drive.Select the option “Install Driver”and click “Next”.If prompted “Can Windows connect to Windows Update to search forsoftware?” select “No, not this time” and select “Next”. Select theoption “Install the software automatically”and click “Next”.A window may appear about the “Syntek STK1160”not passing thewindows logo testing, select “Continue Anyway”.When “Completing the Found New Hardware wizard” windowappears click the “Finish”button to complete the driver installation.ote: ”If any further components are found please repeat the above process until you receive the message “Found newhardware: Your hardware is installed and configured use”You will now need to check that the drivers are installed correctly.Right Click on My Computer and Left Click on Properties. Click on Hardware tab and then Device Manager.In the “Device Manager”, click on the “ symbol”on the “Imaging Device”section. If the driver is installed correctly you shouldsee the “Syntek STK1160”. If it has a Yellow mark next to it then this means that the driver is not installed correctly. You willN
need to remove the driver and disconnect theEasyCAP001 Wireless Receiver (or EasyCAP002 USBDVR) from the computer and re-connect is to install thedriver again.Software InstallationTo start the Application Installation, click Start / Run then type yourCD-ROM and click “Install.Select your language for the installation and Click “Next”or / and“Install”.Click “finish”to complete setup, restart your computer if needed.Run EasyViewer which you just installed.Introduction EasyViewerEasyViewer
EasyViewer is a 4-channel wireless video surveillancesoftware for Windows. It has advanced video viewer separatealgorithm, various alert functions including schedule timer sanp,channel control, and sound. It can handle up to 4-channelsvideo input, captures images up to 30 frames per second fromUSB video capture device. It uses be installed in Windows'svideo encoder and audio encoder , high quality video and audioeffect , record file format AVI. The files can played withWindows Media Player or Real Player etc. JPEG imagesnapshots can be made from video images. Other featuresinclude secure Manual Control Channel, audio listening etc.Features1. Send e-mails attachment with image.2. Save image on Hard Disk.3. Sound alarm.4. Video signal filter, for filtrate Active and Invalid channel.5. Signal lost alarm.6. Motion Detection.7. Adjustable sensitivity.8. Automatically lock, while not any operate.9. Schedule Monitoring sessions, for timer snap.10. Record video/audio(with usb2.0 audio interface),snap shot.11. Automatic Space Management. Stop recorder or capture still automatically on disk full.12. Support 4 Channel Video input on one computer.13. Support On Screen Display. Display’s date and time, or channel description on video.14. Supports manual open/close Invalid channel, or add/delete channel description.15. Supports login and logout, by User Name and Password.16. Supports running background stealthy.System requirementsWindows 2000/XP or betterPentium 4 of CPU or better512MB of RAM betterMicrosoft DirectX 9.0C
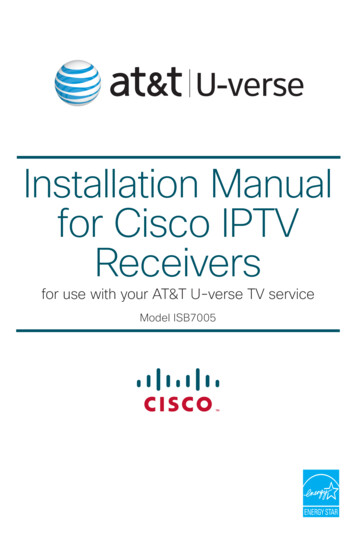
USB 2.0 free portAudio Card / True Color VGA CardEasyViewer Application User GuideThe EasyViewer Application can be started by clicking on the EasyViewer icon or by using the Start menu. The Following windowshould appear:A. Viewer Mode - Select viewer mode, such as Four Viewer, Big & Four Viewer and Single Viewer.B. Viewer Window - Show video image.C. Audio Play - For audio remote listening, with USB2.0 Audio interface .D. Login & Logout - Login and Logout the EasyViewer, by Username and Password.E. Camera/Channel Selection - Click the button, select Camera/Channel.F. Auto turning focus - Click the "ON" button to enable, and click the "OFF" button to disable.G. Channel Settings -Such as channel description, channel active/inactive etc.H. System Settings - Adjust video recorder settings, such as Save AVI File Path etc.I. Record -Start and end video recordJ. Property - Advanced Settings video picture settings and fine tuning.K. Show Stamp -Show EasyViewer's system information, such as channel description, etc.L. Timer Snap - Captures and saves a bitmap picture after Schedule end. Timer adjustable by clicking on have file optionsbutton. Ref. N)M. Snap Shot -Capture and saves an instant bitmap picture.N. Save File - Settings Schedule for timer snap, displays and allows capture of destination path and filename of bitmap
capture file.O. Security & Surveillance - Include E-Mail Sever Setup, Motion Detection Setup, Signal Lost Setup, Sensitivity Setup,and Auto Logout Setup.Schedule Timer Capture Still1. Settings Timer Snap Schedule and Save Image File Path[*](ref. N in Figure1)2. Click on Timer snap Button (ref. L in Figure1)(Note. Default files will be saved under EasyViewer\Picture )[*] Default Settings as follows Figure :Video Capturing1. Click on the Recorder button to begin recording. (ref. I inFigure1).2. To stop recording click on the same button.3. Output file path [*] can be changed by clicking the Systembutton ( ref. H in Figure1)[*] Default files will be saved under EasyViewer installingfolder. Such as: C:\Program Files\EasyViewer\Video
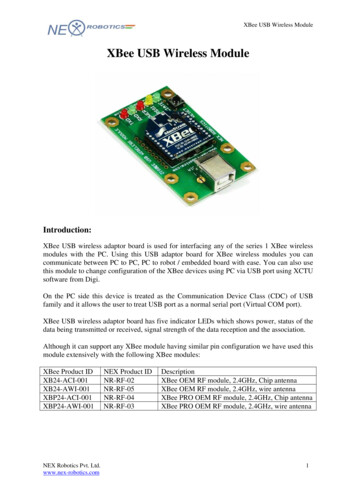
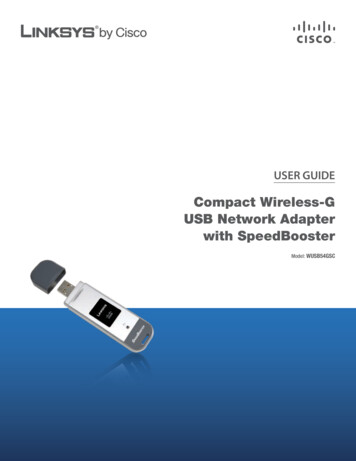
Channel SettingsYou can select the video channel active or inactive by simply selecting CH1 of the CH4 options. You can add chunneldescription in the viewer screen. The default setting as follows Figure :If you seletc the "Manual" button, EasyViewer will immediately stop control video channel, and main panel as showIf you click the "Reset" button, EasyViewer will start signal fiter for search the video channel again, and main panel asshowNote:You can click the "SEARCH" button, to stop search the video channel.Security&Surveillance SettingsYou can select the motion detection, signal lost alarm, auto logout active or inactive by simply selecting the options. Youcan adjust the sensibility. The setting as follows Figure :
If you select the "Open alarm sound" button, EasyViewer open alarm while condition active, and main panel as showNote:[1]You an click the "ALARM" button, to stop play sound.[2]Default still will be saved under EasyViewer installing folder. Such as C\Program Files\EasyViewer\Picture\Motion.Advanced SettingsThe advanced settings window allows the user to adjust image characteristics by clicking on the Camera Controls tab.Camera Controls TabUse the picture property window shown below to adjust picture quality. By sliding the Control Adjust Bar the effect can beseen immediately on the viewer window. These setting can be saved by clicking the save button or cancelled by restoring thedefaultsettings.Check Box control features include:- NTSC, PAL, Vertical Flip, Mirror Flip and Backlight Composition.
Driver for EasyCAP001 Wireless Receiver . Application 2, EasyCAP002 USB DVR 1* EasyCAP002 USB DVR 1* Installations CD-ROM with: . Driver for EasyCAP002 USB DVR . Application Connecting the EasyCAP001 Wireless Camera Receiver when you use it by TV, Monitor, or LCD Monitor: