Transcription
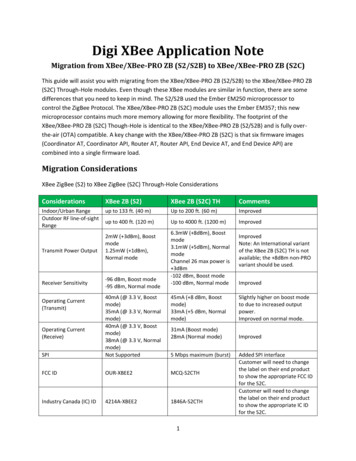
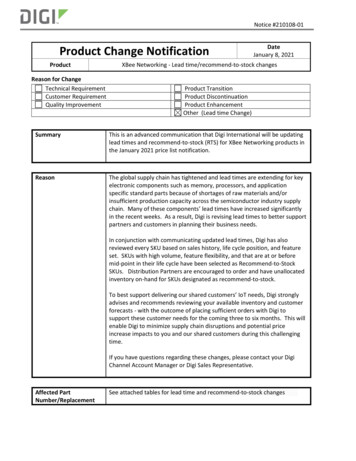
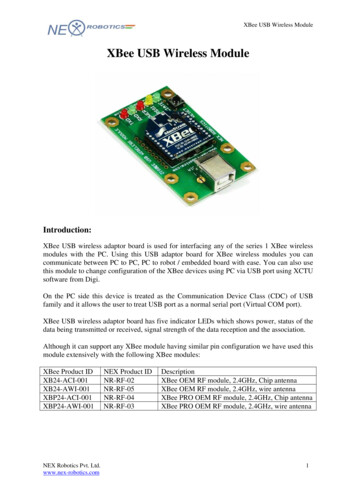
XBee USB Wireless ModuleXBee USB Wireless ModuleIntroduction:XBee USB wireless adaptor board is used for interfacing any of the series 1 XBee wirelessmodules with the PC. Using this USB adaptor board for XBee wireless modules you cancommunicate between PC to PC, PC to robot / embedded board with ease. You can also usethis module to change configuration of the XBee devices using PC via USB port using XCTUsoftware from Digi.On the PC side this device is treated as the Communication Device Class (CDC) of USBfamily and it allows the user to treat USB port as a normal serial port (Virtual COM port).XBee USB wireless adaptor board has five indicator LEDs which shows power, status of thedata being transmitted or received, signal strength of the data reception and the association.Although it can support any XBee module having similar pin configuration we have used thismodule extensively with the following XBee modules:XBee Product 01NEX Robotics Pvt. Ltd.www.nex-robotics.comNEX Product IDNR-RF-02NR-RF-05NR-RF-04NR-RF-03DescriptionXBee OEM RF module, 2.4GHz, Chip antennaXBee OEM RF module, 2.4GHz, wire antennaXBee PRO OEM RF module, 2.4GHz, Chip antennaXBee PRO OEM RF module, 2.4GHz, wire antenna1
XBee USB Wireless ModuleSpecification USB 2.0 compatible (No legacy RS232 required)USB poweredRXD, TXD, RSSI, ASSOSIATE indicator LEDsSupports AT and API commandsAchievable data rates: 2400-115200 bpsData output: CMOS(2.8-3.4V) UART interfaceSupported operating systems: Windows Server 2008 R2Windows 7Windows 7 x64Windows Server 2008Windows Server 2008 x64Windows VistaWindows Vista x64Windows Server 2003Windows Server 2003 x64Windows XPWindows XP x64Windows 2000XBee USB wireless module uses FT232 USB to serial converter to interface XBee modulewith the PC’s USB port. In order to use XBee USB wireless adaptor board you need to installdriver for FT232 USB to serial converter so that you can treat this XBee wireless module asconnected to a virtual serial port (Virtual COM port).Driver Installation:1.1 Steps to install the drivers for USB to serial converter:Step 1: Copy the driver installation folder on your PC from “Software and Drivers \ CDM2.06.00 WHQL Certified” Folder in the CD.Step 2: Connect the USB to serial converter with the PC using the USB cableStep 3: On connecting the device “Found New Hardware” message will appear in the taskbartray and the following window opens.Figure 1.1NEX Robotics Pvt. Ltd.www.nex-robotics.com2
XBee USB Wireless ModuleStep 4: Check on the radio button “No, not this time” and then click on the next button.Figure 1.2The following window will appear.Figure 1.3Select the second option manually to install the drivers and click on next button.NEX Robotics Pvt. Ltd.www.nex-robotics.com3
XBee USB Wireless ModuleStep 5: Now check the second option and set the location of folder containing driversE.g.(C:\CDM 2.06.00 WHQL Certified).Figure 1.4Step 6: On clicking next driver installation will begin.Figure 1.5NEX Robotics Pvt. Ltd.www.nex-robotics.com4
XBee USB Wireless ModuleStep 7: On successfully installing the driver following window will appear. Click Finish tocomplete the installation.Figure 1.6After installation of FT232 USB UART software, PC may ask for USB serial port software.To install this software follow steps 1 to 7 of USB serial converter software installation.NEX Robotics Pvt. Ltd.www.nex-robotics.com5
XBee USB Wireless Module1.2 Identifying COM Port number of the XBee wireless moduleTo use terminal.exe or any other serial program, we need to first identify communication portwhich is generally referred as COM n, i.e. COM1 or COM2 etc. on which USB to serialconverter or wireless device is connected. Follow these steps to identify your COM Portnumber.Step 1: Right Click My Computer and click on properties. System properties window willappear.Figure 1.7Step 2: Click on the Device manager in the Hardware tab.Figure 1.8NEX Robotics Pvt. Ltd.www.nex-robotics.com6
XBee USB Wireless ModuleStep 3: Expand Ports (Com & LPT) tree. COM Port number is mentioned in the parenthesisnext to USB Serial Port.Figure 1.9Step 4: If the COM port number is greater than 10 Terminal will not be able to detect it. Toresolve this problem, change the port number by right clicking on “USB serial Port” andselect properties.Figure 1.10In the Port settings tab click on the Advanced button, the following window will appear.NEX Robotics Pvt. Ltd.www.nex-robotics.com7
XBee USB Wireless ModuleFigure 1.11You can change the COM port number by clicking on the Com Port number drop down listand select the appropriate number. Make sure the new COM port is not being used by anyother.NEX Robotics Pvt. Ltd.www.nex-robotics.com8
XBee USB Wireless Module1.3 Using Terminal software:Terminal is easy to use free software for serial communication. It is located in thedocumentation CD. It can also be downloaded fromhttp://www.smileymicros.com/Step 1: Copy Terminal software on the PC from the documentation CD and double click onthe terminal software. The terminal window will popup.Figure 1.12Step 2: Select the COM Port and set the baud rate and other settings as desired. Once all thesettings are done click connect. Refer to section 1.2 for how to identify COM port. Set thebaud rate at 9600 bpsFigure 1.13NEX Robotics Pvt. Ltd.www.nex-robotics.com9
XBee USB Wireless ModuleStep 3: Now you are ready to transmit the data. Type the data into the text box and clicksend.For more information about using terminal software click help.Figure 1.14NEX Robotics Pvt. Ltd.www.nex-robotics.com10
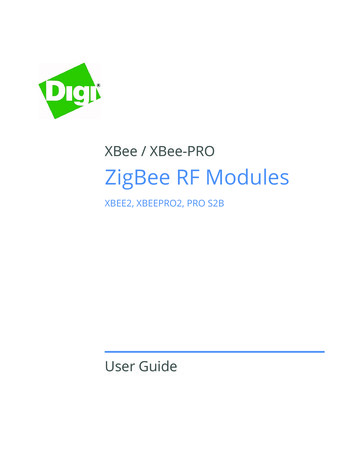
XBee USB Wireless ModuleXBee and XBee-PRO Configuration:All XBee and XBee-PRO modules are factory shipped at 9600 bps baud rate. We canconfigure the module’s baud rate, channel number, and network ID etc. by sending the set ofAT commands to the XBee Module using the XCTU software.Mount the compatible XBee module on the XBee USB Wireless module while USB cable isnot connected. Connect USB cable between PC and XBee USB Wireless module.Step 1: Copy the XCTU folder from the Documentation CD or you can also download itfrom the Digi’s website. Open the folder and run the application “40002637 c.exe” toinstall the XCTU terminal software.Start the XCTU application. Following window appears on the screen.Figure 1.15It will auto detect the virtual com port number of the XBee USB Wireless module and showin the “Select COM Port” window.Select appropriate COM port number.If you are using the XBee module for the first time then set the baud rate at 9600bps. If youhave changed the baud rate earlier then you have to set the same baud rate elsecommunication can not be established.NEX Robotics Pvt. Ltd.www.nex-robotics.com11
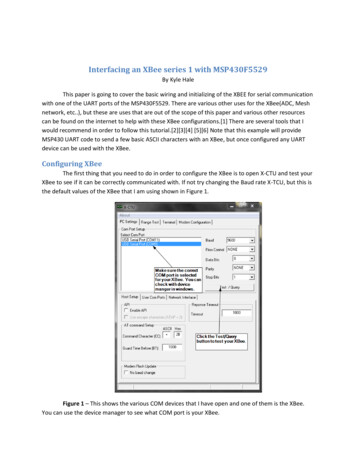
XBee USB Wireless ModuleBy selecting the proper comport no. (in this example as COM7), Baud rate (presently 9600)click on the “Test / Query” tab in the “PC Settings” tab at the top of X-CTU window. Ifcommunication is established correctly, then below response will be appeared.Figure 1.16Press ok to continue.If communication is not established, then retry with the proper baud rate and comportselection.Step 2: Select the “modem configuration” tab, at the top.Figure 1.17Click on the “Read” tab. Following option showing network and security, RF interfacing,sleep mode. serial interfacing, diagnostics will appear.NEX Robotics Pvt. Ltd.www.nex-robotics.com12
XBee USB Wireless ModuleFigure 1.18Using the side scroll, move the bar down till following “serial interfacing” option is seen.Figure1.19NEX Robotics Pvt. Ltd.www.nex-robotics.com13
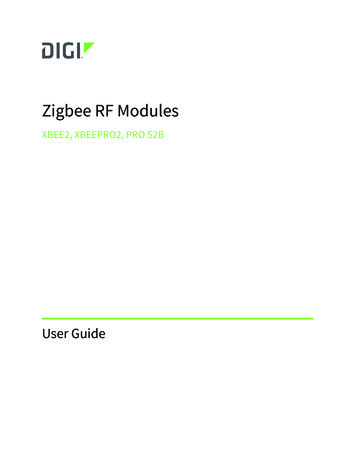
XBee USB Wireless ModuleStep 3: To choose the new Baud rate, select Baud rate from the “BD-Interface Data rate”(say 115200) selection as shown.Figure 1.20Click on the “write” tab to load the AT commands, After successful configuration thecompletion message will be shown at the bottom of window as “ WriteParameters Complete”.NEX Robotics Pvt. Ltd.www.nex-robotics.com14
XBee USB Wireless ModuleFigure1.21XBee or XBee-PRO module is now configured at Baud rate - 115200.NEX Robotics Pvt. Ltd.www.nex-robotics.com15
XBee USB Wireless ModuleNoticeThe contents of this manual are subject to change without notice. All efforts have been made to ensure theaccuracy of contents in this manual. However, should any errors be detected, NEX Robotics welcomes yourcorrections. You can send us your queries / suggestions atinfo@nex-robotics.comContent of this manual is released under the Creative Commence cc by-nc-sa license. For legal informationrefer to: egalcodeProduct’s electronics is static sensitive. Use the product in static free environment.Read the user manuals completely before start using this productRecycling:Almost all the part of this product are recyclable. Please send this product to the recycling plant after itsoperational life. By recycling we can contribute to cleaner and healthier environment for the future generations.NEX Robotics Pvt. Ltd.www.nex-robotics.com16
AT commands to the XBee Module using the XCTU software. Mount the compatible XBee module on the XBee USB Wireless module while USB cable is not connected. Connect USB cable between PC and XBee USB Wireless module. Step 1: Copy the XCTU folder from the Documentation CD or you can also download it from the Digi's website.