Transcription
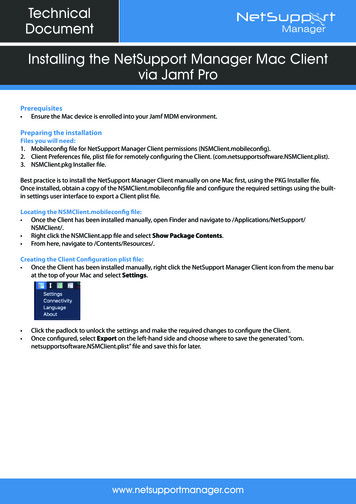
TechnicalDocumentInstalling the NetSupport Manager Mac Clientvia Jamf ProPrerequisites Ensure the Mac device is enrolled into your Jamf MDM environment.Preparing the installationFiles you will need:1. Mobileconfig file for NetSupport Manager Client permissions (NSMClient.mobileconfig).2. Client Preferences file, plist file for remotely configuring the Client. (com.netsupportsoftware.NSMClient.plist).3. NSMClient.pkg Installer file.Best practice is to install the NetSupport Manager Client manually on one Mac first, using the PKG Installer file.Once installed, obtain a copy of the NSMClient.mobileconfig file and configure the required settings using the builtin settings user interface to export a Client plist file.Locating the NSMClient.mobileconfig file: Once the Client has been installed manually, open Finder and navigate to /Applications/NetSupport/NSMClient/. Right click the NSMClient.app file and select Show Package Contents. From here, navigate to /Contents/Resources/.Creating the Client Configuration plist file: Once the Client has been installed manually, right click the NetSupport Manager Client icon from the menu barat the top of your Mac and select Settings. Click the padlock to unlock the settings and make the required changes to configure the Client.Once configured, select Export on the left-hand side and choose where to save the generated “com.netsupportsoftware.NSMClient.plist” file and save this for later.www.netsupportmanager.com
Deploying and configuring the Client via Jamf1 – Deploying the Mobileconfig file for applying the required permissions within macOS for the NetSupportManager Mac Client Log in to Jamf Pro and navigate to Computers Configuration Profiles from the Jamf Pro dashboard. Click Upload in the top-right corner and browse to the NSMClient.mobileconfig you collected in the previoussteps. This will create a configuration profile within Jamf called MDM-NsmClient. Once the file is uploaded and the configuration profile opens, change the Category drop-down menu toMacDevices, ensure the Level drop-down menu is set to Computer Level and the Distribution Method is setto Install Automatically. Select the Scope tab at the top of the Profile window and choose which Mac devices you would like to deploythis configuration profile to. In the screenshot example below, we are deploying this profile to all computers. Click Save to save the changes to this profile.The “MDM-NsmClient” profile will now be listed under Computers Configuration Profiles and this shouldstart installing on your targeted Macs.Note: The screen recording permission must be set locally at the Mac devices. This can be applied by using theNSMPermissions.app file located in manager.com
2 – Adding and deploying the PKG to your MacsIn order to deploy the package via Jamf, you will need to add the package to Jamf and create a policy that willdeploy this package to your specified Mac devices.Adding the package to Jamf: Log in to Jamf Pro, navigate to Computers Management Settings and select Packages from the ComputerManagement section. Click New in the top-right corner to add a new package. From the window that opens, change the Category drop-down menu to MacDevices, select Choose Fileand navigate to and select the NSM Client PKG Installer file. Once selected, this will automatically change thedisplay name of the package to match the name of the PKG file. Click Save to apply the changes and upload the package to Jamf.Deploying the package via Jamf: Once the package has been added, you can then add your policy to deploy this to your Macs. Navigate toComputers Policies from the Jamf Pro dashboard. Click New to add a new policy and enter a name, i.e. “Install NSM Client”. Change the Category drop-down menu to MacDevices. From the Trigger options, select Recurring Check-in and set the Execution Frequency drop-down menu toOnce per computer.www.netsupportmanager.com
Select Packages from the left-hand side column and click Configure. The package you added earlier shouldbe displayed in the list of packages.Click Add next to the NSM Client PKG file you added earlier.The Packages window will open. Ensure the Distribution Point drop-down menu is set to Each computer’sdefault distribution point. Set the Action drop-down menu to Install.Select the Scope tab at the top of the Packages window and choose which computers you would like to targetthe installation to.Note: If you use Jamf’s Self Service feature, you can also make the package available from within the Self Servicesection and configure your desired settings.Click Save to apply the changes to your policy.The package will install on your targeted computers the next time the Mac checks in with Jamf.3 – Deploying the NetSupport Manager Client settingsOnce the Client has been installed via the deployment policy, you can then push out your plist file containing theClient settings for the NetSupport Manager Client. Navigate to Computers Configuration Profiles from the Jamf Pro dashboard.Click New to add a new profile and enter a name, i.e. NSM Client Settings and a description if required.Set the Category drop-down menu to MacDevices. Ensure the Level drop-down menu is set to ComputerLevel and the Distribution Method is set to Install Automatically.www.netsupportmanager.com
From the left-hand side column, choose Application & Custom Settings and click Upload.Click Add and select the Upload option at the bottom left-hand corner. Next, browse to the com.netsupportsoftware.NSMClient.plist that was generated earlier and upload this file.In the Preference Domain field, enter “com.netsupportsoftware.NSMClient”.Select the Scope tab at the top of the window and choose which machines you would like to target thesesettings to.Click Save to apply the changes to the profile and upload this to Jamf. The profile should now be listed withinSystem Preferences Profiles on the targeted Macs.Installing the settings:Now that the settings have been pushed to the Client, you now need to apply the settings to the NetSupportManager Client application. In the NetSupport Manager Client installation directory, there is an “InstallPreferences” script that needs to be run and pointed to the location of the plist file that was deployed via Jamf.First, you need to add the script into Jamf. Navigate to Computers Management Settings from the Jamf dashboard and select Scripts.Click New to add a new script and enter a name, i.e. “Apply NSM Client Settings”. Set the Category toMacDevices.www.netsupportmanager.com
Select the Script tab from the top of the window and enter in the following:sudo /Applications/NetSupport/NSMClient/install preferences /Library/Managed\ Preferences/ Click Save to upload the script to Jamf.Now that the script has been uploaded to Jamf, you can now create a policy to deploy this. Navigate toComputers Policies.Click New to add a new policy and enter a name, i.e. “Apply NSM Settings” and make sure the Enabledcheckbox is selected.Set the Category to MacDevices and the Trigger option to Recurring Check-in. Ensure the ExecutionFrequency is set to Once per computer.Click Scripts on the left-hand side and then click Configure.Select Add next to the script you created above to add the script to the policy.Select the Scope tab from the top of the window and then choose which machines you wish this policy toapply to.Click Save to apply the changes and upload the policy.www.netsupportmanager.com
When the script runs this will apply the settings specified within the plist file to the Client application.As this script is configured to only run once per computer, if you ever need to make future changes to the Clientconfiguration, you will first need to make the change to your plist file within the Computers ConfigurationProfiles section.Once the changes have been made to the plist, you will need to navigate to Computers Policies, select thepolicy that is running the Install preferences script and then select Logs from the bottom of the window. Fromhere, you can click Flush to force the Macs to run the script again to update the settings. Macs that have beenflushed will have a status of “Pending”.4. Uninstalling the NetSupport Manager Client via JamfIn the installation directory for the Client, there is an “uninstall” script that can be run locally. However, this scriptcan also be executed remotely via Jamf. First, you need to add the script to Jamf and then create a policy that willexecute this script.Adding the uninstall script to Jamf: Log in to Jamf Pro, navigate to Computers Management Settings and select Scripts from the ComputerManagement section. Click New in the top-right corner to add a new script. Give the script a display name, i.e. “Uninstall NSM Client” and set the Category drop-down menu toMacDevices.www.netsupportmanager.com
Select the Script option at the top of the window and paste in the following command:sudo /Applications/NetSupport/NSMClient/uninstall Click Save to apply the changes and upload the script to Jamf.Creating a policy to send the script to your devices: Navigate to Computers Policies and click New to create a new policy. Give the policy a name, i.e. “Uninstall NSM Client” and ensure the Enabled checkbox is selected. Set the Category drop-down menu to MacDevices and select Recurring Check-in from the Trigger section. Ensure the Execution Frequency drop-down menu is set to Once per computer. Select Scripts from the left-hand side and click Configure from the right-hand side once loaded.Select the uninstall script you created earlier and click Add.Select the Scope tab at the top of the window and choose which computers you wish to target the policy to.Once your target users have been selected, click Save to save the changes and upload the policy to Jamf.Once the above steps have been completed, the above script will run and uninstall the NetSupport Manager MacClient from the targeted devices when they next check-in with Jamf.www.netsupportmanager.com
The package will install on your targeted computers the next time the Mac checks in with Jamf. 3 - Deploying the NetSupport Manager Client settings Once the Client has been installed via the deployment policy, you can then push out your plist file containing the Client settings for the NetSupport Manager Client.


