Transcription
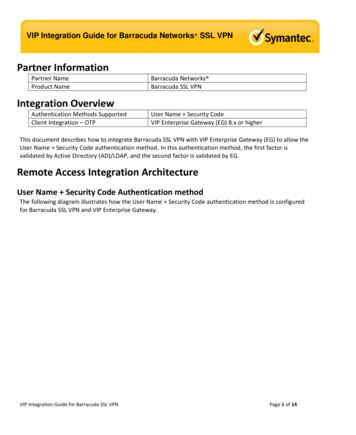
VIP Integration Guide for Barracuda Networks SSL VPNPartner InformationPartner NameProduct NameBarracuda Networks Barracuda SSL VPNIntegration OverviewAuthentication Methods SupportedClient Integration – OTPUser Name Security CodeVIP Enterprise Gateway (EG) 8.x or higherThis document describes how to integrate Barracuda SSL VPN with VIP Enterprise Gateway (EG) to allow theUser Name Security Code authentication method. In this authentication method, the first factor isvalidated by Active Directory (AD)/LDAP, and the second factor is validated by EG.Remote Access Integration ArchitectureUser Name Security Code Authentication methodThe following diagram illustrates how the User Name Security Code authentication method is configuredfor Barracuda SSL VPN and VIP Enterprise Gateway.VIP Integration Guide for Barracuda SSL VPNPage 1 of 14
VIP Integration Guide for Barracuda Networks SSL VPNFigure 1 Authentication process for the User Name Security Code authentication method1. The user enters a user name, password, and a security code.2. As the first part of the two-factor authentication process, Barracuda SSL VPN sends the user name and thepassword to AD/LDAP.3. If AD/LDAP authenticates the user name and the password, AD/LDAP returns the group permissionVIP Integration Guide for Barracuda SSL VPNPage 2 of 14
VIP Integration Guide for Barracuda Networks SSL VPNdetails and the authentication response to Barracuda SSL VPN.4. As the second part of the two-factor authentication process, Barracuda SSL VPN sends the user name andthe security code to the Validation Service.5. The Validation Service authenticates the user name and the security code with the VIP AuthenticationService.6. If the user name and the security code are authenticated, the Validation Service returns an AccessAccept authentication response to Barracuda SSL VPN, based on which the user is allowed to log in.Integration SummaryThe following summary of procedures describes how to install and configure Barracuda SSL VPN for two-factorauthentication through VIP Enterprise Gateway.1. Install and Configure VIP Enterprise GatewayFor more information on installing and configuring VIP Enterprise Gateway, refer to the VIP Enterprise GatewayInstallation and Configuration Guide.2. Configure Barracuda SSL VPNComplete the following procedures to configure Barracuda SSL VPN:1. Integrate User database with Active Directory/LDAP.2. Create Policies and assign them to AD/LDAP user accounts or Groups.3. Configure Resources and assign Policies to the Resources.4. Create authentication schemes and assign policies to the schemes.5. Configure RADIUS server settings.3. Configure and Test an end user:1. Configure and test an end user using SSL VPN web portal.VIP Integration Guide for Barracuda SSL VPNPage 3 of 14
VIP Integration Guide for Barracuda Networks SSL VPNInstall and Configure VIP Enterprise GatewayInstall VIP Enterprise Gateway based on the procedures described in the VIP Enterprise Gateway Installation andConfiguration Guide. Add the Validation Server in the User Name Security Code mode. (See Figure 2 AddValidation Server Page)Figure 2 Add Validation Server PageConfigure Barracuda SSL VPNComplete the procedures in this section to configure Barracuda SSL VPN. You must use the ssladmin account tologin to the Barracuda SSL VPN web portal to complete these procedures.VIP Integration Guide for Barracuda SSL VPNPage 4 of 14
VIP Integration Guide for Barracuda Networks SSL VPNThe examples for the links that you can use to launch the Barracuda SSL VPN web portal are https:// IP :443And http:// IP :80, where 443 and 80 are the port numbers that you must use in the link to access BarracudaSSL VPN web portal.For more information on the ssladmin account and the ports to be configured, refer to the Barracuda SSL VPNAdministrators Guide, Version 2.X.NOTE: The screen shots in these procedures are taken from Barracuda SSL VPN Virtual appliance (FirmwareVersion: 2.0.1.026). Refer to the Barracuda SSL VPN Administrators Guide, Version 2.X for specific screen shots andprocedures.1: Integrate User Database with AD/LDAP1. In the Barracuda SSL VPN web portal, click the Access Control tab.2. Under the Access Control tab, click User Databases.In the User Database section, view the Default, Global, and Super Users databases. The type of thesedatabases is Built-in. You can edit the attributes of the Default database and integrate it with theAD/LDAP. This procedure explains how to integrate the Default database with AD/LDAP.Note: Alternatively, you can create a new database and integrate it with AD/LDAP. If you create a newdatabase, you must use the More link in the Actions column to synchronize the database with AD/LDAP.VIP Integration Guide for Barracuda SSL VPNPage 5 of 14
VIP Integration Guide for Barracuda Networks SSL VPNFigure 3 User database configuration page3. To integrate the Default database with AD/LDAP, click the Edit link in the Actions column of the Defaultdatabase.4. In the edit browser window, in the Connection section, enter the details of AD/LDAP.5. Click Test to verify the user database configuration.6. Click Save at the bottom of the edit browser window to save the user database configuration.7. Under the Access Control tab, click Accounts to view the user accounts that are associated with AD/LDAP.8. Under the Access Control tab, click Groups to view the user groups that are associated with AD/LDAP.2: Create Policies and Assign Them to AD/LDAP Users Accounts or Groups1. Under the Access Control tab, click Policies to create the policies and associate them with the user groups.In the Policies section, you can view the policies that you have created.VIP Integration Guide for Barracuda SSL VPNPage 6 of 14
VIP Integration Guide for Barracuda Networks SSL VPNFigure 4 Policy creation page3: Configure Resources and Assign Policies to Resources1. In the Barracuda SSL VPN web portal, click the Resources tab.2. Under the Resources tab, configure the required resources and assign policies to them.For more information on configuring the resources, refer to the Barracuda SSL VPN Administrator’s GuideVersion 2.x.4: Create Authentication schemes and assign policies1. In the Barracuda SSL VPN web portal, click the Access Control tab.2. Under the Access Control tab, click Authentication Schemes.VIP Integration Guide for Barracuda SSL VPNPage 7 of 14
VIP Integration Guide for Barracuda Networks SSL VPN3. In the Create Scheme section, enter the details to create an authentication scheme. In the AuthenticationSchemes section, view and manage the authentication scheme that you have created.The following figure displays the Authentication Scheme that is created for the User Name SecurityCode authentication method:Figure 5 Authentication schemes and configuration pageVIP Integration Guide for Barracuda SSL VPNPage 8 of 14
VIP Integration Guide for Barracuda Networks SSL VPNFigure 6 Authentication Schemes results pane5: Configure the RADIUS Server Settings1. In the Barracuda SSL VPN web portal, click the Access Control tab.2. Under the Access Control tab, click Configuration.3. In the Configuration browse window, in the RADIUS section, specify the RADIUS Server settings and clickSave Changes.Note: For this RADIUS Server settings, select PAP as the authentication method.VIP Integration Guide for Barracuda SSL VPNPage 9 of 14
VIP Integration Guide for Barracuda Networks SSL VPNFigure 7 RADIUS Server settings pageConfigure and Test an End User1. Click the link to launch the Barracuda SSL VPN web portal.The examples for the links that you can use to launch the Barracuda SSL VPN web portal arehttps:// IP :443 and http:// IP :80, where 443 and 80 are the port numbers that you must use in the linkto access Barracuda SSL VPN web portal.VIP Integration Guide for Barracuda SSL VPNPage 10 of 14
VIP Integration Guide for Barracuda Networks SSL VPNFor more information on the SSL VPN user interface and the ports, refer to the Barracuda SSL VPNAdministrators Guide, Version 2.X.2. In the first login page, enter the user name and click Login.Figure 8 First login promptNote: If there is more than one user database configured, the first Login page displays the More link nearto the Username field. Click this link to select the appropriate database before you click Login.Figure 9 User database selection login prompt3. In the next Login page, enter the password and click Login.VIP Integration Guide for Barracuda SSL VPNPage 11 of 14
VIP Integration Guide for Barracuda Networks SSL VPNFigure 10 Second login prompt4. In the third Login page, enter the security code and click Login.Figure 11 Third login prompt5. After you successfully log in to Barracuda SSL VPN, you can view the user home page as shown below:VIP Integration Guide for Barracuda SSL VPNPage 12 of 14
VIP Integration Guide for Barracuda Networks SSL VPNFigure 12 User’s Home pageVIP Integration Guide for Barracuda SSL VPNPage 13 of 14
VIP Integration Guide for Barracuda Networks SSL VPNCopyright 2011 Symantec Corporation. All rights reserved.Symantec, the Symantec Logo, and the Checkmark Logo are trademarks or registered trademarks of Symantec Corporation or itsaffiliates in the U.S. and other countries. VeriSign, VeriSign Trust, and other related marks are the trademarks or registered trademarksof VeriSign, Inc. or its affiliates or subsidiaries in the U.S. and other countries and licensed to Symantec Corporation. Other names maybe trademarks of their respective owners.The product described in this document is distributed under licenses restricting its use, copying, distribution, and decompilation/reverseengineering. No part of this document may be reproduced in any form by any means without prior written authorization of SymantecCorporation and its licensors, if any.THE DOCUMENTATION IS PROVIDED “AS IS” AND ALL EXPRESS OR IMPLIED CONDITIONS, REPRESENTATIONS AND WARRANTIES,INCLUDING ANY IMPLIED WARRANTY OF MERCHANTABILITY, FITNESS FOR A PARTICULAR PURPOSE OR NON-INFRINGEMENT, AREDISCLAIMED, EXCEPT TO THE EXTENT THAT SUCH DISCLAIMERS ARE HELD TO BE LEGALLY INVALID. SYMANTEC CORPORATION SHALLNOT BE LIABLE FOR INCIDENTAL OR CONSEQUENTIAL DAMAGES IN CONNECTION WITH THE FURNISHING, PERFORMANCE, OR USE OFTHIS DOCUMENTATION. THE INFORMATION CONTAINED IN THIS DOCUMENTATION IS SUBJECT TO CHANGE WITHOUT NOTICE.The Licensed Software and Documentation are deemed to be commercial computer software as defined in FAR 12.212 and subject torestricted rights as defined in FAR Section 52.227-19 "Commercial Computer Software - Restricted Rights" and DFARS 227.7202, et seq.“Commercial Computer Software and Commercial Computer Software Documentation”, as applicable, and any successor regulations.Any use, modification, reproduction release, performance, display or disclosure of the Licensed Software and Documentation by the U.S.Government shall be solely in accordance with the terms of this Agreement.This document may describe features and/or functionality not present in your software or your service agreement. Contact your accountrepresentative to learn more about what is available with this Symantec product.Symantec Corporation350 Ellis Street Mountain View,CA m/support/contact/index.htmlVIP Integration Guide for Barracuda SSL VPNPage 14 of 14
VIP Integration Guide for Barracuda Networks SSL VPN VIP Integration Guide for Barracuda SSL VPN Page 3 of 14 details and the authentication response to Barracuda SSL VPN. 4. As the second part of the two-factor authentication process, Barracuda SSL VPN sends the user name and the security code to the Validation Service. 5.


