Transcription
PayPal Standard Sandbox TestingUpdated June 2014 2014 GoPrint Systems, Inc., All rights reserved. PayPal Standard Configuration Guide1
PayPal Standard Sandbox TestingHow it worksAt the developer Sandbox site, (https://developer.paypal.com) you need to first sign up for a developeraccount. Once signed up you will need to create at least two tests accounts, a Business Account torepresent the merchant, and a Personal Account to represent the buyer. You can use thepreconfigured test account option or manually create your own. It’s recommended to simply use thepreconfigured option since the credit card numbers and bank accounts are auto-generated for you.The testing process OverviewTest your application by creating a Sandbox account for each user entity represented in your PayPaltransactions. When testing, use the test accounts in place of all the live accounts you will use whileprocessing live transactions.1. Configure the GTX to resolve to an external DNS.2. Create a PayPal Developer account at the Developer website at developer.paypal.com.3. Create 2 Sandbox accounts: Business and Personal.4. Note your test Personal Card Cards5. Configure your Instant Payment Notification and Encrypted Payments Settings6. Configure in Control Center7. Begin testingCREATE DEVELOPER ACCOUNTBefore you can create your test accounts you must first create a developer PayPal account. Thisaccount is used to log into the Developer site.Important: if you already have a own personal PayPal account you most likely won’t be able to use thesame email address.Navigate to the developer test site: https://developer.paypal.comand select Sign Up to create your account. 2014 GoPrint Systems, Inc., All rights reserved. PayPal Standard Configuration Guide2
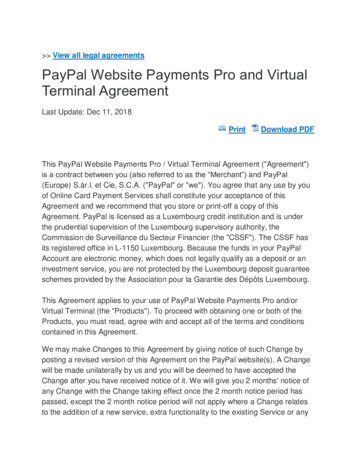
CREATE SANDBOX TEST ACCOUNTSTo create a test account in the Sandbox:1. Log in to the Developer site at https://developer.paypal.com and navigate toApplications Sandbox Accounts.Important: you MUST create both a Business and Personal Account. The Personal Accountgenerates the testing Credit Card payment information you will need to enter at the web client. 2014 GoPrint Systems, Inc., All rights reserved. PayPal Standard Configuration Guide3
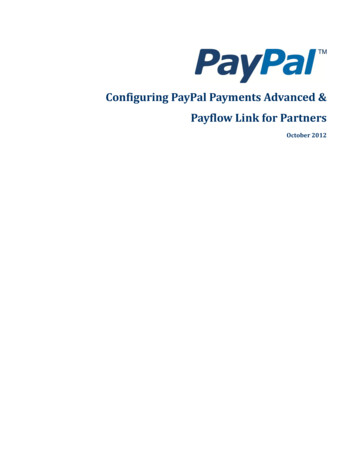
Click Create Account buttonStep 1 – Create Business AccountFill in the Seller data, optioning to createboth a credit card and Bank Account with abalance amount and change the defaultpassword.Note: Email accounts created are not real. The accounts are automatically confirmed andare only valid in the Sandbox.Hint: write down the email address and password. These are used to log in to your seller account andwill be used in Control Center. 2014 GoPrint Systems, Inc., All rights reserved. PayPal Standard Configuration Guide4
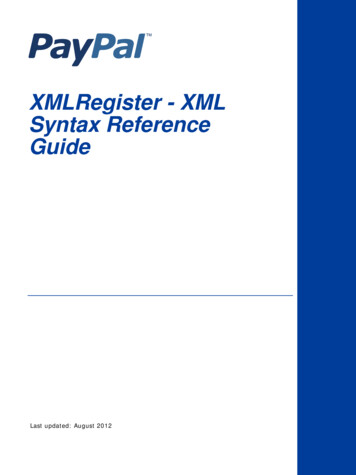
Confirm your Business AccountSelect the Profile tabAt this point, review but ignore the Profile, API credentials, and Funding tabsSettings tabImportant: do not enable Payment Review and Negative Test Mode!If you enable Payment Review, the statusof all test transactions is Under Reviewuntil you manually accept them. 2014 GoPrint Systems, Inc., All rights reserved. PayPal Standard Configuration Guide5
Step 2 – Create your Buyer AccountSelect the Personal radio button:Fill in the account creation fills to create your credit cardand bank account.Once the account is created, select Profile to view your account information and obtain your creditcard information. 2014 GoPrint Systems, Inc., All rights reserved. PayPal Standard Configuration Guide6
Select FundingHint: write down your credit card information because this will be used later at the GoPrintWeb Client to purchase your print funds.Do not enable Payment Refund!!! 2014 GoPrint Systems, Inc., All rights reserved. PayPal Standard Configuration Guide7
Log in to your Business AccountCheck your Business Account then click ENTER SANDBOX SITEYou are redirected to the Sandbox Site: https://www.sandbox.paypal.com/home 2014 GoPrint Systems, Inc., All rights reserved. PayPal Standard Configuration Guide8
From My Account, click the Profile tab to expand the drop down and select MY SELLING TOOLSConfigure the Confirmation Return URLClick Instant Payment Notifications 2014 GoPrint Systems, Inc., All rights reserved. PayPal Standard Configuration Guide9
Enter the External FQDN URL of the GTX with the required Select: IPN messages: Receive IPN MessagesCompleted URL: 2014 GoPrint Systems, Inc., All rights reserved. PayPal Standard Configuration Guide10
Configure the PayPal Public Key and generate your Cert ID1. Selling Tools – More Selling Tools (found in gray box at bottom of page)2. Encrypted Payment Settings3. Select to Download PayPal Public CertificatePlace the PayPal Public key in the GS4\Certs\ directory (not required but makes it easy tomanage. Have clients keep a backup copy someone else! 2014 GoPrint Systems, Inc., All rights reserved. PayPal Standard Configuration Guide11
DO NOT CLOSE THIS PAGE, YOU WILL NEED IT IN A BIT TO UPOAD YOUR GOPRINT PUBLIC KEY ANDGENERATE YOUR CERTIFICATE ID.Open Control Center: Create your PayPal Standard ConnectorImportant:1. PayPal Email Address: Enter your Business Sandbox account NOT your Developer LoginAccount.2. Environment Make sure SANDBOX is selected. 2014 GoPrint Systems, Inc., All rights reserved. PayPal Standard Configuration Guide12
3. Enter the Path to the PayPal Public Certificate fileUpload The GoPrint Public Key to PayPal in order to generate your Certificate ID4. Click Export Your Public Certificate button 2014 GoPrint Systems, Inc., All rights reserved. PayPal Standard Configuration Guide13
Save it under your GS4\certs directoryNavigate back to PayPal to upload your Certificate.Hint: At this point, your PayPal Login has most likely timed out and you will need to log in again. 2014 GoPrint Systems, Inc., All rights reserved. PayPal Standard Configuration Guide14
If successful your Certificate ID was generated.Copy and Paste the Certificate ID in your PayPal Certificate ID field and SAVE 2014 GoPrint Systems, Inc., All rights reserved. PayPal Standard Configuration Guide15
YOUR PAYPAL STANDARD CONFIGURATION IS COMPLETEIf you think you’re having issues with the client’s firewall allowing inbound port 7768 you can have theGTX listen on Port 80: since this port is usually open on most firewalls.Important: to listen on Port 80 you must make sure the WWW service isn’t installed and running on theGTX server or any other application is listening on this port.Final GoPrint ConfigurationStep 1 – Enable the Quota Purse to represent the credit card payment purseNavigate to: Accounts – Class Definitions – Default User Class (or other)1. Check Quota2. Purse Name: enter a user-friendly name used to display to users3. Save 2014 GoPrint Systems, Inc., All rights reserved. PayPal Standard Configuration Guide16
Step 2 – Enable the credit card purse at the PayPoint1. Back to the main page, select your PayPoint2. Select the Financial tab3. Check Default User Class – Credit Card Fund Quota (or your choose name. The dialog boxexpands displaying the following settings.4. Expand the Add Value Option drop down menu and select “Credit Card to Quota”5. SaveHINT: If not selected the Credit Card AddValue option will not appear at the webclient. 2014 GoPrint Systems, Inc., All rights reserved. PayPal Standard Configuration Guide17
TestingLogin to web client and select Add Value then walk through thepayment process.Enter AMOUNTCONFIRM 2014 GoPrint Systems, Inc., All rights reserved. PayPal Standard Configuration Guide18
At this point, you are taken to the physical PayPal Website:Note: this is the difference between PayPal Standard and PayPal Pro. With PayPal Pro the necessaryAPI’s are in place to allow transactions to take place within the web client: or as PayPal Standardstates, directly on your website.Here you have two options to pay:Option to pay with PayPal account or Credit Card: Test with both:If successful, you will be redirected to the GoPrint web client confirmation page. 2014 GoPrint Systems, Inc., All rights reserved. PayPal Standard Configuration Guide19
If the “Thanks for your order confirmation appears” you don’t have the Return URL correct or enabled.You MUST click the Return to Facilitator accounts Test Store to return back to the web client.Network issue or issue with PayPal website 2014 GoPrint Systems, Inc., All rights reserved. PayPal Standard Configuration Guide20
CONFIRM YOUR TRANSACTIONGo to My Account – Transaction History to confirm the transactionReviewing transactionsUse Credit Card Transactions to view pending and completed transactions. 2014 GoPrint Systems, Inc., All rights reserved. PayPal Standard Configuration Guide21
Incomplete transactions display as Started and in PINKStarted transactions are failed transactions and usually the result of networking issues.GoPrint doesn’t make an attempt to re-establish a connection to PayPal so Started transactions canbe considered as lost. It’s important to note, the transactions commonly complete at the PayPalend.When this happens the client has the option to clickDETAILS and manually approve the transaction. 2014 GoPrint Systems, Inc., All rights reserved. PayPal Standard Configuration Guide22
Click OK to confirmTransaction Confirmed and amount added to account.Financial Reports1.2.Credit Card Usage ReportCredit Card Transactions 2014 GoPrint Systems, Inc., All rights reserved. PayPal Standard Configuration Guide23
Credit Card Usage ReportTransaction InquiryUnder every credit card gateway there’s the option to View Transactions. 2014 GoPrint Systems, Inc., All rights reserved. PayPal Standard Configuration Guide24
Click the Trans# number to view what Quota Account it was posted to.TroubleshootingWhen your customer does online payment through Paypal, your customer successfully finishespayment and returned to your site. Instead of “Payment Accepted”, order status is “Awaiting PayPalpayment”.This issue could also happen in Sandbox (testing mode). 2014 GoPrint Systems, Inc., All rights reserved. PayPal Standard Configuration Guide25
The Cert ID generated doesn't' match the GTX Public Key. In other words, the server name in thePublics keys don't match. Delete the Certificate ID and Export and Upload the GTX Public Key again.The FQDN and external IP are incorrectly configured and/or Ports 7768 or 80 are not open inbound tothe GTX server. Also, when experienced randomly, networking issues between PayPal exists. 2014 GoPrint Systems, Inc., All rights reserved. PayPal Standard Configuration Guide26
If “Thanks for your order” confirmation appears, you don’t have the Return URL correct.You MUST click the Return to Facilitator accounts Test Store to return back to the web client.This error indicates an issue with the Instant Payment Notification URL1. An issue with the PayPal server exists. PayPal server may be down.2. Ports 7768 or 80 are blocked3. A typo exists for URL under PayPal Manager. Should onfirm 2014 GoPrint Systems, Inc., All rights reserved. PayPal Standard Configuration Guide27
The certificate may be an experience certificate or a Sandbox certificate is still on use after switchingto Live mode. Log in to your PayPal manager site and download the correct certificate. 2014 GoPrint Systems, Inc., All rights reserved. PayPal Standard Configuration Guide28
Before you can create your test accounts you must first create a developer PayPal account. This account is used to log into the Developer site. Important: if you already have a own personal PayPal account you most likely won't be able to use the same email address. Navigate to the developer test site: https://developer.paypal.com