Transcription
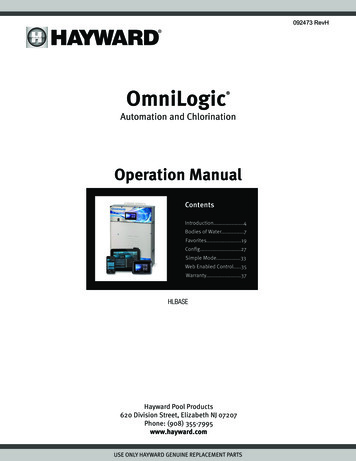
092473 RevHOmniLogic Automation and ChlorinationOperation ManualContentsIntroduction.4Bodies of Water.7Favorites.19Config.27Simple Mode.33Web Enabled Control.35Warranty.37HLBASEHayward Pool Products620 Division Street, Elizabeth NJ 07207Phone: (908) 355-7995www.hayward.comUSE ONLY HAYWARD GENUINE REPLACEMENT PARTS
IMPORTANT SAFETY INSTRUCTIONSWhen using this electrical equipment, basic safety precautions should always be followed, including the following: READ AND FOLLOW ALL INSTRUCTIONS WARNING: Disconnect all AC power during installation. WARNING: Water in excess of 100 degrees Fahrenheit may be hazardous toyour health. WARNING: To reduce the risk of injury, do not permit children to use this productunless they are closely supervised at all times. WARNING: Do not use the OmniLogic to control fire pits or related equipment. A green colored terminal marked “Grounding” is located inside the wiring compartment. To reduce the risk of electric shock, this terminal must be connected to thegrounding means provided in the electric supply service panel with a continuouscopper wire equivalent in size to the circuit conductors supplying the equipment. One bonding lug for US models (two for Canadian models) is provided on theexternal surface. To reduce the risk of electric shock, connect the local commonbonding grid in the area of the swimming pool, spa, or hot tub to these terminalswith an insulated or bare copper conductor not smaller than 8 AWG US / 6 AWGCanada. All field installed metal components such as rails, ladders, drains, or other similarhardware within 3 meters of the pool, spa or hot tub shall be bonded to the equipment grounding bus with copper conductors not smaller than 8 AWG US / 6 AWGCanada. SAVE THESE INSTRUCTIONS2USE ONLY HAYWARD GENUINE REPLACEMENT PARTS
Table of ContentsIntroductionIdle and Home Screen.4Power Button.5Selecting a Body of Water.5Favorites.6Navigation Buttons.6Bodies of WaterControl ScreensFilter Pump.7Schedules.8Pump Speed.9Countdown Timer.11Heater.11Heater Priority.12Chlorinator.13pH Dispense.15ColorLogic.16Other Lights.17Cleaners.17Water Features.17Schedules Button.18Spillover.18Freeze Protect Override.19FavoritesAlarms Button.19Daylight Button.20Features/Lights/Heaters/Backyard Buttons.20Favorites Button.21Themes Button.24ConfigConfig Button.27Config Wizard.27System Info.27Backup Config.27Restore Config.28Display.28Network.28Web Server.28Date/Time.28Language.29Data Log.29Shell Command.29Wifi Bridge.30UpgradeUpgrade Firmware.30Installing New Language.31Simple ModeSimple Mode.33Web Enabled ControlWeb Enabled Control.35WarrantyOmniLogic Limited Warranty.373USE ONLY HAYWARD GENUINE REPLACEMENT PARTS
IntroductionThis manual assumes that the OmniLogic has been installed and configured according to the Installation Manual and is using the latest firmware version available from Hayward. The OmniLogic can now be programmed with user desired settings such as schedules, themes, and favorites. This manual will also explainhow to manually turn pool equipment on/off, program settings for specific equipment, view pool equipment status and conditions, and more.Now that the initial configuration has been completed, the OmniLogic will automatically go to the Home Screen or Idle Screen. All settings and operationfunctions can be accessed from the Home Screen. Note that if the OmniLogic local terminal is not touched for more than two minutes, the Idle Screen will bedisplayed.Using the Local Touchscreen TerminalThe OmniLogic uses a local touchscreen terminal as the main interface with the device. Once configured, the OmniLogic can be controlled remotely usingvarious Hayward remote terminals or, when connected to the home’s network, by Internet enabled devices such as computers, tablets and phones. The localterminal must be used to access the Configuration Wizard. The Configuration Wizard is used for initial configuration (completed during the installation process)and for any changes to existing configuration.Idle ScreenThe OmniLogic Local Terminal will display the idle screen after two minutes of user inactivity. When the filter pump is on, the Idle Screen will display the currenttemperature of the Body of Water shown in the upper left corner. If the OmniLogic is configured to control two Bodies of Water, the idle screen will toggle betweenboth. On the right side of the screen, the air temperature will toggle with the date.SUNDAYjul 2482ºF10:18Home ScreenWhen the idle screen is touched, the OmniLogic will display the Home Screen. This screen will give the user access to all functions, settings and configurationoptions.8271º FairºFalarmlightsdaylightfavorites4USE ONLY HAYWARD GENUINE REPLACEMENT PARTS
Power ButtonThe power button is displayed at all times when the OmniLogic is not idle. When touched, it offers the following 4 functions:82ºF71º Fairalarmlightsdaylightfavoritesservicemodeshut downfeaturesoffsimplemodeShut Down - When Shut Down is selected, the OmniLogic will turn off all pool equipment and report when it is safe to remove power. When this message isdisplayed, you can either power off the unit or restart the OmniLogic by touching the large power button displayed on the left side of the screen.Service Mode - Service Mode will turn off all pool equipment and disable all remote controls including networked devices. Service Mode is useful to preventscheduled operation and disable remote operation while servicing the pool. After selecting Service Mode, there are two options:Service Mode (Standard): The OmniLogic will remain in Service Mode until you manually exit. To exit Service Mode, touch the power button and selectthe Service Mode button again.Service Mode Timed: Before entering Service Mode, you will select a Service Mode timeout. This is the amount of time that the OmniLogic will stay inService Mode before automatically exiting. The timeout can be set between 1-96 hours. There is no need to exit Service Mode manually.Features Off - Features Off offers a quick way to turn off all equipment (except the filter pump, heater, lights and chlorination if running because of a schedule)with a single touch of a button.Simple Mode - Simple Mode is a customizable screen that can be set up for quick access to your Favorites (page 21). You can set up only the Favorites thatyou want shown while in Simple Mode. Because it’s customizable, Simple Mode can provide a convenient way to access the most common functions for ownersas well as a handy solution to limit access to other users. For information on how to create and delete Simple Mode functions, refer to the “Favorites” sectionin this manual as well as page 33. The MSP ID number is needed when entering and exiting Simple Mode.Selecting a Body of Water - Left Side of Home ScreenThe left side of the Home Screen allows you to select and control a Body of Water. If more than one Body of Water is used (typically a pool and spa), pressingthe left and right arrows in the middle of the screen will toggle between the Bodies of Water. If just a pool is configured, there will be no arrows shown.SPA8271º FairºFalarmlightsdaylightfavoritesPress Arrow buttons onleft side of screen tochange Body of Water.10271º FairºFalarmlightsdaylightfavorites5USE ONLY HAYWARD GENUINE REPLACEMENT PARTS
Features Screen - Controlling a Body of WaterWhen the desired Body of Water is displayed, touch the left side of the screen to advance to the Body of Water Features Screens. The items shown on theFeatures Screen relate to that Body of Water ONLY. To control a different Body of Water, select the desired Body of Water at the Home Screen first, then go tothe Features Screens.1/2SPA102ºFalarmlightsWhen the desired Body ofWater is displayed, touchleft side of screen to enterControl Screens.heater71º FairdaylightpHalarmlight itesThe various buttons shown in the Body of Water Features Screens are related to initial configuration. For example, if you configured a gas heater to heat theSpa Body of Water, the heater setting for the gas heater will be found in the Spa Features Screens.Favorites - Right Side of Home ScreenThe right side of the Home Screen is Favorites. These buttons offer universal control for Backyard equipment and all Bodies of Water regardless of which one isdisplayed. Up to four Favorite buttons will be shown on the home screen. To access more Favorites, touch the arrows to the left or right of the Favorite buttons.Note that some default buttons will appear on the Favorites Screen. These buttons are related to your initial configuration settings and are automatically created. In addition, custom “Favorite” buttons can also be added. The OmniLogic supports up to 50 Favorites for quick easy access to commonly used functions.8271º FairºFalarmlightsdaylightfavoritesTouch arrows toadvance to additional favorites.8271º FairºFspillover vsc pumpthemesconfigNavigationThe OmniLogic has been designed to be intuitive allowing most users the ability to navigate with little instruction. Below, a list of commonly used buttons areexplained. As you navigate through the various screens, these buttons will likely be displayed. Some sections of this manual may refer to buttons that are specific to certain types of pool equipment. You’ll find more information about those buttons under their corresponding section. If your installation does not includethat particular equipment, those sections can be skipped.Save - Touch this button to save your selection.Turn On or Enable - This button will either manually turn on poolequipment or enable a function.ONCancel - Touch this button to cancel your selection.Advance - Touch this button to advance to the next screen.Back - Touch this button to return to the previous screen.Add - Touch this button to add an item.Delete - Touch this button to delete a highlighted item.OFFTurn Off or Disable - This button will either manually turn off poolequipment or disable a function.Schedule - Touch this button to schedule a function.Countdown Timer - Touch this button to set a countdown timer.Back - Touch this button to return to a previous screen.6USE ONLY HAYWARD GENUINE REPLACEMENT PARTS
Body of Water Features and Control ScreensAs previously stated, the Body of Water Features Screens allow you to control functions and equipment for a particular Body of Water. Making a change willnot affect other Bodies of Water. For example, if the Pool is being displayed when entering the Features Screens, only the pool will be affected by any changesor settings that you make. The contents of the Features Screen is a result of how the OmniLogic was configured using the Configuration Wizard. If equipmentis missing or does not belong in the Body of Water Features Screen, you may have to go back to the Configuration Wizard and correct the configuration of thatequipment.An example of a Features Screen is shown below. In this example, we are looking at the Pool (shown in lower left of screen). The arrow button on the rightmeans that there are more Features Screens if we advance.1/2vsppHalarmlight pending on the equipment that has been configured in your system, your screens will likely be different. The purpose of this section is to explain how Featuresand Control Screens work as well as show some common equipment examples which will help familiarize you with the interface. Even though some of yourequipment may be different, you should see similarities in the following examples that will help you create and change settings for all the equipment in yourFeatures Screens.The following examples will be shown for the Pool only. All of the equipment shown in the Features Screens have been initially configured in the ConfigurationWizard to operate with the Pool. You may have also configured the same type of equipment to operate with a different body of water. For example, you mayhave a heater for the pool and a second heater for the spa. The following information should help you understand how to control all of your equipment, regardless of which Body of Water is selected.Control ScreensAfter an item has been selected in the Features Screen, you’ll be brought to a Control Screen. Control Screens are where you will actually make changes to thepool’s equipment settings. To change a setting, you’ll first select the Body of Water, then select the feature you’d like to change in the Features Screen, thenmake your change in that feature’s Control Screen.Filter PumpIn the example below, a variable speed pump which was named “vsp” has been configured to be used with the Pool in the Configuration Wizard. Touching the“vsp” button in the Features Screen will bring you to a pump Control Screen which will let you manually turn on/off the pump, set a schedule, set a speed, applya countdown timer and view the status. Single speed and two speed pumps will have a similar Control Screen.1/2ONvsppHalarmlight rowheatercleaneruclightschlorinatorTouching the pump buttonbrings you to the pumpcontrol screen.ONLOWMEDHIGHCUSTOMPOOLvsp pumpPOOLfeaturesPool Features ScreenPump Control Screen7USE ONLY HAYWARD GENUINE REPLACEMENT PARTS
Status of Equipment - This is an indicatoronly. When lit up and in motion (shown below),the equipment is active. When grayed out andstationary, equipment is off.Turn On / Turn Off - Slide this switchmanually to turn on/off the pump. Thiswill override schedules or timer settings.ONONChange Speed- Manually select the desiredspeed. This will not be shown for singlespeed pumps. Low, Med, and High are fixedspeeds. The Custom button will bring you toa screen that allows you to select a speedbased on percentage or RPM (determinedduring configuration).LOWMEDHIGHCUSTOMSet Schedule - Touch thisbutton to add/delete a schedulefor the filter pump or to enable/disable an existing schedule.Countdown Timer - Touch thisbutton to set a countdown timerfor the filter pump.POOLvsp pumpAdd a ScheduleIf the “Set Schedule” button is touched, you’ll be brought to the pump schedule screen below. Here you can add, delete, edit, enable and disable schedules.Because there have been no schedules set up, the screen is blank. Touch the Add button ( ) to add a schedule for the pool pump.ON/OFFstart 10:00 amend 7:00 pmstart / endrepeat10 : 00Please press button to add schedule items.ampmspeedPOOLvsp pumpPOOLvsp pumpSet Schedule TimeRefer to the screen below to set the start and stop times. When finished, touch “repeat”.Set Start Time- Select this button to editthe start time. The pump will start at thetime shown.Edit Time- Use these buttons to changedesired time.Select Field- Touch Hours, Minutes orAM/PM to edit.start 10:00 amend 7:00 pmSet End Time - Select this button to edit the endtime. The pump cycle will end at the time shown.start / endrepeat10 : 00ampmSet Schedule Frequency - Selecthow often you’d like the schedule torun (weekdays, weekends, all week orcustom).speedPOOLvsp pump8USE ONLY HAYWARD GENUINE REPLACEMENT PARTSSet Pump Speed - Select this buttonto change the pump speed for theschedule.
Set Schedule FrequencyRefer to the screen below to select how often you’d like the schedule to run. If “custom” is selected, you’ll be asked which day(s) of the week you would like thepump to run. Touch “speed” when finished.start / endweekdaysweekendsall weekrepeatspeedcustomPOOLvsp pumpSet Pump SpeedRefer to the screen below to select the pump speed during the schedule. If custom is selected, you’ll be asked to set the % pump speed or RPM depending onthe setting. When finished, touch the Save button to save the schedule.start / endlowmedrepeathighAfter saving, you’ll bebrought back to the pumpschedule screen. The newschedule will be displayed.0110:00 am / 7:00 pmmedall weekONspeedcustomPOOLvsp pumpPOOLvsp pumpNOTE: If you intend to run the pump at different speeds throughout the day, create additional schedules. You can start a new schedule on the same minute thatthe previous one ends. If schedules overlap, the newest schedule’s start time will take priority by ending the previous schedule early. You can create up to 20schedules per device.Edit a ScheduleTo edit a schedule, touch the schedule as shown below. You’ll be brought back to the screen which will allow you to set times, speed and frequency.start 10:00 am0110:00 am / 7:00 pmmedall weekend 7:00 pmstart / endONrepeat10 : 00POOLvsp pumpampmspeedPOOLvsp pump9USE ONLY HAYWARD GENUINE REPLACEMENT PARTS
Turning a Schedule OffThere may be circumstances when you will want to turn off a schedule temporarily. To do this, slide the On/Off button to “Off”. The schedule will remain offuntil you go back to this screen and turn it on.01med10:00 am / 7:00 pmall weekOFFPOOLvsp pumpDeleting a ScheduleSchedules can be deleted when they are no longer necessary. To delete a schedule, select the schedule and touch Delete as shown below. A Delete buttonshould appear on the side of the schedule. Touch this Delete button to remove the schedule.Are you sure you want to deletethe schedule?ON/OFF010110:00 am / 7:00 pm10:00 am / 7:00 pmmedall weekmedall weekONPOOLvsp pumpPOOLvsp pump10USE ONLY HAYWARD GENUINE REPLACEMENT PARTS
Countdown TimerA Countdown timer runs or enables equipment for the amount of time specified. You can initiate the Countdown timer at the equipment’s control screen. Atthe countdown screen, set the desired countdown time. In this case, the timer will run the pump for the specified countdown time. If the equipment is alreadyrunning due to a schedule, the countdown timer setting will override the schedule and turn off at the end of the countdown interval. If the equipment is off, thecountdown timer will turn it on for the duration/speed that has been set.timelowcountdown durationcustomhoursminutes00 : 00medspeedhightimespeedPOOLvsp pumpONPOOLvsp pumpONLOWMEDHIGHCUSTOMPOOLvsp pumpHeaterTouching the Heater button in the Features Screen will let you enable/disable heaters, set priority, set temperature, set a schedule and view the status of theheater for the selected Body of Water. An example of the heater Control Screen is shown below:1/2vspheaterpHalarmlight rowcleaneruclightschlorinatorset temperatureON65 F85 FactualPOOLheaterPOOLfeaturesHeater Control Screen11USE ONLY HAYWARD GENUINE REPLACEMENT PARTS
Status of Equipment - When grayed out andstationary, equipment is currently idle. When inmotion, the heater is actively heating.Enable / Disable - Slide this switchto enable and disable the heater. Thesetting will not take effect until the Savebutton is touched. To turn on the heater,adjust the setpoint higher than the actualBody of Water temperature and thenSave.Set Schedule - Touch thisbutton to set a schedule forthe heater.set temperatureON65 F85 FactualChange Setting- This slider will raise andlower the heater setpoint setting.Set Priority - If more than oneheater is configured for the Bodyof Water, use this button to setpriority and enable/disable physical heaters.POOLheaterSave Setting - Setting is not saveduntil this button is pushed.Setting and Changing PriorityIf there is more than one heater configured for the body of water, the Set Priority button will appear in the Heater Control Screen. If the Priority heater can notmeet the demand for heat, the next heater will be allowed to operate. Use Priority to maximize efficiency by allowing the most cost effective heater(s) to run first.The example below shows how to change priority to run the heat pump first, then, if it can’t meet the demand for heat, the gas heater will be allowed to operate.Note that the time interval used for heater priority can only be changed in the Configuration Wizard. Note that a time interval setting of “0” will eliminate priorityand always run both heaters at the same time.PrioritizeSelect Source12PrioritizeSelect SourcePOOLheater1Enable and Disable Heaters - When “SelectSource” is highlighted, touching a heaterbutton will enable and disable that heater. Agrayed out heater is disabled.Select Sourcegasset temperatureON85 FactualPOOLPrioritizeSelect Sourcegas65 F2heaterheat pumpPOOLheaterPrioritizeheat WARDGENUINEGENUINEREPLACEMENTREPLACEMENTPARTSPARTS
ChlorinatorIf a chlorinator has been configured in the Configuration Wizard, you will see it in the Features Screen. Touching the chlorinator button will bring you to theChlorinator Control Screen that will allow you to enable/disable the chlorinator, set a schedule, super chlorinate and view/change diagnostics. A sample screenis shown below. For schedules, refer to the previous examples in this manual.1/2vspheaterpHalarmlight rowcleaneruclightschlorinatorON3200 ppmaveragePOOLchlorinatorPOOLfeaturesEnable / Disable - Slide this switch toenable and disable the chlorinator andthen touch the Save button.Change Setting- This slider will raiseand lower the chlorinator setpointsetting. If an HL-CHEM is used andORP is enabled, the adjustment willbe displayed in “mV”.15%SCSet Schedule - Touch thisbutton to set a schedule forthe chlorinator.ON3200 ppmaverage15%POOLchlorinatorSCSuper Chlorinate - Touch this button toset the amount of hours that you’d like tosuper chlorinate.Chlorinator Diagnostics - Touch this button toview diagnostics, set average salt, change polarity, and to reset the cell timer.Chlorinator Control ScreenIf using an HL-CHEM - The Hayward HL-CHEM Sense and Dispense accessory continuously tests the pool’s sanitization and pH levels allowing the OmniLogicto automatically generate the correct amount of chlorine and dispense the proper amount of pH reducer. If using the HL-CHEM and ORP has been enabled inthe Configuration Wizard, the OmniLogic will display chlorinator readings and settings in “mV” rather than “%”. Refer to the information below as well as theHL-CHEM manual for configuration and operation instructions.Chlorinator Setting - The OmniLogic can only generate chlorine while the filter pump is operating. Set the percentage of run time that you desire chlorinegeneration. Raise this value to generate more chlorine. Lower this value to generate less.NOTE: After the initial setting, you may need to raise the setting when the pool water temperature increases significantly, when there is higher than normalbather load or when your chlorinator cell ages. You may need to lower the setting when the pool water temperature decreases significantly or there are longperiods of inactivity.Super Chlorinate - When you have an unusually high bather load, a large amount of rain, a cloudy water condition, or any other condition that requires alarge amount of chlorine to be introduced to the pool, activate the OmniLogic Super Chlorinate function. The OmniLogic will turn on the filter pump (if notscheduled), set the pool/spa valves to the correct position, and set the chlorine generator to maximum output. The super chlorinate function will continue forthe programmed number of hours overriding the normal filter pump schedule settings. At the end of the super chlorinate period, the pool will return to normaloperation. If you manually turn off the filter pump, the super chlorinate function terminates.13USE ONLY HAYWARD GENUINE REPLACEMENT PARTS
Chlorinator DiagnosticsON3200 ppmaverage15%diagnosticSC /00.00average salt: 3200 ppmPOOLchlorinatorcell type: T-CELL-15POOLdiagnosticReverse Polarity - Touch this button toreset the average salt reading.diagnostic /00.00average salt: 3200 ppmcell type: T-CELL-15POOLdiagnosticRestart Average Salt - Touch this buttonto delete the existing average salt reading.The OmniLogic will restart a new calculation using the instant salt level.Reset Cell Maintenance Timer - Touch torestart the timer.For the chlorinator to be operating, several conditions must exist: the filter pump must be running, the flow switch must detect flow, the chlorinator setting mustbe greater than 0%, the water temperature at the cell must be between 50ºF and 140ºF (superchlorinate will run under 50º except during freeze protection),and the salt level must be within the operating range. If any of these conditions are not met, the diagnostic screen will show that the chlorinator is off. Also,depending on the chlorinator setting, the OmniLogic may be in between cycles and the chlorinator is at rest (cell current shows 0.00A). To force the start ofthe new cycle, you can touch the Reverse Polarity button.NOTE: If a conventional or solar heater is operating, it is likely that the temperature of the water at the cell is higher than the pool/spa water temperature displayed on the OmniLogic default display.Restart Average Salt - The OmniLogic monitors salt level while chlorinating. At any time, go to the chlorinator diagnostic screen to view the average salt basedon an ongoing calculated average. If you restart average salt, the previous average is deleted and the OmniLogic begins calculating the new average from thatmoment. The OmniLogic will start with the instant salt reading and calculate an ongoing average.Reverse Polarity - The OmniLogic periodically reverses the polarity of the voltage applied to the chlorinator cell in order to automatically clean off any calciumdeposits. To check operation in both polarities, touch this button. The chlorinator will turn off, wait for 15 seconds and then turn on in the opposite polarity.Reset Cell Maintenance Timer - To maintain maximum performance, it is recommended that you open and visually inspect the chlorinator cell every 3 monthsor after cleaning your filter. The OmniLogic will remind you to do this by displaying a message to clean and inspect the cell after approximately 500 hours ofoperation. You can restart the timer by touching this button.14USE ONLY HAYWARD GENUINE REPLACEMENT PARTS
pH DispenseIf using an HL-CHEM: The Hayward HL-CHEM Sense and Dispense accessory continuously tests the pool’s sanitization and pH levels allowing the OmniLogic toautomatically generate the correct amount of chlorine and dispense the proper amount of pH reducer. Refer to the information below as well as the HL-CHEMmanual for configuration and operation instructions.1/2vsppHalarmlight rowheatercleaneruclightschlorinatorDispensing OnON7.37.3POOLfeaturespH Dispense Control ScreenSet pH Level - Set thedesired pH level.Enable / Disable - Slide this switch toenable and disable the pH dispenser andthen touch the Save button.Calibrate - Calibrate thepH reading if the OmniLogicdoesn’t display the correctlevel.Dispensing OnON7.37.3Force 15 minute Run - Touchingthis button will force the dispenserto run for 15 minutes. This is onlyavailable in Service Mode.Current pH Level - Shows the currentpH reading in the pool or spa.pH CalibrationIf the OmniLogic pH reading differs from independent water tests, you can adjust the reading by touching the Calibrate button and using procedure below. You’llbe asked for the difference between the displayed pH level and the true pH level. You’ll want to select the amount needed to go from the displayed level tothe true level. In the example below, the displayed level is 7.3 and the true level is 7.5. You need to add .2 to the displayed level to arrive at the true pH level.Dispensing OnON7.
USE ONLY HAYWARD GENUINE REPLACEMENT PARTS 092473 RevH Hayward Pool Products 620 Division Street, Elizabeth NJ 07207 Phone: (908) 355-7995 www.hayward.com
