Transcription
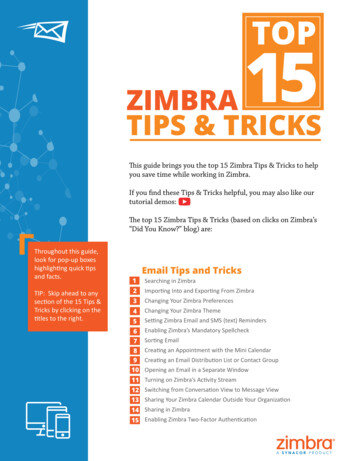
TOP51ZIMBRATIPS & TRICKSThis guide brings you the top 15 Zimbra Tips & Tricks to helpyou save time while working in Zimbra.If you find these Tips & Tricks helpful, you may also like ourtutorial demos:The top 15 Zimbra Tips & Tricks (based on clicks on Zimbra’s“Did You Know?” blog) are:Throughout this guide,look for pop-up boxeshighlighting quick tipsand facts.TIP: Skip ahead to anysection of the 15 Tips &Tricks by clicking on thetitles to the right.1Email Tips and TricksSearching in Zimbra2Importing Into and Exporting From Zimbra3Changing Your Zimbra Preferences4Changing Your Zimbra Theme5Setting Zimbra Email and SMS (text) Reminders67Enabling Zimbra’s Mandatory Spellcheck89Creating an Appointment with the Mini CalendarSorting EmailCreating an Email Distribution List or Contact Group10 Opening an Email in a Separate Window11 Turning on Zimbra’s Activity Stream12 Switching from Conversation View to Message View13 Sharing Your Zimbra Calendar Outside Your Organization14 Sharing in Zimbra15 Enabling Zimbra Two-Factor Authentication
1Searching in ZimbraThere are many great and easy ways to search in Zimbra: Quick keyword search Complex search Right-click searchQuick Keyword SearchHow much time doyou spend searchingfor a specific email?Searches are easy andfast in Zimbra. Searchyour entire Zimbraaccount, includingattachments, inseconds.You can do a quick search using keywords like from, to, in, etc. Click here tosee all search keywords.To search by keyword:keyword: search word(s)Examples: Find all email received from Mark (all email with “Mark” in the Fromfield): Find all email in the Sent folder:Search for words in an email by typing the words into the search field. Forexample, to search for email including “overview document":This shows all email with “overview document” in the: Content Subject line Attachments Etc.Use quotes to search for multiple words combined. Without the quotes, thesearch results will include all emails with “overview” and all emails with“document”.Complex SearchesYou can also build a complex searchusing the Search menu.Click the magnifying glass in thesearch field to open the Search tab.2Back to Table of Contents
The Search tab has multiplemenus and options that youcan use to refine a search. Forexample, you can: Click “has attachment”to see only emails thatinclude attachments Set a date range Show email only from orto a specific sender Show only email with aspecific tag Etc.Right-Click SearchThere is a quick way to searchfor all email you have sent to orreceived from a specific user:1. Right-click a user name(in your inbox, in anemail, in an appointment,etc.).2. Click Find Email.Pin Your Search TabThis is a great featureof Zimbra’s search your search resultsdon’t disappear! Theyopen in a separate tabthat you can refer toas needed.3Pin the Search tab to alternatebetween the search results andyour mail . the search resultsdon’t disappear!Save Your SearchSave any search you perform often. To save a search, click the Save button.Back to Table of Contents
Saved searches are in the overview pane.Click the search whenever you need it.Do you want to learn more aboutsearching in Zimbra?Zimbra Blog posts: Searching with Keywords Searching using the Search Menus Creating a Search Using Common Searches Save a SearchZimbra tutorial: Searching in Zimbra2You can easily addfiles (like addressbook contacts) fromanother account(like Google) toZimbra using Import.Likewise, if you wantto move your Zimbracontacts into anotheraccount, you canexport an addressbook from Zimbra.4Importing Into and Exporting FromZimbraYou can easily move content into and out of your Zimbra account withthe Import and Export features.Things you can import and export include: Mail folders (in tar-gzipped .tgz format) Calendars (in iCalendar .ics format) Contacts (in .csv format)To import or export:1. Click the Preferences tab.2. Click Import/Export.Back to Table of Contents
To import, choose a file and click Import. Zimbra automatically detects thetype of file being imported and displays appropriate import optionsTo export:1. Select the type of item: Account (mail folder), Calendar or Contacts.2. Select the item from the Source menu.3. Click “Advanced settings” to specify: What data types are included in the export What date range to export What filters to use, if any4. Click Export.View a demonstration:5Back to Table of Contents
3 Changing Your Zimbra PreferencesIn Zimbra, you can change many preferences to fit your work style andneeds. Here are some Preferences highlights. For more information, view ademonstration:Have you ever wantedto customize youremail or calendar? Forexample, maybe youwant to: Read emailsbelow the inboxinstead of on theright? Display yourcalendar in amonth viewinstead of a workweek view? Change thelanguage of yourdisplay or yourtimezone?To change your preferences:1. Click the Preferences tab. Your Preferences are listed in the overviewpanel.2. Click General. On the General page, you can change: Appearance, such as the theme (colors of your Zimbra interface), font,etc. Time zone and language displayed Search folders included in your searchesOn the Mail page are options to customize how Zimbra displays messagesand how Zimbra responds to received messages, such as: Specify an action to occur when you receive a message (flash thebrowser title, show a pop up notification, etc.) Forward a copy of the message to another address (helpful if someoneelse manages your calendar invitations and/or inbox) Send a notification message to another address (helpful if you do notcheck your Zimbra mailbox often)6Back to Table of Contents
Other Preferences pages include: Accounts: Link your other email accounts to Zimbra, so you can see all ofyour email in your Zimbra Inbox Filters: Set up mail rules or filters Out of Office: Set up your vacation or out of office messages Signatures: Create as many signatures as you need Calendar: Specify your own calendar settings, such as view, workinghours, etc. Sharing: Create and manage your shared Zimbra items Shortcuts: View or print the keyboard shortcuts available in ZimbraView a demonstration:4 Changing Your Zimbra ThemeThere is another greatcustomization you canmake in Zimbra – thetheme. Your Zimbraweb client probablyshows the colorsand logos of yourcompany or emailservice provider. Youcan change the colorsby changing yourZimbra “theme” inPreferences.To change your theme:1. Click the Preferences tab.2. Click General.3. Select an option from the Theme menu.4. Click Save.Note: If you do not have a Theme menu, or if you do not have the Theme optionsdisplayed here, your organization has not enabled them. Please contact yourSystem Administrator or email service provider for more information.7Back to Table of Contents
You are prompted to reload Zimbra.The new theme is displayed.5 Setting Zimbra Email and SMS (text)RemindersWhen you create an appointment in Zimbra, you can specify a pop upreminder. This is a window that pops up in your browser like this:Have you everforgotten anappointment andwished you had areminder in email oron your phone? WithZimbra, you can!8You can set up email and/or SMS (text) reminders in Zimbra Preferences.To set up email and/or text reminders:1. Click the Preferences tab.2. Click Notifications.3. Complete the fields.4. Save your changes.Back to Table of Contents
Note: If you do not have a Notifications option, your organization has notenabled this Zimbra feature. Please contact your System Administrator oremail service provider for more information.When you next create a calendar appointment or task, you will see newoptions in the Reminder area, as shown below. Click the Email box to send a reminder to your email address. Click the SMS box to send a text reminder to your phone.View a demonstration:6 Enabling Zimbra’s Mandatory SpellcheckHave you eversent an email withembarrassing spellingerrors? In Zimbra,you can enablemandatory spellcheckto automaticallyspellcheck every emailbefore it is sent.9To set up mandatory spellcheck:1. Click the Preferences tab.2. Click Mail.3. Scroll down to the Composing Messages area, and select Mandatory spellcheck before sending a message, as shown below.4. Click Save.Back to Table of Contents
7 Sorting EmailWhen your reading pane is on the right:When you openZimbra, your email islisted chronologicallyby date received. Haveyou ever wanted tochange that sortingorder? Maybe youwant to see emaillisted: By sender With flaggedmessages on top In reverse chronological order By size1. Open the View menu.2. Open the Sort by menu.3. Select the category for sorting.When your reading pane is on the bottom, click any column header to sort bythat category. For example, click the: Subject column header to sort alphabetically by Subject Flag column header to display all flagged messages first From column header to sort all messages alphabetically by sender. Clickagain to sort them in reverse alphabetical order. Received column header to sort all messages chronologically by datereceived. Click again to sort them in reverse chronological order.View a demonstration:10Back to Table of Contents
8 Creating an Appointment with the MiniCalendarDo you use yourZimbra mini calendar?It can save you a lot oftime when you createappointments!Note: If you don’t see a mini calendar, either your organization has notenabled the mini calendar or that preference is turned off in Preferences Calendar Always show the mini calendar. Please check your Preferencesand, if needed, contact your System Administrator or email service providerfor more information.There are two ways to use the Zimbra mini calendar as a shortcut to create ameeting:1. From an email: This is an excellent shortcut because it opens an appointment tab that automatically includes everyone in the email to/from/cclists, the content of the email and any attachments from the email! View ademonstration:2. From any Zimbra tab: As shown below, right-click any date on the minicalendar and select New Appointment. You do not need to be in the Zimbra Calendar tab to create a new appointment.11Back to Table of Contents
9 Creating an Email Distribution List orContact GroupYou can create as many contact groups as you need. You might have a contactgroup for your work team, your larger department, friends, family, etc. As youtype an address into Zimbra, your contact groups autocomplete, too, adding allof the addresses in the group automatically.Zimbra’sautocomplete featureis great when youare addressingemails or creatingappointments – asyou type, addressespop up for you. But itis also very useful tohave your own emailsending list, whichis sometimes calleda distribution list. InZimbra, this is called acontact group.12To create the contact group:1. Open the New menu on any tab and select Contact Group.2. The Contact Group tab opens.3. Name the group.4. Search for contacts to add to the group. Zimbra searches for addresses inthe Global Address List, but you can change this to search your Contacts.5. Select contacts.6. Click Add to add a contact.7. Click Save to save the group.Note: Global Address List is a technical name for your company directory.Back to Table of Contents
The new contact group is displayed. Notice that the icon for a contact group isa multiple head-and-shoulders icon.When entering an address in an email or appointment, just type the name ofthe contact group, and all addresses from the group will auto-complete foryou.View a demonstration:10 Opening an Email in a Separate WindowYou can open an email in a separate window when:Have you ever beenfrustrated by having toclick back and forth todifferent tabs to copyand paste from oneemail to another? InZimbra, you can openemails in separatewindows!13Reading email:1. Open the Actions menu.2. Select “Open in a separate window”.Back to Table of Contents
Composing email: Click the icon in the top right corner of the compose tab.11 Turning on Zimbra’s Activity StreamTo turn on the activity stream:1. Click the gear icon in the Folders area of the navigation pane, and selectActivity Stream.Do you get frustratedwhen your inbox iscluttered with emaillike newsletters,updates from socialsites, etc? In Zimbra,you can easily filterthese emails into theActivity Stream folderinstead of your inbox.142. Select Enable moving messages into Activity Stream.3. Select the type of messages to move: Messages where your address is not in the To or in the To or Cc field Messages from people not in your address book Messages sent to a distribution list that you are a member of Commercial mass marketing and bulk mail messages4. Click Save.Back to Table of Contents
The Activity Stream folder is now in the folders list, and all email meeting thefilter criteria will be delivered into this folder instead of your inbox.12 Switching from Conversation View toMessage ViewZimbra automaticallyshows all of youremails in conversationview. Do you knowwhat conversationview is? Do you knowhow to change yourview?A quick summary of conversation view: All email with the same subject is grouped into a conversation. You can easily see when you are in conversation view from: The expand/collapse arrows The number indicating how many messages are in the conversation Multiple names in the From columnYou can easily switch from conversation to message view. Message view is amore traditional display where every email is shown in a separate row.15Back to Table of Contents
To switch from conversation view to message view, select View By Message.You can easily see when you are in message view by the mail icons.13 Sharing Your Zimbra Calendar OutsideYour OrganizationHave you everwanted to share yourZimbra calendar withsomeone outside ofyour organization?Perhaps familyor friends whowant to see yourwork schedule. Orperhaps you want toshare the calendarwith people whofrequently scheduleappointments withyou.16You can share your Zimbra Calendar information with anyone via a link. Theycan click the link to see when you are free or busy.To share your calendar via a link:1. Click the gear icon in the Calendars navigation pane.2. Select the Send Free & Busy Link As option.3. Select the link format. In this example, I will send anHTML link.Back to Table of Contents
A compose window opens with the link. Send this link, and when the userclicks the HTML link, this is displayed:14 Sharing in ZimbraDid you know that youcan share any of yourZimbra items? You canshare: Email foldersAddress booksCalendarsTask listsBriefcase foldersWhy is this helpful? Here are some examples. If you are collaborating on documents with others, you can all work onthe same documents from a shared briefcase folder. If someone else administers your calendar for you, you can share thecalendar with him or her. If you have a working team that needs access to a set of emails, you canshare the mail folder, and everyone included in the share can read theemails, respond to them, etc.There are two ways to create shares in Zimbra: Right-click the item you want to share, and select Share Folder. Click the Preferences tab, and click Sharing.17Back to Table of Contents
Using either method, you will see the Share Properties dialog box.To create the share:1. Select a “Share with” option: “Internal users or groups” are those within your organization. “External guests” are those outside your organization, and they musthave a password to access the shared item. “Public” is also for those outside your organization; however, they do notneed a password.2. Enter the email address(es) for the share.3. Select the role: None is not commonly used. Viewer is view-only access. Manager allows the user to view, edit, add, and remove from the shareditem. Admin allows the user to do all of the above and add/remove/changeshares to the shared item.4. Click OK.The recipient receives an email as shown here. Ann can click either AcceptShare, and she will be prompted to name the folder and choose a color, orDecline Share.The email also contains a description of the share.View a demonstration:18Back to Table of Contents
15 Enabling Zimbra Two-FactorAuthenticationHas your emailaccount ever beenhacked? Have yourcontacts receivedemail "from" youthat you didn't send?In Zimbra, you canset-up two-factorauthentication (2FA),an extra layer ofsecurity for yourZimbra account. With2FA enabled, to loginto your Zimbraaccount, you needyour password and acode generator on yousmartphone.Enabling 2FA is easy, but there are a few steps. You will need access to bothyour Zimbra account and your smartphone to complete the 2FA setup.1. Click the Preferences tab.2. Click Accounts.3. Click Setup two-step authenticationNote: If you do not see this option in your Account Preferences, yourorganization has not enabled the two-factor authentication feature.Please contact your System Administrator or email service provider formore information.4. Click BeginSetup.blbljb5. Enter yourZimbrapassword.19Back to Table of Contents
6. Click Next.The next steps require your smartphone.7. Click the URL to see which authentication applications are available foryour smartphone. Download the authentication application and install it on your smartphone. Click Set up account in the application. Follow the steps to set up the account using a key.8. Click Next.9. Using the app on your smartphone, enter your email address and the keyprovided in Zimbra, as shown.10. Click Next.Your smartphone will provide a code to complete the 2FA setup.11. Enter the code provided on your smartphone.20Back to Table of Contents
12. Click Next.13. Success! You have enabled 2FA for your Zimbra account!What now? Every time you log into your Zimbra account, you will beprompted for a new code from the application on your phone.What if you don’t have your phone, or what if your phone runs out ofbatteries? You have 10 one-time codes to use if you do not have your phoneavailable. Simply click the “View” link and print the 10 codes (or copy themto an app on your phone). Keep these codes handy, so they are available whenyou need them.View a demonstration:21Back to Table of Contents
2FAwww.zimbra.comCopyright Synacor, Inc. All rights reserved. This product is protected by U.S. and international copyright andintellectual property laws. ZIMBRA is a trademark of Synacor, Inc. in the United States and/or other jurisdictions. All other marks and names mentioned herein may be trademarks of their respective companies.22Back to Table of Contents
Zimbra tutorial: Searching in Zimbra Importing Into and Exporting From Zimbra You can easily move content into and out of your Zimbra account with the Import and Export features. Things you can import and export include: Mail folders (in tar-gzipped .tgz format) Calendars (in iCalendar .ics format) Contacts (in .csv format)
