Transcription
EPIC 950 THERMALTICKET PRINTERSoftware Reference Guidewww.TRANSAC-TECH.com
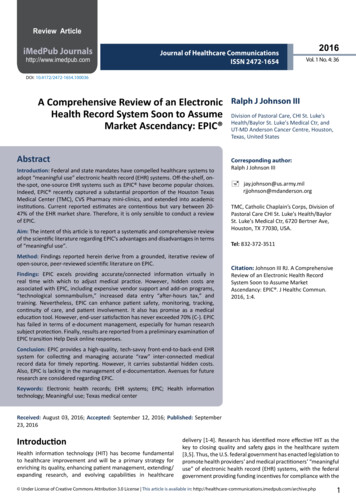
Contacting Information / Serial Plate Info TransAct Technologies Incorporated is themanufacturer of Ithaca brand POS, Banking, and FoodSafety, receipt printers and Epic brand Gaming printers.877.748.4222 - www. transact-tech.comWhen calling the toll free number above enter option 2 forParts and RMA’s or enter option 3 for Technical SupportE-mail Technical Support at:TechSupport@transact-tech.comOnline RMA form:www.transact-tech.com/tsg/rma.htmlAdditional product support information can be found onour website under Support Product Info Epic 950.TransAct also maintains an FTP site for downloadingdocumentation, utilities and firmware files:ftp://ftp.transact.comUSER ID: gamingPASSWORD: CAs1no123or at ftp://gaming:CAs1no123@ftp.transact-tech.comSerial Plate InformationDate Code Identification: The first letter denotes the month built, as follows:A January, B February, C March, D AprilE May, F June, G July, H August,I September, J October, K NovemberL December The two numbers denote thelast two digits of the yearbuilt, as follows:04 200405 2005.Note: Standard Warranty: 2 years from the build date2
Software ToolsFirmware Download Utility - Version 2.18The Download tool is designed to replace/update the firmwareimage in the printer on a single printer.Master Programmer Utility - Version 1.20bThe Master Programmer tool is designed to be used inconjunction with our Master Programmer hardware, and allowsthe replacement/update of firmware image on multiple printersat once.POSjet Terminal Utility - Version 1.7.2The POSjet Terminal tool is designed for an easy way to allowcommands to be sent to the printer for testing communication.You can also use this tool to send a script file (a text filecontaining commands with .dmo as the extension) for testingand developing.Demo and Comm Analyzer Utility - Version 2.0.12The Demo and Comm Analyzer tool allows demo scripts to besent to the printer to test communication and functionality of aprinter. The tool also has a debug mode which allows you tomonitor the communication to and from the printer and PC fortesting and developing.File Download Utility - Version 1.12aThe File Download tool is designed to view the Epic 950’sFlash memory and to transfer files between the printer and aPC. The tool is most commonly used to transfer specific filespresent on the EPIC 950.—Please check with our website for latest version of these tools.3
Firmware Download UtilityThe Firmware Download Utility is designed to replace/update the firmware in the printer.Prepare Printer for Firmware Download:1. Verify the printer is on and ready, no error LEDs.2. Verify no Windows drivers are currently on the same port you willbe using with the Download Utility. If so,temporarily move the Windows driver of this port until you aredone.3. Load the paper.4. Un-Rack the printer slightly from the chassis.5. Open the front lid6. Power off the printer.7. Press and hold the Feed button.8. Power the printer back on while holding the Feed button.9. Let go of the button when you see the solid red Fault LED andblinking green Ready LED.10. You are now in Bootload mode.11. Connect printer to PC using a serial null modem cable and ourDownload Adaptor.Note: The Serial null-modem cable (part#10-2020L) should be connected to theDownload Adaptor. Then plug the Download Adaptor into the printer’s DownloadPort. Adaptor Part# 95-05438L WITH LED’s Can be used with both DownloadUtility and Master Programmer.Adaptor Part# 95-05026L WITHOUT LED’s Can ONLY be used with DownloadUtility.4
Firmware Download UtilityUsing the Firmware Download Utility1. Run the Download program.aSelect or Type in the communication port being used.(Example: COMx)2.Left click the top left PJ printer icon and check Xon/XOff(serial).3.Slide Serial Perfomance Slider to 115200 baud rate.Note: When sliding the Slider to Baud Rates higher than57600 Baud, a Warning Box will come up. Select Yes andit will set to 115200. Once setup, settings are saved for thenext time you open the program.5
Firmware Download UtilityUsing the Firmware Download Utility5. Click the “Get Printer Information” button.7. Program should display information in the fields below thebutton.Note: If you receive the below error, click OK, and click “Get PrinterInformation” button again. If you still get the below error, please verifyyou have followed all the steps on the previous two pages.7.8.Click the “Select file to Download” button.Select the firmware file (.cbt or .bot file) to be downloaded.9. Click “Download Now’ button.10. Wait until flash process completes.6
Firmware Download Utility11. Message that Flash Update Done appears.12. Click Ok.13. Wait for the Green Ready LED to flash quickly on theprinter to indicate firmware download is complete.14. Close Program.15. Rack the printer back into the chassis.16. Close the lid.17. Power the printer off and on.18. A test ticket will print.19. Verify firmware on ticket matches firmware downloaded.20. Disconnect Program Adaptor from the printer.Note: You can also print a test ticket whenever you wish by following the step onthe next page.7
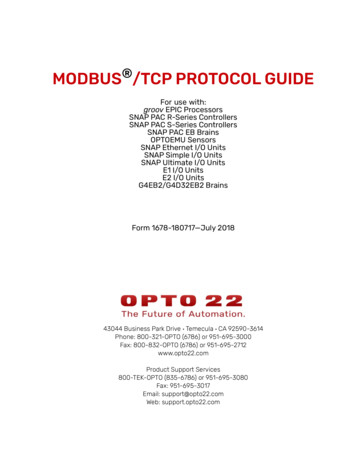
Firmware Download UtilityPrint a test ticket using the printer’s self-test procedure: 1.2.3.4.5.Press and hold the FEED button for approximately 5seconds, then release and the self-test ticket will thenprint.- OR Un-rack the InnerChassisOpen the Ticket Cover.Do not remove thecurrently loaded ticket.Press and hold theFEED button until theOpen LED goes out,then release the button.Now close the TicketCover and the self-testticket will then print.Close the Inner Chassisto resume normaloperation.NOTE:Provides useful informationregarding loaded firmwareversion and configured BaudRate settings in addition toperforming mechanicaltesting.Self-TestTicket8
Master Programmer UtilityThe Master Programmer Utility is designed to be used inconjunction with our Master Programmer hardware, and allows thereplacement/update of firmware image on multiple printers at once.The utility can also be used without the Master Programmer Hardwarefor single printer downloading using the Program Adaptor.Master Programmer UtilityMaster Programmer HardwareProgram Adaptor (single printer download)9
Master Programmer UtilitySingle Printer Download (using Program Adaptor)Using the Master Programmer Utility to load a firmware file to one Epic950 printer:1.2.3.Make sure printer is on and ready, paper loaded.Run the Master Programmer Utility.Use the Browse function to select a firmware (.cbt) file todownload.4. Click OK if you receive the popup below. Note: A verification file isnot needed to download firmware.5. Select the COM port to be used for each connection as required.Example: If your system uses COM7, change to COM7.6. Select Reset Baud Rate check box. This is used when the oldfirmware has a baud-rate different from the baud rate of the newfirmware.7. Connect the printer to the PC. Use a serial null modem cable(part#10-2020L) with Program Adaptor (part#95-05438L)to connected the PC to the printer’s side imPort .8. Press the “Start” button when everything is ready.10
Master Programmer Utility9.Download will start once the “Start” button is pressed.10. Flash update will continue until all data is transferred 100%11. Printer will continue to program the flash memory. Please wait.12. DO NOT disconnect until the program shows: ***DONEPROGRAMMING PRINTER*** message shown below.13. Printer will reset and the Adaptor LEDs will blink fast alternatingred and green to indicate the printer is done downloading.14. Printer can now be disconnected.11
Master Programmer UtilityMaster Programmer Hardware Download1.2.3.4.Make sure the power switch on the master programmer hardwareis on.Run the Master Programmer Utility.Use the Browse function to select a firmware (.cbt) file to download.Click OK if you receive the popup below. Note: A verification file isnot needed to download firmware.5. Select the COM port to be used for each connection as required.Example: If your system uses COM7 thru COM10, change to COM7thru COM10.6. Select Reset Baud Rate check box. This is used when the oldfirmware has a baud-rate different from the baud rate of the newfirmware.7. Press the “Start” button when everything is ready.12
Master Programmer Utility8. Printer downloads will start as soon as printers are attached to theMaster Programmer and the imPort connection is made.9.Flash updates will continue until all data is transferred 100%.10.Printers will continue to program the flash memory. Please wait.11. DO NOT disconnect until the program shows: ***DONE PROGRAMMING PRINTER *** message, see below.12. Printers will reset and the LEDs on the Master ProgrammerHardware will blink fast alternating red and green to indicate theprinter is done downloading.13. Printer can now be disconnected.13
Master Programmer Utility1.Slide an Epic 950 printer into the master programming module asshown. Make sure it is fully seated into the connector.2. Connect the Epic 950 Master Programmer download cable intothe imPort connection on the printer.3. Once you have connected the Programming Adaptor and afirmware file has been selected in the application, the firmwarewill automatically start to download to the Epic 950 printer.14
POSjet Terminal UtilityThe POSjet Terminal Utility is designed for an easy way to allow commands to be sent to the printer for testing communication. Also can beused to send a script file (a text file containing commands with a .dmoas the extension) for testing and developing.Prepare Printer for POSjet Terminal Utility:1. Verify the printer is on and ready, no error LEDs, load paper.2. The serial null modem cable(part#10-2020L) should be connectedto the printer with the Power Comm Adaptor (part#95-05027L).3. Verify no Windows drivers are currently on the same port you willbe using with the POSjet Terminal Utility. If so, temporarily movethe Windows driver of this port until you are done.1615
POSjet Terminal UtilityUsing the POSjet Terminal Utility:1.2.Open/Run the POSjet Terminal program.Select Port, then Settings from the Top menu.3. Select or Type in the communication port and selectsettings to match the printer. (Example: COMx)(Baud rate and other settings can be determined by printing a testticket from the printer.)4.Click Ok.Note: Once setup, these settings are saved for the next time youopen the program.16
POSjet Terminal UtilityInteractive Box:1. Place the cursor in the Interactive box.2. Position the cursor in this box and press the ENTER key.3. The program will send a [CR][LF] to the printer, and the printershould feed paper.Or1.2.3.4.Place the cursor in the Interactive box.Type data in the Interactive box and hit the ENTER key.The data typed is sent to the printer immediately.Press the Feed button to eject ticket to see data printing on ticket.Example: Enter “The data typed here will be sent to the printer” in theinteractive box, and press Enter key. “The data typed here will be sentto the printer” is printed on the ticket. Press the Feed button to ejectticket and see this data printed on the ticket.17
POSjet Terminal UtilityCommand Box:1. Place the cursor in the Command box.2. Enter commands in this box and click the “Send Command”button to send these commands to the printer.Example: The command for Form Feed is [FF] in ASCII.Enter [FF] and Click Send Command. The printer should Form Feed.The same command can be entered in the decimal format: 12 , orthe hex format: 0x0C as well in the Command Box.3. Click the Get Response button to get the return values from acommand sent that would generate a response.Example: Type [GS]z, a request status command. Click the Send Command button. Click the Get Response button. The return status will bereturned. (Note: Auto Query should be off if using this button. If on, thestatus will return automatically, and the Get Status button would notneed to be used.)NOTE: Please see the programmer’s manual for additional commands.18
POSjet Terminal UtilityScript File Box:1. The Script File box is used to select a script to send to the printer.2. A script is simply a text file saved with a .dmo file extension thatcontains data and commands to be sent to the printer.3. Use an external text editor (Example: NotePad), and enter data andcommands.4. Save the file as a text file with a .dmo file extension. See programmer’sguide for commands. Note: A script sample can be found in theC:\Program Files\TransAct\PJTerminal folder. (TEST.DMO)5. Click the “ ” button to select a .dmo file. Or, select a recently used.dmo file from the drop down box.6. Click Open after selecting .dmo file.7. Selected file will be listed in the Script File dropdown box.8. Click “Send Script” button to send the data and commands in theselected .dmo file to the printer.19
POSjet Terminal UtilityBreak and Loop ButtonsThe Loop button will allow you to repeat a command entered in theCommand box continually. If the command sent gets a response, it willalso be displayed underneath as well. (Auto Query should be unchecked when using the Loop button.)The Break button will stop the repeated command.Output Area:Data sent and status returned will appear in the bottom output area.The data displayed will be in ASCII. The status returned can be formatted as Hexadecimal, Decimal, or ASCII depending on your preference.1. Click the Hex, Dec, or Normal radio button to select which formatyou would like the response data to be seen in. (Normal ASCII)2. Check the Auto Query checkbox if you wish to have statusautomatically returned after commands are send.3. Check the Transcript checkbox, if you wish to record a text file withthe output. Click File, Open Log file to set the name and location ofthis output file.20
POSjet Terminal UtilityExample of Return/Response Value FormatsNormal(ASCII):Hexadecimal:Decimal:ASCII: [SO] HEX: E DEC: 14 21
Demo and Comm Analyzer UtilityThe Demo and Comm Analyzer Utility allows demo scripts to be sent tothe printer to test communication and functionality of a printer. The toolalso has a debug mode which allows you to monitor thecommunication to and from the printer and PC for testing anddeveloping.Prepare Printer for Demo and Comm Analyzer Utility:1. Verify the printer is on and ready, no error LEDs.2. Verify no Windows drivers are currently on the same port you will beusing with the Demo and Comm Analyzer Utility. If so, temporarilymove the Windows driver of this port until you are done.3. The serial null modem cable(part#10-2020L) should be connected tothe printer with the Power Comm Adaptor(part#95-05027L).22
Demo and Comm Analyzer UtilityUsing the Demo and Comm Analyzer Utility:1. Run the Demo and Comm Analyzer program.2. Click the Comm Port button to Select or Type in the communicationport being used. (Example: COMx)3. Click the Setup serial port button to set communication settings forthe port. (Baud rate and other settings can be determined by printinga test ticket.)4. Click Ok. Click Ok.Note: Once setup, these settings are saved for the next time you open theprogram23
Demo and Comm Analyzer Utility4. Select a demo ticket to send to the printer.5. Click Print Ticket to send the select demo to the printer.24
Demo and Comm Analyzer UtilityUsing Debug Mode:1. Click the Debug mode checkbox.2. The debug area appears for use.3. Type in a command into the command field, and click the send command button. The communication data is shown in the COMM DATAarea below.Example shows [FF]command being sent.Sending this commandwill eject a blank ticketfrom the printer.25
Demo and Comm Analyzer Utility4. Send a demo ticket and it will show this communication in theCOMM DATA area. Check Hex or Text to format output in COMMDATA area.5. Click the Start Polling button, and a status request command will besent to the printer at the set interval. The request and the responsecan be monitored in the COMM DATA area. Click Stop Polling tostop sending.Note:Data displayed in green is data sent to the printer.Data displayed in blue is data sent from the printer to the host PC.Data displayed in red is for future use, should be disregarded at this time.26
Demo and Comm Analyzer UtilityUsing Smart Mode:Checking the Smart Mode checkbox will display the Printer InformationArea that receives status information from a printer with Periodic StatusBack enabled.Note: To Enable Periodic Status, Dipswitch 7 must be set to the active position.The printer will then continuously send information about the printer’s state.If Dipswitch 7 is not enabled or you have no communication to theprinter, the Printer state area will state: “No status from Printer, Printermay be disconnected, powered off, or periodic status is not enabled.”With Dipswitch 7 enabled, Model and Firmware information is displayed.27
Demo and Comm Analyzer UtilitySmart Mode Status Examples:Lifting the front cover will show check mark with the relevant status,Printer Error and Cover Open.Removing the paper with cover closed marks the relevant status,Printer Error ticket Out, and Top of Form Error (Not seen).28
File Download UtilityThe File Download Utility is designed to view the Epic 950’s Flashmemory and to transfer files between the printer and a PC. The tool ismost commonly used to transfer specific files present on the EPIC 950.Prepare Printer for Firmware Download:1. Verify the printer is on and ready, no error LEDs.2. Verify no Windows drivers are currently on the same port you will beusing with the Download Utility. If so, temporarily move the Windowsdriver of this port until you are done.Note: A serial null-modem cable should be used to connect the printer to PC.Cable should be plugged into the download port located on the side of the printerusing the download Adaptor.29
File Download UtilityUsing the File Download Utility:1. Run the File Download program.2. You will be prompted for a password.3. Enter “fry” and Click OK.4. The main windows will load.Note: When you first open the program the communication is set to COM2. ClickOk. Then see next steps to setup the communication port.30
File Download Utility5. Click the Comm Port Button to select the correct Comm port you areusing.6. Click the Setup serial port button to set the communication settings.Settings should be set to: 115200, 8, None, 1, None.7. Click Ok. Click Ok.Note: Once setup, these settings are saved for the next time you openthe program.8. Click Refresh List.31
File Download UtilityTransferring a File to the Epic 950 Printer Flash Memory1. Locate the file you wish to transfer on your PC.2. Drag and drop it onto the main window of the download utility.3. The transfer will begin and the progress of the transfer will be indicated at the bottom of the download utilities dialog window.32
File Download Utility4. At the end of the transfer, the CRC is checked, if there is adiscrepancy, you will get an error prompt.Transferring a File from the Epic 950 Printer to your PC1. Locate the file you wish to transfer in the list of files, then highlightthe file by clicking on it.2. Click the “Read/Save to Disk” button. The transfer will begin and theprogress of the transfer will be indicated at the bottom of the downloadutilities dialog window. The file will be transferred to the location youselect and that location will become the current working directory.33
File Download UtilityDeleting from the Printer’s FLASH Memory1. Locate the file you wish to delete in the list of files, then highlight hefile by clicking on it.2. Click the “Delete” button. The file will be deleted and the mainwindowdisplaying the information list will be refreshed.Refresh List1. Click the “Refresh List” button.Printer Reset1. Some information change will not take effect until the printer is reset(i.e. changes to “por.ini”).2. Click the “Reset Printer” button.Done1. Click the “Done” button or the “X” to close the program.34
Notes35
Notes36
Notes37
Notes38
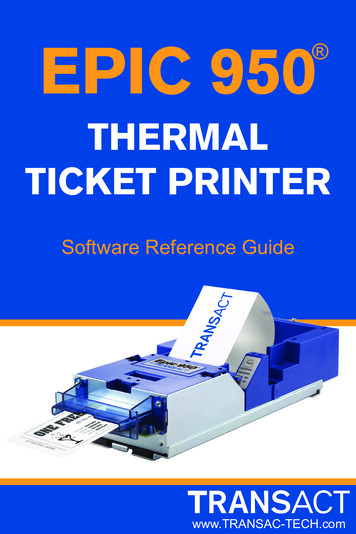
CASINO REVENUEGOES UPWHEN EPICENTRAL GOES INEPICENTRAL empowers casinos to: Create personalized promotional couponsTarget all carded or un-carded playersPrint coupons at the slots in real-timeBottom-line benefits for casinos: 100% increase in lower-tier player Average Daily Theo on day ofrandom award87% redemption rate of coupon targeted at carded players73% boost in coin-in for single one-hour unadvertised promotion40% redemption rate of coupons that encourage mid-week visits30% bump in new player loyalty club enrollment in less than 90 days25% increase in players qualifying for top-tier status
www.TRANSACT-TECH.comTechnical Support: 877.748.4222SRG 100713
Master Programmer Utility Single Printer Download (using Program Adaptor) Using the Master Programmer Utility to load a firmware file to one Epic 950 printer: 1. Make sure printer is on and ready, paper loaded. 2. Run the Master Programmer Utility. 3. Use the Browse function to select a firmware (.cbt) file to download. 4.