Transcription
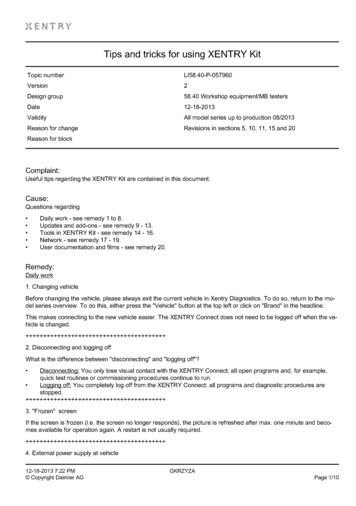
Tips and tricks for using XENTRY KitTopic numberLl58.40-P-057960Version2Design group58.40 Workshop equipment/MB testersDate12-18-2013ValidityAll model series up to production 08/2013Reason for changeRevisions in sections 5, 10, 11, 15 and 20Reason for blockComplaint:Useful tips regarding the XENTRY Kit are contained in this document.Cause:Questions regardingDaily work - see remedy 1 to 8.Updates and add-ons - see remedy 9 - 13.Tools in XENTRY Kit - see remedy 14 - 16.Network - see remedy 17 - 19.User documentation and films - see remedy 20.Remedy:Daily work1. Changing vehicleBefore changing the vehicle, please always exit the current vehicle in Xentry Diagnostics. To do so, return to the model series overview. To do this, either press the "Vehicle" button at the top left or click on "Brand" in the headline.This makes connecting to the new vehicle easier. The XENTRY Connect does not need to be logged off when the vehicle is changed. 2. Disconnecting and logging offWhat is the difference between "disconnecting" and "logging off''?Disconnecting: You only lose visual contact with the XENTRY Connect; all open programs and, for example,quick test routines or commissioning procedures continue to run.Logging off: You completely log off from the XENTRY Connect; all programs and diagnostic procedures arestopped. 3. "Frozen" screenIf the screen is frozen (i.e. the screen no longer responds), the picture is refreshed after max. one minute and becomes available for operation again. A restart is not usually required. 4. External power supply at vehicle12-18-2013 7:22 PM Copyright Daimler AGGKRZYZAPage 1/10
Always connect an external voltage to the vehicle as the XENTRY Connect requires more power than the SDconnect.In this way you will prevent diagnostic routines from being terminated. Also monitor the voltage indicator in XENTRYDiagnostics. 5. Always keep XENTRY Connect connected to power supplyIf the XENTRY Connect is not connected to a power supply unit, it will change to standby mode after ten minutes. Toensure permanent availability, you should keep the XENTRY Connect connected to the power supply when you arenot using it. The device then does not have to be restarted, thereby saving you time.Important:If it necessary to disconnect the vehicle battery when replacing a control unit, it is important to keep the XENTRYConnect supplied from an external power source via the appropriate power supply unit. Otherwise data may be lostwhen the XENTRY Connect switches to standby mode after 10 minutes without a power supply. 6. XENTRY Connect operation and temperatureHigh temperatures can limit the performance of the XENTRY Connect and may cause the XENTRY Connect to switchoff. The speed of the processor in the XENTRY Connect decreases automatically at 65 C and higher. This preventsthe temperature from increasing further. Furthermore, the warning message "XENTRY Connect overheated" appearsin the device's display at 70 C and higher. In this case, please allow the XENTRY Connect to cool down. Refrain fromusing it if possible. It is not recommended to perform flash operations and coding procedures. It is possible to performquick tests and delete fault codes.Tips:Please ensure that the XENTRY Connect is provided with adequate ventilation; it is particularly important to ensure that the fan vents are unobstructed.If the vehicle is equipped with an air conditioning system: Please leave the XENTRY Connect in the air-conditioned vehicle (without air conditioning system: Outside the vehicle!).Please leave the XENTRY Connect switched off overnight (standby mode).Please also refer to the safety information for the XENTRY Connect in the user guide (see remedy 20). 7. Working on more than one vehicle simultaneouslyIn order to work on several vehicles at the same time, "disconnect" from one XENTRY Connect and use XENTRYControl to connect to a different, free XENTRY Connect. In this way you can start diagnostic routines on several vehicles at the same time and change between the different XENTRY Connect devices. 8. Mobile work at breakdown locationIf at a breakdown location, you require an online connection for work on the vehicle, you can use a MiFi (mobile access point with SIM card) or alternatively the hotspot of a smartphone. Further information on online data connection"on the road" can be found in the "Connectivity Guide".##-# ##### ###### ###### ###### /l####-# ##### ###### ###### ###### ###### f####./ ###### #########Updates and add-ons9. Updating XENTRY KitIf you are updating the XENTRY Kit for the first time or you are unsure about how to perform an update, it is advisable to read through Chapter 10 in the user guide or refer to the information in the UpdateAssist (a link is provided onthe desktop of the XENTRY Tab). This will help to avoid actions which would lengthen the update procedure, e.g. thecreation of an incorrect medium or incorrect setup.Please make sure that the XENTRY Kit and in particular the Blu-ray disc drive are standing on a stable surface andcannot be moved while you are installing the update. The Blu-ray Disc can otherwise be scratched which could thenresult in the update being aborted.12-18-2013 7:22 PM Copyright Daimler AGGKRZYZAPage 2/10
10. Add-on download and installationYour XENTRY Kit is permanently updated using add-ons. These add-ons are downloaded to the XENTRY Kit automatically when your devices are online. Following logon at the XENTRY Connect, an automatic search for add-ons takes place, the download is started and the add-ons installed.Note: If your XENTRY Connect has not been online for a long time or if it is new and does not yet have any add-onsinstalled, this process can take longer depending on the number of add-ons available. To interrupt the installation process, click on the appropriate icon in the "Updater". The automatic installation is then deactivated and the icon is marked with a cross in a red dot.IMPORTANT: The add-ons can, however, only be installed while XENTRY Diagnostics is still closed. Therefore, please do not start XENTRY Diagnostics until add-on installation has been completed.Our tip: Put your system online every morning and start add-on installation manually using the "Updater" (icon on theXENTRY Connect desktop) before you start XENTRY Diagnostics for the first time. In this way you ensure that yoursystem is always up to date. 11. Installed add-onsIf you want to check which add-ons are installed on your XENTRY Connect, proceed as follows:1.Step: Make sure that XENTRY Tab and XENTRY Connect are connected to each other.2.Step: Open the Support Tool on XENTRY Tab.All the installed add-ons are listed on the home screen under XENTRY Connect. 12. Add-on via USBSince XENTRY Connect Update 07-08/2013, it is also possible to install add-ons from a USB stick. The DiagnosisUser Help Desk will provide assistance in this regard. 13. Changing XENTRY Connect language after updateFollowing an update, the language of the XENTRY Connect may be set to English. The language may then need tobe changed:To do so, please start XENTRY Control, set the language to "English" and restart XENTRY Control.Now connect to the XENTRY Connect and then log off again.In XENTRY Control, now set the language back to the language you require and then start XENTRY Controlagain.Then reconnect to the XENTRY Connect.A dialog appears asking whether you want to change the language of the XENTRY Connect. Confirm with "Yes".##-# ##### ###### ###### ###### /l####-# ##### ###### ###### ###### ###### f####./ ###### #########Tools in XENTRY Kit14. XENTRY ExplorerThe "XENTRY Explorer" tool is used to copy files and logfiles from the XENTRY Connect directly to the XENTRYTab or to a USB stick connected there. Detailed instructions can also be found in the document "Data transfer" in the"Help" tab of the Support Tool. 15. Support ToolThe Support Tool will assist you if a fault occurs. You can put together support packets, create screenshots or, in the"Help" tab, you can read details in the documents provided.12-18-2013 7:22 PM Copyright Daimler AGGKRZYZAPage 3/10
New as of Update 11-12/2013: The connection status of the individual online servers is displayed in the "Self-Diagnosis" tab in the Support Tool on XENTRY Tab. This will tell you exactly which servers are online. 16. Printing: What points must be taken into consideration when choosing a printer?Any printer which is compatible with Windows 7 can be used for the XENTRY Kit. However, attention should be paidto the following features: Do not use printers with "GDI" or "host-based printing"! (Identifiable by the keyword "GDI" or"host-based printing" in the printer language (usually indicated in the data sheet of the printer or in the manual)) Whenchoosing a printer, make sure that it has its own printing processor and/or supports the Postscript standard. This information can also be found in the data sheet of the printer or in the manual.##-# ##### ###### ###### ###### /l####-# ##### ###### ###### ###### ###### f####./ ###### #########Network17. Network/ access pointsNote to IT administrators: The channels of the access points must not be identical, i.e. non-overlapping wireless channels must be used if more than one access point is available in the workshop. There will otherwise be interferencein XENTRY Tab I XENTRY Connect communication via XENTRY Control. Further information on configuring accesspoints can be found in the "Connectivity Guide". 18. Changing network profile (workshop mode or Service24h mode)You can use the XENTRY Kit either in workshop mode or Service 24h modeDifferences:Workshop mode: Both components of the XENTRY Kit are integrated in the workshop network (LAN or WLAN) andthe backend systems are available.Service24 mode: The XENTRY Kit components are directly connected to each other outside an infrastructure. Thebackend systems are not available in this mode.If you want to change the network profile, you can do this directly via the deskband pop-up. You can select the respective network profile in the "Network profile" column. Both devices (i.e. XENTRY Tab and XENTRY Connect) arethen automatically switched over together. 19. Connecting XENTRY Tab and XENTRY ConnectPlease note that a "green cable" is no longer supplied with the XENTRY Kit and that series connection of the devices is no longer possible. In other words, it is not enough to connect just the XENTRY Tab to the network and simultaneously set up a connection to the XENTRY Connect using a connecting cable. Each component (XENTRY Tab andXENTRY Connect) requires separate network access via LAN or WLAN! Refer also to the information in the XENTRYKit user guide (page 8 onwards).##-# ##### ###### ###### ###### /l####-# ##### ###### ###### ###### ###### f####./ ###### #########User documentation and films20. XENTRY Kit user guide and filmsThe latest user guides (June 2013) for the XENTRY Kit as well as short product films for training purposes can befound in the Mercedes-Benz After-Sales portal y kit de (German) orhttps://aftersales.mercedes-benz.com/info/xentry kit en (English) in the "Downloads" area.We would also like to remind you about our Hot Topics, which are continually being updated for topics de (German) or12-18-2013 7:22 PM Copyright Daimler AGGKRZYZAPage 4/10
cs en (English)AttachmentsFileDesignationConnectivity Guide EN.pdfConnectivity Guide ENSymptomsOverall vehicle/ Networking / Diagnosis/software/ Software update (add-on)Overall vehicle/ Networking / Diagnosis/software/ Current problemsOverall vehicle/ Networking / Diagnosis/software/ Not 7.346**117.352**124 (124)**190 *212.041**212.047**212.048**12-18-2013 7:22 PM Copyright Daimler AGGKRZYZAPage 5/10
*212.224**212.225**212.226**212.227**12-18-2013 7:22 PM Copyright Daimler AGGKRZYZAPage 6/10
*218.394**218.903**218.923**218.959**12-18-2013 7:22 PM Copyright Daimler AGGKRZYZAPage 7/10
**231.47 **251.075**251.077**251.122**12-18-2013 7:22 PM Copyright Daimler AGGKRZYZAPage 8/10
56**251.157**251.165**251.172**251.175**251.177**A (168)**A (169)**A (176)**B (242,246)**B (245)**C (202)**C (203)**C (204)**CL (140)**CL (215)**CL (216)**CLK (208)**CLK (209)**CLS (219)**E (207)**E (210)**E (211)**G (460)**G (461)**G (463)**GL (164)**GL (166)**GLK (204)**M (163)**M (164)**M (166)**S (126)**S (140)**S (220)**S (221)**SL (107)**SL (129)**12-18-2013 7:22 PM Copyright Daimler AGGKRZYZAPage 9/10
SL (230)**SLK (170)**SLK (171)**SLK(172)**SLS (197)**12-18-2013 7:22 PM Copyright Daimler AGGKRZYZAPage 10/10
Daily work -see remedy 1 to 8. Updates and add-ons -see remedy 9 -13. Tools in XENTRY Kit -see remedy 14 -16. Network -see remedy 17 -19. User documentation and films -see remedy 20. Remedy: Daily work 1. Changing vehicle Before changing the vehicle, please always exit the current vehicle in Xentry Diagnostics. To do so, return to the mo


