Transcription
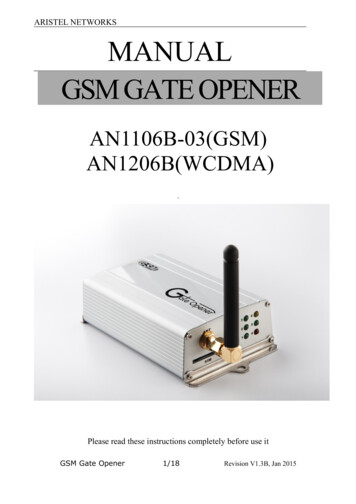
A New UserFriendly ConceptGSM SMS Alarm ForYour Assets!GSM Alarm Control PanelUser ManualS110Ver 1.10Date Issued: 2010-09-01All rights reserved byKing Pigeon HiTech.Co.,Ltd.
KingPigeon S110 – www.microdata.fiTable of Contents1.2.3.4.5.6.7.8.9.10.11.12.13.14.Brief introduction ---------------------------2Safety Directions ------------------3Physical Layout ----------------------------3Features --------------------------------6Settings --------------------------------8Operating Instructions ------18Installation ------------------21Add wireless sensors ---26Technical specifications rtant information uble Shooting ----------------------31This handbook has been designed as a guide to the installation and operation ofS110.Statements contained in the handbook are general guidelines only and in no way aredesigned to supersede the instructions contained with other products.We recommend that the advice of a registered electrician be sought before anyInstallation work commences.The manufacturer, its employees and distributors, accept no liability for any loss ordamage including consequential damage due to reliance on any material contained inthis handbook.The manufacturer, its employees and distributors, accept no liability for GSM Networkupgrading or SIMCard upgrading due to the specifications contained in this handbook.SMS Command ListSMS COMMANDFunctions & ActionsAATo arm, in this mode, any detector triggered will alarm.BBTo disarm, in this mode, detector triggered will not alarm.CCTo switch ON the Relay 2 output.DDTo switch OFF the Relay 2 outputEEInquiry the Status*The commands should plus Password, the format is Password SMS Command.Page 2 of 33 Ver 1.10
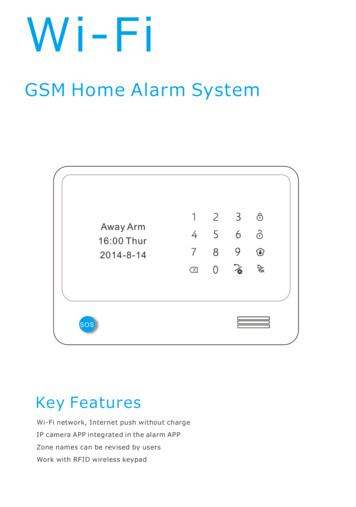
KingPigeon S110 – www.microdata.fii.e.: if the password is 1234, then you can send 1234AA to arm, 1234BB to disarm,the AA EE must be Caps Lock.1. Brief introductionThe GSM Alarm System is a new security protection solution special forhome, house and office and other applications. It based on WirelessGSM Communication network, integrated Lcd Menu display andComputer technology. When any sensor activated, it will Call & SendSMS to owner’s telephone immediately.The GSM Alarm System with user friendly design idea, all operations andsettings are visual and intuitive!.What you need is a SIMCard which supports Call ID function.2.Safety DirectionsSafe StartupDo not use GSM Alarm System when using GSM equipmentis prohibited or might bring disturbance or danger.InterferenceAll wireless equipment might interfere network signals ofGSM Alarm System and influences its performance.Avoid Use at Gas StationDo not use GSM Alarm System at a gas station. Power offGSM Alarm System it near fuels or chemicals.Power it off near Blasting PlacesPlease follow relevant restrictive regulations. Avoid using thedevice in blasting places.Page 3 of 33 Ver 1.10
KingPigeon S110 – www.microdata.fiReasonable UsePlease install the product at suitable places as described intheproduct documentation. Avoid signal screening bycovering the mainframe.Use Qualified Maintenance ServiceMaintenance can be carried out only by qualified maintainer.WaterproofnessThe product is not waterproof. Please install it at dry placesand keep it dry.3. Standard Packing ListControl Unit X1Wireless Magnetic Door Sensor X1Wireless Remote Controls X 2Wireless PIR Motion Sensor X1Wired Strobe Siren (110dB) X1Regulated 12VDC Power Supply X1User Manual X1GSM Antenna X1Optional Accessories: (Wireless Sensors or Wired Sensors)PIR Motion Sensor, Glass Break Sensor, Magnetic Window Sensor,Magnetic Steel Scrolling Door Sensor, Temperature Sensor,Photoelectric Beams, etc.4. Physical Layout4.1 Control Unit physical layoutTips!1)In order to forbidden the intruder power off the alarm system, we equipped the powerPage 4 of 33 Ver 1.10
KingPigeon S110 – www.microdata.fiswitch inside, it is nearby the SIMCard socket, please pay attention to it, and don’ttell others of this. Turn it towards inside is off, turn it towards outside is on.2)We reserved the plastics of the output relay and Wired sensors in the back cover ofthe panel. Because of some of the users needn’t this function. If you want to use theoutput relay and wired sensors, please remove the plastics carefully. Then you cansee the connectors inside.Interface 1 DescriptionPowerExternal Power Connector, Connect to 2A@12V DC powerthrough AC/DC Adaptor.SirenWill start for 60seconds when alarm. The siren or strobesiren should be 12V DC.GSM ANTConnect the GSM ANT, if the GSM signal is not strong,then please change the 3dB GSM ANT.MicrophoneOne sensitive Microphone built inside.Interface 2 DescriptionPage 5 of 33 Ver 1.10
KingPigeon S110 – www.microdata.fi 12V 12VDC@1A power output for wired detectors.IN1Digital input 1, connect to one wire of the wired Detector.IN2Ground point, connect to another wire of the wired Detector or-12VDC.Digital input 2, connect to one wire of the wired Detector.IN3Digital input 3, connect to one wire of the wired Detector.GNDGNDGround point, connect to another wire of the wired Detector.IN4Digital input 4, connect to one wire of the wired Detector.IN5Digital input 5, connect to one wire of the wired Detector.GNDGround point, connect to another wire of the wired Detector.IN6Digital input 6, connect to one wire of the wired Detector.IN7Digital input7, connect to another wire of the wired Detector.GNDIN8Ground point, connect to another wire of the wired Detector or-12VDC.Digital input 8, connect to one wire of the wired Detector. 12V 12VDC@1A power output for wired detectors.R1 Link-Output Relay, when the system alarm will close 4minutes.(Rated Voltage: 3A/240VAC), this relay can connect to any otherR1-lights or CCTV system as a switch.Built in 240VAC@3A rated relay output, connect to the deviceR2 negative electrode.Independent Output Relay, Can switch on or off by SMSCommands. (Rated Voltage: 3A/240VAC), this relay is veryuseful to switch on light when you can not come back in theR2-evening. Then some hours you can switch off it.Built in 240VAC@3A rated relay output, connect to the devicenegative electrode.Page 6 of 33 Ver 1.10
KingPigeon S110 – www.microdata.fi4.2 Working Principle DrawingThe unit works with wireless detectors or Wired detectors. It can switch onor off one appliance by SMS command. Please see below:5. Features5.1 The advantages of the GSM Alarm System1)Two-way Voice communication or wiretap are available;2)LCD displays the entire setup menu;3)Armed, Partial Armed(At House or Stay), Disarmed, SOS areavailable;4)Armed delay, alarm delay, siren work or not, more other functions areProgrammable by user;5)Watchdog,24Hours Zone, SOS zone are available;6)Using ICON to display armed, Partial Armed, Disarmed, Power status,Siren status and GSM Signal status.Page 7 of 33 Ver 1.10
KingPigeon S110 – www.microdata.fi7)Auto-detect and report, GSM Signal Jammer alarm, SMS Switch isavailable.8)User friendly Icons for LED indicators, LCD and functional Buttons.5.2 Functions & Features of the GSM Alarm System1)GSM Frequency: Dual-Band(900/1800/1900MHz), Quad-Band isoptional(850/900/1800/1900Mhz) ;2)Supports armed, Partial armed(At House or Stay) or disarmed, SOSby remote control or mainframe keyboard;3)Supports armed, disarmed, inquiry mainframe status, switch on or offrelay output by SMS Commands;4)Automatically send SMS Alert and dial to the pre-set cell phone whenany sensor had been triggered;5)Equips with 16 Wireless Zones and 8 Wired zones, zone attribute(Normal/At House or Stay mode) and Zone Name is editable;6)3 X 24-Hour zones for smoke and gas leakage sensor,1XWatchdogzone for monitoring elder or child, 1XSOS zone for emergency help;7)Supports 3 SMS Alert Numbers and 5 Calling alert numbers and 100Alarm Records for owner review;8)Supports Timer for automatically arm or disarm the system;9)Supports armed delay to give enough time to you go out the home, thedelay time is editable by user;10) Equips with 1 Alarm-Link output relay, once the system triggered, theoutput will switch on for 4minutes;11) Equips with 1 seperate output relay, it can be switch on or off by SMSCommands. This is very useful for remote switch on light or off whileyou’re in another city in the night;12) The Keypad can use as a dialer, the functions like the Cell phone;13) The external power failure & recovery alert function is optional ;Page 8 of 33 Ver 1.10
KingPigeon S110 – www.microdata.fi14) Supports wiretap through the internal microphone;15) Supports internal Speaker to special user for two-way voicecommunication;16) It is Compatible with PT2262 and PT2242 wireless IC;17) Standby internal rechargeable battery which can last 18 hours;18) Based on the GSM communication network and Operation MenuDisplay technology, apply to wide range situations.6. SettingsTips!1)Please insert the SIMCard firstly, and install the GSM Antenna then power on it.Also, you can insert the SIMCard after you setup.2)All the wireless sensors in the standard package we have assigned to the mainframealready. Needn’t to learn it again.3)After you power on the mainframe, the mainframe will auto detect and display theprocess. It will detect the 8 wired input current connection status and display on theLCD with 8 characters. O stands for Open, C stands for Close, L stands for with2.2KEOL, E Stands for not includes the before 3 status. If it with SIMCard, it will registerthe GSM Network and display the GSM Signal ICON in the left corner of the LCD.4)All of the setup can be done by the LCD except modify the Zone name, if you needto modify the zone name, please see the command list in the related chapter.5)Only disarm by keyboard and modify settings requires password, the other operationneedn’t password. The default password is 1234. Enter password then press Enterbutton to enter the system.6)In standby mode, press #3#6, following UP button. The system will recovery tofactory default settings, the password will be 1234. But the registered wirelesssensors and the Wired type will remain.7)Two way communication:In standby mode, dial the telephone number, following theout; While incoming call, press the, the system will dialButton to answer the incoming. Pleasenote: if the income calling is from the preset number (Includes SMS Alert numberand Auto-dial numbers), then before 6 tones, if answered it, will create two wayPage 9 of 33 Ver 1.10
KingPigeon S110 – www.microdata.fivoice communications. After 6 tones, will be entering into wiretap status. The usercan listen in the alarm around sounds, Max. time is 10Minutes. If the income callingis not from the preset alarm number, after 6 tones, if hasn’t been answered, willhang up.8)If you want to test the two way voice communication, please make sure the otherphone is far from the , at least 500meters. Otherwise, the near-cross will makelots of noise interference.9)Please setup at least one alarm alert number, otherwise the mainframe will onlyactivate the siren to work 6 times, this is to remind you setup alarm numbers.10) The controller panel not accept PIN Code, please disable the SIMCard’s PIN Codefunction.6.1 Key-Function Descriptions.6.1.1 Led indicator DescriptionThe unit uses the icons to stand for the function, it is visual and intuitive to users.::Stay Mode indicator, on is in stay mode;Arm Mode indicator, on is in arm mode, off is in disarm mode;Alarm Indicator, on is alarming, off is normally;:GSM Module indicator, registering will quickly flick, registered successfulwill slowly flick.Page 10 of 33 Ver 1.10
KingPigeon S110 – www.microdata.fi:Alarm link output indicator, when alarm, will turn on and last 4minutes,: means the alarm link output relay closing.Separate output relay indicator, when the independent output relay closed, it: will be on; when the independent output relay opened, will be off.6.1.2 LCD ICONS DescriptionThe unit uses the icons to descript the present status; it will be more user friendly.: Enabled the Timer to arm and disarm function; otherwise, will not display it.: Timer to Arm, has setup a time point to enter armed mode directly.: Timer to disarm. Has setup a time point to enter disarmed mode directly.Enabled the Watchdog zone. In the fixed time range if the sensors in the watchdogzone hasn’t been triggered, will alarm.:Enabledthe system condition report function. Will automatically send system:condition to the user by SMS, otherwise, it will not display.6.1.3 Keyboard functionsThe unit uses the icons to mark the buttons; it will be more user friendly to user.: Enter button, dial out and answer incoming.: Hang up the incoming, Exit, and Backspace button.: Up towards button.: Down towards button.: Turn right button, in special menu need it to choose the option.Disarm Button.Arm ButtonAt House, Stay mode button.SOS, Panic Button.Page 11 of 33 Ver 1.10
KingPigeon S110 – www.microdata.fi6.2 Main MenuIn standby mode, press the1. View2. Setupbutton, you can see the Menu.---To check the settings and event records of the system---To setup the system functions, requires password, thedefault password is 1234.6.2.1 View1. Alarm Records2.Timers---To check the alarm records, up to 100 eventrecords will be saved.---To check the Timer you have setup.---To check the SMS Alert Contents of the WirelessRelated Zones.---To check the SMS Alert Numbers---To check the Auto-dial telephone Numbers---To check the report time.---To check the RF sensor wireless code.---To check the SMS Alert Contents of the WiredRelated Zones.NameNotice:1)The RF Code Query function is for check the wireless sensor transmission. You canenter this submenu, then triggered the wireless sensor, if in the LCD can displaysome codes, means the wireless sensor can transmit wireless signal.6.2.2 SetupPage 12 of 33 Ver 1.10
KingPigeon S110 – www.microdata.fi1. Add/Del RF Parts ---To add or remove wireless sensors or remotecontrols and edit their attributes.2.Wired Zones Set---To setup Wired Zone parameters of the system.---To setup basic parameters of the system.3.Basic Setting---To setup the advanced parameters of the system.4. Advanced Setting6.2.2.1 Add/Del RF Parts---To setup the zone’s attribute and add new wireless1.Edit RF Zonesensors to specificities zone.---To add new remote controls.2.Edit Remote Ctrl---To remove all registered wireless sensors and3. Remove Allremote controls.Notice:1)Zones’ Attribute definition:Zones’ AttributeNormalStay24-Hour ZoneDefinitionThe sensors with this type triggered will alarm in Armed modeand not alarm in disarmed mode.In Stay mode, the sensors with Stay type triggered will alarm, thesensors with Normal type triggered will not alarm.In any mode, the sensors with this type triggered will alarm.In the starting time point and ending time point, the sensors withthis type triggered will not alarm, if the sensor hasn’t beentriggered, will make alarm.In any mode, the sensors with this type triggered will alarm butSOS Help!not drive the siren.Alarm Action: when Alarm occurrence, the system will Automatically dial the Pre-setWatchdogAuto-Dial Tel. Numbers for 3 times one by one, and Send SMS to the Pre-set SMS AlertNumbers, in the meantime, will drive the siren for 60seconds and close the link-Outputrelay for 4 minutes.2) After you enter the menu, the attribute of the zone will be displayed in the LCD, ifthis zone has been assigned wireless sensor, will display “V”. If hasn’t beenassigned wireless sensor, means this zone is empty, you can assign new wirelessPage 13 of 33 Ver 1.10
KingPigeon S110 – www.microdata.fisensor to this zone. Press Up or down button on the keyboard to check the otherZones. Press Enter to edit it. After you pressed the Enter button, you can select thezone attribute, and then press Enter, you can see “Turn on the device” or “Pleasetrigger the new wireless sensor”. Then following the instruction to add the newwireless sensor to the . For Remote control, it will display VVVV if the unit has beenassigned remote control. Both of them you can press Enter to re-assign newwireless sensor or remote control to replace the existence one.3)In the Edit RF Parts you can edit the attribute of the sensor as Normal or Stay Type.If the system is under Stay Mode (Also said At House or Partial Armed), the sensorset as Normal triggered will not alarm, the sensor set as Stay triggered will Alarm. Ifthe system is under Armed Mode, then all RF sensors triggered, will alarm. This isvery important to remember the sensor types of the system. This function is veryuseful when you at house and need some sensors in working status (E.g.: thesensor installed outer and gas and smoke detectors, etc.) and some sensors indoornot in working status (e.g.: the sensors installed in the living room, bed room, etc.).4)The unit can accept total 16 wireless sensors to 16 wireless zones; each zone canbe assigned one wireless sensor, and renamed it by SMS Command. And 5 remotecontrols.5)Wireless Zone Serial Number, Default Zone Name and Zone Attributes Table.Zone SN.Default Zone NameDefault Zone Attribute01Intrusion from Entry DoorNormal02Intrusion from Living RoomNormal03Intrusion from Bed Room 1Normal04Intrusion from Bed Room 2Normal05Intrusion from Bed Room 3Normal06Intrusion from Front BalconyNormal07Intrusion from Behind BalconyNormal08Intrusion from 1F WindowNormal09Intrusion from 2F WindowNormal10Intrusion from Left FenceNormal11Intrusion from Right Fence12Medical Button Alarm13Gas Leakage AlarmNormal24-Hour zones, This attribute cannot be modified. In arm or disarm orPage 14 of 33 Ver 1.10
KingPigeon S110 – www.microdata.fistay mode, once the sensor in thesezones triggered will alarm.Watchdog Zone, the attribute can15Watchdog alarmnot be modified. In arm or disarm orstay mode, once the sensor in thiszone triggered in the preset time,will not alarm, if the sensor hasn’tbeen triggered in the preset time,will alarm.SOS zone, The attribute can not be16SOS Help!modified. In arm or disarm or staymode, once the sensor in thesezones triggered will alarmimmediately. not drive the siren.Notice: The Additional Panic Button, and the SOS button on the Keyboard andremote control is the same attribute with the SOS zone. If the Additional PanicButton assigned in 24-Hour Zones, once triggered, the alarm action will be thesame as SOS zone, not start the siren.14Smoke Fire Alarm6.2.2.2 Wired Zones Set1.Nodes Type---To setup the wired inputs type.2.Zones Attributes---To setup the wired input’s attribute.Notice:1) The Nodes Type NC,NO,EOL should reference the wired input sensor type. TheDefault is NC and we short all of the inputs by wires, if you want to contact wiredsensors, then please replace the short wires by wired sensors directly. The no-useinput, please remain them in short-circuited by wires. Please see 8.4 Install theWired Sensors and Electricity equipments2)3)4)Zones’ Attribute definition of the wired zone is the same as the wireless zone.The unit can accept total 8 wired sensors to 8 wired zones; each zone can beassigned one wired sensor, and renamed it by SMS Command.Wired Zone Serial Number, Default Zone Name and Zone Attributes Table.Zone SN.Default Zone NameDefault Zone Attribute01Outer Door OpenedNormal02Intrusion from Left FenceNormal03Intrusion from Right FenceNormal04Intrusion from Front FenceNormalPage 15 of 33 Ver 1.10
KingPigeon S110 – www.microdata.fi05Intrusion from Guarden Fence0624Hours zone alarm0724Hours zone alarm08SOS Help!Normal24-Hour zones, This attribute can notbe modified. In arm or disarm or staymode, once the sensor in these zonestriggered will alarm immediately.SOS zone, The attribute can not bemodified. In arm or disarm or staymode, once the sensor in these zonestriggered will alarm immediately. Butnot drive the siren.6.2.2.3 Basic Setting---To setup the SMS Alert Number, must be cellphone numbers, total 3.2. Auto-dial Tel No. ---To setup the Auto-dial telephone number, total is 5.---To setup the time and date information. TheFormat is Month-Date-Year. Press Up/Down to3. Time & Datesetup each item, press * to move to next item.---Switch on or off the siren when Alarm occurrence.4. Sound Alarm---Setup the Report time gap, Range:0 240Hours.deflaut is 0, will not report.5. Report Time Gap ---Enable or Disable the alert function while the ACpower is failure more than 30 minutes.6. Power Failure Alert---Setup the delay time after armed the system byremote control or keyboard. Optional: 0S, 20S,30S, 60S, 90S. Default is 30S.7. Arm Delay Time---Setup the delay time after any sensor triggered.Optional: 0S, 20S, 30S, 60S, 90S. Default is 20S.8. Alarm delay Time1.SMS Phone No.Notice:1)The SMS Alert number is for receiving the alarm SMS Message. The Auto-DialTelephone number is for receiving the calling. Please help to try adding country codeor removing country code when you can not receive the call or SMS. Because ofPage 16 of 33 Ver 1.10
KingPigeon S110 – www.microdata.fidifferent GSM Operator with different communication protocols. Our system is withthe international communications protocols.2)The Auto-dial Tel. Number can dial to the , 6 tones later, can wiretap the system site.Before 6 tones, if somebody answers the calling, then can create two-way voicecommunication. The other telephone number can call in the , if nobody answer thecalling, then can not wiretap the system site, if somebody answers the calling, thencan create two-way voice communication.For example:In Finland, the country code is 00358, please note, do not write 358.The user cell phone number is 13511111111 and has been assigned as a SMS Alertnumber, the simcard number in the panel is 13512345678.Problem 1: Alarm but the user hasn’t received the SMS Alert.Solution: Please plus the country code while you setup the 13570810254 as SMSAlert number, means setup 0035813511111111 to instead of the 13511111111.Problem 2: The user number can receive the SMS Alert message from alarm panel,but the alarm panel can not receive the commands from the user number.Solution: Please add country code to the simcard number in the alarm panel. Meanssend sms commands to 0035813512345678 to instead of 13512345678.Solution 3: When you use cell phone dial another one, what number it will bedisplayed then you can set the displayed number as dial numbers; when you use cellphone send SMS to another cell phone, what number it will be displayed then youcan set the displayed number as SMS Alert number, just use the 00 to replace the“ ”.3)If Switch off the siren, then all alarm raised will not drive the siren, if switch on thesiren, then when the system alarm will drive the siren for 1 minute except the SOShelp caused. Default is Switch on.4) If setup the Report Time Gap, the system will periodically send “GSM Alarm Systemin good working condition” to the first SMS Alert number. This is very useful for longtime use the system. Default is 0. Means will not report the system condition.5)If enable the power failure alert function, the system will send SMS “AC Power FailedPage 17 of 33 Ver 1.10
KingPigeon S110 – www.microdata.fi30Min.” to the first SMS Alert numbers after the AC power failure 30minutes, if thepower is recovery then will send SMS “AC Power is OK.”. Default is disabled.6)There’s no delay for Stay Mode.6.2.2.4 Advanced Setting---To setup the starting time to arm and the Ending1.Edit Timertime to disarm.---Tosetup the starting and ending time to work.2. Watchdog Timer---To setup the remote control operation reportfunction.---Tosetup the GSM Jammer Alert function.4. GSM Jammer Alert3. RCO Alert5. Modify Password ---Modify the system password.6. Default Set--- Restore the system settings to factory defaults.All of the remote controls and wireless sensorsshould be re-assigned again.Notice:1) The watchdog is special for elder or child or on-duty personnel, in the period (Startingtime point to Ending time point) if this sensor hasn’t been triggered, the system willalarm. This is very useful to monitor the elder or child goes out the bedroom or entersthe kitchen to eat something. Or monitor the on-duty personnel in the polling periodhave gone to on-site inspection.2)If enable the RCO alert function, then when use any remote control which has beenregistered to the system to arm or disarm or stay operation, the system will sendSMS to the first SMS number.3)If enable the GSM Jammer Alert function, when the GSM Signal is 0 for more than90s, the system will drive the siren for 60seconds and the link-output relay will close 4minutes.6.3 Modify the SMS Alert Content of the Zone (Zone or Sensor Name)The unit accepts SMS Command to modify the SMS Alert Content of thezone.Page 18 of 33 Ver 1.10
KingPigeon S110 – www.microdata.fiFor Wireless Zone Name, the format is: Password # M Zone SerialNumber # New Zone Name #, the Max. Character for the zone name is 32.The Zone Serial Number is 01 16 corresponding to the LCD Menu and6.2.2.1 table. If setup successful, the system will return OK to confirm theoperation.E.g.: Modify the first wireless zone name as Front Door Opened by Intruder! You shouldedit a SMS Content: 1234#M01# Front Door Opened by Intruder!# ,the 1234 is thepassword. Then send it to the Simcard Number.For Wired Zone Name, the format is: Password # Z Zone SerialNumber # New Zone Name #, the Max. Character for the zone name is 32.The Zone Serial Number is 01 08 corresponding to the LCD Menu and6.2.2.2 table. If setup successful, the system will return OK to confirm theoperation.E.g.: Modify the first wired zone name as Front Door Opened by Intruder! You shouldedit a SMS Content: 1234#Z01# Front Door Opened by Intruder!# ,the 1234 is thepassword. Then send it to the Simcard Number.7. Operating InstructionsTips!The user can arm/disarm/Stay (Partial armed) by Remote controls, Keyboard, SMS,also, the user can cancel the alarm by Remote Controls, Keyboard, SMS to Disarm it.Another, the user can switch on or off the independent output relay by SMSCommands.7.1 Arm or Disarm or Stay (Partial Arm, At House Arm) andEmergency Alarm by remote controlsPage 19 of 33 Ver 1.10
KingPigeon S110 – www.microdata.fiPress the button “ ” on the remote control or Press Arm button on thekeyboard then select Arm, the Control Unit enters arm status (delay timeaccording to the setting), theICON will be on. Under this status, anysensor triggered, the control unit will alarm, if answered the call, the sirenwill stop and can listen in the alarm area by phone.Press the button “ ” on the remote control, or press Disarm button on theKeyboard then input the password, the Control Unit disarms immediately.TheICON will be off. Under this status, any sensor triggered, the controlunit will not alarm. Except the sensor type is the 24-Hour Zones orWatchdog zone or SOS zone.Press the button “ ” on the remote control or Press the Arm button on thekeyboard then select Stay, the Control Unit enters Stay(Partial Armed)status, theICON will be on. In this status, the sensors had been set asStay Type triggered will alarm, but the sensors had been set as normalType triggered will not alarm. Please see the menu of the Edit RF Zone.Press Emergency button (SOS) “!” on the remote control or the controlunit or Press any Emergency button. The Control Unit will enteremergency alarm. The siren will not sound, but will alert the pre-set phonenumber immediately.7.2 SMS Commands for Arm or Disarm or Inquiry system status orswitch on/off independent output relay.The User can Arm/Disarm/Inquriysystem status/Switch on or off theindependent output relay by sending SMS to the Control unit. The SMSCommands are below:Notice:The system will carry out the commands immediately (with no delay) after theControl Unit receive this SMS command.7.2.1 ArmedPage 20 of 33 Ver 1.10
KingPigeon S110 – www.microdata.fixxxxAAExample“xxxx” stands for the password(1-4 digits).1234AAReturn SMSWhen the Password is 1234All Armed Mode activated.7.2.2 DisarmExamplexxxxBB“xxxx” stands for the password(1-4 digits).1111BBReturn SMSWhen the Password is 1111System deactivated.7.2.3 Switch On the independent output relayxxxxCCExample“xxxx” stands for the password(1-4 digits).1111CCReturn SMSWhen the Password is 1111Output Relay Closed.7.2.4 Switch OFF the independent output relayxxxxDD“xxxx” stands for the password(1-4 digits).Return SMSExample1111DDWhen the Password is 1111Output Relay Opened.7.2.5 Inquiry System StatusPage 21 of 33 Ver 1.10
KingPigeon S110 – www.microdata.fixxxxEE“xxxx” stands for the password (1-4 digits).Return SMSArmed or At House or DisarmedAC Power is Ok or AC Power is failedGSM Value is 17 or other valueOutput Relay is Closed orOutput Relay is openedNotice:The Output relay status in the Return SMS is the independent output relay status. Itis not the alarm link Output Relay Status.8. InstallationBefore installing the control unit and sensors and sirens, please help to test the systemfirstly, including wireless sensor, power supply, gsm signal, etc.Please ensure the wireless sensors and electricity appliances from the mainframe morethan 3 5m.8.1 Insert SIM into Control Unit and install the GSM ANT.In the backside of the control unit, please install the GSM SIM card. The GSM ANT must
The GSM Alarm System is a new security protection solution special for home, house and office and other applications. . The Keypad can use as a dialer, the functions like the Cell phone; 13) The external power failure & recovery alert function is optional ; . and Auto-dial numbers), then before 6 tones, if answered it, will create two way .
