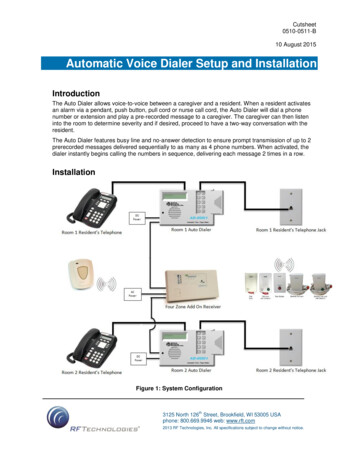
Transcription
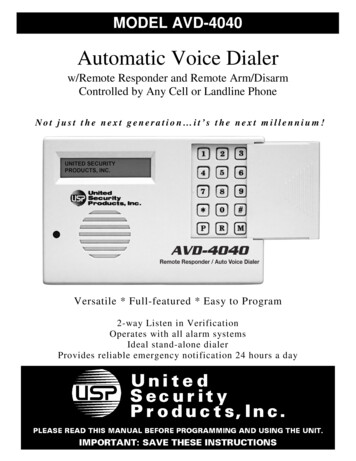
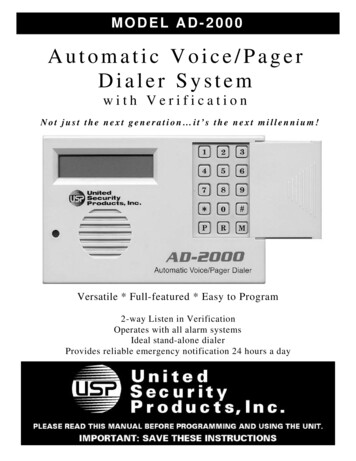
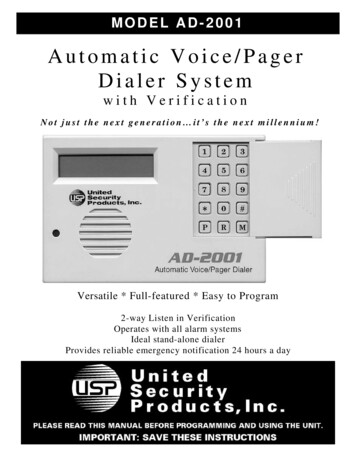
MODEL AD-2001Automatic Voice/PagerDialer Systemwith VerificationNot just the next generation it’s the next millennium!Versatile * Full-featured * Easy to Program2-way Listen in VerificationOperates with all alarm systemsIdeal stand-alone dialerProvides reliable emergency notification 24 hours a day
MODEL AD-2001Owner’s Manual and Operating InstructionsThe Automatic Voice/Pager Dialer SystemFor The Next MillenniumCongratulations!Thank you for purchasing United Security Products, Inc.’s Model AD-2001 - the “smartest”, mostcomprehensive automatic voice/pager security dialer available. Representing an exciting new level ofachievement, the AD-2001 combines technologically advanced features, ease of programming and reliableoperation in a compact, unobtrusive dialer completely compatible with any security alarm system. Installationand hookup are quick and easy, whether installed in conjunction with normally open, normally closed drycontact or voltage activation sensors. The unit can also function as a stand-alone device, by simple connectionto an ordinary telephone jack. The keypad cover glides on and off for added attractiveness and security.How It WorksThe AD2001 dialer features busy-line and no-answerdetection to ensure prompt transmission of up to 2prerecorded messages delivered sequentially to as many as4 standard telephones, cellular phones, voice and/ornumeric pagers. Messages to both local and long-distancecalls can be transmitted. When activated, the dialer instantlybegins calling the numbers in sequence, delivering eachmessage 1 to 3 times in a row, in accordance with thepreselected number of dialing attempts.The AD-2001 is extensively programmable, offeringpersonalized customization to fulfill virtually anyresidential or business requirement. Plain-English promptswalk the user through the process in a timely manner.Programming options abound, allowing the user to: Store up to 4 telephone/pager numbers. Choose 1- 9 calling efforts for the numbers dialed. Select 1-3 message repeats. Record a variable combination (maximum: 3) ofinstructional outgoing messages (total elapsed time: 51seconds).(dry contact or voltage activation) including momentary andcontinuous activation for each).Further individualize each channel by selecting the delaytimes, telephone/pager numbers to be dialed and the specificoutgoing messages to be played.Please Familiarize Yourself With These Instructions BeforeInstallation/Operation. This guide describes how to programand operate the dialer. We strongly recommend that you readthe entire manual before attempting to use the unit.To enhance ease of programming and operation, this guideincludes: A Programming Sample/Quick Setup review on page 13with a corresponding Program Planner. A Blank Program Planner on page 14. One copy of thisPlanner should be kept in a safe place by the end user.A separate copy should also be retained by the installer.We are happy to provide a full measure of securityreassurance and peace of mind with the Model AD-2001. Forinformation about other innovative United Security Productsequipment, call (800) 227-1592.Program up to 2 separate input channels with individuallyenable/disable, entry/exit delay and activation options(Normally Open (N.O.), Normally Closed (N.C.)For Technical Service And Support: Call (858) 597-6677 * Fax (858) 455-0036E-mail usp@ix.netcom.comMonday – Friday * 7:30 AM – 4:00 PM PST2
THIS PACKAGE CONTAINS:1 ea. MODEL AD-20011 ea. PHONE CABLE1 ea. INSTRUCTION MANUAL2 ea. 1K RESISTORSTABLE OF CONTENTSSectionPage numberPackage contents 3Panel Displays 4Installation Hookups: Alarm Panel .5Installation Hookups: Stand Alone 6Programming the Dialer .7-11Overview 7Programming Phone/Pager Numbers .8Programming Auxiliary Information .9Programming/Recording OGMs 10Programming Channels .10-11Testing Your System .11Operating Your System .12Additional Features 12Programming Example .13Sample Program Planner 13Blank Program Planner .14Specifications .15Dialer Accessories .15Important Information 163
PANEL DISPLAYS4
AD-2001 INSTALLATION HOOKUPSAlarm Panel5
AD-2001 INSTALLATION HOOKUPSStand Alone6
PROGRAMMING THE DIALEROverviewPlease study this section thoroughly before beginning to program the dialer, referring to the Sample ProgramPlanner on page 13. Then, select from among the options for each feature, listing each choice in pencil on theblank Program Planner on page 14. Once the dialer is correctly programmed, list each choice in ink. One copyof the Planner should be kept by the installer; one copy should remain with the end user.A look At The Keypad CALLOUT FOR NUMERALS:Press these keys to enter telephone numbers and other programming information asspecified in this manual. A maximum of 50 digits can be input in each phone/pagerlocation.CALLOUT FOR P:Press this key to program in a pause. Each “P” provides a 2-second pause.CALLOUT FOR R:Press this key to record the combination of identification and directional outgoingmessages (OGMs). The total elapsed OGM time cannot exceed 51 seconds.CALLOUT FOR M:Press this key to change the Mode of the dialer, in sequence:PROGRAM TEST OPERATE OFF.Once the unit has been programmed, removing power or placing the dialer in the OFF mode will not affect theprogramming.7
P R O G R A M M I N G T H E D I A L ERFirst Time Installation to Initialize Dialer Follow Steps 1 & 2.STEP 1Apply power to the unit.The LCD will read:NOT PROGRAMMEDPRESS KEYPAD #1STEP 2Press 1.The LCD will change to read:USP AD2001 X.Xthen: PROGRAM: NUMBERSthen: SELECT: 1-40(DONE)Programming Telephone And/Or Pager NumbersYou are now ready to begin programming the dialer.All programming can be input before connecting the dialer to atelephone line. Check the unit’s LCD as you program numbersin the dialer to ensure accuracy. Please complete allprogramming instructions before attempting to operate the unit.Press “*” to store the sequence.Example: To store numeric pager number 555-1212, a 4-secondPause and code 3456:Press:Before programming your dialer to call the police, firedepartment or 9-1-1 directly, you must check with theseagencies for their approval.STEP 3B – TELEPHONE NUMBERSIf you pressed “2” and wish to program in a telephone number Press the digits of the number to be dialed. For long-distancenumbers, first press “1” followed by the area code and then thenumber. The number will appear on the LCD.Press “*” to store the sequence.Example: Store telephone number 1-800-555-1212:Press:A maximum of 50 digits (including pauses) can be programmedin at each location.*PROGRAM: NUMBERSSELECT: 1-41(YES) 2(NO )0(DONE)*This prompt will appear after a number has been programmed and thissection has been exited.REMEMBER/NOTE: Before programming your dialer to call the police, firedepartment 0r 9-1-1 directly, you must check with these agencies for theirapproval.STEP 1 Press location number 1-4 to program the firstnumber. This can be any location 1-4. You do not have toprogram locations in sequence. For example, you can programnumbers in locations 2 and 4. When you are doneprogramming all the desired telephone and/or pagernumbers, press “O” to exit this section.The LCD will read:PAGER1(YES) 2(NO)STEP 2 Press “1” if you wish to program in a numeric pagernumber (step 3A). Press “2” if you wish to program in atelephone number (step 3B), cellular phone numer (step 3B), ora voice pager (step 3C).STEP 3C – VOICE PAGERSIf you pressed “2” and wish to program in a voice pager Press the digits of the pager to be called.Press “P” one or more times in accordance with the number ofseconds needed to accommodate the pager.(Remember each “P” provides a 2-second pause).Press “*” to store the sequence. The number will appear on theLCD.Example: To store voice pager 555-1212 and a 4-second pause:Press:STEP 3A- NUMERIC PAGERSNOTE: WHEN PROGRAMMING NUMERIC PAGERS, YOU MUSTPROGRAM IN ONE OR MORE PAUSES. EACH “P” PROVIDES A 2SECOND PAUSE. BEFORE PROGRAMMING IN A PAGER, CALL THENUMBER TO DETERMINE THE NUMBER OF 2-SECOND PAUSES TO BEPROGRAMMED IN.STEP 4 Repeat steps 1-3 for each number to be programmed ineach location. Select any of 4 location numbers in Step 1(SELECT: 1-4) for each number to be programmed.If you pressed “1” to program in a numeric pager Press the digits of the pager to be called. The numbers willappear on the LCD, as will the following key designations.Press “P” one or more times in accordance with the number ofseconds needed to accommodate the pager.(Remember, each “P” provides a 2-second pause).Press the digits of the numeric pager code.STEP 5 When you are done programming all desiredtelephone and/or pager numbers, press “0” to exit thissection.NOTE: IF YOU ENTER THE WRONG CHOICE, PRESS “M” KEYREPEATEDLY AND RETURN TO THE “PROGRAM MODE”, THENSELECT THE SECTION TO CHANGE (“1” ACCEPT SECTION, “2”FOR NEXT SECTION), THEN ENTER CORRECT INFORMATION.NOTE: SOME PAGER SERVICES REQUIRE A “#” SIGN FORSEPARATION OF THE NUMERIC CODE OR AT THE END OF THENUMERIC CODE FOR PROPER TRANSMISSION.8
PROGRAMMING THE DIALERProgramming Auxiliary InformationStructuring Your Outgoing MessagesThe dialer is preset at the factory to typical telephone line (TLINE), PBX, Dialing Attempts and Message Repeat options. Ifyou choose to accept the following default prompts, simplypress “2” to scroll to the next section. If your phone systemrequires dialing a digit to get an outside line or dial tone,similar to PBX, then turn PBX on and enter digit toprogram.The AD-2001 dialer was designed with optimum versatility andfunctionality in mind. Nowhere is this more apparent than in thematrix of outgoing messages (OGMs). The user’s ability to “mixand match” OGMs allows complete system customization andprovides ultimate efficiency.Total OGM time is 51 seconds.PRESETST-LINE .TONEPBX .OFFATTEMPTS .2MESSAGE .2To change the presets, follow these steps.A beginning identification (ID) message of up to 15 seconds canbe programmed in (option #4). Your ID message should clearlystate your name, address and other pertinent emergencyinformation.Typically, each OGM will have a specific purpose. For instance,OGM 1 can alert the person notified to contact the fire departmentwhile OGM 2 can alert the person to contact the policedepartment. Typically the dialer is programmed to notify family,friends or another responsible party. Before programming yourdialer to call the police, fire department or 9-1-1 directly, you mustcheck with these agencies for their approval.T-LINEThe LCD will display:PROGRAM: T-LINE1(YES) 2(NO)Press “1” to program T-LINE.Press “2” to scroll to the next section.The LCD will display:PROGRAM: T-LINE1(TONE) 2(PULSE)Press “1” for TONE. Press “2” for PULSE.PBXThe LCD will display:PROGRAM: PBX1(ON) 2(OFF)Step 1: Press “1” for ON. Press “2” for OFF.Step 2: If “1” is entered, the LCD will display:PROGRAM: PBXENTER PBX NUMBEREnter PBX number (1 digit).ATTEMPTSATTEMPTS refers to the number of times the dialer will calleach designated number. Both successful and unsuccessful(busy or no answer) call are considered attempts.The LCD will display:PROGRAM: ATTEMPTSENTER 1-9Step 1: Press the digit (1-9) corresponding to the number oftimes you wish the dialer to call each number.OPTION #1No OGM. Select this option if you do not wish torecord any outgoing messages.OPTION #21 OGM. Select this option if you wish to recordone OGM, which may be as long as 51 seconds.OPTION #32 OGMs. Select this option if you wish to recordtwo OGMs, each of which may be as long as 25.5seconds.OPTION #4ID plus 2 OGMs. Select this option if you wish torecord one ID of up to 15 seconds in length, andtwo OGMs, each of which may be as long as 18seconds. **If your ID message is less than 15 seconds in length, the remaining time will beevenly divided among the OGMs.Example: OPTION #4: ID plus 2 OGMs.If the ID is 10 seconds, then each OGM can be (51 minus 10equals 41 divided by 2 equals) 20.5 seconds in length.MESSAGEMESSAGE refers to the number of times each message will bedelivered to each designated number.The LCD will display:PROGRAM: MESSAGEREPEAT ENTER 1-3Step 1: Press the digits (1-3) corresponding to the number oftimes you wish the message(s) to be delivered.After selecting the number of message repeats, the dialer willautomatically exit this section.9
PROGRAMMING THE DIALERProgramming And Recording YourOutgoing MessagesProgramming The ChannelsThe AD-2001 is designed to be adaptable to a complete range ofpersonalized applications. Each of the two input channels can beprogrammed individually for full system customization. Inaddition to setting enable/disable options, entry/exit delays andtype of activation (N.O., N.C., & momentary or continuous), eachuser can specify which emergency messages will be delivered andwhich numbers will be dialed. The first channel activated will bethe priority channel. Numbers programmed to that channel will becompleted before the dialer moves on to the next channel.Although comprehensive in scope, the system is easy to program.Just follow these simple steps.Follow these steps to program and record your outgoingmessages. Skip this portion if you have programmed in onlynumeric pagers, which rely on coded DTMF messages. As withall AD-2001 programming, the unit need not be connected to aphone line when information is programmed in. Remember that“OPT” on the LCD stands for option; “OGM” stands foroutgoing message.NOTE: IF YOU ENTER THE WRONG CHOICE, PRESS “M” KEYREPEATEDLY AND RETURN TO THE “PROGRAM MODE”, THENSELECT THE SECTION TO CHANGE (“1” ACCEPT SECTION, “2”FOR NEXT SECTION), THEN ENTER CORRECT INFO RMATION.NOTE: IF YOU ENTER THE WRONG CHOICE, PRESS “M” KEYREPEATEDLY AND RETURN TO THE “PROGRAM MODE”, THENSELECT THE SECTION TO CHANGE (“1” ACCEPT SECTION, “2”FOR NEXT SECTION), THEN ENTER CORRECT INFORMATION.STEP 1 Decide which of the four options you prefer.STEP 2 Before programming in this option, write down allSTEP 1 The LCD will read: PROGRAM: CHANNELSyour messages. Time them carefully, changing them ifnecessary to fit the alotted time frame. Practice saying them,clearly enunciating each message for maximum clarity in caseof an emergency. Keep a final recording script.STEP 3 Program your option.A) The LCD will read: PROGRAM: OGMS1(YES) 2(NO)B) Press “1” to program your OGMs. Press “2” to scroll to thenext section.C) Press “1” to select the option (#1- #4) displayed or press“2” to scroll to the desired option.STEP 4 After selecting your option as explained above, recordyour message.A) The word RECORD will appear in the upper left corner ofthe LCD, above the instruction: PRESS R. The optionselected will appear in the upper right corner. For instance,if you selected option #2, the LCD will read:RECORDOGM1PRESS RB) Speak 6-12 inches away from the microphone. Referring toyour script and speaking in a normal voice, press and holdR (the word RECORDING will be displayed), releasing thekey after you have completed enunciating your messages.The word DONE will appear on the LCD when themaximum allotted time has been reached.C) The LCD will read: PLAY OGM(S)1(YES) 2(NO)Press “1” to play back your recordingD) The LCD will read: ACCEPT1(YES) 2(NO)Press “1” to accept the recorded OGM(s). Press “2” if youwish to re-record the messages, beginning with Step 4.Changing The OGMsAfter your system is up and operating, you may change one ormore of the recorded OGMs and/or choose a completelydifferent option. To do so, simply scroll to the programmingsection on your display: PROGRAM: OGMS1(YES) 2(NO)Select the option, then begin again from Step 3 above to recordyour new message(s).1(YES) 2(NO)Press “1” to begin programming the channels.STEP 2 The LCD will read: SELECT: 1 OR 20(DONE)Enter the channel you wish to program (1-2).Enable/DisableSTEP 3 The LCD will read: CH X: ENABLE1(YES) 2(NO)(“CH X” being the channel selected)Press “1” to enable the channel. Press “2” to disable the channel.Exit/Entry DelaysCapable of programming up to a maximum of 3 minutes and 20seconds each.STEP 4 The LCD will read: CH X: EXIT DELAY1(YES) 2(NO)Proceed with A) if you wish to program an exit delay.Proceed with B) if you do not.A) To program exit delay, press “1”.The LCD will read:ENTER 0-199 THENPRESS *Enter the digits corresponding to the number of seconds youwish to install. (For example, press “120” then press “*”, ifyou wish to install a 120-second exit delay).B) If you do not wish to program an exit delay, press “2”.STEP 5 The LCD will read: CH X: ENTRY DELAY1(YES) 2(NO)Proceed with A) if you wish to program an entry delay.Proceed with B) if you do not.A) To program an entry delay, press “1”.The LCD will read:ENTER 0-199 THENPRESS *Press “1” to program a delay. Then enter the digitscorresponding to the number of seconds you wish to install.(For example, press “90” then press “*”, if you wish to installa 90-second delay).B) If you do not wish to program an entry delay, press “2”.10
PROGRAMMING THE DIALERNormally Open/Normally ClosedB) Continue the above procedure for each of the up to fourphone/pager numbers programmed in.STEP 9 The LCD will read:CH X: OGM X1(YES) 2(NO)(“OGM X” being the OGM recorded in OGM options #2 - #4)A) Press “1” to deliver OGM X when the channel is activated.Press “2” if you do not wish this OGM to be delivered.B) Continue the above procedure for each Channel/OGM. If youhave programmed in and recorded an ID message as one ofyour OGM options, this ID will be delivered to all channels. Itwill not appear in the Channel display.STEP 6 The LCD will read:CH X: N.O./N.C.1(N.O.) 2(N.C.)A) Press “1” to select a normally open channel.B) Press “2” to select a normally closed channel.Momentary/Continuous ActivationSTEP 7 The LCD will read:CH X: MOM/CONT1(MOM) 2(CONT)A) Press “1” to select a momentary trigger.B) Press “2” to select continuous activation.NOTE: ID AND OGM(S) WILL ONLY BE DELIVERED TO TELEPHONENUMBERS, CELLULAR NUMBERS, AND VOICE PAGERS.Numbers Dialed/Outgoing MessagesCompleting The ProgrammingFollowing these steps allows you to choose which OGM(s) willbe delivered and which numbers will be dialed for each channel.NOTE: Dialer LCD will only show programmed numbers andOGM options.STEP 8 The LCD will read:CH X: DIAL #X1(YES) 2(NO)(“Dial #X” being the number in phone/pager location 1-4)A) Press “1” to dial phone/pager #X to be dialed when theselected channel is activated. Press “2” if you do not wishthis number to be dialed.Once you have programmed in all dialing and OGM options foreach channel, the LCD will read:ACCEPT1(YES) 2(NO)STEP 10 Press “1” to accept the Channel programming. Press“2” to re-program or to revert to previously programmed setting.You are now ready to review your programming and test thesystem.PRESS “M” TO EXIT PROGRAMMING MODE.TESTING YOUR SYSTEMTest your system before an emergency occurs.STEP 4 The LCD will read:Do not neglect to review programmed information and verify allelements of your system thoroughly before relying on the dialerto deliver the necessary information to the desired partiesaccurately and completely.We strongly recommend testing the system in test mode beforeconnecting to a telephone line. The test mode tests the storedinformation, not the full functionality of the dialer. To test thefull functionality of the dialer, the unit must be tested in theoperate mode. In the test mo de, the dialer will not make morethan one attempt per number dialed or play any OGM more thanonce.SELECT: 1-23(BOTH) 0(DONE)Select the channel you wish to test (1-2). Press “3” to test both.Channels. Once a channel is selected (or “all”) the programmedchannel information will be displayed on the LCD. Verify dataaccuracy as the LCD scrolls through by comparing the informationdisplayed with that specified on your Program Planner. Listen toyour recorded message(s) to ensure that the correct OGM (ifprogrammed) is delivered. Press “0” to exit testing.NOTE: IF YOU ENTER THE WRONG CHOICE, PRESS “M” KEYREPEATEDLY AND RETURN TO THE “PROGRAM MODE”, THENSELECT THE SECTION TO CHANGE (“1” ACCEPT SECTION, “2”FOR NEXT SECTION), THEN ENTER CORRECT INFORMATION.be using and test the system again, to determine if it functionscorrectly in an actual emergency situation.STEP 5 Now connect your dialer to the telephone line you willMake sure you notify the receiving party of your intent to call them,and tell them it is just a test.STEP 1 Press the “M” Mode key until the LCD reads:TEST: T-LINE1(YES) 2(NO)STEP 2 Press “1” to display the T-Line configuration.The data will scroll through all selections.Press “2” to scroll to the next section.STEP 3 The LCD will read:TEST: CHANNEL(S)1(YES) 2(NO)Press “1” to test channels.Press “2” to scroll to the next section.STEP 6 To test the operation of your entire system, set Mode toOPERATE and proceed as explained in the next section:Operating Your System.Test your system on a regular basis, at least once a week.11
OPERATING YOUR SYSTEMYou are now ready to begin operating your system,relying on the AD-2001 to work in conjunction with youralarm system to provide 24-hour security reassurance andpeace of mind.When in the operating mode, the system will monitor bothenabled channels, initiating dialing when a valid alarmcondition occurs. Upon activation the dialer will begincalling each phone/pager number selected, in sequence,for the pre-selected number of attempts. During eachsuccessful attempt, the voice message will be delivered 1,2, or 3 times, in accordance with the option selected(numeric messages will only be delivered one time). Inunsuccessful attempts, the dialer will move on to the nextphone/pager number after receiving 8 busy or 8 ringswithout an answer. The dialer will not allow voicemessages to be delivered to programmed numeric pagerlocations.If you send a message to a phone attached to an answeringmachine, it will consider this a successful attempt. Makesure you designate the maximum number of messagerepeats to be sure that a complete message will be left onthe answering machine, because part or all of youremergency message may be “lost” while the answeringmachine delivers its greeting message.Placing your system in OPERATE can also be used as afinal test of the full functionality of each channel’sexit/entry delay, activation, momentary/continuoustrigger, phone numbers and OGM. Although serving as atest, this mode reflects actual operation; therefore theOGM(s) will not be heard through your dialer’s speakerbut only by each party called.To begin operating your system, simply press the “M”Mode key until the word OPERATE appears on the LCD.To disarm the dialer, switch the mode to OFF by pressingthe same key. All programming information will beretainedUnder a momentary activation, a single violation of achannel will cause the dialer to initiate delivering all preselected OGMs to all programmed numbers associated withthat channel. Under continuous activation, the dialer willinitiate the process, terminating it if/when the activatedchannel is restored to a non-alarm state. Once an alarm hasoccurred and all attempts satisfied, the dialer will continueto monitor any remaining enable d channel. Once theactivated channel has been restored to a non-alarm state, itwill then be re-armed and ready for the next alarm.Exit/Entry DelaysIf a channel is activated during a pre-selected exit delay, thealarm condition will be ignored until the delay has expired.If an alarm occurs, the entry delay will cause the dialer towait before starting the dialing process. To de -activate thedialer during the entry wait period, simply press “M” toreturn to the OFF Mode. Both exit and entry delay timescan be pre-selected to range from 1-199 seconds.Additional featuresThe dialer offers three innovative features that enhance theutility of the entire system.Listen-InWhile receiving an OGM on a touch-tone phone, the calledparty can press “1” to listen in to the activity at the other endof the line for one minute. Pressing “1” again restarts theminute increment period and can be repeated indefinitely.When “1” is pressed the OGM will stop playing and thelisten in period will start.Two-WayAfter the called party is listening-in, that party can press “2”to begin a two-way conversation lasting for one minute.This procedure also can be repeated indefinitely by pressing“2” again to restart the minute. Once you are in two-waymode you cannot go back to Listen-In.System NotationsHere are a few explanations to help you better understandhow your AD-2001 dialer operates. For specificinformation on the AD-2001 unit alone, call UnitedSecurity Products, Inc.’s Customer Service Departmentduring normal business hours at (858) 597-6677.Remote Turn-OffThe called party can remotely terminate the activatedchannel any time during the OGM by pressing “1” then “#”twice within one second. The dialer will continue to monitorthe remaining channel. Once the terminated channel isrestored to a non-alarm state, it will re-arm. If in listen-in ortwo-way, simply press “#” twice in one second, for remoteturn-off.Channel ActivationEach of the dialer’s two channels can be activated by anyof the following: a normally open dry contact, normallyclosed dry contact or positive 5-28VDC voltageactivation.12
Sample Program Plannerspecific outgoing messages (OGMs).STEP 7 Using a prepared script and speaking six-to-eight inchesfrom the dialer’s microphone on the front of the unit, press “R” whenyou are ready to enunciate your 15-second identification message andyour two 18-second messages. Dialer automatically prompts to nextOGM. Make OGM1 a message telling the receiving party to call thepolice department. Make OGM2 a message to call the fire department.STEP 8 Press “1” to play back all recorded messages; press “1” againto accept. (NOTE: DIALER LCD WILL ONLY SHOWPROGRAMMED NUMBERS AND OGM OPTIONS).STEP 9 Press “1” to PROGRAM CHA NNELS.STEP 10 Press “1” to program Channel 1. Press “1” to ENABLE.Press “1” then enter “30” then press “*” for a 30-second EXIT delay;press “1” then enter “15” then press “*” for a 15-second entry delay.Now press “2” for NORMALLY CLOSED and then “1” fo rMOMENTARY activation. Press “1” to select phone/pager number 1 tobe dialed. Press “1” again to select phone/pager number 3 to be dialed.Press “2” to not select phone/pager number 4 to be dialed. Press “1” toselect OGM1 to be delivered and press “2” to not select OGM2 to bedelivered. Press “1” to accept the channel configuration.STEP 11 Press “2” to program Channel 2. Press “1” to ENABLE.Press “2” twice to indicate no EXIT or ENTRY delay. Now press “1”for NORMALLY OPEN and the “2” for CONTINUOUS activation.Press “1” to select phone/pager number 1 to be dialed. Press “2” to notselect phone/pager 3 to be dialed. Press “1” to select phone/pagernumber 4 to be dialed. Press “2” to not select OGM1 to be deliveredand press “1” to select OGM2 to be deliv ered. Press “1” to accept thechannel configuration.STEP 12 Press “0” to exit PROGRAM: CHANNELS.Press “M” to exit programming mode .Programming Example for Quick SetupBefore programming the dialer, study the example shown on this page.This “quick setup” example programs in one telephone number, twonumeric pager numbers, two attempts, two repeats, an ID plus twoadditional OGMs, and channels 1 and 2.Once you understand the setup, use the blank Program Planner onpage 14 to begin programming your dialer. We recommend makingseveral blank copies of the Planner before beginning the process. Italso is advisable to fill in the Planner in pencil initially.STEP 1 Press “1”.STEP 2 When the LCD reads SELECT 1-4, press “1” to install thefirst phone number in location 1 press “2” to indicate no pager; thenpress, in sequence, (fictitious) phone number “2345678” followed bythe “*” sign to store the programming process for that number.STEP 3 Press “3” to install the second phone number in location 3;press “1” to indicate numeric pager; then press’ in sequence,“3456789PP4455#” followed by the “*” sign. The first seven digitsrepresent the pager number dialed; each P stands for a 2-second pause;the next four digits followed b y the # sign represent the pager codeand the * stores the programming process for that number.Now press “4” to install the third phone number in location 4; press“1” to indicate numeric pager; then press, in sequence,“3456789PP5544#” followed by the “* ” sign.STEP 4 Press “0” to exit PROGRAM NUMBERS.STEP 5 At the PROGRAM: T -LINE prompt, press “1” to choosetone; press “2” to indicate no PBX; press “2” to program in twodialing attempts per emergency number called; press “2” to programin two message re peats for each call.STEP 6 Press “1” to PROGRAM OGM(S). Press “2” three times toScroll to option #4; press “1” to program in an ID message and two13
Fill out this Program Planner in pencil initiallyAfter thoroughly testing your system, redo your Program Planner in ink.One copy should be kept in a safe place by the end user; one copy should be retained by the installer.14
SPECIFICATIONSDimensionsPower source:Current (OPERATE mode – standby):Current (OPERATE mode – dialing):Activation:Max. digits for outgoing numbers:Operating temperature range:Dimensions (inches):Weight (ounces):Mounting:Case Material:Color:Warranty:9-18VDC28mA typical.100mA max.1) N.C. Activation: dialer activates when an “open” is detected2) N.O. Activation: dialer activates when a “close” is detected3) Voltage Activation: N.C. (applied voltage: Min. 5VDC, Max. 28VDC)N.O. (loss of continuous voltage: Min. 0VDC, Max. 0.25VDC)50-18 to 55 C (0 to 130 F)6 x 4 x 1.5 in10 ozWall or Flat SurfaceABSWhite1 YearNote: Design and specifications subject
You are now ready to begin programming the dialer. All programming can be input before connecting the dialer to a telephone line. Check the unit's LCD as you program numbers in the dialer to ensure accuracy. Please complete all programming instructions before attempting to operate the unit. Before programming your dialer to call the police, fire