Transcription
Manuals User Manuals Simplified.Keystone AD06 GSM Auto Dialer Installation GuideJanuary 19, 2022January 20, 2022Home » Keystone » Keystone AD06 GSM Auto Dialer Installation GuideContents [ hide1234Keystone AD06 GSM Auto DialerFeaturesKit ContentsDialer Fitting Instructions4.1 Tools required4.2 How to install the Auto Dialer5 Connections on the Auto Dialer6 Programming Sections7 Essential Programming8 Advanced Programming9 How to turn the Dialer On/Off locally or remotely9.1 How to Turn Dialer OFF10 How to Open Listen in11 How to return the Dialer to Factory Default Settings12 How to turn the Outputs On and Off13 How to initiate an immediate Test Call or Test SMS from the AutoDialer14 Programming the Dialer by SMS15 Other Useful Information16 TroubleShooting17 Documents / Resources17.1 Related Manuals / Resources
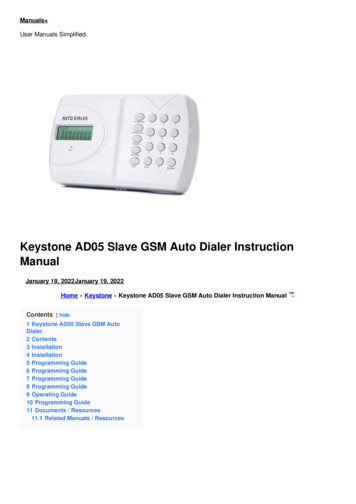
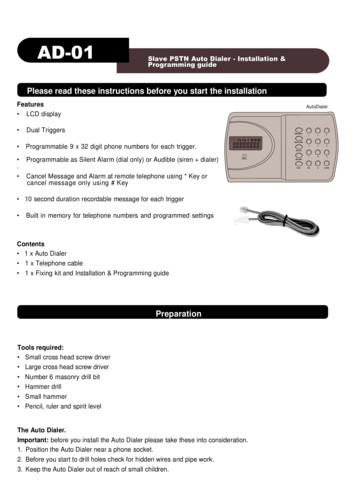
Keystone AD06 GSM Auto DialerPlease read these instructions carefully before you start the installationFeaturesLCD display showing text in any of 8 different languages6 Trigger Inputs4 Outputs9 programmable phone numbers for each triggerDifferent 10 second recordable message or 32 digit SMS sent for each triggerSelect whether a Voice Message, an SMS, or both Voice Message and SMS are sent to each of the phonenumbers and whether all or just some phone numbers are contacted on each of the 6 triggersBuilt in memory for telephone numbers and programmed settingsInputs can be programmed as instant or “double knock”Programmable dial-out delay on trigger activationOutputs can be programmed as User activated only or User activated plus Trigger/Event activatedOutputs can be programmed as either toggle latching or momentaryUsers can activate outputs remotely via dial-in or locally via Dialer keypadBuilt in SirenBuilt in Microphone plus terminals for remote Microphone4 Digit programmable password for programming and dial-inBuilt-in “Listen-in”. Open up either after voice message received or by dial inProgrammable as Silent Alarm (dial only) or Audible (siren dialer)Cancel Message and Alarm at remote telephone using * Key or cancel Message only using # KeyProgrammable daily/weekly/monthly test message (Voice or SMS) Dial in to initiate instant test messageNetwork Provider Field Strength Indication (via Dialer Display or SMS from Dialer)Trigger input runaway prevention – Ability to limit number of dial-outs or SMS’s to 50 in any 24 hour periodPay as you go SIM low credit indication via all incoming SMS’s being automatically forwardedTamper SwitchBattery back-up either from the Panel to which Dialer is connected or optional 9V PP3 batteryExternal Power Fail SMS sent (provided PP3 battery installed)All options Programmable via Keypad. Certain programming sections also programmable via text messageDialer can send SMS’s giving it’s essential programming detailsTurn on/off Dialer via Keypad or dial-in plus passwordKit Contents1 x GSM Auto Dialer1 x Fixing Kit1 x Installation and
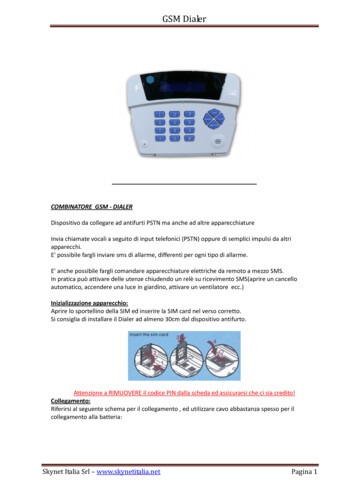
Programming GuideCurrent Cons:60-70mA Standby130-220mA Dial Out90mA Internal Siren Operating120-210mA Listen In OpenExcludes any Output LoadOperating Temp: -20 to 70CYour local installer: www.eaglesecuritysolutions.co.ukDialer Fitting InstructionsTools requiredSmall cross head screw driver & Large cross head screw driverNumber 6 masonry drill bitHammer drillSmall hammerPencil, ruler and spirit levelImportant: before you install the Auto Dialer please take these into consideration.1. Before you start to drill holes check for hidden wires and pipe work.2. Keep the Auto Dialer out of reach of small childrenHow to install the Auto Dialer1. Remove the screw from the SIM card cover on the rear of the unit and keep safe.2. Slide back the SIM card holder and insert SIM card with the cut corner at the top, close SIM holder sliding itback in to the lock position.3. Replace SIM card cover and small cross head screw.4. Connect the 12V power supply to terminals.( 12 and 0V) and, if required, install a 9V back up battery to theconnector inside the battery compartment (if used with an alarm panel, then the alarm panel’s back up batterywould usually be the source for mains failure back up).5. The Auto dialer will automatically start to search for the SIM card GSM network. The words “GSM Start” willappear in the display and a counting sequence from 1 to 5. If the GSM network is found, the display will changeto “On GSM Ready”. If the GSM network cannot be found, the display will read “No Signal”. If this is the case,change the location of the Dialer or use an alternative provider’s SIM card. If there is problem with the SIM cardor it has not been installed correctly into the holder, the display will ready “SIM Error”. Important. If the SIM cardis pin protected, the counting sequence will stop at 1 and the words “PIN” will appear in the display. You willneed to enter the SIM cards pin code at this point in order to proceed further.6. Press 1 2 3 4 ESC to turn the Dialer OFF (Dialer turns on automatically when power first connected. TheDialer must be Off to enable any programming). The display will now read “Off GSM Ready”.7. Mark and drill two holes on a horizontal line 160mm apart.8. Insert the masonry plugs; screw the two fixing screws in the plugs leaving 2mm protruding.9. Run cable from the Dialer to the Alarm Panel (or whatever panel/device you are connecting to). Note Figs 1 and2 “Connections on the Auto Dialer” below. The number of cable strands will be determined by the number oftriggers you require and whether you want the Dialer tamper switch to be active.10. If required, connect the Dialer’s two tamper terminals to the N.C. tamper inputs on the Alarm Panel. Activationof the Dialer’s rear tamper switch will then cause the Panel to go into alarm. If you require a voice/text messageon tamper activation, connect the Panel’s tamper output to one of the Dialer’s trigger inputs.11. If required, run a cable from the Dialer’s outputs to the devices you wish to activate12. If required, run cables from the panel’s microphone terminals to a remote microphone for better “listen-in”.13. If required, unscrew and replace the existing antenna with a remote antenna & cable.14. Place the Auto Dialer onto the wall, making sure the tamper switch is pressed in.15. Press 1 2 3 4 ENTER to turn the Dialer On after programming has been complete
How to test the Dialer’s Signal StrengthWhilst the Dialer is in the OFF mode (enter 4 digit code, default 1234 ESC key), press ENTER to display theNetwork reception quality on the LCD display. A number between 0 and 7 will appear. The strongest reception qualityis 7.The dialer should only be installed in a location where the signal strength display shows 2 or above. Move the dialerto a different location if the number is 1 or below. You can continue to check the Network reception strength at anytime provided the Dialer is in the OFF mode.Note that you can also check signal strength by calling the Dialer and entering your code 7 once it has answered.The Dialer will then send an SMS with current signal strength to Phone No 1 as programmed.Connections on the Auto DialerThe Trigger terminals are for connection to a switched negative output of an Alarm System’s Bell or Siren (Fig 1below). If such switched negative triggers are not available, connect the trigger inputs to a N.O. (normally open) relayoutput with the relay common to OV (Fig 2).The Output terminals are all switched negative (max 100mA). Connect the connected device’s positive pin to the 12Vterminal and the device’s negative pin to athe respective output terminal (O/P1, O/P2, O/P3 or O/P4)The Power terminals are for connection to a 12V power supply, either directly to an Alarm Control Panel’s 12V supplyor else via a regulated 12V 500mA mains power adaptor.The MIC terminals are for connection to an optional external microphone for improved “listen-in”Important: The Tamper terminals are for connection to the N.C. (normally closed) tamper inputs on an Alarm ControlPanel. If they are not being used, please fit a loop of cable as shown
Programming SectionsNOTE: The System must be in the OFF Mode for Programming. Since the Dialer will automatically turn itself onwhen power is first connected or re-connected, you need to turn the Dialer OFF (enter the default code 1234 andthen press ESC Key) before you can start programming as below:NOTE: Only Programming Sct 3, plus the Record, Play and Password Sections are essential to program. For mostapplications, other sections can be left in their default settings. Programming Sct 6 can also be left in its defaultsetting (activation of a trigger will mean ALL Tel numbers that have been programed into the dialer are dialled) unlessyou need to send the Trigger 1 message to different numbers than those for Trigger 2 etc. You must record at leastOne Voice Message and program at least One phone number into section 3 for the Dialer to work.SECTIONSelect Audible or Silent Alarm on trigger1(Default – Silent Alarm)Duration of Audible Alarm on trigger2(Default – 3 Minutes)
Add/Delete Phone Numbers that are dialled out/SMS’s sent to on trigger3(Default – Memory Empty)Select a Delay between Trigger and Dial-out45(Default – No Delay, Instant Dial Out)Select a Delay between the Dialer being turned On/Armed & becomingactive(Default – No Delay)Assign the 9 dial-out Telephone Numbers to triggers 1, 2, 3, 4, 5, 66(Default – ALL Telephone Numbers assigned to ALL triggers)Select an Audible Arm Delay sound7(Default – No sound)Select whether each Output is momentary or Toggle Latching8 (1)(Default – All are momentary)Select the time of the momentary Output8 (2)8 (3)(Default – All are 5 seconds)Select whether an Output is Input Trigger/Event Activated as well asUser Activated(Default – All Outputs are User Activated only)Select Audible or Silent Keypad Stroke8 (4)(Default – Audible, “Beep” heard each time a key is pressed on theKeypadCreate or Delete an SMS to be sent instead of Voice messages90 (1)(Default – Empty)Select whether a Voice message or SMS is sent on activation of eachTrigger(Default – Voice messages sent on activation of each trigger)0 (2)Regular Test message sent to avoid Pay-As-You-Go SIM card deactivation(Default – Off)0 (3)Show the SIM’s IMEI CodeSelect from one of 8 different languages0 (4)(Default – English)Limit the number of SMS’s or Voice calls made to 50 in any 24-hourperiod0 (5)(Default – No Limit)
Forward any incoming Dialer SMS’s to Telephone Number 1 asprogrammed0 (6)(Default – No SMS Forwarding)Select whether the Trigger Inputs are instant or double knock0 (7)(Default – Instant)Select whether an individual Trigger Input is Normally Open or NormallyClosed0 (8)(Default – Normally Open)Select whether an SMS is sent to Tel no 1 on input power failure0 (9)(Default – No SMS sent)RECORDRecord the nine different voice messagesPLAYPlay back the nine voice messagesPASSWORD Change the Default Password of 1234DEFAULTReturn the Dialer to its Default SettingsEssential ProgrammingAll Programming must be done when the Dialer is in the “OFF” mode (1234 ESC)How to Record the Voice Messages:Quick guide: Press 1 2 3 4 RECORD 1 ENTER, Record message now.Note: 1 message for Trigger 1, 2 message for Trigger 2 etc, 0 Test Message, if required. If you wish to receive aperiodic or instant voice Test message instead of SMS Test message, 0 needs to be programmed)1. Key in the four digit user PASSWORD code (factory default 1234).2. Press RECORD.3. Press 1 (to record as the message for Trigger 1) or 2 (to record as the message for Trigger 2) or 0 (to recordthe Test Message). If a periodic Test Message is required, it then needs to be programmed as active as a daily,weekly or monthly test call in Programming section 0 – subsection 2.4. Press ENTER to start recording the message. You now have 10 seconds to record your message5. Press ENTER to stop the recording, or wait for the 10 seconds to end.How to Play Back the Voice Messages:Quick guide: Press 1 2 3 4 PLAY 1 ENTER to play back the recorded messages.(Note: 1 The first message, 2 The second message, 0 Test Message)How to Change the User PASSWORD:(Factory Default 1234)Quick guide: Press 1234 PASSWORD New Code Reconfirm New Code1.2.3.4.5.Key in the four digit user PASSWORD code. Factory default 1234.Press PASSWORD.The LCD will display “PASSWORD”Key in your new four digit code and press ENTERYou have now changed to your new four digit passwordNOTE: You can also program this section by sending an SMS to the Dialer. See “Further Programming by SMS” in“Advanced Programming”.How to Program Phone Numbers for the Dialer to call upon trigger – Section 3:You can enter a maximum of 9 telephone numbers; each number can be a maximum of 32 digits.
Quick guide: Press 1 2 3 4 PROGRAM 3 ENTER 1 ENTER Telephone number ENTER1. Key in the four digit user PASSWORD code (factory default 1234).2. Press PROGRAM 3 ENTER “X”. The number “X” you press after the ENTER button selects the position inthe sequence you want that tel number to be called (1 1st number called, 2 2nd number called).3. Key in the first telephone number (max 32 digits)4. Press ENTER to exit the programming mode.5. Repeat the process until you have entered all the numbers you wish the Auto Dialer to call once it has beentriggered (maximum 9 different numbers). You can repeat the same number/s if you wish.NOTE: You can also program this section by sending an SMS to the Dialer. See “Programming by SMS” in“Advanced Programming”.How to Delete Phone Numbers – Section 3:Quick guide: Press 1 2 3 4 PROGRAM 3 ENTER 1 ENTER DELETE ENTER1. Key in the four digit user Password code (factory default 1234).2. Press PROGRAM 3 ENTER. Select the position for the telephone number you want to delete (1 1stnumber called, 2 2nd number called) and press DELETE. The LCD display will show “DELETE ?” pressENTER to delete this number or ESC to keep the number and exit Programming.How to Designate Telephone Numbers to TRIGs 1,2,3,4,5 and 6 the Test Call – Section 6:(Factory Default – all numbers are called for each trigger input and the Test Call) Only these selected TelephoneNumbers will be called/SMS’s sent to on activation of the respective trigger input.Quick guide: Press 1 2 3 4 PROGRAM 6 ENTER X ENTER N ENTER1.2.3.4.Key in the four digit user PASSWORD code (factory default 1234)Press PROGRAM 6 ENTER.Press 1 (for TRIG 1), or press 2 (for TRIG 2) etc, press 0 for the Test Call Press ENTERYou will see numbers 123456789 illuminated in the Display. This indicates that all 9 telephone numbers (or asmany as have been programed into the dialer) will be called or sent an SMS on that trigger.5. Press 1 – 9 to de-select that phone number from being dialled. You will now see a blank “-“ where that numberwas previously. Press ENTER to save the setting.6. Repeat the process until you have designated all the numbers to each trigger. Remember that you candesignate all 9 numbers to each trigger or only some to one and some to the other.IMPORTANT: The numbers shown on the LCD display are the phone numbers assigned to that trigger or to the TestCall (see section 0 sub-section 2 to enable/disable the Test Call). Pressing buttons 1 to 9 will toggle the numberson/off on 1-9 respectively. If a number is not shown, then it means that it will not be called.Example: 123 – – – 7- 9 means that only tel numbers 1,2,3,7 and 9 will be dialled for that specific trigger.IMPORTANT: Section 0 sub-section 1 selects whether each programmed telephone number to be called receives avoice message only, an SMS only or both a voice message and SMS (default voice only). It also selects whether avoice message, SMS or both is sent on the Test Call. Note that some network providers now require a voicemessage rather than data only to keep a pay as you go SIM card active.NOTE: You can also program this section by sending an SMS to the Dialer. See “Further Programming by SMS” in“Advanced Programming”.How to create an SMS message to for a Trigger Input and/or a Test Message – Section 9: (Default memory isempty)Quick guide: Press 1 2 3 4 PROGRAM 9 ENTER 1 ENTER MESSAGE ENTER (“1” Trigger Input 1 –6 or “0” Test Message. “MESSAGE” 32 Digit message including spaces)1. Key in the four digit user PASSWORD code. (Factory default 1234).2. Press PROGRAM 9 ENTERDisplay will show SMS MessPress 1 to program a message for Trigger Input 1, or 2 for input 2, or 0 to programme the Test message
The Display will now be blank. Use the keys 1-0 on the keypad to enter letters or pronunciation marks. Press eachkey continuously to obtain different letters as per a standard telephone keypad. Pressing the 0 key briefly moves thecursor to the right, pressing it twice creates an 0. That means:1 ” !” or “ ,” or “.” or “1” 2 “a” or “b” or “c” or “2” 3 “d” or “e” or “f” or “3” etc. etc.The cursor will move automatically to the next letter approximately 2 seconds after you have made your entry. Toedit, Press the RECORD key to move the cursor right, Press the PLAY key to move the cursor left, Press theDELETE key to delete the letter over which the cursor is flashing. Press ENTER to save the text.NOTE: You can also program this section by sending an SMS to the Dialer. See “Further Programming by SMS”later in “Advanced Programming”.How to select whether a telephone number receives just a Voice Message, just an SMS or both a VoiceMessage and SMS –Section 0 (sub-section 1):(Default is that all telephone numbers receive a Voice Message only)Quick guide: Press 1 2 3 4 PROGRAM 0 ENTER 1 ENTER N ENTER 0 ENTER (N TelephoneNumber 1,2,3,4,5,6,7,8 or 9 1 Voice, 0 SMS, 2 both Voice & SMS)1. Key in the four digit user PASSWORD code. (Factory default 1234).2. Press PROGRAM 0 ENTER 1 ENTER(Note, pressing 1 after “0” means you enter section 0, sub-section 1)Display will show Voice or SMSPress 1 to program Telephone Number 1, 2 to program Telephone Number 2 etc.Display will show Voice or SMS 1 VoicePress 0 to select that telephone number to receive an SMS only or Press 2 to select that telephone number toreceive an SMS and voice message. Press 1 to return to the input sending a voice message only. Where both voicemessages and SMS are selected, the dialer will send all SMS’s out first, then start dialing each number in sequence.Pressing # or * buttons will cancel continued voice message dial out or pressing 9 will open up listen-in and cancelfurther dial out.Press ENTER to save your selectionAdvanced ProgrammingHow to Program the Auto Dialer to give a local Audible Alarm as well as sending a Voice Message – Section1: (Default setting is Alarm OFF)Quick guide: Press 1 2 3 4 PROGRAM 1 ENTER 1 ENTER (1 Audible, 0 Silent)1. Key in the four digit user PASSWORD code. (Factory default 1234).2. Press PROGRAM 1 ENTER Display will show Alarm Sound SilentPress 1 to Change to Audible, Press 0 to return to Silent. Press ENTER to save your selectionHow to Set the Time the Audible local Alarm will sound on activation – Section 2: (Default is 3 mins)Quick guide: Press 1 2 3 4 PROGRAM 2 ENTER Time ENTER (Alarm time is from 1M-99M.)1. Key in the four digit user PASSWORD code. (Factory default 1234).2. Press PROGRAM 2 ENTER Display will show Alarm Time 5 MinutesPress 1 to Change to Audible, Press 0 to return to Silent. Press ENTER to save your selectionHow to Set the Time the Audible local Alarm will sound on activation – Section 2: (Default is 3 mins)Quick guide: Press 1 2 3 4 PROGRAM 2 ENTER Time ENTER (Alarm time is from 1M-99M.)1. Key in the four digit user PASSWORD code. (Factory default 1234).2. Press PROGRAM 2 ENTER
Display will show Alarm Time 5 MinutesPress digits 1-9 to set the time in minutes between 1-99 that you wish the alarm to sound on activation. Werecommend that you do not exceed a 20 min alarm duration. Press ENTER to save your selection.How to set Trigger Delay times – Section 4: (Default is 0 seconds – instant)Set trigger delay time between 0, 30 and 60 seconds: As a false alarm prevention feature, this is the delay between atrigger being activated and when the dialer starts to dial out. Default setting is 0 secs.Quick guide: Press 1 2 3 4 PROGRAM 4 ENTER N ENTER (N 0 or 3 or 6)1. Key in the four digit user PASSWORD code. (Factory default 1234).2. Press PROGRAM 4 ENTER Display will show Trigger Delay InstantPress 3 to Change to 30 seconds, Press 6 to change to 60 seconds, Press 0 to return to InstantPress ENTER to save your selectionHow to set Arm Delay times: – Section 5: (Default set at 0 seconds, instant)Set arm delay time between 0, 30 and 60 and 90 seconds: This is the delay between the dialer being armed orprimed and the time the triggers are active or ON. Default setting is 0 seconds, or no arm delay. Note that if an armdelay time is programmed, then the ON symbol on the LCD display will flash throughout the programmed time delayperiod.Quick Guide Press 1 2 3 4 PROGRAM 5 ENTER N ENTER (N 0 or 3 or 6)1. Key in the four digit user PASSWORD code. (Factory default 1234).2. Press PROGRAM 1 ENTER Display will show Exit Delay InstantPress 3 to Change to 30 seconds, Press 6 to change to 60 seconds, Press 0 to return to InstantPress ENTER to save your selectionHow to turn the Dialer On/Off locally or remotelyHow to Turn the Auto Dialer ON: (Default ON. That means the Dialer will always be active or ON when power isfirst applied or re-applied to it. Turn Off to program and then turn back On and leave On)From the Dialer: Quick guide: Press 1 2 3 4 ENTER1. Check that the voice message and at least one phone number has been programed into the Auto Dialer.2. Press 1 2 3 4 ENTER. The Dialer will show “ON” on the display.3. The triggers will become active after the delay time you have set has expired. (Default 0 seconds or instant)From a Telephone: Quick guide: Call the Dialer and Press 1 2 3 4 #1. Check that the voice message and at least one phone number has been programmed into the Auto Dialer.2. Call the Dialer (telephone number of the SIM card that has been installed). You will hear a long “beep” toindicate that the Dialer has answered. The Dialer’s display will read “Call in”3. Press 1 2 3 4 (4 digit code) followed by the # key. You will hear 2 beeps to indicate the Dialer has been turnedon and the Dialer will automatically hang up4. The triggers will become active after the delay you have set has expired. (Default set at 0 seconds, instant)From a Text Message: Quick guide. Text the Dialer with 1 2 3 4 #, then press the return key.1. Check that the voice message and at least one phone number has been programmed into the Auto Dialer.2. Text the Dialer (telephone number of the SIM card that has been installed) with the message: 1 2 3 4 # Ensureyou then press the return key before pressing send so the cursor on your phone is flashing on the next line. TheDialer’s display will briefly show a number, being the number of texts it has received to date.3. The triggers will become active after the time you have set has expired. (Default set at 0 seconds, instant)How to Turn Dialer OFF
From the Dialer. This will also stop calls being sent out after it has been triggered: Press 1 2 3 4 Dialer will show“OFF” on the display.From a Telephone: Quick guide: Call the Dialer and Press 1 2 3 4 *1. Call the Dialer (telephone number of the SIM card that has been installed). You will hear a long “beep” toindicate that the Dialer has answered. The Dialer’s display will read “Call in”2. Press 1 2 3 4 (4 digit code) followed by the * key. You will hear 4 beeps to indicate the Dialer has been turnedoff and the Dialer will automatically hang upFrom a Text Message: Quick guide. Text the Dialer with 1 2 3 4 *, then press the return key.Text the Dialer (telephone number of the SIM card that has been installed) with the message: 1 2 3 4 * Ensure youthen press the return key before pressing send so the cursor on your phone is flashing on the next line. The Dialer’sdisplay will briefly show a number, being the number of texts it has received to date.How to Stop the Dialer dialing the telephone numbers in sequence. The Auto Dialer will revert to the “OFF”mode and must be re-set to the “ON” mode as above:Quick guide: When the phone is answered, press # or * on the receiving end’s telephone keypad to stop thedialing sequence. If the Dialer does not immediately hang up, press # or * again until it does.When the Auto Dialer starts dialing, it will dial the first telephone number and repeat the pre-recorded voice messagethree times. The number dialed will appear briefly on the display and the display will then show the Tel number, insequence, being called. If there is no response or acknowledgment (# or * pressed) from that number, then it will dialthe next number until all the programmed numbers for that trigger are dialed. If there is no acknowledgment from anyof the phone numbers, it will display “NO ANSWER”To stop this dial sequence, press the * key on the telephone keypad that is receiving the call. At that time, the AutoDialer will stop its dialing sequence and the alarm (if programmed) will stop. If the local alarm has been programmedas active, then pressing the # key will stop the dialing sequence, but the alarm will continue to sound until timedout. In both cases, the Dialer will remain ON, waiting for any further Trigger.You can also stop the dial sequence at the Dialer’s Keypad by entering the 4 digit code and pressing ESC. This willturn the Dialer OFF.How to Open Listen inWhen answering a Voice Message from the Dialer: Quick Guide Press 91. If you wish to open “listen in” at any time, whilst receiving a voice message from the Dialer, press 9 on yourtelephone keypad.2. To close the listen in, simply hang upFrom a Telephone: Quick guide: Call the Dialer and Press 1 2 3 4 91. Call the Dialer (telephone number of the SIM card that has been installed). You will hear a long “beep” toindicate that the Dialer has answered. The Dialer’s display will read “Call in”2. Press 1 2 3 4 (4 digit code) followed by the 9 key to open listen in. To close, simply hang up.How to return the Dialer to Factory Default Settings(Note that this can only be done from the Dialer when the Dialer is in the OFF mode):From the Dialer: Quick Guide Press 1 2 3 4 * ENTER 1 2 3 4 * ENTER1. Ensure the Dialer is in the OFF mode.2. Press 1 2 3 4 * ENTER, The display will read “Factory Default” Press 1 2 3 4 * ENTER again to confirmyou wish to return to Factory Default Settings or ESC to keep existing settings and exit programmingFrom a Text Message: Quick guide. Text the Dialer with 1 2 3 4 * 1 2 3 4 * (on new line)Text the Dialer (telephone number of the SIM card that has been installed) with the message: 1 2 3 4 * (press “return”to get onto a new line)
1 2 3 4 * Press “send” to send the textThe Dialer’s display will briefly show a number, being the number of texts it has received to date.How to turn the Outputs On and OffThe AD-06 has 4 outputs that can be programmed as:1. User only (default setting) or Event Follower User. “Event Follower” means output 1 activates when trigger 1is activated, output 2 when trigger 2 is activated, output 3 when trigger 3 is activated and output 4 when trigger 4is activated. Program an output as an Event Follower in Section 8, subsection 3.2. A 5 second momentary output (default setting) or a toggle latching output (Section 8, sub-section 1). “ToggleLatching Output” means that the output remains ON until a further command turns it OFF again. Note that if theoutput has been programmed as a momentary output, a further programming section (Section 8, sub-section 2)selects whether it remains On for a time between 1 and 99 seconds before automatically turning Off.User Activation of the OutputsFrom the Dialer: Quick guide: Press 1 2 3 4 0 1 (the number of the output)1. Press 1 2 3 4, followed by 0, followed by the number 1-4, being the number of the output you wish to turn ON(Output 1 in this example)2. The Dialer will show “Output 1″ on the display3. If the output is a momentary output, it will remain active for the time which it has been programmed asremaining on for (1 to 99 seconds, default 5 seconds). If the output has been programmed as a toggle latchingoutput, it will remain on until turned off.4. To turn a Latching output off, Press 1 2 3 4, followed by 0, followed by the number 1-4, being the number of theoutput you wish to turn OFFFrom a Telephone: Quick guide: Call the Dialer and Press 1 2 3 4 0 1 (the no of the output)1. Call the Dialer, Press 1 2 3 4, followed by 0, followed by the number 1-4, being the number of the output youwish to turn ON (Output 1 in this example)2. The Dialer will show “Output 1″ on the display3. If the output is a momentary output, it will remain active for the time which it has been programmed asremaining on for (1 to 99 seconds, default 5 seconds). If the output has been programmed as a toggle latchingoutput, it will remain on until turned off.4. To turn a Latching output off, Call the Dialer, Press 1 2 3 4, followed by 0, followed by the number 1-4, being thenumber of the output you wish to turn OFFFrom a Text Message: Quick guide. Text the Dialer with 1 2 3 4 0 1 (“1” Output Number)Text the Dialer (telephone number of the SIM card that has been installed) with the message:1 2 3 4 0 1 (“1” being the output you want to turn On/Off. That means, if you want to turn Output 2 On/Off, text theDialer with 1 2 3 4 0 2) 1 Press “send” to send the textThe Dialer’s display will briefly show a number, being the number of texts it has received to date.How to initiate an immediate Test Call or Test SMS from the Auto DialerNote that if you wish to receive a Test Voice Call, you will first need to record a Test Message. See “How to recordthe Voice Messages” on Page 2. If y
4.2 How to install the Auto Dialer 5 Connections on the Auto Dialer 6 Programming Sections 7 Essential Programming 8 Advanced Programming 9 How to turn the Dialer On/Off locally or remotely 9.1 How to Turn Dialer OFF 10 How to Open Listen in 11 How to return the Dialer to Factory Default Settings 12 How to turn the Outputs On and Off
