Transcription
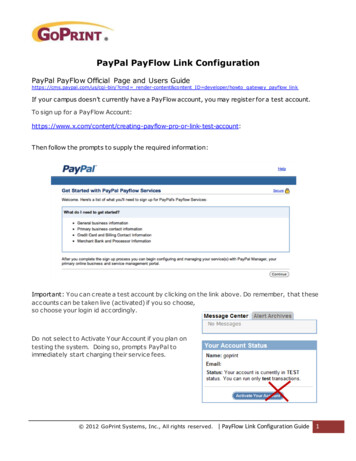
PayPal PayFlow Link ConfigurationPayPal PayFlow Official Page and Users Guidehttps://cms.paypal.com/us/cgi-bin/?cmd render-content&content ID developer/howto gateway payflow linkIf your campus doesn’t currently have a PayFlow account, you may register for a test account.To sign up for a PayFlow -pro-or-link-test-account:Then follow the prompts to supply the required information:Important: You can create a test account by clicking on the link above. Do remember, that theseaccounts can be taken live (activated) if you so choose,so choose your login id accordingly.Do not select to Activate Your Account if you plan ontesting the system. Doing so, prompts PayPal toimmediately start charging their service fees. 2012 GoPrint Systems, Inc., All rights reserved. PayFlow Link Configuration Guide1
Log in to PayPal Manager, navigate to: https://manager.paypal.comPartner is: PayPalEnter Merchant login (ID) and password.This is the user name you registeredunder.Leave User field blank if additional adminusers haven’t been configured.Note: You may add an additional level ofsecurity by creating additional useraccounts to manage various accountingduties.Testing Mode:Again, PayPal continues to prompt you to ActivateYour Account. Simply ignore for testing purposes! 2012 GoPrint Systems, Inc., All rights reserved. PayFlow Link Configuration Guide2
Setting up your ServicesStep 1 - Select - Services Settingthen Set UpStep 2 - Set the transaction processing mode to TestStep 3 - Populate both the PayPal and PayPal Sandbox email addresses in the PayPalexpress checkout section – TESTING ONLY!Note: the PayPal email address should already be automatically populated for you 2012 GoPrint Systems, Inc., All rights reserved. PayFlow Link Configuration Guide3
Step 4 - Set the Billing fields required and editable fields in the Billing Information sectionHint: you must also check off the matching fields under the “Make these fields editable” or userswill not be able to populate the credit card fields.Step 5 – Payment Confirmation sectionThe configuration page provides a message to the user letting them know a payment has beenmade and the transaction processed.1. Show Confirmation – set to On my website2. Enter Return serCreditCardCheckStatusActionThe Return URL links the user back to the GoPrint Web Client. This return method is called inthe coding and automatically returns the user back to the web client without prompting them topress a continue button.3. Return URL Method - select PostLink: Default setting and is strongly recommended for merchants new to HTML. This settingreturns the customer to the specified site. No additional transaction data is posted if this optionis specified.Post: Returns the customer and transaction data to the Web site that you specify in the ReturnURL field. 2012 GoPrint Systems, Inc., All rights reserved. PayFlow Link Configuration Guide4
Step 6 - Silent Post for Data TransferEnsures that the transaction data is passed back to the GoPrint Web Client when atransaction is completed.1. Use Silent Post – set to YesEnter the Silent Return URL of �s recommended that the option "Void transaction when my server fails to receive data sent bysilent post." is enabledIMPORTANT: Payflow Link only supports silent post backs to either port 80 (for http) or port 443(for https). Therefore port forwarding from either port 7768 or 7770 must be enabled.GoPrint PayFlow Link ConfigurationStep 1 – Select: Payments – Credit Card GatewayStep 2 - Press the Plus icon to Add a NewCredit Card GatewayStep 3 – Select: PayPalPayFlow Link 2012 GoPrint Systems, Inc., All rights reserved. PayFlow Link Configuration Guide5
Step 4 - Enter the required Payflow Link credit card gateway informationStep 5 - Enable at a PayPointSelect Credit Card to Quota from the Add Value option drop down menu and press SAVE 2012 GoPrint Systems, Inc., All rights reserved. PayFlow Link Configuration Guide6
User Payment ExperienceStep 1 – log in to your account and press the Add Value button:Step 2 - Enter the amount you would like to purchase: 2012 GoPrint Systems, Inc., All rights reserved. PayFlow Link Configuration Guide7
Step 3 - Confirm the amount:Step 4 – Elect to Pay with your PayPalaccount or credit card 2012 GoPrint Systems, Inc., All rights reserved. PayFlow Link Configuration Guide8
If successful, the transaction is accepted, amount deposited into your GoPrint account, and athePayPal Reference number provided.Click My Account to view your new balance: 2012 GoPrint Systems, Inc., All rights reserved. PayFlow Link Configuration Guide9
Your new balance appears under the Balances sectionScroll down and click the Transaction History to view the actual deposited transaction 2012 GoPrint Systems, Inc., All rights reserved. PayFlow Link Configuration Guide10
Troubleshooting ErrorsThis error indicates an issue with the Silent Post URL1. An issue with the PayPal server exists. PayPal server may be down.2. Ports 80,7768, or 443 are blocked3. A typo exists for the slient URL under PayPal Manager. Should be:Silent Return URL of sactions in question will appear as Started. If so, it may be required to manually confirm thetransactions by clicking Details and then follow the prompts to confirm.Payments – Credit Card TransactionsPress Confirmed or Rejected or Error indicated the reason for t he manual confirmation amount 2012 GoPrint Systems, Inc., All rights reserved. PayFlow Link Configuration Guide11
The incorrect PayPal email account was entered in PayPal Manager under Express Account settings.If in test mode, the PayPal Sandbox account email address also needs to be specified. 2012 GoPrint Systems, Inc., All rights reserved. PayFlow Link Configuration Guide12
IMPORTANT: Payflow Link only supports silent post backs to either port 80 (for http) or port 443 (for https). Therefore port forwarding from either port 7768 or 7770 must be enabled. GoPrint PayFlow Link Configuration Step 1 - Select: Payments - Credit Card Gateway Step 2 - Press the Plus icon to Add a New Credit Card Gateway