Transcription
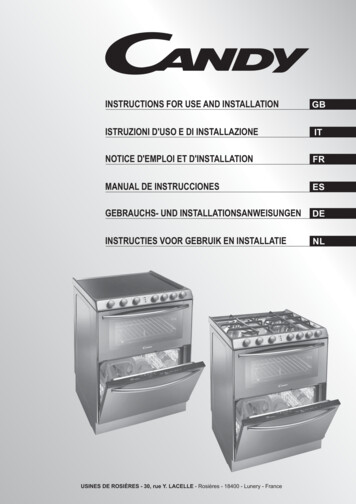
INSTRUCTIONS FOR USE AND INSTALLATIONGBISTRUZIONI D'USO E DI INSTALLAZIONEITNOTICE D'EMPLOI ET D'INSTALLATIONFRMANUAL DE INSTRUCCIONESESGEBRAUCHS- UND INSTALLATIONSANWEISUNGENDEINSTRUCTIES VOOR GEBRUIK EN INSTALLATIENLUSINES DE ROSIÈRES - 30, rue Y. LACELLE - Rosières - 18400 - Lunery - France
SAFETY INSTRUCTIONS ! " # % % %& ! ! ' ( & ) * ! " ) * WARNING !, " . / . 2 2 /5 2 /5 ' 6 #7 %9 : .&; ' ? ' : / ? @ ' C ! @ @ ! ) * D ' ; & : . 03 GB
SAFETY INSTRUCTIONSE H .&; ' # .&; ' # J ?K?; ! .&; ' # @ # .&; ' # ' @ .&; ' # & @ E @ & ' .&; ' # & ' ! ' : " &J 'E # ' " ! ; M ' M M ) * H M% M H ) *M% M ' 5 : M ? # ) ! * 5 ! ! M &J 'E # & M O& P 04 GB
UNPACKING THE APPLIANCE' # # H 6 Q2 9 Q2 5 Q7 QS r 6 5 RECOMMENDATIONS;?&@ T? ' U ;J 'E U &;?VJDL TO MAKE THEMOST OF EJ; &55D'& ?W . Identification plate is located at the back of the Trio.THE COMPANY SHALL NOT BE LIABLE IF THEINSTRUCTIONS PROVIDED IN THIS DOCUMENT ARE NOT COMPLIED WITH.It is not advisable to use adaptors, multiple plugs and/or extensioncables.Any queries regarding the power supply cord should be referredto After Sales Service or a qualified technician.When the appliance is located on a carpet floor, attention mustbe paid to ensure that there is no obstructions to the bottom vents.Any failure to follow the above advice may have seriousconsequences for the safety of the appliance.In order to improve the quality of the products, CANDYmay carry out modifications linked to technicalimprovements.Appliance complies with European Directives 73/23/EEC and89/336/EEC, replaced by 2006/95/EC and 2004/108/EC, andsubsequent amendments.86,5 - 87,5 cmcm60 You should entrust the gas installation of your appliance andits electrical connection to an approved installer or technicianwith similar qualifications. T r V y ' T @ ' @ & Trio is @ T ' T T J @ & . y ) *# . H ' y ? 142 - 143 cm (Model with hob lid)TECHNICAL DATAIMPORTANT NOTES59,6 cmPowerTRIO 9501TRIO 95032100 W8570 WAuxiliary mijorose1 kWUltra-rapid 3,5 kWhilight Ø 220/2300 WFront LeftRapid 2,50 kWhilight Ø 200/1800 WRear LeftSemi-rapid 1,75 kWhilight Ø 140/1200 W668 lt8 ltFront RightRear RightPlace settingsEN50242Water consumptionWater pressure mini 0,08 - max 0,8 MPa05 GBhilight Ø 165/1200 W
INSTALLATIONInstalling a domestic appliance can be a complicated operation which if not carried out correctly, can seriously affect consumersafety.It is for this reason that a professionally qualified person should undertake the task who will carry it out in accordance withthe technical regulations in force.In the event that this advice is ignored and the installation is carried out by an unqualified person, the manufacturer declinesall responsibility for any technical failure of the product whether or not it results in damage to goods or injury to individuals.In case of installation of the cooker on a base, measures have to be taken to prevent the appliance slipping from the baseitselfGAS MODEL %HIRUH LQVWDOOLQJ WKH DSSOLDQFH WKH WHFKQLFLDQ PXVW T T ! r 92 92 C 9 9 # ' y T H Q T 9 U 7 % H H r / y b ' H Q T ) *ANY MODIFICATION MADE TO THE GAS SETTING SHOULD BE NOTED ON THE RATING PLATE AFFIXED TO THE COOKER. * 6 &211(&7,21 y ' E ! y # ; V ! )7* U )9*6 ; V ! )7* U )9*5 ; V ! )7* U )9*7 ! 9 ! 7 7 9 ! 7 5(( &211(&7,21 237,216 RIGID PIPE CONNECTION CONNECTION BY FLEXIBLE HOSE WITH MECHANICAL FITTINGSWe recommend this type of connection.U CONNECTION BY SOFT RUBBERWe do not recommend this type of connection.T U )9* V (2) In all cases, make sure the seal is fitted. Following the connection operations, test the leak tightness using soapy water, testing byflame is strictly prohibited.06 GB
INSTALLATION & 1*,1* 7 ( * 6 7 3( . # H GAS/GAZ/Pression (mbar) Factory setting :Natural gas G20-20 mbar/G25-25 mbarG20/20 G20/25 G25/25 G30/29 G30/36 G31/30 G31/37 G350/13CAT.Gas setting possible according to installationButane gas G30-29 mbar or Propane gasG 31-37 mbarII 2E 3 BE-FRII 2H3 CH-ES-GBIT-PTII 2H3B/PCZ-DK-FINO-SEII 2H3B/PHUI 2EDEII 2L3B/PNLII 2ELs3B/P PL Hob burner jetsTo gain access to the jets :- lift the hob lid,- remove the top, grills, caps andheads of all burners,- use a tube spanner (7) inside theburner,- according to the information givenin the table, install jets suitable forthe burner type and gas typesupplied.For reinstallation, fit the heads,burner and top grills. Each jet is identified with a mark.BURNER 8;,/, 5 Front rightJetJETG20 20 mbarG20 25 mbar76G25 25 mbarG30 29 mbarG31 30 mbar50G31 37 mbarkW6(0, 5 3,'Rear leftJetkW1,001,20 1010,901,001,752,001,601,750,901,001,601,75665 3,'Front leftJet118808/75 5 3,'Resr rightkWJet2,502,802,302,503,50144 4,003,203,502,252,5094 If the gas type has been altered, the stability of the flame in the minimum flowmust be checked and set by adjusting the by-pass screw.To access the top burner by-pass screw, remove the control panel knobs.a) Butane- propane gas :the setting is done by screwing right in (without forcing) the by-pass screwwhose calibrated hole provides the minimum flow.Warning :b) Natural gas :Never loosen- unscrew the by-pass screw one turn,the others- replace the knob, light the burner and set to low flame,screws !- remove the knob again, screw the by-pass screw until areduced flame is obtained, staying stable when going from high to low position.- replace the knob.2S 6By-pass screwkW3,203,50
INSTALLATIONELECTRICAL CONNECTION"The installation must conform to the standard directives".The manufacturer declines all responsibility for any damage thatmay be caused by unsuitable or unreasonable use.Warning : shown on the electricity meter, the adjustment of the circuitbreaker, the continuity of the connection to earth to the installationand that the fuse is suitable. a socket with a plug with earth, or via an omni pole cut-outswitch .If the appliance has a socket outlet, it must be installed so thatthe socket outlet is accessible.The manufacturer cannot be held responsible for any accidentsresulting from the use of an appliance which is not connectedto earth, or with a faulty earth connection continuity. to After Sales Service or a qualified technician.To connect :. unscrew the cable grip,. pass the cable through the cable grip,. strip the insulation off the end of the each wire and connect themto the according to the numbers shown in the table as well asthe "bars shunts".Example of connection in monophase1- Put in the2- Put in3- Pass the cablebars shuntsthe wiresthrough the cable gripCaution: incorrect tightening can cause dangerous heatingrisks for the power supply cable.Warning! This appliance must be earthed. In the absence ofadequate earthing you will notice that when touching themetal parts of your appliance an electrical dispersion can befelt due to the presence of a radio interference suppressor.When the connection operation to the appliance terminals isfinished, tighten the cable clamp and close the cover. A power cord is supplied with the Trio which allows it to beconnected only to a power supply of 220-230 V betweenphases, or between phase and neutral. Connect to a 10/16Amp socket.Monophase Three phases Three phases220-230V 220-230V3 380-415V3N A power cord is not supplied with this Trio, but it is equipped witha terminal block that enables you to choose the correct connectionfor the particular power supply.The terminal block is located at the back of the Trio.CABLEH05VV-F H05RR-F, H05VV-F or,TYPE-AERA 3 G 2,5 mm2 H05VV-F or, H05RR-F4 G 2,5 mm2 5 G 1,5 mm2CONNECTION TOTHETERMINALBLOCKTo open the terminal block :. Locate the two tabs on the sides,. place the screwdriver blade on the front of the tab, insert it (1)and press down (2). Lift the cover off.Terminal blockx 3 bars shuntsL2L3To Shunt: 2 Phasemake aShunt 1-2bridge with Shunt 2-3a shunt bar5 NeutralShunt 4-51 PhaseShunt 1-22 Phase3 PhaseShunt 3-45 PhaseT Earth08 GB1 PhaseT Earth3 Phase5 NeutralShunt 4-5T Earth
USEINSTALLATIONGAS BURNERSWATER CONNECTION - WATER DRAINAGEEach burner is contolled by a tap with progressive settings allowing:* a wider choice of settings from the maximum position to thelowest and most precise one,* easier flame regulation according to the pan diameter,* no risk of cutting off the flame or switching off when theflame is turned down quickly.WA :The inlet and drain hoses can be directed to left or right.The dishwasher can be connected to either cold or hot water, aslong as it is no hotter than 60 C.Water pressure mut be between 0,08 MPa and 0,8 MPa. If thepressure is below the minimum consult the service departmentfor advice.The inlet hose must be connected to a tap so that the water supplycan be cut off when the machine is not in use (fig.1). Thedishwasher inlet hose is fitted with a 3/4" threaded connector(fig.2). The inlet hose "A" should be tightly connected to a 3/4" tap"B".The water connection of the dishwasher must be done exclusivelywith the pipe supplied. Do not use an old pipe.IGNITIONRECOMMENDATIONS : when the burners are not in service,the general gas supply tap should always be turned off. Turn on the gas tap, A symbol next to each control knob indicates which burner is lit. Turn and press in the relevant burner control knob to thesymbol, keeping it pressed in until the flame ignites. Onmodels fitted with electronic ignition the flame is ignited by anelectric spark. This is operated by the button or by pressing theknob (for models with ignition under the knob).For models not fitted with electronic ignition, or if there is noelectric power, light the flame with a match.If the machine is connected to new pipes or to pipes which havenot been in use for long time, run water through for a few minutesbefore connecting the inlet hose. In this way no deposits of sandor rust will clog up the water inflow filter.NB: for models fitted with the SAFETY thermocouple, keepthe knob pressed in for a few seconds in order to activatethe safety system. If the knob is released straightawaythere is not time for the safety system to be activated andthe flame goes out. If this happens, repeat the ignitionprocedure from the beginning waiting longer after the flameis lit.The rapid thermocouple safety device automatically cutsoff the gas supply if the flame is accidentally extinguished.WA Take care not to bend or kink the drain hose when connecting itto the machine so that the water can drain freely from it (fig.4y).The drain hose must be at least 40 cm above floor level and itmust have an internal diameter af at least 4 cm. It is advisable tofit an anti-odour air trap (fig.4x).If necessary, the outlet hose can be extended up to 2,6 m, providedthat it is kept at a maximum height of 85 cm above floor level. Forthis, contact Customer Service.If there are particular local gas supply conditions which makeignition difficult, you are advised to repeat the ignition procedure,turning the knob to “minimum” ( ). your cooking requirements.Intermediate positions are available between the ( ) and ( )settings on the control knob. To turn the flame out, turn the control knob back to stop position. burner is accidentally extinguished, turn the knob to “0”,wait one minute and then try to ignite again.4PANSFor a proper use of the burners, choose pans which match thedimensions given below :* Very fast* Fast* Semi-fast* AuxiliaryØ 18 cm and moreØ from 16 to 18 cmØ 12 cmØ 10 cm Pans with curved, ridged or warped bottoms are notrecommended. Aluminium pans may leave marks on the enamelledpan support. These marks can easily be removed witha damp cloth and a light abrasive product.The hose can be hooked over the side of the sink (it must not beimmersed in water, in order to prevent water from being siphonedback to the machine when this is in operation) Check that thereare no kinks in the inlet and outlet hoses. To extend, if necessarythe intlet hose, contact the Customer Service. Avoid boiling food too intensely. Food is not cooked any morequickly this way. In fact, it is subjected to severe agitation, whichmay cause the food to lose some of its flavour. To save gas, make sure that the flames do not overlap the bottomof the pan. ! 09 GB burner with an empty pan.
USETHE VITROCERAMIC ZONEPositionsADVICESThe use of high quality utensils is important to obtain good cookingresults : bases. & y. the surface unit.Some Tips11-2 Very Low To keep a dish hot, melt butter and chocolate.23-4 Low35-6 Moderate Beans, frozen foods, fruit, boiling water.47-8 Medium5 9-10 HighSlow cooking, sauces, stews, rice puddingpoached eggs.Steamed apples, fresh vegetables, pasta,crepes, fish.More intense cooking, omelettes, steaks.CHOOSING UTENSILS6 11-12 Very High Steaks, chops, frying.The following information will help you to choose cookware whichwill give good performance.Recommendations : # Always usethe appropriate cookware. ! ! ! hob, they may cause damage. ! hob, they may cause damage. ! zones.On the label, check the mark that shows ifthe pan is compatible with the vitroceramic.Stainless Steel : highly recommended. Especially good with asandwich clad base. The sandwich base combines the benefitsof stainless steel (appearance, durability and stability) with theadvantages of aluminium or copper (heat conduction, even heatdistribution).Aluminium : heavy weight recommended. Good conductivity.Aluminium residues sometimes appear as scratches on the hob,but can be removed if cleaned immediately.Because of its low melting point, thin aluminium should not beused.Cast Iron : usable, but not recommended. Poor performance.May scratch the surface.Copper Bottom / stoneware: heavy weight recommended. Goodperformance, but copper may leave residues which can appearas scratches. The residues can be removed, as long as the hobis cleaned immediately. However, do not let these pots boildry. Overheated metal can bond to glass hobs. An overheatedcopper pot will leave a residue that will permanently stain the hob.Porcelain/enamel : Good perfomance only with a thinly smooth,flat base.It is strongly recommended to keep children away from thecooking zones while they are in operation or when they areswitched off, so long as the residual heat indicator is on, inorder to prevent the risks of serious burns.OVEN EQUIPMENT (According to the model)It is necessary to do an initial cleaning of the equipment beforethe first use of each of them. Wash them with a sponge. Rinseand dry off. : it is for holdingdishes, plates, and meatjoints when cooking with the grill.It is fitted with rails which enablesthe drip tray to be slid into.Thanks to its special shape, the shelf always remains horizontal,even when pulled to its fullest extent towards the front of the oven,thus avoiding the risk of dishes sliding off or tipping over.THE ZONES " it is operational within 3 seconds and is suitablefor steady, homogeneous and sustained cooking. # " with the sprinter facility, reduced cooking times ofup to 15% can be achieved. P TRAY : collects meatand grilling juices during grilling.It can be put on the shelf, or slidunder it. Unless used with the grill,the drip tray must not be storedin the oven while in use.Never use the drip tray as a roasting tray. This would cause smoketo be produced, fat to be splashed and the oven would becomerapidly stained.USE ; zone that you need. 112 highest until it has properly warmed up and thenlower to the desired cooking setting.112103498 that the heat zone is operating.7 65 & ' hob. It lights up when the heat zone temperature reaches 60 Cand above. It will stay on, even if the unit is switched off, untilthe surface has cooled down. To switch off a heat zone, turn the corresponding control knobuntil the position "0". PASTRY TRAY must beplaced on the shelf. It is forcooking small pastries like choux,biscuits, meringues, etc.Never place the pastry tray directly on the oven bottom. is equipped with a skewer and an handle,two forks and a skewer support.When the oven is in use, any unused accessories should be removed. T-BREAKER TIMER for between 1 and 120 minutes, with immediate1020start and automatic stop. When the time is up,30the timer automatically cuts off the power supply12040to the oven.11050100 the examples below are intended as a guide. Whenyou become familiar with using your hob you will be able towork out the settings that suit you best.90608070 % r, the oven could be used withoutprogramming. In this case, turn the control knob to the Handposition .Nota : to set a time, turn the control knob clockwise up to the 120minutes mark and then turn it back to the required time.10 GB
USETHE OVEN USECOOKING ADVICESMEAT :It is better not to salt meats until after cooking as salt encouragesthe meat to splatter fat.This will dirty the oven and make a lot of smoke.Joints of white meat, pork, veal, lamb and fish can be put into theoven cold. The cooking time is longer than in a preheated oven,but it cooks through to the centre better as the heat has more timeto penetrate the joint.VERY IMPORTANT : the oven and the d
- replace the knob, light the burner and set to low flame, - remove the knob again, screw the by-pass screw until a reduced flame is obtained, staying stable when going from high to low position. - replace the knob. CAT. G20/20 G20/25 G25/25 G30/29 G30/36 G31/30 G31/37 II 2E 3 BE-FR II 2H3 CH-ES-GB IT-PT II 2H3B/P CZ-DK-FI NO-SE


