Transcription
Using a Commercial SSL VPN with LeostreamRemote Access and Desktop Connection Management for Hybrid Cloud VDIVersion 9.1October 2021
Integrating Leostream with SSL VPNsContacting LeostreamLeostream Corporation271 Waverley Oaks RdSuite 204Waltham, MA 02452USAhttp://www.leostream.comTelephone: 1 781 890 2019To submit an enhancement request, email features@leostream.com.To request product information or inquire about our future directions, email sales@leostream.com.Copyright Copyright 2002-2021 by Leostream CorporationThis software program and documentation are copyrighted by Leostream. The software describedin this document is provided under a license agreement and may be used or copied only under theterms of this agreement. No part of this manual may be copied or reproduced in any form withoutprior written consent from Leostream.TrademarksThe following are trademarks of Leostream Corporation.Leostream The Leostream graphical logo The absence of a product name or logo from this list does not constitute a waiver of the trademarkor other intellectual property rights concerning that product, name, or logo by Leostream.Linux is the registered trademark of Linus Torvalds in the U.S. and other countries. UNIX is aregistered trademark of The Open Group. OpenLDAP is a trademark of The OpenLDAP Foundation.Microsoft, Active Directory, Hyper-V, Windows, and the Windows logo are trademarks or registeredtrademarks of Microsoft Corporation in the United States and/or other countries. Other brand andproduct names are trademarks or registered trademarks of their respective holders. Leostreamclaims no right to use of these marks.PatentsLeostream software is protected by U.S. Patent 8,417,796.2
Integrating Leostream with SSL VPNsContentsContentsOverviewHow SSL VPNs workAuthenticationNetworking and EncryptionJuniper Networks SSL VPN SetupConfiguring Juniper Networks RolesBuilding a General Role for LeostreamExpanding the Role for Java RDP ClientsExpanding the Role to use winlaunchterm.cgi for RDP ConnectionsExpanding Roles to Bypass the Connection Broker BookmarkDefining Role MappingsConfiguring Connection Broker Web Resource Profiles in Juniper NetworksAssigning the Connection Broker Resource to the Juniper Networks RoleConfiguring Resource PoliciesConfiguring a Web Rewriting PolicySetting up a Terminal Services Access Control PolicyConfiguring Single Sign-On to LeostreamConfiguring Protocol Plans in the Connection BrokerLaunching Connections using winlaunchterm.cgi and Microsoft RDPLaunching Connections using a Java RDP ClientSigning the Elusiva Open Source Java RDP ClientCisco 55xx SSL VPN SetupGeneral Cisco SSL VPN SetupSetting up the Cisco SSL VPN to Work with the Connection BrokerConfiguring a Connection Broker BookmarkSingle Sign-On URL PostAssigning the Bookmark to a Group PolicyAssigning Users to a Group PolicyLogging in Through the Cisco SSL VPNUsing the Cisco Systems VPN Client with Leostream ConnectF5 FirePass SSL VPN 333334363
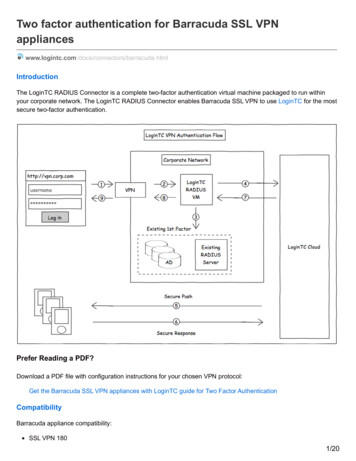
Integrating Leostream with SSL VPNsOverviewThe Connection Broker is a management layer, not a proxy solution. Therefore, the display protocoldoes not travel through the Connection Broker. For external access to desktops, the ConnectionBroker uses your existing hardware-based SSL VPN device, allowing you to provide secure access totraveling users without needing to qualify another SSL VPN solution.You can also use the Leostream Gateway to tunnel traffic from your user’s client to their isolatedremote desktop. See the Leostream Gateway Guide for more information.How SSL VPNs workAn SSL VPN performs two functions: Authentication Encryption of data as it passes over the Internet from the user’s computer to the corporatenetwork.AuthenticationUsers typically access an SSL VPN using a Web browser. Their Web browser recognizes the SSLcertificate in the SSL VPN server as being valid and containing the correct address. The addition ofLeostream to an existing SSL VPN does not change the security model.The SSL VPN must pass the user’s username and password to the Connection Broker in order forthe user to have single sign-on to the broker. This information transfer can be problematic if the SSLVPNs authenticates against a stand-alone Radius server, rather than against an LDAP server such asMicrosoft Active Directory . In addition, if the SSL VPN requires only the username andcryptographic key, the SSL VPN cannot pass sufficient information for single sign-on.The simplest solution is for the SSL VPN to first authenticate against the radius server, and then toauthorize against the Connection Broker. The latter step passes the user credentials to theConnection Broker.Networking and EncryptionSSL VPNs break the standard model of networking. They take data packets from the corporatenetwork, or the user’s computer, and send them across a connection established at the applicationlevel. To do so, they act as a form of advanced reverse proxy. In the user’s computer, thenetworking layer thinks it is talking to a device on the local network. At corporate end, thecorporate computers also think they are talking to a local device.The key element of an SSL VPN is a virtual network adapter. The adaptor appears to the operatingsystem as a normal network adapter, but instead sends it to an application. This application couldbe an SSL VPN application that encrypts the data and sends it across a pipe to another SSL VPNapplication that sends it to another virtual network adapter so it reappears.4
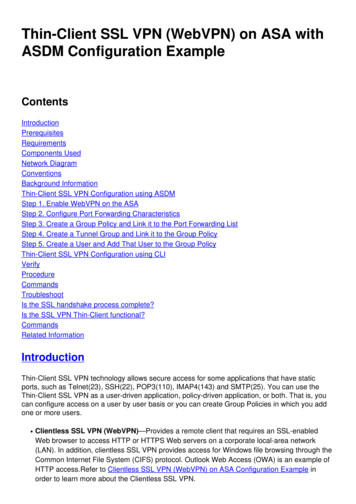
Integrating Leostream with SSL VPNsIn the simplest case, the network within the user’s computer is bridged with the corporatenetwork, but this requires both networks to be within the same subnet. For example, assume theuser has an IP address of 172.29.229.151 and the server they are talking to has an IP address of172.29.229.23. It does allow LAN broadcasts (required by services such as Windows NetBIOS filesharing and network neighborhood browsing).The other option is routing, where the user’s computer is on one subnet, with an address of192.168.2.151, and the corporate network is on another subnet 172.29.229.xxx with a server at172.29.229.151. This is more efficient because only traffic destined for the remote system passesover the SSL VPN encrypted tunnel, but it requires routes to be setup that link each subnet.The networking operation is carried out at the end user’s computer in one of two ways. The firstapproach is to install an SSL VPN client after which all the user’s applications have access to theremote network.After the SSL VPN sets up a network connection, the Leostream Connect client can be run on theuser’s computer or the user can launch connection from the Leostream Web client.Juniper Networks SSL VPN SetupThe Leostream Connection Broker integrates with the Juniper Networks SSL VPN providing userswith secure access to their resources from outside the corporate network. Configuring your JuniperNetworks SSL VPN and Connection Broker to work together consists of the following steps.1. Configure the Juniper Networks SSL VPN administrator interface to include the following:a. User Roles to enable access to the Resource Profiles defined for the LeostreamConnection Broker.If your users log in from client devices running different operating systems, such asWindows or Macintosh, you will need different roles for each user.b. Web Application Resource Profiles defined for the Leostream Connection Broker.The type of Web Application Resource Profile you create depends on the type ofconnections your users are establishing.In these Resource Profiles, you’ll set Web Access Control and Single Sign-on autopolicies to allow connection(s) to backend resources and provide single sign-on tothe Connection Broker.2. Build Connection Broker protocol plans for users who connect via the Juniper Networks SSLVPN.Juniper Networks and Leostream use common terms such as Roles and Policies, but theseterms relate to different concepts in the two products.5
Integrating Leostream with SSL VPNsThe following sections describe these steps in more detail. For complete instructions on workingwith the Juniper Networks Secure Access administrator interface, see the Administration Guideavailable from the Juniper Networks Web site.The Juniper device does not inform the Connection Broker when the user logs out ordisconnects from their remote desktop.To invoke actions specified in a user’s release plan afterlogging in via a Juniper SSL VPN, you must install a Leostream Agent on the remote desktop.Configuring Juniper Networks RolesThe first step in integrating Leostream and Juniper Networks is to create Juniper Networks Rolesand map these Roles to users via the Juniper Networks User Realms. After creating Roles, youcreate Resource Profiles for your Connection Broker and assign those Resource Profiles to theseRoles.The number of Juniper Networks Roles you need, and their configuration, depends on what viewingclients are used to launch connections and on the number of different viewing clients you need tosupport. If all users use the same set of viewing clients, you can use one Role. If you have userslogging in from client devices running different operating systems, such as Microsoft Windows andApple Macintosh, and you want to use different viewing clients for each operating system, youneed two Roles.Building a General Role for LeostreamYou create a general Role for your Leostream Connection Broker, as follows.1. Select the Users User Roles New User Role menu from the left-side of your JuniperNetworks device Central Manager.2. In the Name edit field, provide a descriptive name for this role.3. Optionally, enter a description for this role in the Description edit field, for example:4. After a user logs into the Juniper Networks device, the default start page typically displays alist of bookmarks for the user’s offered Resource Profiles, one of which points to theLeostream Connection Broker. You can, instead, automatically log the user into theConnection Broker after they log into the Juniper Networks device by over-riding thedefault start page. To automatically log the user into Leostream, ensure that the UI Optionscheck box in the Options section is selected if you want to over-ride the default start pageassociated with all User Roles6
Integrating Leostream with SSL VPNs5. In the Access features section, select the Web check box to provide access to yourLeostream Connection Broker, as shown in the following figure6. Click Save Changes at the bottom of the form to finish creating the new roleTo have this role go to the Connection Broker Sign In page, instead of displaying a bookmark for theConnection Broker, modified the General UI Options, as described in Expanding Roles to Bypass theConnection Broker Bookmark.Additional Role configuration may be necessary depending on the type of viewing clients your userslaunch. The following sections can be combined to build Roles that allow users to launch a varietyof client types. To configure the Role to allow users to connect to desktop using a Java RDP client, seeExpanding the Role for Java RDP Clients To configure the Role to use winlaunchterm.cgi to launch Microsoft RDP connections todesktops, see Expanding the Role to use winlaunchterm.cgi for RDP ConnectionsExpanding the Role for Java RDP ClientsUsers that log into the Juniper Networks device from client devices running a Linux or Macintoshoperating system need to use a Java RDP client to launch connections to desktops. The JuniperNetworks winlaunchterm.cgi script does not support these operating systems.To create a Role:1. Create a Role using the procedure described in Configuring Juniper Networks Roles.2. Any Resource Policies associated with this role must include a Java Access Control Policy.7
Integrating Leostream with SSL VPNsAfter the Role is complete, create a Web Resource Profile for your Connection Broker (seeConfiguring Resource Policies).Expanding the Role to use winlaunchterm.cgi for RDP ConnectionsFor users logging in from a Windows client, you can build a Role that uses the winlaunchtermcommand to launch RDP connections. To create the Role:1. Create a Role using the general procedure described in Configuring Juniper Networks Roles.2. In this Role, click on the General tab.3. In the General tab, click on the Overview tab.4. In the Access features section, select the Terminal Services check box. Your role now hastwo check boxes selected, as shown in the following figure5. Click Save Changes at the bottom of the form.6. Within this role, go to the Terminal Services tab.7. In the Terminal Services tab, go to the Options tab.8. Select the User can add sessions option, as shown in the following figure.8
Integrating Leostream with SSL VPNs9. Click Save Changes.10. In order to use winlaunchterm.cgi to establish RDP connections, you must create thefollowing Resource Policies and assign them to this Role. Web Rewriting Policy – If you do not create a Web Rewriting Policy, clicking on theConnect link for a desktop after logging into Leostream produces no results. Terminal Services Access Control Policy – If you do not create a Terminal Services AccessControl Policy, clicking Connect link for a desktop after logging into Leostream launchesthe RDP connection to the desktop, but the connection fails.This role is appropriate for any client device that launches RDP connections using the JuniperNetworks winlaunchterm command, called from a Leostream protocol plan or directly by theJuniper Networks device.After the Role is complete, create a Web Resource Profile for your Connection Broker. SeeConfiguring Resource Policies for more information.Expanding Roles to Bypass the Connection Broker BookmarkIf your users log into the Juniper Networks device to access only the Leostream Connection Broker,you can configure their Juniper Networks Role to skip the Bookmarks page and, instead, directly logthe user into Leostream.To configure a Role to log directly into the Connection Broker:1.From the Central Manager menus, select the Users User Roles.2.From the list of Roles, click the name of the role that will log users into Leostream.3. In this role’s General tab, click on the UI Options tab.9
Integrating Leostream with SSL VPNs4. Scroll down to the Start page section.5. Select the Custom page option.6. In the Start page URL, enter the URL to your Connection Broker, including the port number,as shown, for example, in the following figure.7. Select the Also allow access to directories below this url option.8. Click Save Changes.Defining Role MappingsUse Role Mappings within your User Realms to assign the correct Role to users, based on the typeof client they use. For example, the following procedure creates a rule that assigns a user logging inusing a Safari Web browser to the Leostream – Mac role.1. Select the User Realms Users Role Mapping menu from the left-side of your JuniperNetworks device Central Manager.2. Click New Rule.3. From the Rule based on drop-down menu, select Custom Expressions. Custom Expressionsallow you to define rules that filter users based on their Web browser type.4. Click Update next to the Rule based on drop-down menu.5. In the Name edit field, provide a unique name for this Role Mapping Rule, for example,Leostream – Mac.6. If you do not already have a custom expression that filters by Web browser type, clickExpressions in the Rule: If user has any of these custom expressions section. Otherwise,skip to step 7.a. In the Expressions tab of the Server Catalog for Production dialog that opens,enter a name for the new custom expression in the Name edit field.b. In the Expressions edit field, enter the following string to distinguish Safari Web10
Integrating Leostream with SSL VPNsbrowsers. To distinguish other types of Web browsers, modify your customexpression, accordingly.userAgent '*AppleWebKit'For example:c. Click Add Expression.d. Click Close to return to the form for creating the new Rule.7. From the Available Expressions list, select your custom expression.8. Click Add- next to the Available Expressions list.9. From the Available Roles list in the .then assign these roles section, select the role toassociated with this expression. In this example, because the custom expression is filteringon the Safari Web browser, the Leostream – Mac Role is selected.10. Click Add- .11. If a user assigned to a role by this rule should not be assigned to any other role, select theStop processing rules when this rule matches option.12. Click Save Changes.The rules in the Role Mapping table are processed from top-down. If you have multiple Rules for11
Integrating Leostream with SSL VPNsusers logging into Leostream, place the most restrictive Rule first, followed by roles with decreasingrestrictions.For example, in the following figure, the first rule assigns the Leostream – Mac role based on thecustom expression created in the previous procedure. Users logging in from a Safari Web browsersatisfy this Rule. All other users fall through the first Rule and satisfy the second Rule, thereby beingassigned to the Leostream – Windows Role.Configuring Connection Broker Web Resource Profiles in JuniperNetworksLeostream integrates with Juniper Networks via Web Resource Profiles. The following procedurecreates a Resource Profile that can be used for the following connection types: Standard Microsoft RDP client connections created by the Juniper Networkswinlaunchterm script. This option uses the Juniper SSL VPN section of the LeostreamConnection Broker protocol plan. Java RDP client connections created by a URL defined in the Connection Broker. This optionuses the External Viewer section of the Leostream Connection Broker protocol plan.To create a Custom Resource Profile for Leostream:1. Select the Users Resource Profiles Web menu from the left-side of your JuniperNetworks device Central Manager.2. Click New Profile.3. From the Type list, select Custom.4. Enter a name into the Name edit field.5. Optionally enter a description into the Description edit field.6. Enter your Connection Broker URL into the Base URL edit field. Ensure that you include theport number, for example:https://broker address.mycompany.com:44312
Integrating Leostream with SSL VPNs7. Ensure that the auto-policy for Web Access Control is enabled. Your form appears similar tothe following figure.8. If you plan to use Java RDP clients for connections, turn on the auto-policy for Java AccessControl, as follows.a. Click the Show ALL autopolicy types buttonb. Check the Autopolicy: Java Access Control option. The section expands, as shownin the following figure.c. In the edit field below the Resource table header, enter the following text.*:3389If you establish RDP connections on a non-standard RDP port, change 3389 to yourspecific port number.13
Integrating Leostream with SSL VPNsd. Leave the default selection of Allow socket access in the Action drop-down menu.e. Click Add.f.By default, the Juniper Networks device resigns Java applets using a self-signedcertificate. To have the Juniper Networks device resign the Java applet with anuploaded certificate, select the Sign applets with uploaded code-signingcertificates. Consult the Juniper Networks documentation for more information onuploading and using code-signing certificates.The Java access control policy should appear similar to the following figure.9. If you want the Juniper Networks device to pass the user’s credentials to the ConnectionBroker, providing single sign-on from the Juniper Networks device to the Connection Brokerand the user’s resources, enable the Single Sign-on auto-policy. See Configuring Single SignOn to Leostream for instructions.10. Click Save and Continue.11. To assign Roles to this Resource Profile:a. In the Roles tab that opens, select the Role to which this Resource Profile applies.Ensure that the Role is configured correctly based on what type of RDP connectionis being established.b. Click Add- .c. Click Save Changes.The Juniper Networks device automatically generates a bookmark for the Resource Profile thatpoints to the Leostream Connection Broker Sign In page. You can opt to not display this bookmarkto the Leostream user and, instead, automatically open the Sign In page after the user logs into theJuniper Networks device. See Expanding Roles to Bypass the Connection Broker Bookmark forinstructions.Users assigned to this type of Resource Profile should have Connection Broker policies that useprotocol plans set to either the Juniper SSL VPN or External Viewer option. See ConfiguringProtocol Plans in the Connection Broker for information on configuring Connection Broker protocol14
Integrating Leostream with SSL VPNsplans.Assigning the Connection Broker Resource to the JuniperNetworks RoleAfter you create and save Resource Profiles, you can add or modify the Roles associated with thoseResource Profiles using the Roles tab. To access and use the Roles Tab.1. Select the Users Resource Profiles Web menu from the left-side of your JuniperNetworks device Central Manager.2. Click on the name of the Resource Profile in the list.3. Go to the Roles tab.4. To add a Role:a. Select your Connection Broker role in the Available Roles list.b. Click Add - .5. To remove a Role:a. Select your Connection Broker role in the Selected Roles list.b. Click Remove.6. Click Save Changes.Configuring Resource PoliciesConfiguring a Web Rewriting PolicyBy default, the SSL VPN dynamically rewrites the Connection Broker URL. To avoid this, create aSelective Rewrite Web Resource Policy that instructs the Juniper Networks Secure Access device tonot rewrite the Connection Broker URL, as follows.1.Select the Users Resource Policies Web menu from the left-side of your JuniperNetworks device Central Manager.2. If the Rewriting tab is not displayed on the Web Access Policies page, click the Customizebutton located to the right of the tabs. In the Customize View dialog that opens, shown inthe following figure:1. Click the All pages link.2. Click OK. You should notice a number of tabs appear on the form.15
Integrating Leostream with SSL VPNs3. Click the Rewriting tab.4. Click the Selective Rewriting tab.5. Click New Policy.6. Create a new Selective Rewrite policy, as follows:1. Enter a name for the policy in the Name edit field, for example, Don’t-RewriteLeostream-CB-Response.2. In the Resources list, enter the hostname or IP address for your SSL VPN outsidethe firewall. This is not the Connection Broker IP address; it is the external URL ofthe Juniper Networks device that the users connect to.For example:https://sslvpn.yourcompany.com/*3. In the Roles section, select your Leostream Role from the Available roles list.4. Click Add- to move the Role into the Selected roles list.5. In the Actions section, select Don’t rewrite content, Redirect to target web server.6. Click Save Changes. Your configuration should look similar to the following figure.16
Integrating Leostream with SSL VPNs17
Integrating Leostream with SSL VPNsThe Juniper Networks device applies Resource Policies from top to bottom. After creating thenew Rewriting Policy, ensure that you move it above the default Initial Rewrite Policy, as shownin the following figure.Setting up a Terminal Services Access Control PolicyBy default, the SSL VPN blocks access to Remote Desktop/Terminal Server (3389/tcp). If yourinitiate an RDP connection using the winlaunchterm command, you must define a TerminalServices Access Control Policy, as follows.1.Select the Users Resource Policies Terminal Services Access Control menu from theleft-side of your Juniper Networks device Central Manager.2. Click New Policy.3. Enter a name for the policy in the Name edit field.4. Optionally provide a description for the new Resource Policy in the Description field.5. In the Resources section, enter the following text to allow access to port 3389.*:33896. In the Roles section, select your Leostream Role from the Available roles list.7. Click Add- to move the Role into the Selected roles list.8. In the Action section, select Allow access.9. Click Save Changes.Your configuration should look similar to the following figure.18
Integrating Leostream with SSL VPNsConfiguring Single Sign-On to LeostreamOptionally, you can enable an advanced policy to forward the user’s credentials to the LeostreamConnection Broker. With single sign-on enabled, the user is automatically logged into theConnection Broker and their offered resources.To enable single sign-on:1. Select the Resource Profiles Web menu from the left-side of your Juniper Networksdevice Central Manager2. Click on the name of the Web Application Resource Profile to edit.3. Click the Show ALL autopolicy types button.4. Select Autopolicy: Single Sign-on option.19
Integrating Leostream with SSL VPNs5. Select the radio button for Remote SSO.6. Select the POST the following data option.7. In the Resource edit field, enter the URL for your Connection Broker.8.In the Post URL edit field, enter the URL to your Connection Broker Sign in page, 3/index.pl9. Ensure that the Deny direct logon for this resource and Allow multiple POSTs to thisresource options are not selected.10. In the table of post parameters, enter the following information:LabeluserpasswordsaveDATA FIELDSFORM SUBMITNameuserpasswordsaveDATA FIELDSFORM SUBMITValue USERNAME PASSWORD Sign Inpassword,user1User modifiable?Not modifiableNot modifiableNot modifiableNot modifiableNot modifiablePlease note the single (‘ ’) and double (‘ ’) underscores used in the example, andthat the value for USERNAME and PASSWORD must include the less than and greaterthan signs. All fields are case sensitive.The Leostream Connection Broker Web Resource Profile form looks similar to the followingfigure.20
Integrating Leostream with SSL VPNs11. Click Save Changes.You can use the Send the following data as request headers to pass additional informationabout the client to the Connection Broker. The information appears in the HTTP head string, whichyou can view if you edit the client in the Connection Broker. You can use the HTTP header string tocreate client locations, for example.Configuring Protocol Plans in the Connection BrokerThe following sections describe how to create Connection Broker protocol plans to use inconjunction with a Juniper Networks device. After you create the protocol plan, associated it withpools in the policies assigned to your users that log in remotely.Launching Connections using winlaunchterm.cgi and Microsoft RDPYou can configure a Connection Broker protocol plan that sends a Terminal Services request to theJuniper Networks device. Use this protocol plan with Juniper Network Web Resource Profileconfigured to use winlaunchterm.cgi (see Creating Custom Resource Profiles for Microsoft RDPandJava RDP Connections).The following procedure configures a protocol plan that users the winlaunchterm.cgi commandto launch the Microsoft RDP client.1. Open the Edit Protocol Plan page for the protocol plan to assign to the desktops for userswho log in through the SSL VPN.21
Integrating Leostream with SSL VPNs2. Select 1 from the Priority drop-down menu for Juniper SSL VPN in the Web Browsersection, as shown in the following figure.3. Select Do not use from the Priority drop-down menu for all other protocols in the WebBrowser section, as shown in the following figure.4. Enter the URL in the Configuration file edit field, for inlaunchterm.cgi?host {IP}&screenSize fullScreen&colorDepth 32&user {DOMAIN}\ USER &password PASSWORD Where sslvpn.yourcompany.com is the external address of your Juniper IVE.In this URL: Parameters are case sensitive You can combine using ampersand characters (&) You can set variables using Connection Broker or Juniper dynamic tags.The Connection Broker replaces the {IP} dynamic tag with the hostname or IP address of theuser’s remote desktop. The Juniper device replaces the USER and PASSWORD dynamic tag withthe user’s credentials.You can include the following additional options in the URL: screensize (screenSize fullScreen, screenSize 800x600,screenSize 1024x768, screenSize 1280x1024)22
Integrating Leostream with SSL VPNs connectDrives (connectDrives Yes, connectDrives No)connectPrinters (connectPrinters Yes, connectPrinters No)Launching Connections using a Java RDP ClientYou can use the External Viewer option in Connection Broker protocol plans to launch desktopconnections using a third-party Java RDP client. Use this protocol plan with Juniper Network WebResource Profiles that contain the necessary Java Access Control Policy.The following list includes examples of third-party Java RDP clients. Elusiva Open Source Java Remote Desktop Protocol clientYou must manually sign the Elusiva Java RDP client before you can use it within yourConnection Broker. See Signing the Elusiva Open Source Java RDP Client for instructions. HOB Inc., HOBLink JWT Java clientVersion 7.0 of the Juniper IVE includes a Hob RDP Java applet, which is launched using abookmark created for a Terminal Service Resource Profile. Currently, Juniper Networks bookmarkscannot be launched programmatically. Therefore, you cannot use the integrated Hob RDP Javaapplet in your Leostream environment.To launch a Java RDP client from the Connection Broker, you must upload the client into theConnection Broker and use the External viewer option in the protocol plan, as follows.1. Download the Java client you plan to use and store it in a location that is accessible to allthe Connection Broker’s in your cluster.2. In your Connection Broker, go to the System Maintenance page.3. Select the Upload third party content option, as shown in the following figure.23
Integrating Leostream with
menu from the left-side of your Juniper Networks device Central Manager. 2. In the Name edit field, provide a descriptive name for this role. 3. Optionally, enter a description for this role in the Description edit field, for example: 4. After a user logs into the Juniper Networks device, the default start page typically displays a
