Transcription
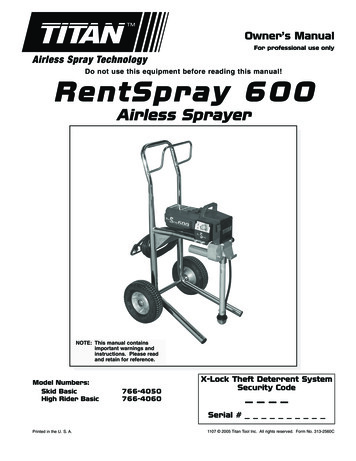
Owner’s ManualFor professional use onlyDo not use this equipment before reading this manual!RentSpray 600Airless SprayerNOTE: This manual containsimportant warnings andinstructions. Please readand retain for reference.Model Numbers:Skid BasicHigh Rider Basic766-4050766-4060X-Lock Theft Deterrent SystemSecurity Code— — — —Serial #Printed in the U. S. A.1107 2005 Titan Tool Inc. All rights reserved. Form No. 313-2560C
Important Safety Information Read all safety information beforeoperating the equipment. Save these instructions.HAZARD: HAZARDOUS VAPORSPaints, solvents, insecticides, and other materials canbe harmful if inhaled or come in contact with the body.Vapors can cause severe nausea, fainting, orpoisoning.PREVENTION: Use a respirator or mask if vapors can beinhaled. Read all instructions supplied with themask to be sure it will provide the necessaryprotection. Wear protective eyewear. Wear protective clothing as required by coatingmanufacturer.This symbol indicates a hazardous situation,which, if not not avoided could result in death orserious injury.To reduce the risks of fire or explosion, electricalshock and the injury to persons, read and understand all instructions included in this manual. Befamiliar with the controls and proper usage of theequipment.HAZARD: INJECTION INJURYA high pressure paint stream produced by thisequipment can pierce the skin and underlyingtissues, leading to serious injury and possibleamputation. See a physician immediately.DO NOT TREAT AN INJECTION INJURY AS A SIMPLECUT! Injection can lead to amputation. See a physicianimmediately.HAZARD: EXPLOSION OR FIRESolvent and paint fumes can explode or ignite.Property damage and/or severe injury can occur.PREVENTION: Provide extensive exhaust and fresh air introduction tokeep the air within the spray area free from accumulationof flammable vapors. Solvent and paint fumes canexplode or ignite. Do not spray in a confined area. Avoid all ignition sources such as static electricsparks, open flames, pilot lights, electricalappliances, and hot objects. Connecting or disconnectingpower cords or working light switches can make sparks.Paint or solvent flowing through the equipment is able toresult in static electricity. Do not smoke in spray area. Fire extinguisher must be present and in good workingorder. Place pump at least 25 feet (7.62 meters) from the sprayobject in a well ventilated area (add more hose ifnecessary). Flammable vapors are often heavier than air.Floor area must be extremely well ventilated. The pumpcontains arcing parts that emit sparks and can ignitevapors. The equipment and objects in and around the spray areamust be properly grounded to prevent static sparks. Keep area clean and free of paint or solvent containers,rags and other flammable materials. Use only conductive or grounded high pressure fluid hose.Gun must be grounded through hose connections. For electric units — power cord must be connected to agrounded circuit. Always flush unit into a separate metal container, at lowpump pressure, with spray tip removed. Hold gun firmlyagainst side of container to ground container and preventstatic sparks. Follow the material and solvent manufacturer's warningsand instructions. Know the contents of the paints andsolvents being sprayed. Read all Material Safety DataSheets (MSDS) and container labels provided with thepaints and solvents. Follow the paint and solventmanufacturer’s safety instructions. Use extreme caution when using materials with aflashpoint below 70ºF (21ºC). Flashpoint is thetemperature that a fluid can produce enough vapors toignite. Plastic can cause static sparks. Never hang plastic toenclose a spray area. Do not use plastic drop clothswhen spraying flammable materials. Use lowest possible pressure to flush equipment. Do not spray onto pump assembly.The maximum operating range of the sprayer is 3300 PSI / 22.8MPa fluid pressure.PREVENTION: NEVER aim the gun at any part of the body. Do not aim the gun at, or spray any person or animal. NEVER allow any part of the body to touch the fluid stream.DO NOT allow body to touch a leak in the fluid hose. NEVER put your hand in front of the gun. Gloves will notprovide protection against an injection injury. ALWAYS lock the gun trigger, shut the pump off, andrelease all pressure before servicing, cleaning the tip orguard, changing tip, or leaving unattended. Pressure willnot be released by turning off the motor. ThePRIME/SPRAY valve or pressure bleed valve must beturned to their appropriate positions to relieve systempressure. Refer to the PRESSURE RELIEFPROCEDURE described in this manual. ALWAYS keep the tip guard in place while spraying. Thetip guard provides some protection but is mainly awarning device. ALWAYS remove the spray tip before flushing or cleaningthe system. Paint hose can develop leaks from wear, kinking andabuse. A leak can inject material into the skin. Inspectthe hose before each use. Do not use hose to lift or pullequipment. NEVER use a spray gun without a working trigger lockand trigger guard in place. All accessories must be rated at or above 3300 PSI / 22.8MPa. This includes spray tips, guns, extensions, and hose. Do not leave the unit energized or under pressure whileunattended. When the unit is not in use, turn off the unitand relieve the pressure in accordance with thePRESSURE RELIEF PROCEDURE described in thismanual. Verify that all connections are secure before operating theunit. Unsecured parts may eject at great force or leak ahigh pressure fluid stream causing severe injury. Always engage the trigger lock when not spraying. Verifythe trigger lock is functioning properly.NOTE TO PHYSICIAN:Injection into the skin is a traumatic injury. It isimportant to treat the injury as soon as possible. DONOT delay treatment to research toxicity. Toxicity is aconcern with some coatings injected directly into theblood stream. Consultation with a plastic surgeon orreconstructive hand surgeon may be advisable.2 Titan Tool Inc. All rights reserved.
Important Safety Information Read all safety information beforeoperating the equipment. Save these instructions.Grounding InstructionsHAZARD: EXPLOSION HAZARD DUE TOINCOMPATIBLE MATERIALSWill cause property damage or severe injury.PREVENTION: Do not use materials containing bleach or chlorine. Do not use halogenated hydrocarbon solvents such asbleach, mildewcide, methylene chloride and 1,1,1 trichloroethane. They are not compatible with aluminum. Contact your coating supplier about the compatibility ofmaterial with aluminum.This product must be grounded. In the event of an electricalshort circuit, grounding reduces the risk of electric shock byproviding an escape wire for the electric current. This productis equipped with a cord having a grounding wire with anappropriate grounding plug. The plug must be plugged into anoutlet that is properly installed and grounded in accordancewith all local codes and ordinances.Improper installation of the grounding plugcan result in a risk of electric shock.HAZARD: GENERALCan cause severe injury or property damage. Read all instructions and safety precautions beforeoperating equipment. Follow all appropriate local, state, and national codesgoverning ventilation, fire prevention, and operation. The United States Government Safety Standards havebeen adopted under the Occupational Safety and HealthAct (OSHA). These standards, particularly part 1910 ofthe General Standards and part 1926 of the ConstructionStandards should be consulted. Use only manufacturer authorized parts. User assumesall risks and liabilities when using parts that do not meetthe minimum specifications and safety requirements of thepump manufacturer. All hoses, fittings, and filter parts must be secured beforeoperating spray pump. Unsecured parts can eject at greatforce or leak a high pressure fluid stream causing severeinjury. Before each use, check all hoses for cuts, leaks, abrasionor bulging of cover. Check for damage or movement ofcouplings. Immediately replace the hose if any of theseconditions exist. Never repair a paint hose. Replace itwith another grounded high-pressure hose. Do not kink or over-bend the hose. Airless hose candevelop leaks from wear, kinking and abuse. A leak caninject material into the skin. Do not expose the hose to temperatures or pressures inexcess of those specified by manufacturer. Do not spray outdoors on windy days. Wear clothing to keep paint off skin and hair. Do not operate or spray near children. Keep childrenaway from the equipment at all times. Do not overreach or stand on an unstable support. Keepeffective footing and balance at all times. Use lowest possible pressure to flush equipment. Stay alert and watch what you are doing. Do not operate the unit when fatigued or under theinfluence of drugs or alcohol. For electric units — Always unplug cord from outlet beforeworking on equipment. Do not use the hose as a strength member to pull or liftthe equipment. Do not lift by cart handle when loading or unloading. Titan Tool Inc. All rights reserved.If repair or replacement of the cord or plug is necessary, do notconnect the green grounding wire to either flat blade terminal.The wire with insulation having a green outer surface with orwithout yellow stripes is the grounding wire and must beconnected to the grounding pin.Check with a qualified electrician or serviceman if thegrounding instructions are not completely understood, or if youare in doubt as to whether the product is properly grounded.Do not modify the plug provided. If the plug will not fit theoutlet, have the proper outlet installed by a qualifiedelectrician.Grounded OutletGrounding PinCover for grounded outlet boxIMPORTANT: Use only a 3-wire extension cord that has a3-blade grounding plug and a 3-slot receptacle that willaccept the plug on the product. Make sure your extensioncord is in good condition. When using an extension cord,be sure to use one heavy enough to carry the current yourproduct will draw. An undersized cord will cause a dropin line voltage resulting in loss of power and overheating.A 12 gauge cord is recommended. If an extension cord isto be used outdoors, it must be marked with the suffix WA after the cord type designation. For example, adesignation of SJTW-A would indicate that the cord wouldbe appropriate for outdoor use.IMPORTANT: When the sprayer is used with a generatoror uncontrolled line voltage, the use of Titan’s “Line SurgeProtector” (P/N 800-935) is recommended.SpecificationsGallons per minute (GPM) .0.58 (2.2 LPM)Maximum tip sizes .0.024”Maximum pressure .3300 PSI (22.8 MPa)Power .1.45 HP Infinity BrushlessDC motorWeight, Skid.31 lbs. (14.1 kg)Weight, High Rider.55 lbs. (24.9 kg)Weight, Low Rider.59 lbs. (26.8 kg)Maximum hose length.300’ (91.4 m)3
Table of ContentsSetupSafety Precautions .2Specifications .3General Description .4Operation .4Setup .4Preparing to Paint .5Painting .5Control Panel Indicators .5Xact Digital Control System Operation .6Pressure Relief Procedure .7Spraying .8Spraying Technique .8Practice .8Cleanup .9Maintenance.9General Repair and Service Notes.9Replacing the Motor .10Replacing the Gears .10Replacing the Transducer .11Replacing the PRIME/SPRAY Valve.11Servicing the Fluid Section .12Replacing the Filters .13Troubleshooting .14Xact Digital Control System Error Messages .15Parts Listings.20Main Assembly.20Skid Assembly .21Siphon Assembly .21Fluid Section Assembly .22Drive Assembly .23High Rider Cart Assembly .24Labels .24Electrical Schematic .24Accessories .25Warranty .28Perform the following procedure before plugging in the powercord of an electric unit.1. Ensure that the siphon tube and the return hose areattached and secure.2. Using a wrench, attach a minimum of 50’ of 1/4” nylonairless spray hose to the outlet fitting on the sprayer.Tighten securely.3. Attach an airless spray gun to the spray hose. Using twowrenches (one on the gun and one on the hose), tightensecurely.NOTE: Do not attach the tip to the spray gun yet.Remove the tip if it is already attached.Make sure all airless hoses and spray guns areelectrically grounded and rated at or above themaximum operating pressure range of the airlesssprayer.4. Make sure the pressure control knob is in its OFF positionin the black zone.5. Make sure the ON/OFF switch is in its OFF position.6. Fill the oil cup with one tablespoon of piston seal lubricant(Piston Lube).IMPORTANT: Never operate unit for more than tenseconds without fluid. Operating this unit without fluidwill cause unnecessary wear to the packings.7. Make sure the electrical service is 120V, 15 ampminimum.8. Plug the power cord into a properly grounded outlet atleast 25’ from the spray area.IMPORTANT: Always use a minimum 12 gauge, three-wireextension cord with a grounded plug. Never remove thethird prong or use an adapter.General DescriptionPreparing a New SprayerThis airless sprayer is a precision power tool used for sprayingmany types of materials. Read and follow this instructionmanual carefully for proper operating instructions,maintenance, and safety information.If this sprayer is new, it is shipped with test fluid in the fluidsection to prevent corrosion during shipment and storage.This fluid must be thoroughly cleaned out of the system withmineral spirits before you begin spraying.IMPORTANT: Always keep the trigger lock on the spraygun in the locked position while preparing the system.1. Place the siphon tube into a container of mineral spirits.2. Place the return hose into a metal waste container.3. Set the pressure to minimum by turning the pressurecontrol knob to the “Min” setting in the yellow zone.Min. – 1900 PSI1901 – 3300 PSI(yellow zone)(green ontrolSystemCoverXact DigitalControl System(Optional)ON/OFFSwitchOil CupPRIME/SPRAYValveBlinking Yellow0-200 PSISolid Yellow201-1900 PSISolid Green1901-3300 PSIOFF(blackzone)FluidSectionlsePu eanClMotor RunningTurbo PulseClean(red zone)OutletFittingMin PSI(Bar)Max PSI(Bar)PressureControl Knob4. Move the PRIME/SPRAY valve down tothe PRIME position.5. Turn on the sprayer by moving theON/OFF switch to the ON position.6. Allow the sprayer to run for 15–30 secondsto flush the test fluid out through the return hose and intothe waste container.7. Turn off the sprayer by moving the ON/OFF switch to theOFF position.OperationThis equipment produces a fluid stream atextremely high pressure. Read and understandthe warnings in the Safety Precautions section atthe front of this manual before operating thisequipment.4 Titan Tool Inc. All rights reserved.
Preparing to PaintPaintingBefore painting, it is important to make sure that the fluid in thesystem is compatible with the paint that is going to be used.1. Place the siphon tube into a container of paint.2. Place the return hose into a metal wastecontainer.3. Set the pressure to minimum by turningthe pressure control knob to the “Min”setting in the yellow zone.4. Move the PRIME/SPRAY valve down to thePRIME position.5. Turn on the sprayer by moving the ON/OFFswitch to the ON position.6. Allow the sprayer to run until paint iscoming through the return hose into the metal wastecontainer.7. Turn off the sprayer by moving the ON/OFF switch to theOFF position.8. Remove the return hose from the waste container and placeit in its operating position above the container of paint.9. Move the PRIME/SPRAY valve up to theSPRAY position.10. Turn on the sprayer.11. Unlock the gun by turning the gun triggerlock to the unlocked position.NOTE: Incompatible fluids and paint may cause thevalves to become stuck closed, which wouldrequire disassembly and cleaning of thesprayer’s fluid section.Min PSI(Bar)lsePu anCleMax PSI(Bar)IMPORTANT: Always keep the trigger lock on the spraygun in the locked position while preparing the system.1. Place the siphon tube into a container of the appropriatesolvent. Examples of the appropriate solvent are water forlatex paint or mineral spirits for oil-based paints.2. Place the return hose into a metal wastecontainer.3. Set the pressure to minimum by turningthe pressure control knob to the “Min”setting in the yellow zone.Min PSI(Bar)lsePu anCleMax PSI(Bar)4. Move the PRIME/SPRAY valve down to thePRIME position.NOTE: Hold the return hose in the wastecontainer when moving thePRIME/SPRAY valve to PRIME incase the sprayer is pressurized.5. Turn on the sprayer by moving the ON/OFF switch to theON position.6. Allow the sprayer to run for 15–30 seconds to flush the oldsolvent out through the return hose and into the metalwaste container.7. Turn off the sprayer by moving the ON/OFF switch to theOFF position.12.13.14.15.NOTE: Make sure that the spray gun does not have atip or tip guard installed.8. Move the PRIME/SPRAY valve up to theSPRAY position.9. Turn on the sprayer.10. Unlock the gun by turning the gun triggerlock to the unlocked position.16.17.Ground the gun by holding itagainst the edge of the metalcontainer while flushing. Failureto do so may lead to a staticelectric discharge, which maycause a fire.11. Trigger the gun into the metal waste container until the oldsolvent is gone and fresh solvent is coming out of the gun.12. Lock the gun by turning the gun triggerlock to the locked position.13. Set down the gun and increase thepressure by turning the pressure controlknob slowly clockwise into the green zone.Trigger lock in14. Check the entire system for leaks. Iflocked position.leaks occur, follow the “Pressure ReliefProcedure” in this manual before tightening any fittings orhoses.15. Follow the “Pressure Relief Procedure” in this manualbefore changing from solvent to paint.NOTE: Turning the pressure up higher then needed toatomize the paint will cause premature tip wearand additional overspray.NOTE: If the sprayer is equipped with an Xact DigitalControl System, go to “Xact Digital ControlSystem Operation” at the end of the Operationsection of this Manual.Control Panel IndicatorsThe following is a description of the control panel indicators.Blinking Yellow0-200 PSISolid Yellow201-1900 PSIPressureIndicatorBe sure to follow the pressure relief procedurewhen shutting down the sprayer for any purpose,including servicing or adjusting any part of thespray system, changing or cleaning spray tips, orpreparing for cleanup. Titan Tool Inc. All rights reserved.Ground the gun by holding itagainst the edge of the metalcontainer while flushing. Failure todo so may lead to a static electricdischarge, which may cause a fire.Trigger the gun into the metal waste container until all airand solvent is flushed from the spray hose and paint isflowing freely. from the gun.Lock the gun by turning the gun triggerlock to the locked position.Turn off the sprayer.Attach tip guard and tip to the gun asinstructed by the tip guard or tip manuals.Trigger lock inPOSSIBLE INJECTION HAZARD.Do not spray without the tip guard locked position.in place. Never trigger the gununless the tip is in either the spray or the unclogposition. Always engage the gun trigger lockbefore removing, replacing or cleaning tip.Turn on the sprayer.Increase the pressure by turning the pressure control knobslowly clockwise toward the green zone and test the spraypattern on a piece of cardboard. Adjust the pressure controlknob until the spray from the gun is completely atomized.Try to keep the pressure control knob at the lowest settingthat maintains good atomization.Motor RunningIndicator5Solid Green1901-3300 PSIMin PSI(Bar)lsePu eanClMotor RunningMax PSI(Bar)
Pressure IndicatorNOTE: The pressure control knob overrides the XactDigital Control System settings. Anytime thepressure control knob is turned, the sprayerpressure will change accordingly.The pressure indicator shows the current operating pressure ofthe sprayer. It has three different indications: blinking yellow,solid yellow, and solid green.Blinking YellowWhen the pressure indicator is blinking yellow, the sprayer isoperating between 0 and 200 PSI. A blinking yellow pressureindicator means: The sprayer is plugged in and turned “ON” The sprayer is at priming pressure (little or no pressure) It is safe to move the PRIME/SPRAY valve betweenpositions It is safe to change or replace the spray tipFunction KeysThe function keys are numbered 1–4. Each key is labeled withan additional function as well.#1/Menu KeyPressing the #1 key scrolls through the available menuscreens or performs a function described on the active menuscreen.#2/ KeyPressing the #2 key performs a function described on theactive menu screen or increases a value.#3/- KeyPressing the #3 key performs a function described on theactive menu screen or decrease a value.#4/Select KeyPressing the #4 key selects the active menu screen orperforms a function described on the active menu screen.NOTE: If the pressure indicator begins blinking yellowwhen the pressure control knob is set at ahigher pressure and the PRIME/SPRAY valve isin the SPRAY position, either the spray tip isworn or the sprayer is in need of service/repair.Solid YellowWhen the pressure indicator is solid yellow, the sprayer isoperating between 201 and 1900 PSI. A solid yellow pressureindicator means: The sprayer is at the proper pressure setting for sprayingstain, lacquer, varnish, and multi-colors If the pressure indicator goes to solid yellow when thepressure is set so that it starts at solid green, it indicatesone of the following:a. Tip Wear Indicator — when spraying with latex or athigh pressure the solid yellow appears. This meansthe tip is worn and needs to be replaced.b. Tip Too Large — when a tip that is too large for thesprayer is put in the gun, the pressure indicator will turnfrom solid green to solid yellow.c. Fluid Section Wear — if a solid yellow pressureindicator appears when using a new tip and thepressure is set at maximum, service may be required(worn packings, worn piston, stuck valve, etc.).Solid GreenWhen the pressure indicator is solid green, the sprayer isoperating between 1901 and 3300 PSI. A solid green pressureindicator means: The sprayer is at the proper pressure setting for sprayingoil-based and latex house paints The sprayer is operating at peak performance at a highpressure settingMenu ScreensSeveral menu screens are available for the user to customizeand monitor sprayer operation. They include Main Screen,User Pre-Sets, Volume Pumped, Job Volume, Unit Serial #,TImers, Job Timers, Service Time, Pressure, Security Code,Prime, and Pulse Clean.Main ScreenSET PSI3000The Main Screen is the default ACTUAL PSI2950screen for the control systemat sprayer startup. Pressing the #2 key switches between PSIand MPa units of measure. Press the #1 key to scroll throughthe remaining menu screens.User Pre-Sets ScreenUSER PRE-SETSThe User Pre-Sets screenSELECT-4MENU-1allows the user to set fourdifferent pressure settings and save them for future use. Toselect the User Pre-Sets screen, press the #4 key.Press keys 1 through 4 fromthe Select screen to select orchange a pre-set pressure.Press the #4 key to select thesetting and the Main Screenwill appear.The Motor Running indicator is on when the motor iscommanded to run. This indicator is used by service centersto troubleshoot motor problems.Xact Digital Control System Operation(if equipped)The Xact Digital Control System is an optional add-on thatincreases the functionality of the sprayer. It is installed directlybelow the pressure control knob on the control panel. It consistsof a display and four function keys. The display shows variousmenu screens that allow the user to customize and monitorsprayer operation using the function keys.FunctionKeysSET PSIACTUAL PSI –SELECT1234750CHG-2VOLUME PUMPEDThe Volume Pumped screenSELECT-4MENU-1shows the total number ofgallons or liters sprayed by thesprayer.To select the Volume Pumpedscreen, press the #4 key.Job Volume Screen30002950MENUPSI SETTINGSELECT-4PRE-SET #1750Press the #2 key to changePRESS /- TO CHGthe setting. On the followingscreen, use the #2/ key toincrease the setting or the #3/- screen to decrease the setting.Once the desired setting has been reached, press the #4 keyto set and the Main Screen will appear. To select or changethe remaining three pre-sets, scroll to the User Pre-Setsscreen and repeat the above procedure.Volume Pumped ScreenMotor Running IndicatorDisplaySELECTPRE-SETS 1-4GALLONS XXXXXXPRESS 1 FOR MENUJOB VOLUMEThe Job Volume screen allowsSELECT-4MENU-1the user to reset a galloncounter to track usage onspecific jobs.To select the Job Volumescreen, press the #4 key.6JOB GALLONSXXXXMENU-1RESET-3 Titan Tool Inc. All rights reserved.
Unit Serial # ScreenThe Unit Serial # screenshows the sprayers serialnumber.UNIT SERIAL #SELECT-4MENU-1To select the Unit Serial #screen, press the #4 key.Timers ScreenSER # XXXXXXXXXXPRESS 1 FOR MENUENTER NEW CODEEnter the new security code.NUMBEROnce the new code is entered,the display will automaticallyask that the new code be re-entered for verification. If thesame new code is re-entered, the display will confirm that thenew code has been accepted and return to the Main Screen.If the new code is re-entered incorrectly, the display will returnto the “Enter New Code Number” screen and the process willrepeat.TIMERSThe Timers screen shows theMENU-1total time the sprayer has been SELECT-4turned on as well as the totaltime the sprayer has been running (pumping).To select the Timers screen,press the #4 key.Job Timers ScreenON TIME XXXXX:XXRUN TIME XXXX:XXThe Job Timers screen allowsthe user to reset the “ONTIME” and “RUN TIME” totrack time on specific jobs.JOB TIMERSSELECT-4MENU-1NOTE: To inactivate the X-Lock security function,enter “1111” at the “Enter New Code Number”screen (this is the default code that leaves thesprayer unlocked). As a result, the MainScreen will appear at sprayer startup.NOTE: If there is no action at any menu screen for 30seconds, the display will go back to the MainScreen.Prime ScreenThe Prime screen appearsPRIMEwhen the pressure controlknob is set at the “Min” settingin the yellow zone.Pulse Clean ScreenPULSE CLEANThe Pulse Clean screenappears when the pressureACTUAL PSIXXXXcontrol knob is set at thePULSE CLEAN position in the red zone and thePRIME/SPRAY valve is in the PRIME position.ON TIME XXXXX:XXTo select the Job TImersscreen, press the #4 key. The RUN TIME XXXX:XXscreen will toggle between thetimers and a screen that allows the user to reset the timers.Service Time ScreenSERVICE TIMEThe Service Time screenMENU-1allows the user to set a service SELECT-4time interval (in hours). Belowthe set time, the screens shows the current amount of hourson the sprayer. To select the Service TImer screen, press the#4 key.Pressure Relief ProcedureXXXHRThe screen will toggle between SERVICE @XXthe service hours and a screen RUN HOURSthat allows the user to changethe service time interval.When the service time interval is set and met by the run hours,the display will toggle between the "Main screen" and a"Service Required" screen at sprayer startup. To stop thetoggling, scroll to the "Service Time" screen and either set anew service time interval or set the service time to "0".Pressure ScreenThe Pressure screen allowsthe user to see the current setpoint pressure as well as theactual working pressure.Be sure to follow the pressure relief procedurewhen shutting the unit down for any purpose,including servicing or adjusting any part of thespray system, changing or cleaning spray tips, orpreparing for cleanup.1. Lock the gun by turning the gun triggerlock to the locked position.2. Turn
X-Lock Theft Deterrent System Security Code — — — . or uncontrolled line voltage, the use of Titan's "Line Surge Protector" (P/N 800-935) is recommended. Specifications