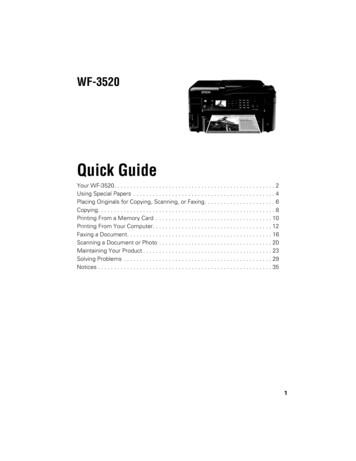
Transcription
Cindy FD QG.book Page 1 Tuesday, May 29, 2012 2:35 PMWF-3520Quick GuideYour WF-3520. . . . . . . . . . . . . . . . . . . . . . . . . . . . . . . . . . . . . . . . . . . . . . . . . . 2Using Special Papers . . . . . . . . . . . . . . . . . . . . . . . . . . . . . . . . . . . . . . . . . . . . 4Placing Originals for Copying, Scanning, or Faxing. . . . . . . . . . . . . . . . . . . . . . 6Copying. . . . . . . . . . . . . . . . . . . . . . . . . . . . . . . . . . . . . . . . . . . . . . . . . . . . . . . 8Printing From a Memory Card . . . . . . . . . . . . . . . . . . . . . . . . . . . . . . . . . . . . 10Printing From Your Computer. . . . . . . . . . . . . . . . . . . . . . . . . . . . . . . . . . . . . 12Faxing a Document. . . . . . . . . . . . . . . . . . . . . . . . . . . . . . . . . . . . . . . . . . . . . 16Scanning a Document or Photo . . . . . . . . . . . . . . . . . . . . . . . . . . . . . . . . . . . 20Maintaining Your Product . . . . . . . . . . . . . . . . . . . . . . . . . . . . . . . . . . . . . . . . 23Solving Problems . . . . . . . . . . . . . . . . . . . . . . . . . . . . . . . . . . . . . . . . . . . . . . 29Notices . . . . . . . . . . . . . . . . . . . . . . . . . . . . . . . . . . . . . . . . . . . . . . . . . . . . . . 351
Cindy FD QG.book Page 2 Tuesday, May 29, 2012 2:35 PMYour WF-3520After you set up your WF-3520 (see the Start Here sheet), turn to this Quick Guide andyour online User’s Guide for instructions on using your product.FeaturesWhere to find informationCopy, scan, and fax from the easy-to-use controlpanelSee this Quick Guide for the basics.See the online User’s Guide for details.Process large documents with the 30-page capacityAutomatic Document FeederSee this Quick Guide for the basics.See the online User’s Guide for details.Easy networking—Wi-Fi, Wi-Fi Direct, and Ethernet See the Start Here sheet and the onlineUser’s Guide.Copy files to and from your computer with the built-inmemory card readerSee the online User’s Guide for details.Print and Scan from anywhere with EPSON Connect Solutions, and Google Cloud PrintSee www.epson.com/connect andthe online User’s Guide for details.Using the Touch PanelThe touch panel makes it easy to use all the features of your product. To save energy, thescreen goes dark after several minutes of inactivity. Press a button to wake it up. If youwant to adjust the time before the screen goes dark, press r, select Eco Mode, and thenselect Sleep Timer.Caution: Press the touch panel gently with the tip of your finger; don’t press too hardor use sharp objects.Note: To turn off the “beep” heard when you press a button on the screen, or toreduce its volume, press l or r and select Setup, then press OK. Select PrinterSetup, select Sound, and adjust one of the settings. If you turn off the sound, thedialing sound made when you transmit a fax is also turned off.2 Your WF-3520
Cindy FD QG.book Page 3 Tuesday, May 29, 2012 2:35 PMThe touch panel displays only the buttons that are available for the task you are workingon.ButtonPDescriptionTurn the product on or off.Return to the Home screen.yu, d,l, r,Cancel current operation and return to previous screen.yCancel printing, copying, faxing or scanning, or clear settings for the mode you’reusing (Copy, Fax, etc.)xStart printing, copying, faxing, or scanning in black and white or color.Use the arrow keys and OK button to navigate menus.and OKYou may see the following icons on the screen:IconMeaningThe product is connected to a wired network.The product is connected to a wireless network.ADFA document is loaded in the automatic document feeder.Auto Answer is onNote: Thelight is green when the product is connected to a network. It flasheswhen network settings are being adjusted (green for wireless and orange for wired).Using the Touch Panel 3
Cindy FD QG.book Page 4 Tuesday, May 29, 2012 2:35 PMUsing Special PapersEpson offers a wide array of high quality papers, making it easy to maximize the impact ofyour documents, photos, presentations, and other projects.You can purchase genuine EPSON ink and paper at EPSON Supplies Central atwww.epson.com/ink3 (U.S. sales) or www.epson.ca (Canadian sales). You can alsopurchase supplies from an EPSON authorized reseller. To find the nearest one, call800-GO-EPSON (800-463-7766).PartnumberSheetcountLetter (8.5 11 inches[216 279 mm])S041586500EPSON Brochure & Flyer Paper MatteDouble-sidedLetter (8.5 11 inches[216 279 mm])S042384150EPSON Ultra Premium PresentationPaper MatteLetter (8.5 11 inches[216 279 mm])S04134150EPSON Premium Presentation PaperMatte8 10 inches (203 254 mm)S04146750Letter (8.5 11 inches[216 279 mm])S041257S04218050100EPSON Premium Presentation PaperMatte Double-sidedLetter (8.5 11 inches[216 279 mm])S04156850EPSON Presentation Paper MatteLetter (8.5 11 inches[216 279 mm])S041062100Legal (8.5 14 inches[216 356 mm])S0410671004 6 inches (102 152 mm)S042181S042174601005 7 inches (127 178 mm)S041945208 10 inches (203 254 mm)S04194620Letter (8.5 11 inches[216 279 mm])S042182S04217525504 6 inches (102 152 mm)S041808S041727401005 7 inches (127 178 mm)S041464208 10 inches (203 254 mm)S04146520Letter (8.5 11 inches[216 279 mm])S042183S0416672550Paper nameSizeEPSON Bright White PaperEPSON Ultra Premium Photo PaperGlossyEPSON Premium Photo Paper Glossy4 Using Special Papers
Cindy FD QG.book Page 5 Tuesday, May 29, 2012 2:35 PMPaper nameSizePartnumberSheetcountEPSON Premium Photo PaperSemi-gloss4 6 inches (102 152 mm)S04198240Letter (8.5 11 inches[216 279 mm])S04133120EPSON Photo Paper Glossy4 6 inches (102 152 mm)S041809S04203850100Letter (8.5 11 inches[216 279 mm])S041141S041649S0412712050100EPSON Photo Quality Self-adhesiveSheetsA4 (8.3 11.7 inches[210 297 mm])S04110610EPSON Iron-on Cool Peel TransferpaperLetter (8.5 11 inches[216 279 mm])S04115310Note: Media availability varies by country.For best results: In the lower paper cassette, load only plain paper or EPSON Bright White Paper. Load paper printable side down; it is usually whiter or brighter. Always load paper short edge first and make sure the edge guides are against the paper. Make sure the paper is loaded against the edge guide and not sticking out from theend of the cassette. The paper may slide forward slightly as you insert the cassette.This is normal. Do not load paper with binder holes in the cassettes. For instructions on loading envelopes, legal-size paper, or using the rear paper feedslot, see the online User’s Guide.Using Special Papers 5
Cindy FD QG.book Page 6 Tuesday, May 29, 2012 2:35 PMPlacing Originals for Copying,Scanning, or FaxingBefore you copy, scan, or fax, place your documents on the scanner glass or in theAutomatic Document Feeder (ADF). Place photos on the scanner glass only.Using the Scanner GlassYou can place a photo or a document up to letter-size (or A4-size) on the scanner glass.1.Raise the document cover.2.Place your original facedown on the scannerglass, with the top against the back leftcorner.3.Close the cover gently to keep your originalin place.Using the Automatic Document FeederYou can place up to 30 letter- or A4-size sheets (single- or double-sided), or 10 legal-sizesheets (single-sided only), in the ADF.1.Fan the originals, then tap them on a flat surface to even the edges.2.Slide out the edge guide.6 Placing Originals for Copying, Scanning, or Faxing
Cindy FD QG.book Page 7 Tuesday, May 29, 2012 2:35 PM3.Insert the originals face up, top edge first. The ADF icon appears on the screen.Note: If you’re using the 2-up Copy layout, make sure the originals are loaded asshown below.4.Slide the edge guide against the originals, but not too tight.Using the Automatic Document Feeder 7
Cindy FD QG.book Page 8 Tuesday, May 29, 2012 2:35 PMCopyingFollow the steps in this section to copy black-and-white or color documents.You can copy documents just like on a copy machine. If you use the Automatic DocumentFeeder (ADF), you can copy up to 30 sheets at a time.Note: You can select More Functions Copy/Restore Photos to copy photos ontoEPSON photo paper (various types and sizes available). See the online User’s Guide fordetails.Copying a Document1.Make sure paper is loaded in one of the paper cassettes (see page 4).2.Place your original document on the scanner glass or in the ADF (see page 6).Note: When you use the Copy function with originals loaded in the AutomaticDocument Feeder, letter-size paper is automatically selected for your printedcopies. If you copy a legal-size document, the image will be cropped. To copy a fulllegal-size document on letter-size paper, scroll down and select Reduce/Enlarge.Then select Legal- Letter.3.Press, if necessary, then press OK to select Copy.You see this screen.4.Press or – to select the number of copies you want(up to 99).5.Press l or r to adjust the density (make the copieslighter or darker), if necessary.8 Copying
Cindy FD QG.book Page 9 Tuesday, May 29, 2012 2:35 PM6.To change copy settings, press the d arrow, select Paper and Copy Settings andpress OK. The Layout setting should be With Border and the Paper Size should beLetter. To make double-sided copies, select 2-Sided Copying, then press OK and selectone of the available options. To adjust the copy size, select Reduce/Enlarge, press OK, then choose ActualSize (to print at actual size), Custom Size (to select a percentage), Auto FitPage (to automatically size the image to fit your paper), or one of the specificsizes listed. To change the copy quality, select Quality, press OK, then choose Draft,Standard Quality, or Best.Note: To clear previously used copy settings, press y Stop/Reset. For moreinformation about copy settings, see your online User’s Guide.7.Press one of the x buttons to begin copying.To cancel copying, press y Cancel.Note: When printing two-sided, if ink on the front of the paper smears, select a longerDry Time setting.Copying a Document 9
Cindy FD QG.book Page 10 Tuesday, May 29, 2012 2:35 PMPrinting From a Memory CardYour product lets you print photos directly from your digital camera’s memory card; justinsert it into the memory card slot and you’re ready to print.See the online User’s Guide for a list of compatible memory cards and instructions oncopying memory card files between your product and a computer.Inserting the Card1.Make sure your printer is turned on.2.Insert your card as shown.Note: Do not force the card into the slot; it won’t goin all the way.The memory card access light flashes, then stays lit. Nowyou can view your photos on the LCD screen and printthem.Memory cardaccess lightRemoving the CardAfter you finish printing your photos, follow these steps to remove the card:1.Make sure the memory card access light is not flashing.Caution: Do not remove the card or turn off your printer while the memory cardaccess light is flashing; you may lose data on the card.2.3.If the product is connected to your computer with a USB cable, do one of thefollowing before removing the memory card or turning off the printer: Windows: Right-click the name of your card (removable disk) in Computer, MyComputer, or Windows Explorer, and select Eject. Mac OS X: Drag theremovable disk icon from your desktop into the trash.Pull the card straight out of its slot.10 Printing From a Memory Card
Cindy FD QG.book Page 11 Tuesday, May 29, 2012 2:35 PMPrinting Photos From the LCD ScreenYou can select individual photos for printing as you view them on the LCD screen. See theonline User’s Guide for instructions on printing various types of layout sheets andpersonalized note paper.1.Load several sheets of EPSON photo paper in cassette 1 (various types available; seepage 4).2.Press3.Select Print Photos.4.Press l or r to scroll through your photos and displayone that you want to print.5.Press or – to select the number of copies you want ofthat photo.6.Repeat steps 4 and 5 to select more photos.7.If desired, press d, then select Photo Adjustments and press OK to turn on red-eyereduction or other photo enhancing features. Press y when done., if necessary, and select More Functions.Note: To crop the photo, press d, then select Crop/Zoom and press OK. Press or – to frame theimage; use the arrows to move the frame. Press OKwhen done.8.Press d, then select Print Settings and press OK toselect the Paper Size and Paper Type you want touse for printing. Press d to select other settings, suchas Borderless, or Date.9.When you’re ready to print, press x Color.To cancel printing, press y Cancel.Printing Photos From the LCD Screen 11
Cindy FD QG.book Page 12 Tuesday, May 29, 2012 2:35 PMPrinting From Your ComputerThis section describes the basic steps for printing from a Windows or Mac computer. Fordetailed instructions on printing, see the online User’s Guide.Printing in Windows1.Select the Print command in your application.Select your EPSONproductClick here to openyour printersoftware2.Select your product, then click the Preferences or Properties button.(If you see a Setup, Printer, or Options button, click it, then click Preferences orProperties on the next window.)12 Printing From Your Computer
Cindy FD QG.book Page 13 Tuesday, May 29, 2012 2:35 PM3.On the Main tab, select basic print settings. Make sure you choose the correct PaperSource and Paper Type setting for your paper (see page 15).Select yourPaper SourceSelect yourDocument SizeClick herefor quickaccess topredefinedsettingsSelect yourPaper TypeClick here for2-Sided PrintingTip: For quick access to the most common settings, select one of the PrintingPresets on the left side of the screen. You can delete these presets or create yourown by clicking the Add/Remove Presets button.For more information about print settings, click Help.4.For automatic duplex printing, select 2-Sided Printing and Auto.5.To resize your printout or select other print settings, click the More Options tab.6.Click OK to save your settings.7.Click OK or Print to start printing. A window will appear and show the progress ofyour print job.Printing in Windows 13
Cindy FD QG.book Page 14 Tuesday, May 29, 2012 2:35 PMPrinting With a MacFollow the steps below to print from Mac OS X.1.Open a photo or document in an application.2.Open the File menu, and select Print.3.Select your product as the Printer setting.Select your Epson productClick to expand,if necessary4.Select basic copy and page settings. For borderless photos, choose a Paper Sizesetting with a Borderless option.Note: If the setting you want isn’t shown (for example, Scale), check for it in yourapplication before printing or check for it at the bottom of this window.Copy and pagesettingsApplicationsettingsPop-up menu14 Printing With a Mac
Cindy FD QG.book Page 15 Tuesday, May 29, 2012 2:35 PM5.Choose Print Settings from the pop-up menu, and select your Paper Source,Media Type, Print Quality, and other print settings.6.For automatic duplex printing, choose Two-sided Printing Settings from the popup menu, and select the option you want.7.Choose any other printing options you may need from the pop-up menu. See theonline User’s Guide for details, or click ? when it appears on the screen.8.Click Print.9.To monitor your print job, click theprinter icon in the Dock.Selecting the Correct Paper TypeSelect the correct Paper Type (Windows) or Media Type (Mac OS X) setting in yourprinter software so the ink coverage can be adjusted accordingly.For this paper/mediaSelect this settingPlain paperEPSON Bright White PaperEPSON Presentation Paper MatteEPSON Photo Quality Self-adhesive SheetsEPSON Iron-on Cool Peel Transfer paperPlain Paper/Bright White PaperEPSON Ultra Premium Photo Paper GlossyUltra Premium Photo Paper GlossyEPSON Premium Photo Paper GlossyPremium Photo Paper GlossyEPSON Photo Paper GlossyPhoto Paper GlossyEPSON Premium Photo Paper Semi-glossPremium Photo Paper Semi-GlossEPSON Premium Presentation Paper MatteEPSON Premium Presentation Paper Matte DoublesidedEPSON Brochure & Flyer Paper Matte Double-sidedPremium Presentation Paper MatteEnvelopesEnvelopeSelecting the Correct Paper Type 15
Cindy FD QG.book Page 16 Tuesday, May 29, 2012 2:35 PMFaxing a DocumentYour product lets you send faxes by entering fax numbers or selecting entries from a speeddial list. Using the Automatic Document Feeder (ADF), you can fax up to 30 pages at atime.Note: You can also send/receive faxes from your computer using the EPSON FAXUtility. For more information, see the online User’s Guide.Breakdown or repair of this product may cause loss of fax data and settings. Epson isnot responsible for backing up or recovering data and settings during or after thewarranty period. We recommend that you make your own backup or print out your faxdata and settings.This product allows you to store names, telephone numbers, and fax data in itsmemory even when the power is turned off. Use the following procedure to erase thememory if you give away or dispose of the product: Select Setup Restore DefaultSettings All Settings. This procedure will erase all of your network settings and faxdata.Connecting a Phone or Answering Machine1.Connect the phone cable from the walljack to the LINE port on the back of the Telephonewall jackproduct.Note: If you’re connecting the productto a DSL phone line, you must plug aDSL filter into the wall jack or youwon’t be able to use the fax ortelephone equipment. Contact yourDSL provider for the necessary filter.2.To use a telephone or answeringmachine on the same line, you need aTelephonesecond phone cable. Remove the capfrom the EXT. port on the back of the wall jackproduct. Connect one end of the cableto the telephone or answering machine,and connect the other end to the EXT.port.Note: Set the printer ringer to answerone ring after the answering machine.16 Faxing a Document
Cindy FD QG.book Page 17 Tuesday, May 29, 2012 2:35 PMIn Auto Answer mode, if the incoming call is a fax and you pick up the phone or theanswering machine answers, the product automatically begins receiving the fax. If theother party is a caller, the phone can be used as normal or a message can be left on theanswering machine.Note: Any phone or answering machine must be connected to the EXT. port for yourproduct to detect an incoming fax call when the phone is picked up. Epson cannotguarantee compatibility with VoIP, cable phone systems, or fiberoptic digital services suchas FiOS .Setting Up Fax FeaturesBefore sending or receiving faxes, you should create a fax header and select the number ofrings before the fax answers.Note: To select other settings or use the Epson FAX Utility, see the onlineUser’s Guide.Entering Fax Header InformationYou should enter your name and phone number in the fax header before sending faxes sothat recipients can identify the origin of the fax.Note: If you leave your product unplugged for a long time, the date and time settingsmay get lost. See the online User’s Guide for instructions on resetting them.Entering Your Sender Name1.Press, if necessary, then press l or r, select Setup, and press OK.2.Press d and select Fax Settings, then select Communication.3.Press d and select Header, then select Fax Header.You see the Fax Header screen.4.Use the keypad to enter the header information. Youcan enter up to 40 characters or digits for your nameand other contact information.To enter text, press a keypad number repeatedly toswitch between uppercase, lowercase, or numbers.5.Select Done to return to the Header menu.Setting Up Fax Features 17
Cindy FD QG.book Page 18 Tuesday, May 29, 2012 2:35 PMEntering Your Phone Number1.Select Your Phone Number from the Header menu.2.Use the keypad to enter your phone number, up to 20digits. You don’t need to use dashes. Use the # buttonto type the symbol for an international number.Press l to delete a character.3.Press OK to return to the Header menu.Selecting the Number of Rings to AnswerIf you connected an answering machine and it is set to pick up on the fourth ring, youshould set the product to pick up on the fifth ring or later:1.Press, if necessary, then press l or r, select Setup, and press OK.2.Press d and select Fax Settings.3.Select Communication, then Rings to Answer.4.Press u or d to select the number of rings, then press OK.Note: Set the fax to answer one ring after the answering machine.Sending a Fax From the Control PanelYou can send a fax by manually entering a fax number, as described below.Note: To dial the number using a telephone, by redialing, or by selecting from yourspeed dial list, see the next section. To send a fax from your computer using the EpsonFAX Utility, see your online User’s Guide.1.Place your original(s) for faxing (see page 6).2.Press, if necessary, and select Fax.To fax a two-sided document, place your documentin the ADF. Press d on the Fax screen, then selectSend Settings. Select 2-Sided Faxing, then selectOn.3.Use the numeric keypad to enter the fax number (upto 64 digits). Then press Done.18 Sending a Fax From the Control Panel
Cindy FD QG.book Page 19 Tuesday, May 29, 2012 2:35 PM4.Press x Color or B&W to begin scanning and faxing your document. (To cancel,press y Cancel.) If the recipient’s fax machine prints only in black and white, your fax isautomatically sent in black and white even if you press x Color. You can select 2-Sided Faxing even if the recipient’s fax machine does not print2-sided. If you are scanning with the ADF (see page 6), your document is automaticallyscanned and faxed. If you placed your document on the scanner glass, you can scan additional pagesafter the first one is sent. If the fax number is busy, you see a redialing message and the product redialsafter one minute. To redial immediately, press Redial/Pause.Note: If you turn off the product, the following data stored in the product’s temporarymemory will be lost: received faxes that haven’t yet been printed, faxes scheduled tobe sent later, and faxes being retransmitted automatically.Receiving FaxesBefore receiving faxes, make sure you load plain paper and select the correct settings for thepaper you’ve loaded.1.Press, if necessary, then press l or r, select Setup, then press OK.2.Press d and select Fax Settings.3.Select Receive Settings.4.To receive faxes automatically, select Auto Answer, then select On.5.Select the Paper Size and Paper Source you want to use for printing faxes.Note: If the incoming fax is larger than the paper you loaded, it is reduced to fit orprinted on multiple pages, depending on the Auto Reduction setting you select.Note: To change the number of rings before the product answers, see page 18.If you run out of paper during printing, you see an error message. Load more paper andpress one of the x buttons to continue.Note: To manually receive a fax, see your online User’s Guide.Receiving Faxes 19
Cindy FD QG.book Page 20 Tuesday, May 29, 2012 2:35 PMScanning a Document orPhotoYou can use your product to scan original documents and photos and save them on yourcomputer.Quick Scanning With the Control PanelUse the control panel to quickly scan a photo or document and save it on your computer.You can even scan and send the image or document to an online service or to a remoteprinter.Note: For Mac OS X 10.6/10.7, see “Scanning With Mac OS X 10.6/10.7” on page 22.1.Place your original document or photo as shown on page 6. For 2-sided scanning,place your document in the ADF.2.Press3.Scroll down, if necessary, and select one of the following options: , if necessary, and select Scan.Scan to Memory Card automatically creates a JPG image or PDF and saves it toan inserted memory card. Scan to Cloud lets you send your scanned files to a destination that you haveregistered with EPSON Connect. Scan to PC automatically creates a JPG image and saves it to your computer;ideal for scanning photos. Scan to PC (PDF) automatically creates a PDF file and saves it to your computer;ideal for scanning documents. Scan to PC (Email) automatically scans a photo, resizes it, launches your emailapplication, and attaches a JPG image to a new outgoing message. This workswith MAPI-type email such as Microsoft Outlook or Windows Live Mail, butnot web-based email such as Gmail. Scan to PC (WSD) lets you manage network scanning in Windows 7 orWindows Vista (English only).20 Scanning a Document or Photo
Cindy FD QG.book Page 21 Tuesday, May 29, 2012 2:35 PM4.If you’re scanning to a memory card, select your scan settings then press one of thex buttons to begin scanning.If you’re scanning to your computer, select USB Connection if your product isconnected by a USB cable, or select the name of your computer if your product isconnected over a network. Press one of the x buttons to begin scanning.Once your image is scanned, you see its icon in Windows Explorer or Mac Finder, oras an attachment in your email application.Scanning With EPSON Scan SoftwareYou can scan original documents and photos and save them as files on your computerusing the EPSON Scan software. You can also launch EPSON Scan from any TWAINcompliant application.Note: For Mac OS X 10.6/10.7, see “Scanning With Mac OS X 10.6/10.7” on page 22.For detailed scanning instructions, see the online User’s Guide.1.Place your original document or photo as shown on page 6. For 2-sided scanning,place your document in the ADF.2.Do one of the following to start Epson Scan: Windows: Double-click the EPSON Scan icon on your desktop.Mac OS X 10.5: Double-click EPSON Scan in Applications EpsonSoftware. To scan from an application, start your application. Then open the File menu,choose Import or Acquire, and select your EPSON product.Scanning With EPSON Scan Software 21
Cindy FD QG.book Page 22 Tuesday, May 29, 2012 2:35 PM3.EPSON Scan opens in Office Mode the first time you use it. (You can change thescan mode using the Mode selector in the upper right corner.)Click here to changethe scan modeNote: You cannot use Home mode to scan with the Automatic Document Feeder.4.Click Scan. The image is scanned and you see its icon in Windows Explorer or MacFinder.Scanning With Mac OS X 10.6/10.7You can scan original documents and photos and save them as files on your computer.1.Open an image editing application such as Image Capture and select your productfrom the DEVICES or SHARED list, if necessary. Then click the Scan button topreview your image.2.If you would like to select scan settings, such as Color Restoration and file savesettings, click Show Details.3.Click the Scan button to begin scanning. Your image is saved to the folder selected inthe Scan To pop-up menu.Note: With Mac OS X 10.6 or 10.7, in addition to scanning with Image Capture, youcan download and install EPSON Scan. This software gives you additional imageadjustment features, and provides an interface for TWAIN-compliant OCR scanningsoftware, such as ABBYY FineReader . To download EPSON Scan, visit Epson’sdriver download site epson.com/support (U.S.) or epson.ca/support (Canada).22 Scanning With Mac OS X 10.6/10.7
Cindy FD QG.book Page 23 Tuesday, May 29, 2012 2:35 PMMaintaining Your ProductFollow the instructions in this chapter to check and clean the print head nozzles, check inklevels, and replace ink cartridges. If you need to align the print head or replace themaintenance box, see the online User’s Guide.Checking the Print Head NozzlesIf your printouts are faint or have gaps in them, some of the nozzles in the print head maybe clogged or ink may be running low in one or more of the ink cartridges. Follow thesteps below to check the print head nozzles.1.Load a few sheets of plain paper in the cassette.2.Press3.Select Maintenance, then Nozzle Check.4.Press one of the x buttons. The nozzle check is printed.5.Check the printed pattern to see if there are gaps in the lines.if necessary, then press l or r and select Setup.Nozzles are clean6.Nozzles need cleaningIf there are no gaps, the print head is clean. Select Done.If there are gaps or the pattern is faint, select Clean the Print Head. Then follow theinstructions on the screen to clean the print head (see page 24).Maintaining Your Product 23
Cindy FD QG.book Page 24 Tuesday, May 29, 2012 2:35 PMCleaning the Print HeadIf print quality has declined and the nozzle check indicates clogged nozzles, you can cleanthe print head. Print head cleaning uses ink, so clean it only if necessary.Note: You cannot clean the print head if an ink cartridge is expended, and may not beable to clean it when a cartridge is low. You must replace the cartridge first (seepage 26).1.Pressif necessary, then press l or r, select Setup, and press OK.2.Select Maintenance, then Head Cleaning.3.When you see the first screen, press OK, then choose the ink set you want to clean.Tip: Use the nozzle check pattern to determine which colors need cleaning. Youcan save ink by cleaning only selected colors.Cleaning takes a few minutes. When it’s finished, you see a message on the LCDscreen.Caution: Never turn off the product during head cleaning or you may damage it.4.Select Print Nozzle Check Pattern. Then press one of the x buttons to print thenozzle check and confirm that the print head is clean.Note: If you don’t see any improvement after cleaning the print head four times, leavethe product on and wait at least six hours to let any dried ink soften. Then try cleaningthe print head again. If quality does not improve, one of the ink cartridges may need tobe replaced. If that doesn’t help, contact Epson as described on page 34.If you do not use your product often, it is a good idea to print a few pages at least oncea month to maintain good print quality.24 Cleaning the Print Head
Cindy FD QG.book Page 25 Tuesday, May 29, 2012 2:35 PMChecking Ink LevelsYou can check the ink levels anytime right on the LCD screen. To check the ink levels withyour Windows or Mac OS X software, see the instructions in your online User’s Guide.Note: Printing stops when an ink cartridge is expended. If a color
Using Special Papers 5 Note: Media availability varies by country. For best results: In the lower paper cassette, load only plain paper or EPSON Bright White Paper. Load paper printable side down; it is usually whiter or brighter. Always load paper short edge first and make sure the edge guides are against the paper. Make sure the paper is loaded against the edge guide and not sticking out .