Transcription
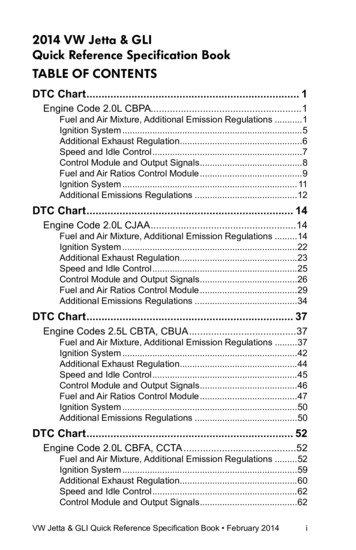
VA-ONCE QUICK REFERENCE USERGUIDEDESIGNED FOR CERTIFYING OFFICIALSVersion 8, March 20151
IntroductionThe VA-ONCE Quick Reference User Guide wascreated especially for you, the school certifyingofficial. Whether you are a novice taking over theduties as certifying official or a seasoned “Veteran ofVA-ONCE, we hope that this quick reference guidewill make a great desktop reference for you.VBA Education StaffNOTE: All information contained within this manual is based onfictitious names, social security numbers, and other personalidentifiable information.The VA-ONCE Quick Reference User Guide is a generalreference guide. Always contact your Education LiaisonRepresentative if clarification is needed.2
ReferencesGI Bill Web tional Education Call Center:1-888-442-4551SCO Hotline (for certifying official use only):1-855-225-1159VA ONCE - Users Guide; Users Tips; Updates:http://www.benefits.va.gov/gibill/school training resources.aspEducation Liaison Representative (for certifying official use ducation resources/school certifying officials/elr.asp3
CONTENTSSectionPageInitial Set Up6–7Password8 – 11Overview12 – 17User Preferences18 – 22User Accounts23 – 25Entering Term Dates26 – 29Entering Programs and Objective/Course Codes30 – 42User Defined Fields43 – 45Select Student46School Details47 – 50Students51 – 57Certify Enrollments58Single Term59 – 67Multi-Term Enrollments68 – 724
CONTENTSSectionPageAdding Remarks73 – 75Modifying Enrollments76 – 77Adjust Enrollments78 – 85Amend Enrollments86 – 89Terminate Enrollments90 – 94Certification Deletion95 – 97Reports98 – 104VA Data Tab105 – 106Log Tab107 – 110History Tab111 – 112Sorting Data113 – 114Inactive/Deleted Students115 – 119Change SSN120 – 1225
STEP 1: INITIAL SET UP – Go to the VA-ONCE Home page for School Certifying OfficialsThe full web address is https://vaonce.vba.va.gov/vaonce student/default.aspNOTE: Your browser should beInternet Explorer (IE) in order toaccess VA-ONCE. Other browserscan be used to access VAONCE, butVA does not test to certify compliancewith browsers other than InternetExplorer. See your IT department foravailable browsers at your school.VA is currently using IE 9. There areknown issues with VA-ONCE andInternet Explorer (IE) 10 and 11. If youare having problems, please try usingVA-ONCE in Compatibility mode. In IE10, click the compatibility icon at thetop of your browser. It is usually foundnext to the search bar and looks like apiece of paper torn in half horizontally.In IE 11, click the cog icon. It islocated next to the star in the upperright corner. On the menu select Viewin Compatibility Mode, and add va.govto the list of web sites.6
STEP 2: INITIAL SET UP – Log OnLog in using your VA provided user ID and temporary Password.Note: Your browser must allow “Pop-Ups” to view this page.7
STEP 3: INITIAL SET UP – Changing your PasswordEach certifying official will be assigned a temporary password. Click on the “Admin” button tochange the password.8
STEP 4: INITIAL SET UP – Changing your PasswordClick on “User” and then “User Preferences” in the drop down menu.9
STEP 5: INITIAL SET UP – Changing your PasswordClick on “Change” next to the current password.10
STEP 6: INITIAL SET UP – Changing your PasswordComplete “New Password”, “Confirm Password”, and “Password Hint”. Click “Change Password”.Passwords must consist of 3 of the 4 following categories: Uppercase; Lowercase; Numeric; Special Characters.NOTE: You will be prompted to change your password every 90 days. If you do not log in, your account will bedeleted after 120 days of inactivity.11
ACTIONSAcross the top of every screen are theactions that can be performed on thatpage.The 3 mini tabs located at the bottom ofevery VA ONCE screen are the TASKS,MARGIN, and HELP tabs.MAIN TASKBUTTONSThe TASKS tab is the default. When it isselected you will see the Main TaskButtons: Select, Admin, Reports, andLogout.MINI TABS13
MARGIN TAB - When the Margin Tab is selected, the left margin will change as you entereach individual field on the page and give you information specific to that field.In this example the cursor is in the “Search Text” box and the Margin text instructs theuser on what to enter.14
HELP TAB - When the Help Tab is selected, the left margin will display Help questions relatedto the page you are viewing.If you click on the question, the answer will appear in a separate pop-up.In this example the user clicked “What do the status codes mean?”. The pop-up provides theanswer.15
Remember that you have 3 mini tabs that will help you move throughVA-ONCE. The TASKS tab located at the bottom left corner of every VA ONCEscreen will bring you back to Main Task Buttons. The MARGIN tab located next to the Tasks tab provides you withhelp text specific to each field on the page. If the cursor is not in a field,the Margin text will be specific to the page. The HELP tab located next to the Margin tab provides you withFrequently asked questions regarding the page. Clicking on thequestion will bring up a pop-up box with the answer. At the bottom ofthe screen when the Help Tab is selected is also a link for Keyboardshortcuts, if you prefer using the keyboard to the mouse.16
Processing Status Flow Chart and DefinitionsFor each major action taken in VA-ONCE there is an associated status code. The status isshown in the top right corner of the screen. The status chart can be viewed at any time byclicking on the icon with the status number.The status code of the last action taken will also be listed next to your student on the SelectStudent page.NOTE: The status will always reflect the last status that occurred. If a certification is started(status 2), but subsequently cancelled or deleted, the status will remain at 2 until another17event occurs to change the status.
STEP 1: INITIAL SET UP – User PreferencesUser Preferences allows you to edit basic functions such as name, phone number,email, password, along with setting defaults.(1) Click on the “Admin” button.(2) On the User drop down menu, select “User Preferences”.19
STEP 2: INITIAL SET UP – User Preferences(1) Click on “Default State”.(2) Select your state from the drop down menu. This will set the default state for allnewly added student addresses.(3) Click on “Save”.20
STEP 3: INITIAL SET UP – User Preferences(1) Click on “Always print address on certs”.(2) Set the default to “No”, if you do not want the address on the printed Certification. SelectYes, if you would always like the address printed.(3) Click on “Save”.NOTE: The address is only sent to VA the first time acertification is submitted for the student, or if there hasbeen a change since the submission of the lastenrollment.21
STEP 4: INITIAL SET UP – User Preferences(1) Highlight “Default Training Type”.(2) Select the most appropriate type of training for your school from the drop downmenu. This will set the default training type for newly added students.(3) Click on “Save”.22
STEP 1: INITIAL SET UP – User Accounts.User Accounts allows the School Certifying Official the ability to add / deleteadditional users and give those users specific edit, delete, or read only access.(1) Click on the “Admin” button.(2) Select the “User” menu at the top of the page.(3) Select “User Accounts”.24
STEP 2: INITIAL SET UP – User Accounts.(1) Click “Add”. (2) Complete the information in the Edit User section. (3) Click “Save”.By checking “Can Delete Student Information”, the individual will be able to view, edit, anddelete. By checking “Can Edit Student Information”, the individual will be able to view and editonly. If you check neither, the individual will have “read only” access.25
STEP 1: INITIAL SET UP – Entering Term Dates.Adding term dates allows for quick access later as you will not need to re-type the termeach time. A drop-down for the terms you entered will be displayed when you certify yourenrollments.(1) Click on the “Admin” Button.(2) Click on “Maintenance” drop down menu.(3) Select “Standard Terms”.27
STEP 2: INITIAL SET UP – Entering Term Dates.(1) Click on “Add”. (2) Complete the Edit Term section. (3) Click on SAVE(See additional information on the following page to help you understand how to complete thissection.)28
Additional Information to complete New TermsTerm Name – (e.g. FALL 2010, SUM 10) Enter an abbreviation for the term. Thisabbreviation cannot be duplicated for another term. This is not a required field, but may makeit easier for you.Order Number – Changes the order of how the terms are displayed. You can designatewhich terms appear at the top of the drop down by the order number. Order number 1 wouldplace that term on top of your list of terms.Beginning Date, End Date – Enter the dates published in the school catalog.Term Type – Select Semester, Quarter, or Clock as appropriate.Drop Date – Enter the date as published in the school catalog. It will enable edits in VAONCE that will not allow you to enter the reason “during drop period”, if it is after this date.Break Days – Enter the number of days of the break during the term; must be 7 days ormore. Add a remark on the enrollment certification letting the VA know the dates of the break(e.g. Holiday Break: 12/21/2010 – 01/05/2011)Deactivated – Check the box if you do not want this term to appear in your drop down list,but wish to keep the term in your archive for future use. Click on the box and then click onDEACTIVATE located on the top of the screen. You can also re-activate the term by clickingon the term name and then clicking on the “checked” Deactivate Box to uncheck it.To delete a term from the list of terms, you can check the box associated with the term youwish to delete and then click on DELETE located on the top of the screen.29
STEP 1: INITIAL SET UP – Entering Programs.It is very important that you enter all approved programs (shown in the WEAMS documentprovided by your ELR) prior to entering your students, as the programs you enter will appearin the Student Bio page drop-down menu.(1) Click on the “Admin” button.(2) Click on the “Maintenance” drop down.(3) Select “Standard Programs”.31
STEP 2: INITIAL SET UP – Entering Programs.(1) Click “Add”. (2) In the Edit Program section, enter the Program Abbreviation, ProgramName, VA Objective Code and VA Course Code accordingly. (3) Click “Save”. Repeat to addmore programs. (See additional information on the following pages to help you understandhow to complete this section.)32
Additional Information to complete Entering ProgramsProgram Abbreviation – Enter an abbreviation for the approved program. This abbreviationcannot be duplicated for another program. For example, if you enter “SOC” for BS-Sociology,you cannot use “SOC” for BA-Sociology.Program Name - Enter the program name. You may type of degree followed by the program ofstudy (e.g. BS-Sociology), or the program of study followed by the degree (e.g. Sociology-BS).If there is more than one type of degree for the program, list each type separately (e.g. BASociology; BS-Sociology; MS-Sociology).OBJECTIVE CODES AND COURSE CODES ARE LISTED ON PAGES 37 - 42Adding VA Objective Codes and Course Codes for IHL programs- If you are adding Objective/Course code(s) to program(s) that were input before thecode requirement, select the program name by highlighting it. This will enable the EditProgram area. You can now input the Objective/Course code from the correspondingdrop down list. Select Save when complete.- If you are adding new program(s), you will have to enter all of the required data, toinclude the Objective and Course codes. Select Save when complete.33
VA Objective/Course Codes cont.Adding VA Objective Codes and Course Codes for NCD programsFollow the directions above. However, you do not need to select the VA ObjectiveCode. Select the appropriate VA Course Code from the drop down list. The VAObjective Code will automatically populate with the same code. The VA Objectivecode field will be disabled.34
VA Objective/Course Codes cont.On the drop down list, all Course codes are preceded by the type of training. IHL – for programs at an Institution of Higher Learning; NCD – for programs at Non-College Degree schools; NAI – for Non-college degree programs at Institutions of Higher Learning; and FLI – for Flight programsIHL programs are listed first, but you can jump to different portions of the listby typing in “N” (NCD) or “F” (Flight).N.E.C. stands for Not Elsewhere Classified. If a VA Objective or Course Codedoes not seem to apply to your program, please use one of the general codeswhich contain “N.E.C.”.35
Additional Information to Complete Entering ProgramsOrder Number – You can designate in which order programs are listed by giving theprogram an order number. Order number 1 would place the program first in the listof programs shown.Note – You can also alphabetize the programs in your list by either the ProgramName or Program Abbreviation. These options are at the top of the page and will reorder the programs accordingly.Deactivated – Check the box if you want this term not to appear in your list, butwish to keep the term in your archive for future use. Click on the box and then clickon DEACTIVATE located on the top of the screen. You can also un-deactivate byclicking on the name of the program and then clicking on the “checked” DeactivateBox.To delete a term from the list of terms, you can check the box associated with theterm you wish to delete and then click on DELETE located on the top of the screen.Additional Information on Changing ProgramsSpecial characters that are not allowed are removed when you are first enteringprograms, but if you are changing the name of a program, they are not. Please DONOT use slashes (forward “/” or backward “\”) when changing the name of theprogram, as it can cause errors with the Standard Programs page.36
VA Objective and Course Code ListingsVA Objective Codes:Non-Mat (000) Non-matriculatedAA (011) Associate of ArtAS (012) Associate of ScienceAD (013) Associate Degree Not Elsewhere ClassifiedBA (021) Bachelor of ArtBS (022) Bachelor of ScienceBD (023) Bachelor Degree Not Elsewhere ClassifiedMA (031) Master of ArtMS (032) Master of ScienceM (033) Masters Degree Not Elsewhere ClassifiedDr of Philosophy (041) Doctor of PhilosophyDoctors Degree (042) Doctors Degree Not Elsewhere ClassifiedPostdoctoral (051) Postdoctoral Degree Not Elsewhere Classified37
VA Course Codes – Institutes of Higher Learning (IHL):Nonmatriculate (000)Mathematics and Statistics (150)Undecided Major (001)Astronomy (161)Business and Commerce (060)Chemistry (162)Engineering (070)Environmental Sciences (163)Preparation for Teaching (080)Physic (164)Applied Arts (091)Physical Sciences, N.E.C. (165)English and Literature (092)Economics (171)Fine Arts (093)History (172)Foreign Languages (094)Industrial Relations (173)Liberal Arts, N.E.C. (095)Political Science (174)Performing Arts (096)Psychology (175)Philosophy (097)Public Administration (176)Theology (098)Social and Welfare Work (177)Law (except prelaw) (100)Sociology (178)Agricultural Sciences (110)Other Social Sciences (179)Biological Sciences (120)Computer Science and Systems Analysis (191)Medicine and Surgery (131)Home Economics (192)Dentistry (D.D.S. and D.D.M. only-Not predental) (132)Library Science (193)Nursing (133)Other Academic Fields, N.E.C. (194)Osteopathy (134)Agricultural and related courses (911)Pharmacy (135)Marine engineering and navigation (912)Veterinary Medicine (D.V.M. only-Not Preveterinary) (136) Mortuary science (913)Optometry (137)Stationary engineer (914)Chiropody or Podiatry (138)Other institutional courses, N.E.C. (915)Physical Therapy (139)Dental Hygiene (141)38Occupational Therapy (142)Other Medical or Related Courses (exclude Technicians) (143)
VA Course Codes – Non College Degree (NCD):Accounting (421)Acting (331)Advertising (422)Air Conditioning and Refrigeration (510)Aircraft Mechanics (576)Airline Service (437)All Other Crafts and Trades, N.E.C. (632)Applied Arts N.E.C. (320)Automobile or Motor Vehicle Mechanics (571)Baking, Canning, and Preserving (561)Ballet Dancing (332)Barbering (431)Blacksmithing (581)Bookbinding (621)Bookkeeping (423)Bricklaying (521)Cabinetmaking (522)Carpentry (523)Ceramics and Design (Not Engineering) (328)Chemical and Related Products (622)Clerical (425)Commercial Art (321)Computer Technology (424)Custodial Service (432)Dairying (562)Decorating and Window Display (322)Design (325)Diesel and Heavy Equipment Mechanics (572)Drafting (323)Dressmaking and Tailoring (530)Electrical Trades (540)Electronic & Communication Mechanic (553)Electronic Technician (311)Electronics Assembly and Installation (551)Electronics Operation (552)Elementary Courses (451)Engineering Technician (312)Engraving, Hand and Machine (582)Glass Products (623)Grain Processing and Packing (563)Heavy Equipment Operation (629)Hospital or Medical Services (435)Hotel and Motel Training (433)Jewelry and Watchmaking (583)Laundry & Dry Cleaning (434)Leather and Leather Products (624)Legal Technician, Including Law Clerk (315)Lumber and Lumber Products (625)Machinists (584)Meat Processing (564)Mechanical Courses, N.E.C (577)Medical & Related Technologies (313)Metalwork Courses, N.E.C. (586)Musicians (333)Optical Mechanics (575)Other Services, N.E.C. (438)39
VA Course Codes – Non College Degree (NCD):Other Business and Commerce, N.E.C. (429)Other Construction and Related Courses (526)Other Electrical Trades, N.E.C. (554)Other Food Trades (565)Other Technical Courses, N.E.C. (314)Painting (524)Paper and Paper Goods (626)Performing Arts, N.E.C. (335)Photography (324)Plumbing (525)Printing (590)Protective Services (436)Radio and TV Broadcasting (334)Railroad Mechanics and Repairmen (573)Real Estate and Insurance (427)Salesmanship (428)Secondary Courses (High School & College) (452)Secretarial (426)Sheetmetal Working (585)Shoe Making and Repair (610)Surveying (329)Textile Manufacturing (627)Tobacco Manufacturing (628)Upholstering (631)Agricultural and related courses (911)*Marine engineering and navigation (912)*Mortuary science (913)*Stationary engineer (914)*Other institutional courses, N.E.C. (915)** These 5 codes are listed under IHL.However, they can by used for NCD andat IHL, if applicable40
VA Course Codes – Non College Degree (NCD):Applied, Fine and Graphic Arts Technology (201)Automotive Technology (214)Bible Study or Religious Work (Technology) (202)Building and Construction Technology (203)Business and Commerce Technology (204)Data Processing Technology (205)Electrical Technology (206)Mechanical Technology (207)Medical or Related Technology (208)Police, Criminology, or Fire Protection (Technology) (209)Miscellaneous Engineering-Related Technology (211)Miscellaneous Science-Related Technology (212)Other Technologists, N.E.C. (213)Agricultural and related courses (911)*Marine engineering and navigation (912)*Mortuary science (913)*Stationary engineer (914)*Other institutional courses, N.E.C. (915)** These 5 codes are listed under IHL, howeverthey can be used for NCD and NCD at IHL, ifapplicable.41
VA Course Codes – Flight:Advanced Flight or Commercial Pilot (341)Airline Transport pilot Training (342)Flight Instructor Course (344)Glider Training (343)Instrument rating Course (345)Multiengine Class Rating Course (346)Other Flight Training, N.E.C. (347)VA Course Codes – Other:Special Program (999)42
STEP 1: INITIAL SET UP – User Defined Fields.The user defined fields are 3 text boxes and a check box on theStudent Bio page. They are there for your use only, and are nottransmitted to VA. You can use these fields to track anythingyou would like. Some schools use these to keep track of thingssuch as the student's counselor, branch of service, tuitiondeferments, Chapter 33 percentage rates, Fry Scholarships,tuition assistance, or other information important to your school.(1) Click on the “Admin” button.(2) Click on the “Maintenance” menu.(3) Select “User Defined Fields”.44
STEP 2: INITIAL SET UP – User Defined Fields.(1) Click on the User Defined Field Name (the name containing One, Two, Three, or Box) to highlight it.(2) Type in the name to be displayed in the User Defined Field Label field.(3) Click “Save”.The Bio screen will show the new user defined field label. You can display up to 3 userdefined text boxes and one check box. If you do NOT want to display the field, uncheck the“Display” Box.45
STEP 1: INITIAL SET UP – Select Student – School DetailThe Select Student screen has two menus: “Student” and “School Detail”.We will cover SCHOOL DETAIL first. (1) Click on School Detail. The Select School screenwill appear.47
STEP 2: INITIAL SET UP – School Details.The SCHOOL DETAIL action allows your Education Liaison Representative (ELR) to inputinformation about you and your school. You will have read only access to most data on thescreen. If any is incorrect, contact your ELR. To access, double click on the school name or(1) Click on “School”. (2) Select “Access”. The School Data screen will appear.48
STEP 3: INITIAL SET UP – School Details – School Data – Automated EmailsTo establish an automated email to the student each time a certification is submitted:(1) Place a check in the “E-mail Confirmation” box by clicking the box.(2) Click “Save” after checking or unchecking the box. An email will be sent to the studentemail address (or addresses) on the Student Bio page.49
STEP 4: INITIAL SET UP – School Details – School Data – Charges per HourYou also have the option of entering rates in the Undergraduate per hour charges field and theGraduate per hour charges field. By entering the per hour charge, the tuition and fees will beautomatically calculated based upon the number of hours you enter on a certification.For example, if you enter 100 per hour here and enter 12 hours on the enrollmentcertification, the Tuition and Fees field will be populated with 1200.00. You will be able tochange this, if needed.50
STEP 1: INITIAL SET UP – Student – Adding students(1) Click on the Student menu at the top of the screen.(2) Select “Add”. An Add a Student Box appears.51
STEP 2: INITIAL SET UP – Students - Adding students(1) Enter the Last Name, select the appropriate facility code from the drop down, enter theStudent SSN and enter the Student SSN again in the Confirm Student SSN field. Be verycareful to enter the correct SSN for the student.(2) Click OK when finished.- If the student exists at another school, a message appears (see page 53).- If the student already exists at your school, a different message appears (see page 54).- If the student is being added to VA-ONCE for the first time, you will be taken to the Biopage.52
STEP 3: INITIAL SET UP – Add a Student – Student Exists at another schoolIf you receive this message, the student has been certified in the past by another school.When you add the student, you will be able to see, but not modify, those past certifications.Click OK to continue, or Cancel if this is not the correct student.NOTE: If another student’s name appears, and youare positive you have entered the correct SSN, clickCancel and contact your ELR. Do not click OK.53
STEP 3: INITIAL SET UP – Add a Student – Student Exists at Your SchoolIf you receive this message, the student is at your school. The Student Status column willhave an A (Active), D (Deleted), or I (Inactive). If Deleted or Inactive, click cancel to go backto select student page. Then, on the select student page, use the Status filter for Deleted orInactive. This will bring up a list of students in that status and you can undelete or reactivatethe student. (See Page 115 – 119 for instructions.)54
STEP 4: INITIAL SET UP – Adding StudentsEnter the required information for the student on the Bio Data page. Required fields aredesignated by an asterisks. Once you have entered the information, click “Save”.(See additional information on the following page to help you understand how to completethis section.)55
Additional Information to complete the BIO DATA page The File Number is usually the students’ SSN with the exception of Dependent'sEducational Assistance, chapter 35. For chapter 35, this is the dependent’s spouse orparent’s Social Security Number or 8 digit claim number. The dependents VA File numberwill be on all award documents sent to the claimant. Don’t confuse Ch 35 (dependents)with Ch 33 Transferee dependents. VA uses the Ch 33 transferee (the student) SSN asthe file number. For chapter 31 students, the file number may be 8 digits. Be sure youinput the correct VA File number for chapter 31 students or the certification will not bereceived by the VR&E counselor. Fry Scholarship recipients: Select Ch 33 as the chapter for this type of beneficiary(not eligible for yellow ribbon) Use the student’s SSN as the file number. The Payee Number for Ch 35 may not be known. If not known, add “XX”. Make sure that the Training Type you choose from the drop down menu reflects theactual type of program the Student is taking (IHL, NCD). Use “Guest Student” if your school is not the primary institution. (Make sure you have aparent letter on file if you are the guest school). Enter the name of the parent school andthe State in order for it to be routed to the correct Regional Processing Office. VRAP: This benefit ended on March 31, 2014. The selection was removed from VAONCE. If you need to make a change to a certification that was sent as VRAP claim, youwill need to change the benefit type on the Bio page to 32.56
Additional Information to complete the BIO DATA page cont. For additional assistance, review the MARGIN and HELP tabs for complete informationon how to fill out the BIO DATA page for your students. After you SAVE the data, you can go back to the Select Page to add another student byclicking on SELECT button.57
STEP 1: Certify Enrollment – Single TermCertifying Enrollments correctly is the most important step in the process of ensuring thatbenefits are paid correctly. Attention to detail is the key ingredient when creating an enrollmentcertificate.(1) Double-click on the student you wish to certify. The student’s record will open to the Biopage. Additional tabs will be available.59
STEP 2: Certify Enrollment – Single Term(1) Click on the “Certs” tab. The Certs screen appears.60
STEP 3: Certify Enrollment – Single Term(1) Click on the Cert menu located on top of the screen. A drop down appears.(2) Select “New”. The bottom ½ of the screen will open for editing. The section title will changefrom “View Current Status” to “Edit Enrollment”.61
STEP 4: Certify Enrollment – Single Term(1) Complete the fields in the Edit Enrollment section. All fields with asterisks are required.NOTE: If you click on the arrow next to Term Date, you will see all of the terms you enteredusing the Standard Terms feature. This will save you valuable time.See pages 65 – 66 for additional information on Chapter 33 Tuition & Fees (T&F).62
STEP 5: Certify Enrollments – Single TermOnce you have entered the required data, review for accuracy.(1) Click “Save”.(2) Click “Complete”. NOTE: You can skip this step and click directly on “Submit”. “Complete”can be used if you are not submitting right away and would like to review later.(3) Click “Submit”.63
Additional Information to complete the Certs - Edit Enrollment sectionTerm Name – A corresponding arrow next to the TERM NAME box will allow to access thedrop down list of all the terms you have entered. The name, begin date and end date willbe entered.Res – Number of residential (classroom) credits taken during the term. NOTE: THE RESbox must not include any DIST, R/D, or Clock hour credits. ONLY Residential (Classroom)should be entered. The field requires a numerical value. Report “0” if necessary.Dist – Number of distance (online, non-classroom) credits taken during the term. The fieldrequires a numerical value. Report “0” if necessaryR/D – Number of remedial / deficiency credits taken during the term. NOTE: OnlineRemedial Courses cannot be certified. Only Residential Remedial courses can becertified.Clock – Number of clock hours taken per week (typically found in NCD programs,internships, externships).Tuition & Fees – Tuition and fees charged to the student for that term. (See following pagefor further information on Tuition & Fees.)TT/FT – Graduate programs – for non-chapter 33, select the training time from the dropdown list. For chapter 33, insert the number of credits that is considered full time for thatprogram and term based on your school catalog. See the SCO Handbook for further info.Yellow Ribbon – Only available for benefit type 33Yellow. Insert the amount your institutionhas agreed to fund above the highest instate rate for that particular term.Out of State Charges – Charges above and beyond the in-state charges. These chargeswill be covered by the Yellow Ribbon program. The out-of-state field will appear only onYellow Ribbon certifications.64
General rules for reporting tuitionTuition & Fees: Schools should report the net-charge for tuition and fees.What should be deducted from the Tuition amount reported to VA?Any waiver, scholarship, aid, or assistance [other than loans and funds provided undersection 401(b) of the Higher Education Act of 1965] provided directly to the institution andspecifically designated for the sole purpose of defraying tuition and fees.Only in-state charges should be reported in the Tuition and Fees field.Any additional out-of-state net charges should be reported in the Out of State Chargesfield.What should NOT be deducted from the Tuition amount reported to VA?Title IV FundsWaiver, scholarship, aid, or assistance that is not designated for the
VA-ONCE, we hope that this quick reference guide will make a great desktop reference for you. VBA Education Staff NOTE: All information contained within this manual is based on fictitious names, social security numbers, and other personal identifiable information. The VA-ONCE Quick Reference User Guid