Transcription
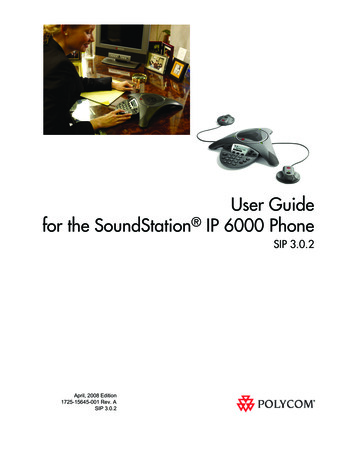
User Guidefor the SoundStation IP 6000 PhoneSIP 3.0.2April, 2008 Edition1725-15645-001 Rev. ASIP 3.0.2
Trademark InformationPolycom , the Polycom logo design, SoundPoint IP, SoundStation , SoundStation VTX 1000 , ViaVideo ,ViewStation , and Vortex are registered trademarks of Polycom, Inc. Conference Composer , Global ManagementSystem , ImageShare , Instructor RP , iPower , MGC , PathNavigator , People Content , PowerCam ,Pro-Motion , QSX , ReadiManager , Siren , StereoSurround , V2IU , Visual Concert , VS4000 , VSX , andthe industrial design of SoundStation are trademarks of Polycom, Inc. in the United States and various other countries.All other trademarks are the property of their respective owners.Patent InformationThe accompanying product is protected by one or more U.S. and foreign patents and/or pending patent applicationsheld by Polycom, Inc.DisclaimerSome countries, states, or provinces do not allow the exclusion or limitation of implied warranties or the limitation ofincidental or consequential damages for certain products supplied to consumers, or the limitation of liability for personalinjury, so the above limitations and exclusions may be limited in their application to you. When the implied warrantiesare not allowed to be excluded in their entirety, they will be limited to the duration of the applicable written warranty. Thiswarranty gives you specific legal rights which may vary depending on local law.Copyright NoticePortions of the software contained in this product are:Copyright 1998, 1999, 2000 Thai Open Source Software Center Ltd. and Clark CooperCopyright 1998 by the Massachusetts Institute of TechnologyCopyright 1998-2003 The OpenSSL ProjectCopyright 1995-1998 Eric Young (eay@cryptsoft.com). All rights reservedCopyright 1995-2002 Jean-Loup Gailly and Mark AdlerCopyright 1996-2004, Daniel Stenberg, daniel@haxx.se Permission is hereby granted, free of charge, to any person obtaining a copy of this software and associateddocumentation files (the “Software”), to deal in the Software without restriction, including without limitation the rights touse, copy, modify, merge, publish, distribute, sublicense, and/or sell copies of the Software, and to permit persons towhom the Software is furnished to do so, subject to the following conditions:The above copyright notice and this permission notice shall be included in all copies or substantial portions of theSoftware.THE SOFTWARE IS PROVIDED “AS IS”, WITHOUT WARRANTY OF ANY KIND, EXPRESS OR IMPLIED,INCLUDING BUT NOT LIMITED TO THE WARRANTIES OF MERCHANTABILITY, FITNESS FOR A PARTICULARPURPOSE AND NONINFRINGEMENT. IN NO EVENT SHALL THE AUTHORS OR COPYRIGHT HOLDERS BELIABLE FOR ANY CLAIM, DAMAGES OR OTHER LIABILITY, WHETHER IN AN ACTION OF CONTRACT, TORT OROTHERWISE, ARISING FROM, OUT OF OR IN CONNECTION WITH THE SOFTWARE OR THE USE OR OTHERDEALINGS IN THE SOFTWARE. 2008 Polycom, Inc. All rights reserved.Polycom Inc.4750 Willow RoadPleasanton, CA 94588-2708USANo part of this document may be reproduced or transmitted in any form or by any means, electronic or mechanical, forany purpose, without the express written permission of Polycom, Inc. Under the law, reproducing includes translatinginto another language or format.As between the parties, Polycom, Inc. retains title to, and ownership of, all proprietary rights with respect to the softwarecontained within its products. The software is protected by United States copyright laws and international treatyprovision. Therefore, you must treat the software like any other copyrighted material (e.g. a book or sound recording).Every effort has been made to ensure that the information in this manual is accurate. Polycom, Inc. is not responsiblefor printing or clerical errors. Information in this document is subject to change without notice.
About This GuideThank you for choosing the SoundStation IP 6000 conference phone. Thisphone provides multi-person audio conferencing capabilities for medium tolarge conference rooms within a Session Initiation Protocol (SIP) internettelephony system.This guide provides everything you need to quickly use your new phone.Verify with your system administrator that the network is prepared forconfiguring the phone. Also, read the Parts List and the Safety andCompliance section in this guide before you set up and use the phone.This guide includes regulatory compliance information that your systemadministrator should review. You can also view this guide atwww.polycom.com/support/voip/.iii
User Guide for the SoundStation IP 6000 Phoneiv
ContentsContentsAbout This Guide . . . . . . . . . . . . . . . . . . . . . . . . . . . . . . . . . iii1 Getting Started with Your Phone . . . . . . . . . . . . . . . . . . . . 1-1Parts List . . . . . . . . . . . . . . . . . . . . . . . . . . . . . . . . . . . . . . . . . . . . . . . . . . . . . . 1-2Optional Accessories . . . . . . . . . . . . . . . . . . . . . . . . . . . . . . . . . . . . . . . . 1-2Installing the Phone . . . . . . . . . . . . . . . . . . . . . . . . . . . . . . . . . . . . . . . . . . . . . 1-2Connecting Network and Power Sources . . . . . . . . . . . . . . . . . . . . . . . 1-3Power over Ethernet . . . . . . . . . . . . . . . . . . . . . . . . . . . . . . . . . . . . . 1-3AC Power . . . . . . . . . . . . . . . . . . . . . . . . . . . . . . . . . . . . . . . . . . . . . . 1-4Connecting Optional Extension Microphones . . . . . . . . . . . . . . . . . . . 1-5Features of the Phone . . . . . . . . . . . . . . . . . . . . . . . . . . . . . . . . . . . . . . . . . . . 1-6Understanding Line and Call Icons . . . . . . . . . . . . . . . . . . . . . . . . . . . . . . . . 1-9Navigating Menus and Entering Data . . . . . . . . . . . . . . . . . . . . . . . . . . . . 1-102 Customizing Your Phone . . . . . . . . . . . . . . . . . . . . . . . . . . 2-1Configuring Basic Settings . . . . . . . . . . . . . . . . . . . . . . . . . . . . . . . . . . . . . . . 2-2Updating Preferences . . . . . . . . . . . . . . . . . . . . . . . . . . . . . . . . . . . . . . . . 2-2Updating the Language . . . . . . . . . . . . . . . . . . . . . . . . . . . . . . . . . . 2-2Updating the Time and Date Display . . . . . . . . . . . . . . . . . . . . . . . 2-3Updating the Display Contrast . . . . . . . . . . . . . . . . . . . . . . . . . . . . . . . . 2-6Updating the Backlight Intensity . . . . . . . . . . . . . . . . . . . . . . . . . . . . . . 2-6Updating the Ring Tone . . . . . . . . . . . . . . . . . . . . . . . . . . . . . . . . . . . . . . 2-9Selecting a Ring Tone . . . . . . . . . . . . . . . . . . . . . . . . . . . . . . . . . . . . 2-9Setting Distinctive Ring Tones for Contacts . . . . . . . . . . . . . . . . 2-10Adjusting the Speaker and Ringer Volume . . . . . . . . . . . . . . . . . . . . . . . . 2-11Using Call Lists . . . . . . . . . . . . . . . . . . . . . . . . . . . . . . . . . . . . . . . . . . . . . . . . 2-11Viewing Call Lists . . . . . . . . . . . . . . . . . . . . . . . . . . . . . . . . . . . . . . . . . . 2-11Managing Call Lists . . . . . . . . . . . . . . . . . . . . . . . . . . . . . . . . . . . . . . . . 2-12Managing Contacts . . . . . . . . . . . . . . . . . . . . . . . . . . . . . . . . . . . . . . . . . . . . 2-13Adding Contacts to Your Local Contact Directory . . . . . . . . . . . . . .Adding Contacts Manually . . . . . . . . . . . . . . . . . . . . . . . . . . . . . .Adding Contacts From Call Lists . . . . . . . . . . . . . . . . . . . . . . . . .Adding Contacts to Your Contact Directory From aCorporate Directory . . . . . . . . . . . . . . . . . . . . . . . . . . . . . . . . . . . .2-142-152-172-18v
User Guide for the SoundStation IP 6000 PhoneSearching for Contacts . . . . . . . . . . . . . . . . . . . . . . . . . . . . . . . . . . . . . . 2-19Searching for Contacts in Your Local Contact Directory . . . . . . 2-19Searching for Contacts in a Corporate Directory . . . . . . . . . . . . 2-20Updating Contacts in Your Local Contact Directory . . . . . . . . . . . . . 2-20Deleting Contacts From Your Local Contact Directory . . . . . . . . . . 2-22Placing Calls to Contacts . . . . . . . . . . . . . . . . . . . . . . . . . . . . . . . . . . . . 2-22Managing Incoming Calls . . . . . . . . . . . . . . . . . . . . . . . . . . . . . . . . . . . . . . . 2-23Distinguishing Calls . . . . . . . . . . . . . . . . . . . . . . . . . . . . . . . . . . . . . . . . 2-23Rejecting Calls . . . . . . . . . . . . . . . . . . . . . . . . . . . . . . . . . . . . . . . . . . . . . 2-23Diverting Calls . . . . . . . . . . . . . . . . . . . . . . . . . . . . . . . . . . . . . . . . . . . . . 2-25Understanding Shared Lines . . . . . . . . . . . . . . . . . . . . . . . . . . . . . . . . . . . . 2-263 Using the Basic Features of Your Phone . . . . . . . . . . . . . . . 3-1Placing Calls . . . . . . . . . . . . . . . . . . . . . . . . . . . . . . . . . . . . . . . . . . . . . . . . . . . 3-2Placing Calls Using Speed Dials . . . . . . . . . . . . . . . . . . . . . . . . . . . . . . . 3-3Answering Calls . . . . . . . . . . . . . . . . . . . . . . . . . . . . . . . . . . . . . . . . . . . . . . . . 3-4Ending Active Calls . . . . . . . . . . . . . . . . . . . . . . . . . . . . . . . . . . . . . . . . . . . . . 3-4Muting the Microphone . . . . . . . . . . . . . . . . . . . . . . . . . . . . . . . . . . . . . . . . . 3-5Redialing Numbers . . . . . . . . . . . . . . . . . . . . . . . . . . . . . . . . . . . . . . . . . . . . . 3-5Holding and Resuming Calls . . . . . . . . . . . . . . . . . . . . . . . . . . . . . . . . . . . . . 3-6Hosting Conference Calls . . . . . . . . . . . . . . . . . . . . . . . . . . . . . . . . . . . . . . . . 3-6Setting Up Conferences . . . . . . . . . . . . . . . . . . . . . . . . . . . . . . . . . . . . . . 3-7Setting Up a Conference Using the Conference Soft Key . . . . . . 3-7Setting Up a Conference with an Active Call and aCall on Hold . . . . . . . . . . . . . . . . . . . . . . . . . . . . . . . . . . . . . . . . . . . . 3-7Holding and Resuming Conferences . . . . . . . . . . . . . . . . . . . . . . . . . . . 3-8Splitting Conferences . . . . . . . . . . . . . . . . . . . . . . . . . . . . . . . . . . . . . . . . 3-9Ending Conferences . . . . . . . . . . . . . . . . . . . . . . . . . . . . . . . . . . . . . . . . . 3-9Transferring Calls . . . . . . . . . . . . . . . . . . . . . . . . . . . . . . . . . . . . . . . . . . . . . . . 3-9Performing a Consultative Transfer . . . . . . . . . . . . . . . . . . . . . . . . . . . 3-10Performing a Blind Transfer . . . . . . . . . . . . . . . . . . . . . . . . . . . . . . . . . 3-10Forwarding Calls . . . . . . . . . . . . . . . . . . . . . . . . . . . . . . . . . . . . . . . . . . . . . . 3-11Forwarding Calls Statically . . . . . . . . . . . . . . . . . . . . . . . . . . . . . . . . . . 3-11Forwarding Calls Dynamically . . . . . . . . . . . . . . . . . . . . . . . . . . . . . . . 3-13Using Do Not Disturb . . . . . . . . . . . . . . . . . . . . . . . . . . . . . . . . . . . . . . . . . . 3-14Managing Speed Dial Entries . . . . . . . . . . . . . . . . . . . . . . . . . . . . . . . . . . . . 3-15Using Voice Mail . . . . . . . . . . . . . . . . . . . . . . . . . . . . . . . . . . . . . . . . . . . . . . 3-16vi
Contents4 Using the Advanced Features of Your Phone . . . . . . . . . . . 4-1Handling Multiple Call Appearances . . . . . . . . . . . . . . . . . . . . . . . . . . . . . . 4-1Using Buddy Lists . . . . . . . . . . . . . . . . . . . . . . . . . . . . . . . . . . . . . . . . . . . . . . 4-2Updating Presence Settings . . . . . . . . . . . . . . . . . . . . . . . . . . . . . . . . . . . 4-2Selecting Contacts to Monitor . . . . . . . . . . . . . . . . . . . . . . . . . . . . . . . . . 4-3Blocking Contacts From Viewing Your Status . . . . . . . . . . . . . . . . . . . 4-4Using Your Blocked List to Unblock Contacts . . . . . . . . . . . . . . . 4-5Monitoring the Status of Contacts in Your Buddy List . . . . . . . . . . . . 4-6Integrating With Microsoft Office Live CommunicationsServer 2005 . . . . . . . . . . . . . . . . . . . . . . . . . . . . . . . . . . . . . . . . . . . . . . . . . 4-6Using Instant Messaging . . . . . . . . . . . . . . . . . . . . . . . . . . . . . . . . . . . . . . . . . 4-7Managing Instant Messages . . . . . . . . . . . . . . . . . . . . . . . . . . . . . . . . . . 4-8Sending Instant Messages . . . . . . . . . . . . . . . . . . . . . . . . . . . . . . . . . . . . 4-8Restarting the Phone . . . . . . . . . . . . . . . . . . . . . . . . . . . . . . . . . . . . . . . . . . . . 4-95 Troubleshooting Your Phone . . . . . . . . . . . . . . . . . . . . . . . 5-1Installation Configuration . . . . . . . . . . . . . . . . . . . . . . . . . . . . . . . . . . . . . . . . 5-1Power and Startup . . . . . . . . . . . . . . . . . . . . . . . . . . . . . . . . . . . . . . . . . . . . . . 5-2Controls . . . . . . . . . . . . . . . . . . . . . . . . . . . . . . . . . . . . . . . . . . . . . . . . . . . . . . . 5-3Access to Screens and Systems . . . . . . . . . . . . . . . . . . . . . . . . . . . . . . . . . . . . 5-4Calling . . . . . . . . . . . . . . . . . . . . . . . . . . . . . . . . . . . . . . . . . . . . . . . . . . . . . . . . 5-5Displays . . . . . . . . . . . . . . . . . . . . . . . . . . . . . . . . . . . . . . . . . . . . . . . . . . . . . . . 5-6Audio . . . . . . . . . . . . . . . . . . . . . . . . . . . . . . . . . . . . . . . . . . . . . . . . . . . . . . . . . 5-6Testing Phone Hardware . . . . . . . . . . . . . . . . . . . . . . . . . . . . . . . . . . . . . . . . 5-6Safety Notices . . . . . . . . . . . . . . . . . . . . . . . . Safety Notices-1Index . . . . . . . . . . . . . . . . . . . . . . . . . . . . . . . . . . . . . Index-1vii
User Guide for the SoundStation IP 6000 Phoneviii
1Getting Started with Your PhoneThis chapter provides basic installation instructions and information forobtaining the best performance from your SoundStation IP 6000 conferencephone.The SoundStation IP 6000 conference phone is a next-generation phone with amodern industrial design, and the latest advancements in Polycom voicetechnology.Some of the key features of the phone include: Excellent wideband audio performance A console microphone with a range of up to ten feet Expansion microphones to accommodate large room sizes International language support Corporate Directory supportThis chapter includes the following topics: Parts List on page 1-2 Installing the Phone on page 1-2 Features of the Phone on page 1-6 Understanding Line and Call Icons on page 1-9 Navigating Menus and Entering Data on page 1-10To read about how to change the settings on your phone, see Chapter 2,Customizing Your Phone. To read about the phone’s basic features, seeChapter 3, Using the Basic Features of Your Phone. To read about moreadvanced features, see Chapter 4, Using the Advanced Features of YourPhone.If you require additional information or assistance with your new phone, seeyour system administrator.1-1
User Guide for the SoundStation IP 6000 PhoneParts ListThe following items are included in your basic SoundStation IP 6000 package: SoundStation IP 6000 Conference Phone 25-foot Network Cable Quick Start GuideMake sure your conference phone package contains each item. If any item ismissing, see your system administrator.SoundStation IP 6000 Conference Phone25-foot Network CableQuick Start GuideOptional AccessoriesThe following items are optional accessories for your phone: AC Power Kit with:— Power Adapter— Regional Power Cord— Power Insertion Cable External Microphone Kit with two extension microphonesInstalling the PhoneThis section describes how to install your phone. It includes the followingtopics:1-2 Connecting Network and Power Sources on page 1-3. Connecting Optional Extension Microphones on page 1-5.
Getting Started with Your PhoneConnecting Network and Power SourcesThere are two ways to connect your phone to the network and a power source.Your system administrator can tell you which of the following methods bestsuits your teleconferencing needs: Power over Ethernet (PoE) AC PowerPower over EthernetPower over Ethernet is the default connection for your phone.NoteAC power adapters are not included in the PoE package. If you require one, seeyour system administrator.The following figure shows how to connect your phone to the network usinga PoE source.1225-foot Network CableTo connect the phone using PoE:1. Connect one end of the 25-foot Network Cable to the LAN jack on thephone.2. Connect the other end of the 25-foot Network Cable to an available LANport on the wall or hub/switch device port.1-3
User Guide for the SoundStation IP 6000 PhoneAC PowerTo connect your phone to the network using AC power, make sure you havethe optional AC Power Kit. The AC Power Kit contains a Power Adapter,Regional Power Cord, and a Power Insertion Cable.The following figure shows how to connect your phone to the network usingoptional AC power.Power Insertion Cable234125-foot Network CablePower Adapter5To connect the phone using AC power:1. Connect one end of the 25-foot Network Cable to the LAN jack on thephone.2. Connect the other end of the 25-foot Network Cable to thePower Insertion Cable.3. Connect the Power Insertion Cable to an available LAN port on the wallor hub/switch device port.4. Connect the Power Adapter to the Power Insertion Cable.5. Connect the Power Adapter (with the attached Regional Power Cord) tothe wall outlet.1-4
Getting Started with Your PhoneConnecting Optional Extension MicrophonesConnect the free end of the optional extension microphone cable to one of themicrophone connectors on the phone.The following figure shows the optional extension microphones connected tothe microphone connectors on the phone.1-5
User Guide for the SoundStation IP 6000 PhoneFeatures of the PhoneThe following figure shows the primary hardware features of your s for ringer and hands-free audio output.2MicrophonesProvide 360o coverage by three internalmicrophones.3LED IndicatorsIndicate phone and call status through three bi-colorLEDs. The LEDs illuminate to indicate the followingnormal operational states: Solid red—Power is on, software booting, oryour call is muted Flashing red—You have placed a call on hold Solid green—A dial-tone is available, dialing isin-progress, or a call is in-progress Flashing green—A call is incoming
Getting Started with Your PhoneThe following figure shows the primary key buttons, controls, and indicatorson your phone console:119108761234512ItemDescriptionSelect keyAllows you to:Scroll keys Select a field of displayed data Toggle features on or offAllow you to: Scroll through displayed information Enable or disable fields3Volume keysAdjust the volume of the speaker and the ringer.4Mute keyToggles the microphone on or off during aconversation by doing the following: Stopping local audio from being heard at thefar end of the call Allowing local audio to be heard at the far endof the call1-7
User Guide for the SoundStation IP 6000 PhoneItemDescription5Dial pad keysContain 10 digits, 26 alphabetic characters, andother special characters available incontext-sensitive applications.6Redial keyAutomatically dials the last number you called.7Call keyInitiates or ends a call.8Soft keysSelect specific context-sensitive functions thatdisplay on the screen above each soft key.9Exit keyExits the current screen and returns to theprevious menu.10Menu keyAllows you to:111-8LCD graphic display Access additional features and configurationsettings Exit the current screen and return to the idlescreenShows the time and date, and information aboutcalls, messages, soft keys, and other relevantinformation.
Getting Started with Your PhoneUnderstanding Line and Call IconsIconLine or Call StateDescriptionActive callA call is in progress using HD Voice. Theactive call icons merge into one icon on thephone screen. The following figure shows whatdisplays on the screen during an active call:ConferenceA conference is in progress. See HostingConference Calls on page 3-6.DialingThe phone is dialing a number.Do Not DisturbYou have enabled the Do Not Disturb featureon your phone. Your phone will not ring. SeeUsing Do Not Disturb on page 3-14.ForwardingYou have enabled the forwarding feature onyour phone. See Forwarding Calls on page3-11.HoldA call or conference is on hold. See Holdingand Resuming Calls on page 3-6 and Holdingand Resuming Conferences on page 3-8.Registered lineThe phone can place and receive calls.Registered shared lineThe phone, which shares a directory numberwith another phone, can place and receivecalls. See Understanding Shared Lines onpage 2-26.RingingThe phone is ringing.Unregistered LineThe phone is unable to place and receive calls.Voice mail messageYou have a new voice mail message. SeeUsing Voice Mail on page 3-16.1-9
User Guide for the SoundStation IP 6000 PhoneNavigating Menus and Entering DataTo navigate menus and enter data, follow these tips:NoteAfter 20 seconds of inactivity, the menu system automatically exits to the idlescreen unless an edit session is in progress.If you want to.Then do this.Enter the main menuPress.Exit the main menu and returnto the idle screenPress.Press.Return to the previous menuIn some cases, you can press the Back soft keyto return to the previous menu.Scroll through menu itemsUse.When lists appear on more than one page, youcan press the * key to Page Up, or press the #key to Page Down.Scroll through lists or fieldsUseSelect a menu itemDo one of the following: or the Next and Prev soft keys.Scroll to the menu item, and then press.or Press the dial pad key that corresponds tothe item in the numbered menu list, and thenpress.For example, to select the second item in amenu, press 2, and then press.Enter textPress the dial pad keys one or more times.For example, to enter ‘A,’ press 2. To enter ‘C,”press 222.1 - 10Enter numbers, uppercasecharacters, or lowercasecharactersPress the 1/A/a soft key one or more times toselect numerical, uppercase, or lowercasemode, and then press the dial pad keys one ormore times.Enter special charactersPress the 1, *, 0, and # keys one or more times.
Getting Started with Your PhoneIf you want to.Then do this.Enter text in a specificlanguagePress the Encoding soft key.When in text entry mode, the language the textwill display in appears at the top of the screen.Delete text you enteredPress the soft key.View additional soft keysPress the More soft key.Enable or disable fieldsUseor the Change soft key.Enable or disable menu itemsPress.1 - 11
User Guide for the SoundStation IP 6000 Phone1 - 12
2Customizing Your PhoneYou can customize your SoundStation IP 6000 conference phone by adjustingcertain settings, including language, volume, time and date, display contrast,backlight intensity, and ring type. You can also add contacts to the phone’slocal Contact Directory.This chapter shows you how to customize your phone. It includes thefollowing topics: Configuring Basic Settings on page 2-2 Adjusting the Speaker and Ringer Volume on page 2-11 Using Call Lists on page 2-11 Managing Contacts on page 2-13 Managing Incoming Calls on page 2-23 Understanding Shared Lines on page 2-26Some customizations, including shared lines and viewing a CorporateDirectory, must be set up by your system administrator.To learn about your phone’s basic features, see Chapter 3, Using the BasicFeatures of Your Phone. To read about the phone’s advanced features, seeChapter 4, Using the Advanced Features of Your Phone.For more information or assistance with your new phone, see your systemadministrator.2-1
User Guide for the SoundStation IP 6000 PhoneConfiguring Basic SettingsTo configure basic phone settings, press, and then select Settings Basic to view the basic phone settings you can customize.This section includes the following topics: Updating Preferences Updating the Display Contrast Updating the Backlight Intensity Updating the Ring ToneUpdating PreferencesThe Preferences menu allows you to customize the language that displays onyour phone and to specify how the time and date display on the idle screen.You can also enable your phone to save Corporate Directory search results, ifCorporate Directory is set up on your phone (see Searching for Contacts in aCorporate Directory on page 2-20).Updating the LanguageThe phone supports the following languages. English (Canada) is the defaultlanguage that displays.Language (Localization)1. English (Internal)2. English (Canada)3. Chinese (China)4. Danish (Denmark)5. Dutch (Netherlands)6. English (United Kingdom)7. English (United States)8. French (France)9. German (Germany)10. Italian (Italy)11. Japanese (Japan)12. Korean (Korea)2-2
Customizing Your PhoneLanguage (Localization)13. Norwegian (Norway)14. Portuguese (Portugal)15. Russian (Russia)16. Spanish (Spain)17. Swedish (Sweden)To change the language:1. Press, and then select Settings Basic Preferences Language.The Language screen displays.2. Scroll to the language you want, and then press.The text on the screen changes to the language that you selected.3. Pressto return to the idle screen.Updating the Time and Date DisplayThe time and date appear on the idle screen of your phone. If the phone cannotobtain a time and date, the display will flash. If this happens, or if the time ordate is incorrect, see your system administrator.You can select from various formats for the time and date display, includingwhether the time or date displays first (clock order). You can also turn the timeand date display off, so the time and date does not display on the idle screen.Select and set options that are right for you.The following figure shows the default format for the date and time display onthe phone screen.2-3
User Guide for the SoundStation IP 6000 PhoneTo update the time and date display:1. Press, and then select Settings Basic Preferences Time and Date.The Time and Date screen displays.2. Do one of the following:— To change the date format, press.or— To change the time format, scroll to Clock Time, and then pressThe Clock Date screen or the Clock Time screen displays.or3. Scroll to the date or time format you want, and then press.4. Pressto return to the idle screen. The new date or time formatdisplays on the screen.2-4.
Customizing Your PhoneTo change the order of the time and date display:1. Press, and then select Settings Basic Preferences Time and Date Clock Order.The Clock Order screen displays.2. Scroll to the clock order you want, and then presssetting is date before time.3. Press. The defaultto return to the idle screen.To enable or disable the time and date display:1. Press, and then select Settings Basic Preferences Time and Date.The Time and Date screen displays.2. Do one of the following:— To disable the time and date display, scroll to Disable.or— To enable the time and date display, you do not have to highlight anitem. Enable is already highlighted. Go to step 3.3. Press4. Press.to return to the idle screen.2-5
User Guide for the SoundStation IP 6000 PhoneUpdating the Display ContrastYou can set how light or dark the screen appears.To adjust the contrast on the phone screen:1. Press, and then select Settings Basic Contrast.The Contrast screen displays.2. Press the Up or Down soft keys to increase or decrease the displaycontrast.3. Press the Ok soft key.4. Pressto return to the idle screen.Updating the Backlight IntensityBacklight intensity on the phone has three modes: Backlight On Backlight Idle DimYou can modify the Backlight On intensity and the Backlight Idle intensityseparately. You can select high, medium, low, and off levels for both.You can also modify the Maximum Intensity. The Maximum Intensitydetermines the highest intensity you can choose for the Backlight On andBacklight Idle intensities. For example, if you lower the Maximum Intensity,the highest level for Backlight On and Backlight Idle intensities will be loweredto the same level.2-6
Customizing Your PhoneDim mode intensity is determined by the Backlight On intensity and theBacklight Idle intensity together as follows:Backlight On IntensityBacklight Idle IntensityDim Intensityoffoffofflowdimmer than lowlowmediumdimmer than diumhighhighhighThe Backlight On mode turns on for following events: Any key press Incoming calls Ending a call, holding a call, resuming a call by the other party A voice or instant message receivedIf you do not press any keys on the phone after 20 seconds of the backlightturning on, the backlight dims (or changes) to medium in the following cases: A call is in progress A call is on hold There is an incoming call (ringing) There is an outgoing call (ringing back) Any menu shows on the displayIn all other cases, the mode changes to Backlight Idle.2-7
User Guide for the SoundStation IP 6000 PhoneTo change the backlight intensity:1. Press, and then select Settings Basic Backlight Intensity.The Backlight Intensity screen displays.2. Select Backlight On Intensity.The Backlight On Intensity screen displays.3. Scroll to the intensity you want, and then pressBacklight On Intensity is Medium. The default4. Press the Save soft key.5. Select Backlight Idle Intensity.The Backlight Idle Intensity screen displays.6. Scroll to the intensity you want, and then pressBacklight Idle Intensity is Medium.7. Press the Save soft key.2-8. The default
Customizing Your Phone8. Select Maximum Intensity.The Maximum Intensity screen displays.9. Press the Up or Down soft keys to increase or decrease the maximumintensity the screen can display, and then press the Ok soft key.10. Pressto return to the idle screen.Updating the Ring ToneYou can select from many different ring tones to distinguish your phone fromyour neighbor’s. You can also set distinctive ring tones for contacts in you
obtaining the best performance from your SoundStation IP 6000 conference phone. The SoundStation IP 6000 conference phone is a next-generation phone with a modern industrial design, and the latest advancements in Polycom voice technology. Some of the key features of the phone include: Excellent wideband audio performance