Transcription
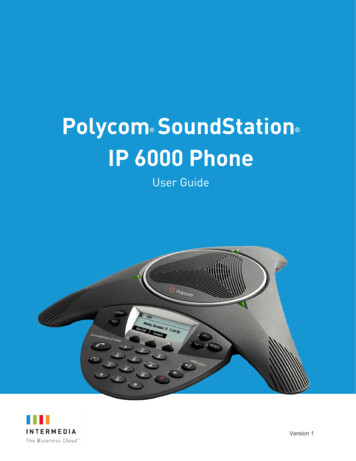
Polycom SoundStation IP 6000Set-up and user guide
2What’s in this guide?Welcome3What’s in the box?3Setting up4Getting to know your phone6Using your phone7Volume controls9Need help?9Things you need to know9
3Welcome to the Polycom SoundStationIP 6000The Polycom SoundStation IP 6000 is a premium conference phone ideal for medium-largesized rooms. We know you’ll be eager to get going with your new phone but before youcan get started, you’ll need to set it up.It won’t take long.What’s in the box?Make sure you’ve got everything. You should have: SoundStation IP 6000 Ethernet cable Mains power adapter Quick Start Guide
4Setting upThere are two ways to connect your SoundStation IP 6000, depending on whether yournetwork port gives you Power over Ethernet (PoE) or not.Connecting with PoEConnect the LAN port (1) on the SoundStation IP 6000 to your network port (2) using theEthernet cable supplied in the box.2125-foot network cableConnecting with mains powerIf you’re not getting Power over Ethernet, you’ll need to connect the phone to themains instead.1. Connect one end of the network cable to the LAN jack of the phone.2. Connect the other end of the network cable to the power insertion cable.3. Connect the power insertion cable to a LAN port on the wall or on the switch port.4. Connect the power adapter to the power insertion cable.5. Plug the power adapter into a power socket.Power insertion cable241325-foot network cablePower adapter5
5Check that you’re set up for the serviceOnce you’ve connected your phone to the network, it’ll do a series of firmware updates.This may take a while so please be patient while it does what it needs to do.When everything is complete and ready to go, you’ll see the phone number in the top lefthand corner of the display. If this doesn’t happen, please call your service desk for help.Firewall portsMost routers will automatically work with IP phones and devices.But if you’re using a Linksys WRT series router, you may need to enable port triggering:Using IP Phones or ATAs 5060-5090, Type: UDP 16384-16482, Type: UDPUsing the Call Controller with SoftPhone 5060-5090, Type: UDP 8000-8200, Type: UDPIf you’re using multiple call controllers on a single network, we also recommend you changethe local port number from within each call controller:1. On your call controller, go to Menu and select Options2. Expand the Account Information tab on the left3. Click on Connection4. C hange the Local Port value from 5060 to another availableport between 5060-5090Don’t use the same port number for another call controller.
6Getting to know your phoneNow that you’ve set up your phone, it’s time to find out what each of the buttons are for.109118721635412Name ofbuttonWhat it doesSelectPress this to choose something you’ve highlighted onthe display or to switch features on and off.ScrollUse these to move up and down through informationon the screen, or to enable and disable functions suchas Call Forwarding. When the phone’s not in use, thesebuttons double as shortcuts: scroll up to see yourspeed dial information; scroll down for missed calls.3VolumeChange the volume of the speakers and the ringer.4MuteTurn the microphone on and off so other people onthe call can’t hear you.5DialYou know what these do!6RedialAutomatically dials the last number you called.7CallUse this to start and finish calls.Name ofbuttonWhat it does8Soft keysFunction changes depending on what you’re doingwith the phone. Their functions appear on the screen.9ExitUse this to exit the current screen and return to theprevious menu.10MenuUse this to access features on your phone and tochange its set up. You can also use it to exit yourcurrent screen and return to the ‘idle’ screen.DisplayscreenShows the time and date, menus and soft keys, andinformation about calls, messages and features.The information display line (that shows the directorynumber) also shows icons and text, including: Pop up message (eg. network error messages) Do Not Disturb text or icon Call forwarding info (eg. Call Forwarding Enabled) Missed calls (eg. ‘4 new missed calls’) Presence (eg. ‘Busy’) Prompt message (eg. ‘Enter URL’)11
7Using your phoneMaking a call1. Press the Call button2. Enter the phone number3. Press the Send soft keyAnswering callsPress the Answer soft key. If you want to ignore the call, press the Reject soft key.To prevent your phone from ringing –1. Press the Menu button2. Select Features3. Select Do not disturb4. Press the Select button to turn Do not disturb on or offEnding callsPress the Call button or the End call soft key.Holding and resuming calls1. Press the Hold soft key during a call (the LED on the phone will blink red)2. Press the Resume soft key to resume the callRedialling a numberPress the Redial button to call the last number dialled on the phoneTransferring calls1. Press the Transfer soft key during a call to put it on hold2. Enter the number you want to transfer the call to3. Press the Send soft key4. Press the Transfer soft key after you speak to the person you’re transferring the call toPress the Cancel soft key if you change your mind and want to continue talking to thecaller yourself.
8Hosting conference calls with up to two other parties1. Call the first party2. Press the Confrnc soft key after the first party answers (the call is now on hold)3. Dial the number of the second party then press the Send soft key4. Press the Confrnc soft key when the second party answers and the conference will start5. To put the conference on hold, press the Hold soft key6. Press the Resume soft key to resume it7. To end the conference, press the End call soft keyYou can also split the conference into two separate calls on hold by pressing theSplit soft key.
9Volume controlsAdjusting the speaker and ringer volumePress the Volume buttons during a call to alter the speaker volume.Press them when the phone is idle to adjust the ringer volume.Muting the microphoneWhen you turn on Mute, other parties won’t be able to hear you but you will still be ableto hear them.1. Press the Mute button to mute your microphone (this will also work if you’ve pluggedin an external microphone)2. The LED light will be red when mute is on3. Press the Mute button again to turn off muteNeed help?If you have any problems setting up or using your SoundStation IP 6000,call your service desk.Things you need to know999 or 112 emergency callsWhen you call 999 or 112 from a landline, the emergency services normallyknow where you’re calling from because they can see the address whereyour number is registered. But if you use your BT Cloud service at a differentaddress to your registered address, they won’t know where you are.They’ll assume you’re at the registered address and go there.So if your work location changes, you must tell your BT Cloud serviceadministrator so they can change your registered address.You might not be able to make 999 or 112 calls when there’s a power or networkfailure or if you’re using the service through an app on a mobile device.Safety informationDo not open the SoundStation IP 6000 casing. This could expose you to high voltages orother risks. Contact your service desk if you have a problem.
10CleaningClean the SoundStation IP 6000 with a damp (not wet) cloth, or an anti-static wipe.Never use household polish as this will damage the product. And don’t use a dry cloth asthis may cause a static shock.Environmental Don’t expose the SoundStation IP 6000 to direct sunlight. D on’t stand it on carpets or other surfaces that generate fibres, or place it in locationspreventing the free flow of air over its surfaces. Don’t submerge any part of it in water and do not use it in damp or humid conditions. Don’t expose it to fire, explosive or other hazardous conditions. T here is a slight chance that an electrical storm could damage your SoundStationIP 6000.Product disposal instructionsUnder the Waste of Electrical and Electronic Equipment (WEEE) Directive (2002/96/EC)classes this product as Electrical or Electronic Equipment. That means you must not disposeof it with other household or commercial waste at the end of its working life.GuaranteeWe guarantee the SoundStation IP 6000 for 12 months from the date of purchase.The guarantee is subject to these conditions: It only applies to defects that happen within the 12-month guarantee period. You can provide your proof of purchase. You return the equipment to us or our agent as instructed. T he guarantee does not cover any faults or defects caused by accidents, misuse, fairwear and tear, neglect, tampering with the equipment, or any attempt at adjustment orrepair other than through approved agents. The guarantee does not affect your statutory rights.If you meet these conditions, we (or our agent) will repair or replace the product (or anyof its components except for batteries) if it is faulty or below standard because of inferiorworkmanship or materials.If you bought the product over 28 days ago, we may replace it with a refurbished orrepaired product.
Offices WorldwideThe services described in this publication are subject to availability and maybe modified from time to time. Services and equipment are provided subject toBritish Telecommunications plc’s respective standard conditions of contract.Nothing in this publication forms any part of any contract. British Telecommunications plc 2019. Registered office: 81 Newgate Street,London EC1A 7AJ. Registered in England No. 1800000.May 2019
The Polycom SoundStation IP 6000 is a premium conference phone ideal for medium-large sized rooms. We know you'll be eager to get going with your new phone but before you can get started, you'll need to set it up. It won't take long. Make sure you've got everything. You should have: SoundStation IP 6000 Ethernet cable