Transcription
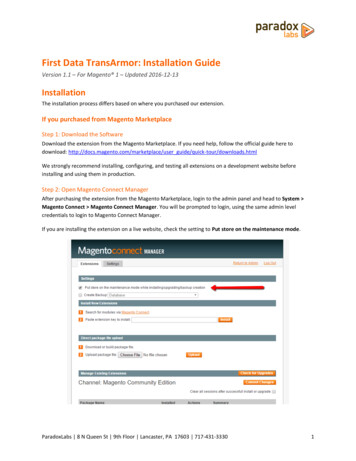
Authorize.Net CIM: User ManualVersion 2.3 – For Magento 1.x – Updated 2016-11-18Table of ContentsInstalling the Extension.2Updating the Extension .2Configuration .4General.4Advanced Settings.6ACH Processing (eCheck) .7Usage .7Checkout Payment Form.7Order status page .9Customer ‘My Payment Data’ account area .9Admin order form .10Admin order status page.11Admin customer ‘Payment Data’ account area .11Admin transaction info .12Accept.js: Same Authorize.Net, even better security .13What is Accept.js, and why should I care? .13How do I enable Accept.js? .13Possible Accept.js Errors .14Recurring Profiles .14Configuration .14Purchasing .15Management.15Rebilling .16Frequently Asked Questions .17Why are my API Login ID and Transaction Key invalid? .17How do I do an online refund from Magento? .18I got an email from Authorize.Net about a new Akamai API endpoint. Does that affect me? .18Technical / Integration Details.18Architecture .18ParadoxLabs 8 N Queen St 9th Floor Lancaster, PA 17603 717-431-33301
Custom customer attributes .18Custom database schema .18Events.19Magento API .19Support .22Installing the ExtensionStep 1: Upload filesUpload all files within the upload folder into the root directory of Magento.Folder in Download/upload/app//upload/js//upload/skin/ Folder on Server/app//js//skin/Step 2: Flush Cache / Run InstallationTo complete the installation process, open the Admin Panel and go to System Cache Management. Click theFlush Magento Cache button at the top-right, and wait for the page to finish loading.If you have Magento's compilation enabled, you also need to recompile. Go to System Tools Compilation andclick Run Compilation Process at the top-right to do this.Step 3: Set up CronIn order to use the recurring billing features of this extension, you must set up Magento's cron scheduler in yourserver's crontab or task scheduler if you've not already done so. This will need to be done either through yourserver control panel or through SSH. Magento's scheduling script, cron.sh, should be executed every 5 minutes.For instructions on doing this, see this guide: Magento Tip: Setting Up Cron (Scheduled Tasks)If you need assistance in setting this up, please contact us.Step 4: ConfigureSee the configuration section below.Updating the ExtensionStep 1: Upload filesUpload all files within the upload folder into the root directory of Magento.Folder in Download/upload/app//upload/js//upload/skin/ Folder on Server/app//js//skin/ParadoxLabs 8 N Queen St 9th Floor Lancaster, PA 17603 717-431-33302
Step 2: Flush CacheTo complete the installation process, open the Admin Panel and go to System Cache Management. Click theFlush Magento Cache button at the top-right, and wait for the page to finish loading.If you have Magento's compilation enabled, you also need to recompile. Go to System Tools Compilation andclick Run Compilation Process at the top-right to do this.Step 3: Verify ChangesIf you have any integrations or custom functionality based on this extension, we strongly recommend testing toensure they are not affected. If you would like details on changes beyond what is provided in the release notes,you can run a diff between versions or contact us for specifics.If you have copied our template files to any theme, ensure that any changes to the base templates are reflectedin your copies. Failure to do so may result in errors during checkout or card management.ParadoxLabs 8 N Queen St 9th Floor Lancaster, PA 17603 717-431-33303
ConfigurationBefore proceeding: Sign up for an Authorize.Net merchant account if you don’t have one already, and ensureyour account has Customer Information Manager (CIM) enabled.Open your Admin Panel and go to System Configuration Sales Payment Methods. Toward the bottom of thepage, you’ll find an ‘Authorize.Net CIM’ settings section like the below.General Version Installed: This tells you the version of our extension currently installed on your website. Pleaseinclude this in any support requests.API Test Results: If you’ve entered an API Login ID and Transaction Key, we will automatically connect toAuthorize.Net to verify that the API works successfully. If we cannot connect to Authorize.Net, or your APILogin ID or Transaction Key is incorrect, or your Authorize.Net account does not have the CIM serviceenabled, this will tell you with a red message. Correct the error, then reload the page and it should show‘Authorize.Net CIM connected successfully.’Enable: Yes to enable the payment method. If disabled, you will still be able to invoice/refund existingorders, but it will not show up as a payment option during checkout.Title: This controls the payment option label on checkout and order status pages.API Login ID: This is a secret value from your Authorize.Net account. If you don’t know it, log into yourAuthorize.Net account, then go to Tools Security Settings General Security Settings API Login ID andTransaction Key. Your API Login ID will be in the middle of the page.Transaction Key: This is a secret value from your Authorize.Net account. If you don’t know it, log you’reyour Authorize.Net account, then go to the same page as API Login ID above. You will have to enter yoursecret answer to generate a new transaction key. Record the generated value for your records.WARNING: Generating a new transaction key will cause your existing transaction key to expire 24 hourslater. If any other services or software are connected to your Authorize.Net account, you MUST updatethem with the new transaction key immediately.ParadoxLabs 8 N Queen St 9th Floor Lancaster, PA 17603 717-431-33304
Authorize.Net Sandbox Account: Choose ‘Yes’ if the API Login ID and Transaction Key you entered are fora sandbox account. If this value is correct, the API Test Results will report ‘Your API credentials are invalid.’If you want to test, you must have a sandbox account (separate from your production Authorize.Netaccount). You can create one here: https://developer.authorize.net/hello world/sandbox/Payment Action: Choose from the following options.o Save info (do not authorize): This will require customers to enter a credit card on checkout, andstore that credit card in Authorize.Net CIM. If Validation Type is set to ‘live’, it will be tested toverify it is a valid credit card in the process. No funds will be captured or held from the creditcard upon checkout. Invoicing the order will perform a standalone authorize capturetransaction, but is not guaranteed to go through.o Authorize: This will authorize the order amount upon checkout, allowing for manual invoicingand capture of the funds later. The order amount will be reserved (held) for several days. If youdo not invoice within a couple weeks, the authorization will expire, and invoicing will perform astandalone authorize capture transaction instead (which is not guaranteed to go through).o Authorize and Capture: This will capture all funds immediately when an order is placed.Payment processors strongly recommend not capturing funds unless/until you are within three days offulfilling (shipping) the order.New Order Status: Set this to your desired initial status for orders paid via Authorize.Net CIM. DefaultMagento behavior is ‘Pending’ for Authorize Only, and ‘Processing’ for Authorize and Capture.Validation Type: Choose from the following options.o Live: This will run a 0.00 or 0.01 test transaction against the credit card to verify that all details(card number, expiration date, CCV, AVS) are correct. The transaction amount depends on thecard type. The transaction is immediately voided if successful, the customer will never see it onany statements—however, this does incur an additional transaction fee on your account.The benefit of live validation is that you are guaranteed all cards stored in Authorize.Net CIM(and visible on customers’ accounts) are valid and usable.The downsides are the extra validation fee, and a chance of ‘duplicate transaction’ errors ifcustomers enter part of their card info incorrectly.o Test: In this mode, Authorize.Net will verify that the credit card number and expiration date arepossible, but will not actually talk to the card processor. There is no guarantee that the CCV orbilling address are correct, or that the card has any funds available.o None: In this mode, Authorize.Net will blindly store the card without any validation.Allow Credit Card Types: Choose the CC types you want to allow on checkout.Credit Card Verification: If yes, customers will be prompted for their credit card’s CCV code whenentering a new card.Allow card to not be stored: If yes, customers will have a ‘Save for next time’ checkbox on checkout. If no,logged in customers will see a message instead: “For your convenience, this data will be stored securely byour payment processor.” Guests will never be given the option to store a credit card.Note that all cards are always stored in CIM, regardless of this setting or the customer’s choice. This isnecessary for payment processing. If the order is placed as a guest, or the customer chooses to not savetheir card, it will be automatically purged from all systems 120 days (the maximum refund period) after itslast use. This ensures the info is available for edits, captures, and refunds, but respects the customer’wishes.If a card is ‘not saved’, it will not display under the customer’s saved credit cards (Account My PaymentData), nor will it be selectable during checkout. Note that as an admin, order ‘edit’ or ‘reorder’ will bypassthis, always allowing reuse of the original payment info (unless it was since purged).ParadoxLabs 8 N Queen St 9th Floor Lancaster, PA 17603 717-431-33305
Show Authorize.Net Logo: If yes, checkout will display an ‘Authorize.Net’ logo next to the payment form.Accepted Currency: This setting must match the currency of your Authorize.Net account.Allow Payment from Countries: This setting allows you to limit which countries are able to select it as apayment option.Minimum Order Total: This setting allows you to set a minimum order value for the payment option. Forinstance, set to 5 to only allow credit card checkout for orders of 5 or more.Maximum Order Total: This setting allows you to set a maximum order value for the payment option. Forinstance, set to 1000 to only allow credit card checkout for orders of 1000 or less.Sort Order: This setting allows you to change the order of payment options on checkout. Enter a numberfor this and all other payment methods according to the order you want them to display in.Advanced Settings Accept.js: If yes, and you’ve entered your Client Key (below), Authorize.Net’s Accept.js functionality willbe enabled everywhere credit card info is entered. This sends CC data straight to Authorize.Net, bypassingyour server entirely. Unless it causes problems, we strongly recommend using this, for security and PCIcompliance reasons. See the full details on what Accept.js is and how it works in the section later in thisdocument.ParadoxLabs 8 N Queen St 9th Floor Lancaster, PA 17603 717-431-33306
Client Key: In order to use Accept.js, you must enter your Client Key. To find this, log in to Authorize.Netand go to Account Settings Security Settings General Security Settings Manage Public Client Key.Require CCV for all transactions: If yes, customers and admins will be required to enter the credit cardCCV for all transactions, even with previously-stored cards.Send Shipping Address: If yes, shipping address will be included with every new transaction sent toAuthorize.Net. This is required for some fraud filters. There is no performance penalty associated with thisoption. Shipping addresses are not stored in CIM.Send Line Items: If yes, the order items will be included with every transaction. This is required for Level-2processing, but may not be desired for other reasons. There is no performance penalty associated withthis option.Reauthorize on Partial Invoice: If yes, and you invoice part of an order, a new authorization will becreated for the outstanding order balance (if any). This helps guarantee funds, but can cause multipleholds on the card until transactions settle. Any failure during reauthorization is ignored.Auto-select 'save for next time': If yes, the ‘save this card for next time’ checkbox will be checked bydefault. If no, customers will have to explicitly select it to store and reuse their card.Verify SSL: If yes, the Authorize.Net API connection will be verified against known SSL information for theAPI. Do not disable unless you encounter SSL errors from the API test results and your host is unable to fixthe underlying problem. Disabling this will make your store vulnerable to MITM (man-in-the-middle)attacks.3D Secure Card Validation: We support 3D Secure through Cardinal Commerce for most credit cardtransactions. This requires a separate relationship with Cardinal Commerce, and additional configurationof Magento and your Authorize.Net account. If you have done those things, set Yes to enable. Note thatAccept.js must be disabled to use 3D Secure.ACH Processing (eCheck)If you want to accept ACH (eCheck) payments, the first step is to apply and be approved by Authorize.Net andeCheck.Net for ACH processing. Your account must be approved, or ACH payments will not go through.If/when your account is approved for ACH processing, then complete the payment method settings for‘Authorize.Net CIM – ACH (eCheck)’. This is a separate payment method option, with its own settings.All settings are analogous to those covered above.Note that there are significant differences in how ACH payments work compared to credit cards. Although allprocesses appear the same to Magento, when and how money is moved is quite different. We stronglyrecommend familiarizing yourself with the eCheck.Net e content&id A554Also note that Authorize.Net Accept.js does not yet support ACH payment information.UsageThere isn’t much to using Authorize.Net CIM in practice: It’s a standard Magento payment method, and allinterfaces should be pretty self-explanatory. That being said, here’s what you get:Checkout Payment FormThe frontend payment form lets you choose/enter credit card information. You can choose an existing card (if any)from the dropdown, or to add a new one.ParadoxLabs 8 N Queen St 9th Floor Lancaster, PA 17603 717-431-33307
If a customer re-enters a card they’ve used before, the existing card will be detected, and the new information(expiration date, billing address, etc.) will be saved on top of it. This happens seamlessly behind the scenes.If the customer has stored cards, their most recent one will be selected by default:ParadoxLabs 8 N Queen St 9th Floor Lancaster, PA 17603 717-431-33308
Order status pageCustomer ‘My Payment Data’ account areaThe My Payment Data section allows customers to see their stored cards, add, edit, and delete.ParadoxLabs 8 N Queen St 9th Floor Lancaster, PA 17603 717-431-33309
Note that cards associated with an open (uncaptured) order cannot be edited or deleted. They will display a ‘CardIn Use’ message in place of the buttons. As soon as all orders paid by the card are completed, the ‘Edit’ and‘Delete’ buttons will appear.Admin order formThe admin form displays the same options as frontend checkout, in slightly different format.ParadoxLabs 8 N Queen St 9th Floor Lancaster, PA 17603 717-431-333010
Admin order status pageThe admin panel shows extended payment info after placing an order, including transaction ID and validationresults. These details are not visible to the customer at any time.Admin customer ‘Payment Data’ account areaViewing a customer, you will see an added ‘Payment Data’ tab. This shows all of the same information with all ofthe same functionality as the equivalent frontend section.ParadoxLabs 8 N Queen St 9th Floor Lancaster, PA 17603 717-431-333011
Admin transaction infoViewing an order, you can also see full transaction info from the ‘Transactions’ tab.Click into a transaction, and you’ll see all of the raw transaction data from Authorize.Net.Click the ‘Fetch’ button on this page to grab the latest transaction info from Authorize.Net. This can be particularlyuseful when dealing with fraud review via the Advanced Fraud Detection Suite (AFDS) or checking for settlementon ACH transactions.ParadoxLabs 8 N Queen St 9th Floor Lancaster, PA 17603 717-431-333012
Accept.js: Same Authorize.Net, even better securityWhat is Accept.js, and why should I care?Accept.js is Authorize.Net’s new alternative to Direct Post Method, released in summer of 2016. Accept.js allowscredit card information to be sent straight from your customers’ browsers to Authorize.Net, without touching yourweb server at all. Instead, Authorize.Net gives us a one-time-use token (nonce) that refers to it. Since your webserver never sees the raw credit card number or CCV, this improves your website’s security, and reduces your PCIcompliance exposure.Image 2016 Authorize.Net (used by permission)Since Accept.js sends the credit card number directly to Authorize.Net, using our extension and Accept.js for allcredit card transactions may make you eligible for PCI Self-Assessment Questionnaire (SAQ) A-EP, rather than thelonger and more intensive PCI SAQ D form. For details on the SAQ types and why this is the case, see“Understanding the SAQs for PCI DSS version 3” (PDF, by PCI Security Standard Council).Enabling Accept.js has minimal impact on user experience. The credit card form is still located on your website,using your theme’s templates and styles. The data is tokenized as soon as all credit card fields are completed,completely behind the scenes. Any validation or processing errors will be displayed to the customer inline on thepage.How do I enable Accept.js?In order to use Accept.js, change the ‘Accept.js’ setting to ‘Yes’ at Admin System Configuration PaymentMethods Authorize.Net CIM Advanced Settings Accept.js.After changing that setting, you will see a new field for Client Key. You must enter your Client Key fromAuthorize.Net. To find this, log in to Authorize.Net and go to Account Settings Security Settings GeneralSecurity Settings Manage Public Client Key.Note that Accept.js requires any pages having a payment form to use SSL (including your admin panel and devsites). Also, while we’ve done the best we can to ensure compatibility, we cannot guarantee the additionalfunctionality will work with every possible payment form and checkout solution. We strongly recommend testingcheckout after enabling Accept.js, to ensure it works as expected. If you experience problems, please contact us.In the interest of security, we also strongly recommend evaluating your Magento admin accounts, and onlyproviding access to Magento’s configuration area to people that absolutely require it.ParadoxLabs 8 N Queen St 9th Floor Lancaster, PA 17603 717-431-333013
Possible Accept.js ErrorsAccept.js is another layer of complexity on top of the existing credit card processing, and that means more thingsthat can go wrong. Here are errors you might start seeing after you enable Accept.js, and what they mean:“Invalid token. Please re-enter your payment info. (E00114)” (Log: ‘Invalid OTS Token.’)This error means Authorize.Net rejected the one-time-use payment token we sent them for the transaction.Usually this happens when the customer tries to place an order with a new credit card, their payment is rejected(AVS failed/wrong billing address, or transaction declined, etc.). After they get that error message, theyimmediately try hitting ‘Place Order’ again, without changing any of their billing or payment info. Since none of theinfo changed, we did not request a new token, the existing one expired, and hence the error.How to fix: Have the customer re-enter their billing and payment info, taking care to correct whatever error theyencountered originally.“We did not receive the expected Accept.js data. Please verify payment details and try again. If you getthis error twice, contact support.”This error means that your server received a raw credit card number, instead of the Accept.js token that wasexpected. We will never accept raw credit card details with Accept.js enabled, so we throw this error instead. Thismeans either the payment form that was submitted is incompatible with Accept.js, or the customer somehowcompleted the form without triggering Accept.js.How to fix: If most customers are able to checkout successfully, collect info about the customer’s browser andoperating system, then either have them re-attempt checkout (possibly using another browser or device), or assistthem by placing an admin order instead.If no customers are able to complete checkout, or you can reproduce the problem yourself, please disableAccept.js temporarily, then contact us for support.Browser console displays “Cross-Origin Request Blocked: The Same Origin Policy disallows reading theremote resource at https://js.authorize.net/v1/AcceptCore.js.” (or similar message) on checkoutThis message happens because your webpage is unable to access that file directly. Usually this would be a problem(hence the warning message), but in this case this is actually normal and intended behavior. This is part of themany security features of Accept.js: Your site cannot (and should not be able to) access that particular file directly.This is not an error, nothing is going wrong, and you can safely ignore the message. If you noticed it because ofother problems you are experiencing with our extension, please contact us for support with an explanation of whatthose problems are.Recurring ProfilesThis version of the extension includes support for Magento’s Recurring Profiles functionality. Recurring profiles areMagento 1’s approach to recurring billing and subscription functionality. If you are unfamiliar with recurringprofiles, start here: http://docs.magento.com/m1/ce/user urationRecurring profile configuration for Authorize.Net CIM is no different from any other payment method. If youalready have recurring profiles you sell, customers will now be able to purchase them with Authorize.Net CIM.ParadoxLabs 8 N Queen St 9th Floor Lancaster, PA 17603 717-431-333014
PurchasingPurchasing a recurring profile with Authorize.Net CIM looks exactly like a normal checkout, except that customerswill not have the option to not store their credit card.Also note, all of the normal caveats of recurring profiles still apply: Recurring profiles can only be purchased standalone; they cannot share the cart with any other items.The ability to use coupons, promotions, and any other kind of discount functionality with recurringprofiles is limited at best.ManagementRecurring profiles can be managed from the frontend or admin panel. The recurring profile status page showsprofile info and schedule:Clicking ‘Modify Recurring Profile’ takes you to the edit form:ParadoxLabs 8 N Queen St 9th Floor Lancaster, PA 17603 717-431-333015
In addition to changing shipping address and payment info, the admin version of this form allows you to edit thenext billing date.RebillingAll recurring profile rebilling for Authorize.Net CIM is processed automatically each hour through Magento’s cronscheduler.In the interest of flexibility, all billing is done as once-off transactions; we do not use Authorize.Net’s AutomatedRecurring Billing (ARB) service. This allows complete control over schedule and amount of billings (from a codestandpoint). However, this does have some caveats: If Magento’s cron scheduler does not run, your recurring profiles never bill.If you duplicate your production database (such that recurring profiles live in both places at once), andenable Magento’s cron scheduler for both environments, all recurring profiles will be billed twice. Theenvironments have no knowledge of each other’s existence, so this is unavoidable. Be extremely carefulwith recurring profiles on non-production environments.There are protections in the billing task to prevent double-billing within a single environment, even if the task isexecuted multiple times simultaneously. That being said, you should ensure that Magento’s cron scheduler runsevery 5 minutes and does not double up.ParadoxLabs 8 N Queen St 9th Floor Lancaster, PA 17603 717-431-333016
Every time a recurring profile bills successfully, a new order is created, and it gets recorded against the recurringprofile (the billed count and next billing date are updated, and the new order is attached). The customer willreceive a normal order confirmation email each time.If a recurring profile fails to bill, the failure will be logged and recorded against the recurring profile (incrementingthe ‘failed count’ value). No notifications will occur out-of-box. If you have the ‘Maximum Payment Failures’ valueset and the failed count meets that number, the recurring profile will be automatically moved to the ‘suspended’status, where it will stay until payment data is fixed and it is manually reactivated. Otherwise, the next billing datewill be calculated like normal, and it will retry the next time it would normally be due.If you have a recurring profile set to ‘Auto Bill on
ParadoxLabs 8 N Queen St 9th Floor Lancaster, PA 17603 717-431-3330 6 Show Authorize.Net Logo: If yes, checkout will display an 'Authorize.Net' logo next to the payment form. Accepted Currency: This setting must match the currency of your Authorize.Net account. Allow Payment from Countries: This setting allows you to limit which countries are able to select it as a
