Transcription
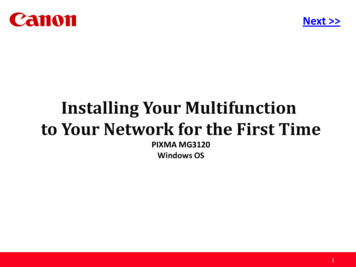
PreviousNext Installing Your Multifunctionto Your Network for the First TimePIXMA MG3120Windows OS1
PreviousNext Installing Your Multifunctionto Your Network for the First TimePIXMA MG3120Windows OSPreparing to Connect My Multifunction to My NetworkNetwork RequirementsNotes on Wireless ConnectionInstalling the Drivers & Software33452
Preparing to Connect My MultifunctionTo My Network PreviousNext Network RequirementsBefore connecting the machine to the network, make sure that configuration of the computer and access point or router iscomplete, and that the computer is connected to the network.Wireless ConnectionBefore connecting the machine to the network, the computer needs to be connected to the network. Make sure thatconfiguration of the computer and access point or router is complete.3
Preparing to Connect My MultifunctionTo My Network PreviousNext An "Ad-hoc connection," which establishes a direct wireless connection betweenthe computer and printer without using an access point, is not supported.A router or access point is required for your printer to be used on a wirelessnetwork.Notes on Network Connection The configuration, router functions, setup procedures and security settings ofthe network device vary depending on your system environment. For details,refer to your device's instruction manual or contact its manufacturer. In an office setup, consult your network administrator If you connect to a network that is not protected with security measures, thereis a risk of disclosing data such as your personal information to a third party. If an error message appears or if you have trouble with the networkconnection, refer to the printed manual: Network Setup Troubleshooting. Place the machine and computer on the same network segment.4
Installing the Drivers & Software PreviousNext Software InstallationTo use the machine by connecting it to a computer, software including the drivers needs to be copied (installed) to the computer's hard disk. Theinstallation process takes about 20 minutes. (The installation time varies depending on the computer environment or the number of applicationsoftware to be installed.)IMPORTANT Log on as the administrator (or a member of the Administrators group). Quit all running applications before installation. Do not switch users during the installation process. Internet connection may be required during the installation. Connection fees may apply. Consult the internet service provider. It may be necessary to restart your computer during the installation process. Follow the on-screen instructions and do not remove theSetup CD-ROM during restarting. The installation resumes once your computer has restarted. If the firewall function of your security software is turned on, a warning message may appear that Canon software is attempting to accessthe network. If such a warning message appears, set the security software to always allow access.5
Installing the Drivers & Software PreviousNext Installing the PIXMA MG3120 on Your Wireless NetworkIf you are installing your printer on your network for the first time, a step-by-step walk through of the wireless setup is built in to the installationroutine of the software that shipped with your PIXMA.*Insert the Setup CD-ROM that came with your printer into your CD-ROM drive and proceed through the easy to follow instructions.*If you don’t have or cannot use the Setup CD-ROM, you can still install the printer using a downloaded file. Click here for information.Be sure to select Wireless Connection on the Connection Method Selection screen (1-2).Continue carefully following the Printer Setup instructions (Steps 2-1 through 2-3) until the Setup Procedure Selection screen (3-1)appears. This is shown on the next page.6
Installing the Drivers & Software PreviousNext On the Setup Procedure Selection screen (3-1) screen, select Wireless Setup Using the USB Cable. This is the recommended setup method.You will need to use the supplied USB cableContinue to follow any on-screen instructions until the Software Installation List appears. This screen is shown on the next page7
Installing the Drivers & Software PreviousNext On the Software Installation List select any additional* software to install and click Next.*MP Drivers is required for installation and cannot be deselected. In addition, we recommend installing MP Navigator EX and EasyPhotoPrint EX in order to take full advantage of your printer’s features.*If you are using the downloaded ‘Mini Master setup’ file to install the printer, only the MP Drivers will be installed. Additional softwarecan be downloaded separately. The software can be found in the Software section of Drivers & Software (the same page where youdownloaded the Mini Master setup file)8
Installing the Drivers & Software PreviousNext The drivers and software will install. Continue to follow the on-screen instructions.Connect the supplied USB cable to the printer and computer when the Connect Cable screen appearsThe Connect Cable screen closes automatically after the printer is detected9
Installing the Drivers & Software PreviousNext If the Detected Access Points List* appears, select the one you wish to connect to, enter the network key and click connect*This screen normally appears if you have multiple access points or multiple access points exist in your immediate area.10
Installing the Drivers & Software PreviousNext If the Confirm Connection Access Point* screen appears, verify the information then click Yes*This screen normally appears when you have only one access point11
Installing the Drivers & Software PreviousNext Disconnect the USB cable when the Disconnect Cable screen appears. Click NextSetup is now complete. Follow any remaining instructions to exit the setup program.12
Installing the Drivers & Software PreviousInstalling the PIXMA MG3120 on Your Wireless NetworkIf you can’t find your CD-ROM, you may download the MG3100 series Mini Master Setup, which includes the same step-by-step installation asthe CD-ROM, by following the instructions below:1.2.3.4.5.6.7.Click here to access the MG3120 Drivers & Software page.Select the operating system of your computer in the dropdown lists (see example below).Expand the ‘Drivers’ section, if necessary, by clicking the red triangle.Click on the ‘MG3100 series Mini Master Setup’ entry.After reading the license agreement, click ‘I Agree – Begin Download’ and save the file to your computer.Once the download is complete, double-click the file from its download location to begin the installation.Follow the same instructions as you would if using the Setup CD-ROM. Click here to go to instructions.13
5. After reading the license agreement, click 'I Agree - egin Download' and save the file to your computer. 6. Once the download is complete, double-click the file from its download location to begin the installation. 7. Follow the same instructions as you would if using the Setup CD-ROM. Click here to go to instructions.
