Transcription
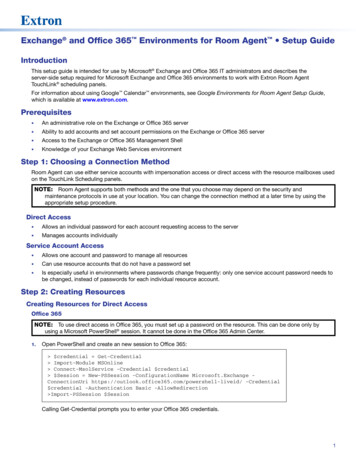
1Exchange and Office 365 Environments for Room Agent Setup GuideIntroductionThis setup guide is intended for use by Microsoft Exchange and Office 365 IT administrators and describes theserver-side setup required for Microsoft Exchange and Office 365 environments to work with Extron Room AgentTouchLink scheduling panels.For information about using Google Calendar environments, see Google Environments for Room Agent Setup Guide,which is available at www.extron.com.Prerequisites An administrative role on the Exchange or Office 365 server Ability to add accounts and set account permissions on the Exchange or Office 365 server Access to the Exchange or Office 365 Management Shell Knowledge of your Exchange Web Services environmentStep 1: Choosing a Connection MethodRoom Agent can use either service accounts with impersonation access or direct access with the resource mailboxes usedon the TouchLink Scheduling panels.NOTE: Room Agent supports both methods and the one that you choose may depend on the security andmaintenance protocols in use at your location. You can change the connection method at a later time by using theappropriate setup procedure.Direct Access Allows an individual password for each account requesting access to the server Manages accounts individuallyService Account Access Allows one account and password to manage all resources Can use resource accounts that do not have a password set Is especially useful in environments where passwords change frequently: only one service account password needs tobe changed, instead of passwords for each individual resource account.Step 2: Creating ResourcesCreating Resources for Direct AccessOffice 365NOTE: To use direct access in Office 365, you must set up a password on the resource. This can be done only byusing a Microsoft PowerShell session. It cannot be done in the Office 365 Admin Center.1.Open PowerShell and create an new session to Office 365: credential Get-Credential Import-Module MSOnline Connect-MsolService -Credential credential Session New-PSSession -ConfigurationName Microsoft.Exchange ConnectionUri https://outlook.office365.com/powershell-liveid/ -Credential credential -Authentication Basic -AllowRedirection Import-PSSession SessionCalling Get-Credential prompts you to enter your Office 365 credentials.1
Exchange and Office 365 Environments for Room Agent Setup Guide (continued)2.Create the new resource and set the appropriate flags. alias name room name alias name Replace alias name with the alias to use for the calendar (the part before @domain in an email address) and replace room name with the identifier for the room.Exchange 2013 or 20161.Log in to the Exchange Admin Center.2.Select Recipients and choose the Resource option.3.To create a new mailbox, click New Room mailbox.4.Choose the following settings for the new resouce: Select AutoAccept new meetings. Set DeleteComments to true/enabled. Set DeleteSubject to false/disabled. Set Allowconflicts to false/disabled.Exchange 2007 or 20101.2.Open the Exchange Management Console.Select Recipient Configuration (see figure 1, 1).A list of options is shown in the Actions panel.3.2Figure 1.Exchange Management ConsoleFigure 2.Recipient Configuration Actions PanelIn the Actions panel, click New Mailbox.(see figure 2, 1).
4.5.6.7.The New Mailbox Introduction window opens. SelectRoom Mailbox (see figure 3, 1).Click Next (2).Figure 3.New Mailbox — IntroductionFigure 4.New Mailbox — User TypeFigure 5.New Mailbox — User InformationThe New Mailbox User Type window opens. Select NewUser (see figure 4, 1).Click Next (2).8.The New Mailbox User Information window opens.Enter the user information requested.9.Use this window to change the organizational unit, ifrequired (see figure 5, 1).10. ClickNext (2).3
Exchange and Office 365 Environments for Room Agent Setup Guide (continued)11. TheNew Mailbox Mailbox Settings window opens.Enter an alias (see figure 6, 1).12. ClickNext (2).Figure 6.New Mailbox — Mailbox SettingsFigure 7.New Mailbox — Configuration SummaryFigure 8.New Mailbox —CompletionNew Mailbox configuration summary opens.Review the summary.13. TheBack, make changes asneeded and return to this page. If it is correct, clickNew (see figure 7, 1).14. If it is not correct, clickNew Mailbox Completion view opens.Once everything is completed, click Finish (seefigure 8, ). The New Mailbox window closes.15. The4
Once the account is created a password needs to be set so that ithas login access. For user accounts, this is the default. For resourceaccounts, this must be done manually.Passwords can be set through the Active Directory Users andComputers window or the Exchange Management shell. Passwordsmust meet or exceed the minimum security and complexitystandards set by Microsoft. To set a password:1.Open the Properties window for the mailbox that wascreated in the previous section (in figure 9, the mailbox is calledConfRoomTest).2.Select the Resource General tab (see figure 9, 1) and enableautomatic processing to auto-accept new meetings.3.In the Resource Policy tab (2), ensure Allow conflictingmeetings is not selected.4.In the Resource Information tab (3), check Deletecomments (4) and ensure Delete the subject (5) is notselected.Figure 9.Mailbox Properties WindowCreating Resources for Service Account Access1.Create or a select a dedicated user account with existing login to be the service account.Give this service account an ApplicationImpersonation role. Impersonation allows multiple individual accounts,each of which has its own password to be controlled by a single impersonation account with a single password, whichsimplifies resource administration.By default, this role allows impersonation access to all users in an organization. If this is intended, or if you have ascope already defined, skip to step 3. Otherwise, continue to step 2.2.To specify a set of resource accounts, create a new scope. To create a new scope, open the Exchange Managementshell and enter the following command (for information about creating a new session, see step 1 of “CreatingResources for Direct Access”, “Office 365” on page 1):New-ManagementScope -Name:" your scope name " RecipientRestrictionFilter:{ RecipientTypeDetails -eq “RoomMailbox” or RecipientTypeDetails -eq “EquipmentMailbox” }Replace your scope name with a name of the scope that is easy to identify.3.In the Exchange Management shell, enter the following command (without carriage returns) to set the impersonationrole to the service account:New-ManagementRoleAssignment -Role:ApplicationImpersonation-Name " resource impersonation " -User: your service account -CustomRecipientWriteScope " your scope name "4. Replace resource impersonation with an identifier that is easy to remember. your service account is the name of the service account being used. -CustomRecipientWriteScope is the optional flag for the scope. your scope name is the name of the scope created in step 3 or that was already existing.In the Exchange Management shell, create new resource accounts:New-Mailbox –Name “ room name ” –DisplayName “ alias name ”-UserPrincipalName name@your-domain.com -RoomAlternatively, follow steps 1-4 in Creating Resources for Direct Access (see page 1) to create the room in theExchange Admin Center.5
Exchange and Office 365 Environments for Room Agent Setup Guide (continued)UPN Settings for EWSAll credential matching for Exchange Web Services (EWS) is done with a User Principal Name (UPN) and not an SMTPaddress. If there are separate domains for your SMTP address and UPN, then the appropriate UPN suffix must be added.These can be viewed and set in Active Directory by a domain administrator or enterprise administrator.Verify UPN SettingsIn Exchange 2007/2010:1.Open the Exchange server Active Directory Users and Computers window.2.Click the Find object icon. The Find Users, Contacts, and Groups dialog box opens.3.Enter the name of the account to be verified in the User, Contacts, and Groups Name field.4.Click Find Now. The Search results: pane displays the room.5.Right-click the room in the Search results: pane and click Properties.6.Make sure the General tab is selected and it will display the room properties.7.Note the email address shown. This is the UPN, and is the only valid Exchange User ID for this room for EWS and theRoom Scheduling System.In Office 365:1.Open the Office 365 Admin Center.2.Select Resources Room & Equipment.3.In the Home Rooms & Equipment pane that displays, enter the room name in the Room field and press Enter.In the Room information a dialog box for the selected room opens.The e-mail address shown here is the UPN and is the only valid Exchange User ID for this room for EWS and the RoomScheduling System.Setting UPN SuffixesNOTE: Any changes to UPN or SMTP information can take up to 30 minutes to take effect.If you wish to use a domain for authentication other than the designated UPN name (an SMTP alias for example), anadditional UPN suffix matching that domain should to be added.1.Click the Windows Start icon, click Administrative Tools, and then click Active Directory Domains andTrusts.2.In the console tree, right-click Active Directory Domains and Trusts, and then click Properties.3.In the UPN Suffixes tab, enter an alternative UPN suffix for the forest (a collection of directory trees), and then clickAdd.4.Repeat step 3 to add additional alternative UPN suffixes.TroubleshootingIf the panel disconnected response (red ellipses in the lower right of the panel) is displayed after the TouchLink schedulingpanel has been loaded with the Room Agent configuration, verify the following items: The account that is attempting to connect through the panel can log in through the Outlook Web Access portal withthe user ID and password entered in the software. The user ID attempting to authenticate is the UPN name (see Verify UPN Settings, starting on the previous page, forinformation about setting a UPN name that matches your SMTP address). If you are using a service account, make sure the service account works on the panel directly. If so, check that theappropriate ApplicationImpersonation role has been added to the service account. This can take some time topropagate if it was recently set. Open the PowerShell and enter the following command:Get-ManagementRoleAssignment -Role “ApplicationImpersonation” GetEffectiveUsers 6Verify your EWS endpoint has a valid connection. Microsoft has a tool for this if your Exchange server is externallyaccessible.1.Go to https://testconnectivity.microsoft.com/.2.Select the tab appropriate for your server (Exchange or Office 365).
3.Select the Synchronization, Notification, Availability, and Automatic Replies bullet and click Next.4.Enter the credentials, validate the session CAPTCHA, and click Perform Test. Also enter the EWS endpoint ifAutodiscover is not enabled for your server. This is typically in the format https:// your-server-domain /EWS/Exchange.asmx.The results should display any EWS errors that are received.If the Meeting Organizer is showing up where the Meeting Subject should be on the TouchLink Scheduling panel, verifythat the Delete Subject property is disabled. OAuth for Microsoft Office 365NOTE: Microsoft is planning to end single-factor authorization in the second half of 2021 and will be moving to2-factor authorization (OAuth).There are three steps to this process: Obtaining OAuth Credentials (see page 7) Assigning OAuth Credentials to Room Agent (see page 10) Assigning OAuth Credentials to Touchpanels (see page 12)Obtaining OAuth CredentialsTo obtain OAuth credentials by two-factorauthorization, follow these steps.1.Go to https://portal.azure.com/ (seefigure 10).2.Click Azure Active Directory (1).Figure 10. Welcome to AzureThe Overview page for your organizationopens (see figure 11).3.Click App registrations (1).Figure 11. Organization Overview Page7
Exchange and Office 365 Environments for Room Agent Setup Guide (continued)The App registrations page opens (seefigure 12).4.Click New registration (1).Figure 12. App RegistrationsThe Register an application pageopens (see figure 13).5.Provide a Name for the App (1). Thiscan be edited later.6.Check the radio button to select fromthe Supported account type (2).This determines who can use the appor access the API.7.You must enter a reply address suchas http://localhost (3). This isrequired for Room Agent to work.8.Click Register (4).Figure 13. Register an applicationThe page for your new app opens (seefigure 14).9.Make a note of the Application(client) ID (1) and the Directory(tenant) ID (2). You will need theseto access the calendar from RoomAgent. The values have been blurredout in figure 14.10. ClickAuthentication (3).Figure 14. New app Created8
The Authentication page for your appopens (see figure 15).Accounts in this organizationaldirectory (1).In the Advanced Settings, click Yes (2).Click Save (3).Click API permissions (4).11. Select12.13.14.Figure 15. API permissions15. ClickAdd a permission (see figure 16, 1).The Request API permissions page opens(2).16. ClickMicrosoft Graph (3).Figure 16. Request API permissions pageThe Request API permissions panelopens.17. ClickDelegated permissions (1).A list of permission categories opens.Calendars in the Selectpermissions text box (2). This narrows the18. (Optional) Enternumber of options listed.19. ClickCalendars (3) to expand the list ofcalendar options.Calendars.ReadWrite andCalendars.ReadWrite Shared check boxes20. Select the(4).21. ClickAdd Permissions (5).Figure 17. Request API permissions panel9
Exchange and Office 365 Environments for Room Agent Setup Guide (continued)The added permissions arelisted (1).22. ClickOverview (2).Figure 18. Permissions listed23. ClickGet Started (1).Figure 19. Permissions overviewAssigning OAuth Credentials to Room AgentNOTE: Microsoft is planning to end single-factor authorization in the second half of 2021 and will be moving to2-factor authorization (OAuth).1.Open Room Agent and select the Configure tab.2.From the drop-down list of calendars, selectMicrosoft Office 365 (1).3.Click Add Credentials (2).Figure 20. Select Microsoft Office 365The Authenticate a device to Office 365 dialogbox opens.4.Provide a Name for the Credentials (1).5.Enter the Client ID (2) and Tenant ID (3), whichwere obtained in step 9 (see page 8) of theprevious section.6.Click Get Code (4).Figure 21. Authenticate a device to Office 36510
The dialog displays a QR and a code.7.Scan the code or enter www.microsoft.com/devicelogin into a browser.Figure 22. Office 365 QR CodeThe Microsoft website opens:8.Enter the code obtained in step 7, above.9.Click Next.Figure 23. Enter code10. Select an account that will provide authorizationfor Room Agent to read its calendar. The Microsoftwebsite confirms that the OAuth process iscomplete.Figure 24. Microsoft confirms the OAuthprocess is complete.The Room Agent Authenticate a device to Office 365dialog box also confirms that the credentials have beenauthenticated.Figure 25. Room Agent confirms the OAuthprocess is complete.11
Exchange and Office 365 Environments for Room Agent Setup Guide (continued)Assigning OAuth Credentials to TouchpanelsIn the Configure tab, make sure that the OAuthCredentials (1) match the name given when youauthenticated the device to Office 365 in step 5 onpage 8. Make sure the Account Calendar (2) isthe one selected in step 11 on page 9.Figure 26. Assign credentials to touchpanels 2017-2021 Extron Electronics All rights reserved. All trademarks mentioned are the property of their respective owners. www.extron.com1268-3332-01 Rev C09 21
In Office 365: 1. Open the Office 365 Admin Center. 2. Select Resources Room & Equipment. 3. In the Home Rooms& Equipment pane that displays, enter the room name in the Room field and press Enter. In the Room information a dialog box for the selected room opens.
