Transcription
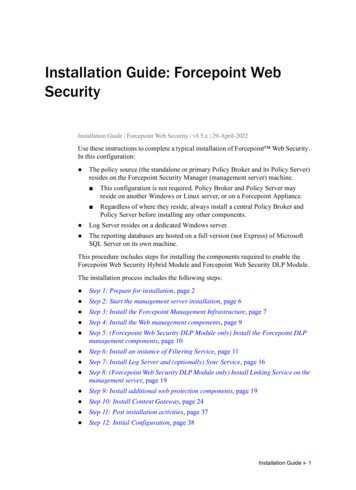
Installation Guide: Forcepoint WebSecurityInstallation Guide Forcepoint Web Security v8.5.x 29-April-2022Use these instructions to complete a typical installation of Forcepoint Web Security.In this configuration: The policy source (the standalone or primary Policy Broker and its Policy Server)resides on the Forcepoint Security Manager (management server) machine. This configuration is not required. Policy Broker and Policy Server mayreside on another Windows or Linux server, or on a Forcepoint Appliance. Regardless of where they reside, always install a central Policy Broker andPolicy Server before installing any other components. Log Server resides on a dedicated Windows server. The reporting databases are hosted on a full version (not Express) of MicrosoftSQL Server on its own machine.This procedure includes steps for installing the components required to enable theForcepoint Web Security Hybrid Module and Forcepoint Web Security DLP Module.The installation process includes the following steps: Step 1: Prepare for installation, page 2 Step 2: Start the management server installation, page 6 Step 3: Install the Forcepoint Management Infrastructure, page 7 Step 4: Install the Web management components, page 9 Step 5: (Forcepoint Web Security DLP Module only) Install the Forcepoint DLPmanagement components, page 10 Step 6: Install an instance of Filtering Service, page 11 Step 7: Install Log Server and (optionally) Sync Service, page 16 Step 8: (Forcepoint Web Security DLP Module only) Install Linking Service on themanagement server, page 19 Step 9: Install additional web protection components, page 19 Step 10: Install Content Gateway, page 24 Step 11: Post installation activities, page 37 Step 12: Initial Configuration, page 38Installation Guide 1
Step 1: Prepare for installationMake sure the servers you intend to use meet or exceed the System requirements forthis version.Prepare your database serverMake sure that: A supported version of Microsoft SQL Server is installed and running in yournetwork. See this article to see a list of supported versions. The latest service pack for your version has been applied. The SQL Server Agent service is running on the database host. The database host can be reached from the machine that will host the managementserver. You have identified a SQL Server or Windows Trusted account with appropriatepermissions to create the database and run SQL Agent jobs.See Installing with SQL Server for details on the necessary permissions.NoteAn end user whose requests are managed by FilteringService has no direct or indirect influence over thedatabase. Although the log entry for each request isstored in the SQL Server database, the user does notdirect its storage and cannot retrieve the record.The only interface to the database itself is from LogServer, the reporting services, and the managementconsole. Filtering Service and Content Gateway do notaccess the database, but instead send information viaLog Server.Prepare your Windows serversBecause Forcepoint Web Security management and reporting components can onlyreside on Windows servers, prepare at least two Windows servers: one to be themanagement server and one to host Log Server (and optionally Sync Service).Before starting the installation process, on every Windows server that will hostForcepoint Web Security components, do the following:2 Forcepoint Web Security
1. Make sure there are no underscores in the machine’s fully-qualified domain name(FQDN). The use of an underscore character in an FQDN is inconsistent withInternet Engineering Task Force (IETF) standards.NoteFurther details of this limitation can be found in the IETFspecifications RFC-952 and RFC-1123.2. Make sure all Microsoft updates have been applied. There should be no pendingupdates, especially any requiring a restart of the system.3. Verify that there is enough disk space to download the installer, extract temporaryinstallation files, and install the management components on the Windowsinstallation drive (typically C).4. Make sure that .NET Framework versions 3.5 and 4.5 are installed. Windows Server 2008 R2 (v8.5 only): You can use Server Manager to install.NET 3.5. Usually the feature is on by default. You must download .NET 4.5from the Microsoft site. Windows Server 2012 or 2012 R2: Both .NET 3.5 and .NET 4.5 can beinstalled using the Server Manager. Usually, v3.5 is off by default and v4.5 ison by default. Turn them both on.Note that .NET Framework 4.5 must be installed before adding any languagepacks to the operating system (as noted in the following article from /5a4x27ek(v vs.110).aspx#To installlanguage packs.).5. Synchronize the clocks on all machines (including appliances) where acomponent will be installed. It is a good practice to point the machines to the sameNetwork Time Protocol server.6. Disable the antivirus software on the machine before installation. Afterinstallation, before restarting your antivirus software, see this section of theDeployment and Installation Center.7. Disable any firewall on the machine before starting the installer and then reenable it after installation. Open ports as required by the components you haveinstalled, and make sure that required ports are not being used by other localservices on the machine. Some ports are used only during installation and can be closed onceinstallation is complete. See the Web tab of the Forcepoint Ports spreadsheet for more informationabout ports.8. Disable User Account Control (UAC) and Data Execution Prevention (DEP)settings, and make sure that no Software Restriction Policies will block theinstallation.9. Copy the Forcepoint Security Installer (Forcepoint85xSetup.exe) to a temporarydirectory on the machine.Installation Guide 3
Find the installer executable on the Downloads menu of the Forcepoint CustomerHub. You can download the installer to your network, then copy it to eachWindows server that will host Forcepoint components.Note that the installer is quite large, so the download process may take some time.Potential issue when installing v8.5.4 and v8.5.5A security update done for the v8.5.4 product release has resulted in a newrequirement for a specific dynamic-link library (dll) when installing v8.5.4 or F8.5.5Forcepoint Web Security software on a Windows platform.If you have not recently downloaded the Visual C Redistributable Package fromMicrosoft, it is likely that the installation will prompt with the error “Installation failedwith error code 3004”. The log file generated by the installation process, available inthe Temp folder of the user running the installer, will contain a line similar source\jre\bin\freetype.dll: Can't find dependent librariesThe dependency referenced in this log entry is for vcruntime140.dll, a file that is partof the Redistributable Package.Should the error occur during the installation process:1. Close the error window but do NOT stop the install process. Leave the installerwindow open.2. Locate the latest 64-bit Redistributable Package for your Windows version fromthis site.3. Download and install the package.4. Return to the installation window and continue the process.Prepare your Linux serversBefore starting the installation process, on every Linux server that will hostForcepoint Web Security components, do the following:1. If SELinux is enabled, disable it or set it to permissive.2. If a firewall is active, open a command shell and use the appropriate command,based on your operating system, to shut down the firewall before running theinstallation.After installation, restart the firewall. In the firewall, be sure to open the portsused by web protection components installed on this machine. See the Web tab ofthe Forcepoint Ports spreadsheet for more information about ports.ImportantDo not install Network Agent on a machine running afirewall. Network Agent uses packet capturing that mayconflict with the firewall software.4 Forcepoint Web Security
3. If you receive an error during installation regarding the /etc/hosts file, use thefollowing information to correct the problem.Make sure the hosts file contains a hostname entry for the machine, in addition tothe loopback address. (Use the hostname -f command to check this.)To configure a hostname:a. Enter the following command:hostname host b. Update the HOSTNAME entry in the /etc/sysconfig/network file:HOSTNAME host c. In the /etc/hosts file, specify the IP address to associate with the hostname.This should be static, and not served by DHCP. Do not delete the second linein the file (the IPv4 loopback address) or the third line in the file (the IPv6loopback address). IP address 127.0.0.1::1 FQDN localhost.localdomainlocalhost6.localdomain6 host localhostlocalhost6Here, FQDN is the fully-qualified domain name of this machine (i.e., host . subdomains . top-level domain )—for example,myhost.example.com—and host is the name assigned to the machine.ImportantThe hostname entry you create in the hosts file must be thefirst entry in the file.4. Your web protection software supports only TCP/IP-based networks. If yournetwork uses both TCP/IP- and non-IP-based network protocols, only users in theTCP/IP portion of the network are filtered.5. Make sure the following are installed. haveged serviceMake sure this service is running. xorg-x11-fonts-Type1 dejavu-serif-fontsThe installer will check for these and display a message with instructions on howto install if any are not found.6. Copy the Web Security Linux installer (Web85xSetup Lnx.tar.gz) to themachine:a. Log on to the installation machine with full administrative privileges(typically, root) and create a setup directory for the installer files. Forexample:/root/Websense setupb. Find the installer executable on the Downloads menu of the ForcepointCustomer Hub. You can download the installer to your network, then copy itto each Linux server that will host Forcepoint components.Installation Guide 5
c. Enter the following to uncompress and extract files:tar -xvzf Web85xSetup Lnx.tarPrepare for appliance installationRefer to the Firstboot Wizard section of the Forcepoint Appliances Getting StartedGuide and gather information as instructed under “Gather data for firstboot”.Step 2: Start the management server installationBefore installing management server components on a supported Windows server,make sure you have prepared the machine (including downloading the installer file) asdescribed in Prepare your Windows servers, page 2.ImportantIf, during the installation process, you encounter the error“Installation failed with error code 3004”, refer toPotential issue when installing v8.5.4 and v8.5.5 forinstructions.To begin the installation process:1. Log on to the machine.2. Use the Run as administrator option to launch the Forcepoint85xSetup.exeinstaller.ImportantIf you are installing Forcepoint DLP components, run theinstaller using a dedicated account that you want servicesto use when interacting with the operating system. Do notchange this account after installation. If you must changethe account, contact Technical Support first.After a few seconds, a progress dialog box appears, as files are extracted.3. On the Welcome screen, click Start.4. On the Subscription Agreement screen, select I accept this agreement, then clickNext.5. On the Installation Type screen:a. Select Forcepoint Security Manager.b. Mark the Forcepoint Web Security or Forcepoint URL Filtering checkbox.c. If you have purchased the Forcepoint Web Security DLP Module, also markthe Forcepoint DLP check box.6 Forcepoint Web Security
d. Click Next.On the second Installation Type screen:e. If the option is available, select Use the SQL Server database installed onanother machine.Otherwise, simply make sure you have a supported version of Microsoft SQLServer installed in your network. See the Certified Product Matrix for a list ofsupported versions.f.Click Next.6. On the Summary screen, click Next to continue the installation.Forcepoint Management Infrastructure Setup launches.Step 3: Install the Forcepoint Management InfrastructureThe Forcepoint Management Infrastructure includes data storage and commoncomponents for the Forcepoint Security Manager.1. On the Forcepoint Management Infrastructure Setup Welcome screen, click Next.2. On the Installation Directory screen, specify the location where you wantForcepoint Management Infrastructure to be installed and then click Next. To accept the default location (recommended), simply click Next. To specify a different location, click Browse.ImportantThe full installation path must use only ASCII characters.Do not use extended ASCII or double-byte characters.3. On the SQL Server screen, specify the location and connection credentials for adatabase server located elsewhere in the network.a. Enter the Hostname or IP address of the SQL Server machine, including theinstance name, if any, and the Port to use for SQL Server communication. If you are using a named instance, the instance must already exist.If you are using SQL Server clustering, enter the virtual IP address of thecluster.b. Specify whether to use SQL Server Authentication (a SQL Server account)or Windows Authentication (a Windows trusted connection), then providethe User Name or Account and its Password.If you use a trusted account, an additional configuration step is required afterinstallation to ensure that reporting data can be displayed in the Web moduleof the Security Manager. See Configuring Apache services to use a trustedconnection.c. Click Next. The installer verifies the connection to the database engine. If theconnection test is successful, the next installer screen appears.Installation Guide 7
If the test is unsuccessful, the following message appears:Unable to connect to SQL Server.Make sure the SQL Server you specified is currently running. If it is running,verify the access credentials you supplied.Click OK to dismiss the message, verify the information you entered, andclick Next to try again.4. On the Server & Credentials screen, do the following:a. Select an IP address for this machine. If this machine has a single networkinterface card (NIC), only one address is listed.Administrators will use this address to access the console (via a web browser),and web protection components on other machines will use the address toconnect to the management server.b. Specify the Server or domain of the user account to be used by ForcepointManagement Infrastructure and the Forcepoint Security Manager. The namecannot exceed 15 characters.c. Specify the User name of the account to be used by the Security Manager.d. Enter the Password for the specified account.5. On the Administrator Account screen, enter an email address and password forthe default Security Manager administration account: admin. When you arefinished, click Next. The Administrator password must be a minimum of 8 characters, with at least1 each of the following: upper case letter, lower case letter, number, specialcharacter. System notification and password reset information is sent to the emailaddress specified (once SMTP configuration is done; see next step).6. On the Email Settings screen, enter information about the SMTP server to beused for system notifications and then click Next. You can also configure thesesettings after installation in the Security Manager.ImportantIf you do not configure an SMTP server now and you losethe admin account password (set on previous screen)before the setup is done in the Security Manager, the“Forgot my password” link on the logon page does notprovide password recovery information. SMTP serverconfiguration must be completed before passwordrecovery email can be sent. IP address or hostname: IP address or host name of the SMTP serverthrough which email alerts should be sent. In most cases, the default Port (25)should be used. If the specified SMTP server is configured to use a differentport, enter it here. Sender email address: Originator email address appearing in notificationemail.8 Forcepoint Web Security
Sender name: Optional descriptive name that can appear in notificationemail. This can help recipients identify this as a notification email from theForcepoint Security Manager.7. On the Pre-Installation Summary screen, verify the information and then clickNext to begin the installation.The Installation screen appears, showing installation progress. Wait until all fileshave been installed.If the following message appears, check to see if port 9443 is already in use onthis machine:Error 1920. Server ‘TRITON Central Access’ (EIPManagerProxy) failed tostart. Verify that you have sufficient privileges to start system services.If port 9443 is in use, release it and then click Retry to continue installation.8. On the Installation Complete screen, click Finish.You are returned to the Installer Dashboard and, after a few seconds, the WebProtection Solutions setup program launches.Step 4: Install the Web management componentsAfter the Forcepoint Management Infrastructure installation is complete, the installerfor the Forcepoint Web Security management components is launched automatically.To install the Web Security management components:1. On the Select Components screen, select: Forcepoint Security Manager (Web module) (selected by default) Real-Time Monitor Policy Broker and Policy Server2. Still on the Select Components screen, clear the check box next to LinkingService, then click Next.If this service is required in your deployment, it will be installed in a later step,when all component dependencies have been met.3. On the Policy Broker Replication screen, indicate which Policy Broker mode touse. Select Standalone if this will be the only Policy Broker instance in yourdeployment. Select Primary, then create a Synchronization password if you will laterinstall additional, replica instances of Policy Broker.The password may include between 4 and 300 alphanumeric characters.ImportantIf you are installing the primary Policy Broker, be sure torecord the synchronization password. You must providethis password each time you create a Policy Broker replica.Installation Guide 9
Do not select Replica at this stage. You must install a standalone or primaryPolicy Broker before you can install a replica.If you are not sure about which Policy Broker mode to choose, see ManagingPolicy Broker Replication.4. If the management server machine does not include a supported version of theMicrosoft SQL Server Native Client and related tools, you are prompted to installthe required components. Follow the on-screen prompts to complete this process.5. On the Pre-Installation Summary screen, verify the installation path, selectedcomponents, and other information, then click or select Next.A progress screen is displayed while components are installed.6. On the Installation Complete screen, click Next.7. If you have chosen to install the Forcepoint DLP management components, youare returned to the Installer Dashboard and the next component installer islaunched. See Step 5: (Forcepoint Web Security DLP Module only) Install theForcepoint DLP management components, page 10.If you are not installing any Forcepoint DLP (or Forcepoint Web Security DLPModule) components, be sure to select the option that allows you to saveinstallation files on this machine when you exit the installer. There is one morecomponent to install on the management server, but it cannot be installed untilafter you install Filtering Service. Continue with Step 6: Install an instance ofFiltering Service, page 11.Step 5: (Forcepoint Web Security DLP Module only)Install the Forcepoint DLP management componentsWhen you add the Forcepoint Web Security DLP Module to Forcepoint Web Security,Forcepoint Web Security and Forcepoint DLP components must reside on the samemanagement server.To install the Forcepoint DLP components:1. On the Forcepoint DLP installer Welcome screen, click Next.2. On the Select Components screen, click Next to accept the default selections.3. If prompted, click OK to indicate that services such as ASP.NET and SMTP willbe enabled.Required Windows components will be installed. You may need access to theoperating system installation disc or image.4. On the Fingerprinting Database screen, accept the default location or use theBrowse button to specify a different location.Note that you must use a local path for the Fingerprinting database.5. On the Temporary Folder Location screen, complete the fields as follows: Enable incident archiving and system backup: Check this box if you planto archive old or aging incidents and perform system backup or restore.10 Forcepoint Web Security
From SQL Server: Enter the path that Microsoft SQL Server should use toaccess the temporary folder. For best practice, it should be a remote UNCpath, but local and shared network paths are supported. For example:C:\folder or \\10.2.1.1.\folder. Make sure the account used to run SQL Serverhas write access to this folder. From Forcepoint management server: Enter the UNC path the managementserver should use to access the temporary folder. For example:\\10.2.1.1.\folder. Enter a user name and password for a user who isauthorized to access this location.6. On the Local Administrator screen, enter or verify the local administrator username and password that will be used to run some Forcepoint Web Security DLPModule services, then click Next.7. On the Installation Confirmation screen, click Install to begin installation ofForcepoint Web Security DLP Module components. A message may appear stating that port 80 is required. Click Yes to continuethe installation. A message may appear stating that port 443 may appear. Click Yes to continuethe installation. If prompted to install required software, click Yes to continue the installation.8. The Installation progress screen appears. Wait for the installation to complete.9. When the Installation Complete screen appears, click Finish to close theForcepoint DLP installer.ImportantWhen you exit the installer, be sure to select the option thatallows you to save installation files on this machine. Thereis one more component to install on the managementserver, but it cannot be installed until after you installFiltering Service.Step 6: Install an instance of Filtering ServiceWhen the standalone or primary Policy Broker and the central Policy Server reside onthe management server, you must install at least one instance of Filtering Service thatconnects to the central Policy Server.This instance of Filtering Service may reside: On a supported Windows server On a supported Linux server On a filtering only applianceNote that using a software installation for this instance of Filtering Service maymake for a more convenient deployment. A software deployment allows you toInstallation Guide 11
also install components like User Service and Usage Monitor for the centralPolicy Server. (These components don’t reside on a filtering only appliance.)Although other components (like Network Agent or a transparent identification agent)may be installed with Filtering Service, a second instance of Policy Server may notreside on this machine. This Filtering Service instance must connect to the centralPolicy Server on the management server.Installing Filtering Service on WindowsBefore installing Filtering Service on a supported Windows server, make sure youhave prepared the machine (including downloading the installer file) as described inPrepare your Windows servers, page 2.ImportantIf, during the installation process, you encounter the error“Installation failed with error code 3004”, refer toPotential issue when installing v8.5.4 and v8.5.5 forinstructions.To install Filtering Service:1. Log on to the machine.2. Use the Run as administrator option to launch the Forcepoint85xSetup.exeinstaller. After a few seconds, a progress dialog box appears, as files are extracted.3. On the Welcome screen, click Start.4. On the Subscription Agreement screen, select I accept this agreement, then clickNext.5. On the Installation Type screen, select Custom and then click Next.6. On the Summary screen, click Next.7. On the Custom Installation screen, click the Install link next to Forcepoint WebSecurity or URL Filtering.8. On the Welcome screen for the Web Protection Solutions setup program, clickNext.9. Accept the subscription agreement, then click Next.10. If the machine has multiple NICs, on the Multiple Network Interfaces screen,select the IP address of the NIC that software components should use forcommunication, then click Next.11. Select the Custom installation type, then click Next.12. On the Select Components screen, select the following components, then clickNext: Filtering Service User Service Usage Monitor12 Forcepoint Web Security
Optionally, you may also select: Network Agent State Server DC Agent, Logon Agent, eDirectory Agent, or RADIUS Agent Directory Agent (used by the Forcepoint Web Security Hybrid Module)13. On the Policy Server Connection screen, enter the IP address of the Policy Serverfor this Filtering Service, and the Policy Server communication port (55806, bydefault), then click Next.14. On the Active Directory screen, indicate whether you are using Windows ActiveDirectory to authenticate users in your network, then click Next.15. On the Computer Browser screen, indicate that the installer should attempt to startthe service, then click Next.16. On the Integration Option screen, select Install Web Security to connect toContent Gateway, then click Next.17. If you are installing Network Agent, on the Network Card Selection screen, selectthe NIC that Network Agent should use to communicate with other components,then click Next.18. On the Feedback screen, indicate whether you want your web protection softwareto send feedback to Forcepoint, then click Next.19. On the Directory Service Access screen, enter the domain, user name, andpassword of an account that is a member of the Domain Admins group on thedomain controller, then click Next.User Service, DC Agent, and Logon Agent use this information to query thedomain controller for user and group information.20. On the Installation Directory screen, accept the default installation path, or clickor select Choose to specify another path, and then click Next.The installation path must be absolute (not relative). The default installation pathis C:\Program Files\Websense\Web Security\.The installer creates this directory if it does not exist.ImportantThe full installation path must use only ASCII characters.Do not use extended ASCII or double-byte characters.21. On the Pre-Installation Summary screen, verify the installation path, selectedcomponents, and other information, then click Next.A progress screen is displayed while components are installed.22. When the installation process finishes, the Installation Complete screen isdisplayed. Click Next to exit the installer.Continue with Step 7: Install Log Server and (optionally) Sync Service, page 16.Installation Guide 13
Installing Filtering Service on LinuxBefore installing Filtering Service on a supported Linux server, make sure that youhave prepared the machine (including downloading and extracting the installer files)as described in Prepare your Linux servers, page 4.To install Filtering Service:1. Log on to the installation machine with full administrative privileges (typically,root).2. Launch the installer using the following command (from the setup directory):./install.sh -gThis launches a GUI-based installer and is available on English versions of Linuxonly. A text-only, command-line version can be launched by omitting the -gswitch:./install.sh3. On the Introduction screen, click or select Next.4. On the Subscription Agreement screen, choose to accept the terms of theagreement and then click or select Next.5. If the machine has multiple NICs, on the Multiple Network Interfaces screen,select the IP address of the NIC that software components should use forcommunication.6. On the Installation Type screen, select Custom and then click or select Next.7. On the Select Components screen, select the following components, then click orselect Next: Filtering Service User Service Usage MonitorOptionally, you may also select: Network Agent State Server Logon Agent, eDirectory Agent, or RADIUS Agent Directory Agent (used by the Forcepoint Web Security Hybrid Module)8. On the Policy Server Connection screen, enter the IP address of the Policy Serverfor this Filtering Service, and the Policy Server communication port (55806, bydefault).9. On the Integration Option screen, select Install Web Security to connect toContent Gateway then click or select Next.When you install Content Gateway (as described in Step 10: Install ContentGateway, page 24), you will be prompted for the Filtering Service IP address.10. If you are installing Network Agent, on the Network Card Selection screen, selectthe NIC that Network Agent should use to communicate with other softwarecomponents, then click or select Next.14 Forcepoint Web Security
11. On the Feedback screen, indicate whether you want your web protection softwareto send feedback to Forcepoint, then click or select Next.12. On the Installation Directory screen, accept the default installation path (/opt/Websense/), or click or select Choose to specify another path. The installationpath: Must be absolute (not relative) Must use only ASCII characters (no extended ASCII or double-bytecharacters)When you are finished, click or select Next.The installer creates the installation directory if it does not exist and compares theinstallation’s system requirements with the machine’s resources. Insufficient disk space prompts an error message. The installer closes whenyou click or select OK. Insufficient RAM prompts a wa
Step 7: Install Log Server and (optionally) Sync Service, page 16 Step 8: (Forcepoint Web Security DLP Module only) Install Linking Service on the management server, page 19 Step 9: Install additional web protection components, page 19 Step 10: Install Content Gateway, page 24 Step 11: Post installation activities, page 37
