Transcription
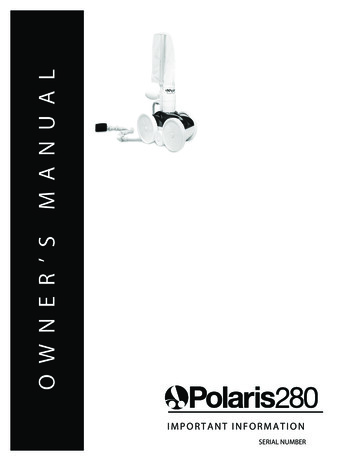
M A N U A LO W N E R ’ SI M P O R TA N T I N F O R M AT I O N
Important InformationThe Polaris Vac-Sweep 280 automatic pool cleaner comes ready to connect to a threaded 1-1/2" femalepipe fitting on a dedicated return line. Other connections are possible, but they require additional fittings(see Section B on page 4).The Polaris 280 is intended for use with a Polaris Booster Pump. You should have a licensed electricianinstall the cleaner’s booster pump. The booster pump must be installed according to the electricalcodes applicable in your area. Improper installation can result in serious or even fatal injury.The following are important points to remember when installing and operating the Polaris 280. Always turn the filtration pump on before turning on the booster pump.Always disconnect the Polaris from the pool wall when cleaning or backwashing the pool filter.After cleaning or backwashing, let the filtration system run for at least five minutes beforereconnecting the Polaris.New plumbing lines should be flushed out before installing the Polaris.The Polaris should not be used to remove plaster dust in new pools.Always remove the Polaris before swimmers enter the pool.Always handle the Polaris with care. Do not let children or pets play with the Polaris; it is not a toy.Except when checking the wheel RPM, do not handle the Polaris while it is operating (see page 7).Never pick up the Polaris by the head float.Always remove the Polaris from the pool before chemical shock treatments. As a general rule,any pool water that is unsafe for swimming is unsafe for the Polaris.Carefully cut the hoses following the instructions on page 5.By following these simple guidelines, you can help protect against injury and prolong the life of yournew Polaris 280.Before the Polaris is installed, please take a moment to record the serial number. For the location ofthe serial number, refer to the Exploded Parts Diagram on page 14. You will be asked for thisnumber when you contact our Customer Service Department.Serial # CWARNING: USE OF POLARIS 280 IN A VINYL LINER POOLCertain vinyl liner patterns are particularly susceptible to rapid surface wear or pattern removal causedby a variety of objects coming into contact with the vinyl surface, including pool brushes, pool toys,floats, fountains, chlorine dispensers, and automatic pool cleaners. Some vinyl liner patterns can beseriously scratched or abraded simply by rubbing the surface with a pool brush. Ink from the patterncan also rub off during the installation process or when it comes into contact with objects in the pool.Polaris is not responsible for, and the Limited Warranty does not cover, pattern removal, abrasion ormarkings on a vinyl liner.U.S. Patents: 4,618,420; 5,863,425; D. 288,373; D. 409,341.Foreign Patents: 85149 (Canada); 135543 (Australia); 2072463 (U.K.); 98 1274 (France); 142,198 (Spain). Other Patents Pending.
Table of ContentsI. Introduction . . . . . . . . . . . . . . . . . . . . . . . . . . . . . . . . . . . . . . . . . . . . . . . . . . . . . . . . . . . . . . . . . . .II. Installation Instructions . . . . . . . . . . . . . . . . . . . . . . . . . . . . . . . . . . . . . . . . . . . . . . . . . . . . . . . . . .A. Polaris 280 Components . . . . . . . . . . . . . . . . . . . . . . . . . . . . . . . . . . . . . . . . . . . . . . . . . . . . . . . .B. Possible Pool Connections . . . . . . . . . . . . . . . . . . . . . . . . . . . . . . . . . . . . . . . . . . . . . . . . . . . . . .1. Dedicated Return Line . . . . . . . . . . . . . . . . . . . . . . . . . . . . . . . . . . . . . . . . . . . . . . . . . . . . . . . .2. Over-the-deck Installation . . . . . . . . . . . . . . . . . . . . . . . . . . . . . . . . . . . . . . . . . . . . . . . . . . . . .C. Installing the Universal Wall Fitting . . . . . . . . . . . . . . . . . . . . . . . . . . . . . . . . . . . . . . . . . . . . . . . .D. Cutting the Feed Hose . . . . . . . . . . . . . . . . . . . . . . . . . . . . . . . . . . . . . . . . . . . . . . . . . . . . . . . . . .E. Assembling the Polaris . . . . . . . . . . . . . . . . . . . . . . . . . . . . . . . . . . . . . . . . . . . . . . . . . . . . . . . . .F. Checking Operation . . . . . . . . . . . . . . . . . . . . . . . . . . . . . . . . . . . . . . . . . . . . . . . . . . . . . . . . . . . .G. Fine Tuning . . . . . . . . . . . . . . . . . . . . . . . . . . . . . . . . . . . . . . . . . . . . . . . . . . . . . . . . . . . . . . . . . .1. Thrust Jet Adjustment . . . . . . . . . . . . . . . . . . . . . . . . . . . . . . . . . . . . . . . . . . . . . . . . . . . . . . . .2. Head Float Adjustment . . . . . . . . . . . . . . . . . . . . . . . . . . . . . . . . . . . . . . . . . . . . . . . . . . . . . . .3. Sweep Hose Adjustment . . . . . . . . . . . . . . . . . . . . . . . . . . . . . . . . . . . . . . . . . . . . . . . . . . . . . .4. Universal Wall Fitting Pressure Restrictors . . . . . . . . . . . . . . . . . . . . . . . . . . . . . . . . . . . . . . . .5. Checking Wheel RPM . . . . . . . . . . . . . . . . . . . . . . . . . . . . . . . . . . . . . . . . . . . . . . . . . . . . . . . .III.Operation and Maintenance . . . . . . . . . . . . . . . . . . . . . . . . . . . . . . . . . . . . . . . . . . . . . . . . . . . . . .A. What to Expect From Your Polaris 280 . . . . . . . . . . . . . . . . . . . . . . . . . . . . . . . . . . . . . . . . . . . . .B. Turning On/Off the Polaris . . . . . . . . . . . . . . . . . . . . . . . . . . . . . . . . . . . . . . . . . . . . . . . . . . . . . . .C. Operating Time . . . . . . . . . . . . . . . . . . . . . . . . . . . . . . . . . . . . . . . . . . . . . . . . . . . . . . . . . . . . . . .D. Connecting/Disconnecting the Polaris . . . . . . . . . . . . . . . . . . . . . . . . . . . . . . . . . . . . . . . . . . . . . .E. Cleaning the Filter Bag . . . . . . . . . . . . . . . . . . . . . . . . . . . . . . . . . . . . . . . . . . . . . . . . . . . . . . . . .F. Periodic Maintenance . . . . . . . . . . . . . . . . . . . . . . . . . . . . . . . . . . . . . . . . . . . . . . . . . . . . . . . . . .1. Filter Screen . . . . . . . . . . . . . . . . . . . . . . . . . . . . . . . . . . . . . . . . . . . . . . . . . . . . . . . . . . . . . . .2. Wear Rings . . . . . . . . . . . . . . . . . . . . . . . . . . . . . . . . . . . . . . . . . . . . . . . . . . . . . . . . . . . . . . . .3. Tires . . . . . . . . . . . . . . . . . . . . . . . . . . . . . . . . . . . . . . . . . . . . . . . . . . . . . . . . . . . . . . . . . . . . . .4. Sweep Hose Scrubber . . . . . . . . . . . . . . . . . . . . . . . . . . . . . . . . . . . . . . . . . . . . . . . . . . . . . . . .G. Backwashing the Pool Filter . . . . . . . . . . . . . . . . . . . . . . . . . . . . . . . . . . . . . . . . . . . . . . . . . . . . .H. Storage . . . . . . . . . . . . . . . . . . . . . . . . . . . . . . . . . . . . . . . . . . . . . . . . . . . . . . . . . . . . . . . . . . . . .I. Winterizing . . . . . . . . . . . . . . . . . . . . . . . . . . . . . . . . . . . . . . . . . . . . . . . . . . . . . . . . . . . . . . . . . . .J. Accessories . . . . . . . . . . . . . . . . . . . . . . . . . . . . . . . . . . . . . . . . . . . . . . . . . . . . . . . . . . . . . . . . . .1. Sweep Hose Weight . . . . . . . . . . . . . . . . . . . . . . . . . . . . . . . . . . . . . . . . . . . . . . . . . . . . . . . . .2. Ladder Guard Kit . . . . . . . . . . . . . . . . . . . . . . . . . . . . . . . . . . . . . . . . . . . . . . . . . . . . . . . . . . . .3. WaterStars and WaterStars WF . . . . . . . . . . . . . . . . . . . . . . . . . . . . . . . . . . . . . . . . . . . . . . . .4. Filter Bags . . . . . . . . . . . . . . . . . . . . . . . . . . . . . . . . . . . . . . . . . . . . . . . . . . . . . . . . . . . . . . . . .5. SpaWand . . . . . . . . . . . . . . . . . . . . . . . . . . . . . . . . . . . . . . . . . . . . . . . . . . . . . . . . . . . . . . . . . .IV.Troubleshooting the Polaris . . . . . . . . . . . . . . . . . . . . . . . . . . . . . . . . . . . . . . . . . . . . . . . . . . . . . .A. Problems and Solutions . . . . . . . . . . . . . . . . . . . . . . . . . . . . . . . . . . . . . . . . . . . . . . . . . . . . . . . . .B. Troubleshooting Worksheet . . . . . . . . . . . . . . . . . . . . . . . . . . . . . . . . . . . . . . . . . . . . . . . . . . . . . .Polaris Booster Pump . . . . . . . . . . . . . . . . . . . . . . . . . . . . . . . . . . . . . . . . . . . . . . . . . . . . . . . . . . . . .Exploded Parts Diagram . . . . . . . . . . . . . . . . . . . . . . . . . . . . . . . . . . . . . . . . . . . . . . . . . . . . . . . . . . .Warranty . . . . . . . . . . . . . . . . . . . . . . . . . . . . . . . . . . . . . . . . . . . . . . . . . . . . . . . . . . . . . . . . . . . . . . . 31417
I. IntroductionCongratulations on the purchase of your newautomatic pool cleaner, and thank you forchoosing a Polaris Vac-Sweep 280. The Polaris280 is designed to give you years of dependableand efficient service. With the Polaris 280,you and your family can spend more timeenjoying your pool and less time cleaning it.If you are unable to find genuine Polaris parts inyour area, contact us at 1-800-VAC-SWEEP (USAand Canada only) or (760) 599-9600 to receive thename of the participating Polaris dealer nearest you.For best results, the Polaris 280 should beinstalled by a pool professional. For those withexperience and confidence in handling plumbingand mechanical equipment, installation instructions are included in this manual.The Polaris has been built with the finest materialsavailable. The Polaris 280 is backed by the Polarislimited warranty that protects against defects inparts and workmanship (see the warranty on page17). Like most mechanical devices, it will requireperiodic adjustments, routine maintenance, andthe replacement of certain hardworking parts.Be sure to have the Polaris checked occasionallyby your local Polaris dealer.Please Note: Installation instructions for thePolaris Booster Pump are included with the pump. Look for this symbol throughout the owner’smanual for helpful hints in the use of yournew Polaris 280.The numbers in parentheses found throughoutthe manual refer to the index numbers in theExploded Parts Diagram on pages 14-16. Thereare also part numbers listed in parentheses tohelp identify the replacement parts available atyour participating Polaris dealer.Always insist on genuine Polaris replacementparts. You can be sure you are buying genuinePolaris parts if they come in Polaris part bags orhave the Polaris logoon them. Non-Polarisparts are not made to our specifications. Theymay have an adverse effect on the operation ofyour Polaris or may even damage it.Once again, thank you for choosing a Polaris.3
II. Installation InstructionsC. Installing the UniversalWall FittingA. Polaris 280 Components1. Turn on the filtration pump and flush out theplumbing line.The Polaris 280 box contains (the numbersbelow refer to the exploded parts diagramon pages 14-16):1. Sand/Silt Bag (#1)2. Sweep Hose (#7)3. Head Float (#4)4. Cleaner Head5. Complete Feed Hose6. Back-up Valve (#54)7. Sweep Hose Scrubber (#5)8. Quick Disconnect (#47) with UniversalWall Fitting (#41)9. Universal Wall Fitting Pressure Restrictors(one red and one blue) (#40)2. Remove the universal wall fitting from thequick disconnect. The universal wall fittinghas a blue pressure restrictor installed to helpthe Polaris operate at its optimum level of efficiency. Screw the universal wall fitting andthe blue restrictor into the return line by hand.3. Turn the quick disconnect into the universalwall fitting clockwise and pull away to secure.4. Turn the quick disconnect by hand to tightenthe universal wall fitting; do not overtighten. Once the universal wall fitting issecure, the quick disconnect can beremoved without removing the universalwall fitting.B. Possible Pool Connections1. Dedicated Return LineA 1-1/2" dedicated return line is recommended.It should be approximately 6" below the waterlevel and have 1-1/2" female threads. If it has3/4" female threads, you will need to purchasethe 3/4" x 1-1/2" coupling (part #G-9).Pool WallUniversalWall FittingUniversal WallFitting PressureRestrictor2. Over-the-deck InstallationIf the pool does not have a dedicated return line,the Polaris can be installed by obtaining anover-the-deck kit (part #G-12) and running anaboveground feed line from the booster pumpover the pool deck to the pool wall.QuickDisconnectPressure ReliefValveProperly Sized Feed HoseFor proper cleaner performance, the hose must be sized to fit your pool. To size correctly, follow the steps inSection D. Once sized, the feed hose should look like the one below.Entire Feed Hose Reaches Within 6" of Farthest Point of Pool*White Hoses Are Cut to Equal LengthsUniversal WallFittingFloats Are Evenly Distributed(1-1/2 to 3 Feet Apart)Clear Hose is Equal toGreatest Depth of Pool2-3 Feet Apart*Please Note: The illustrations in this section do not necessarily represent the farthest point for every pool.You must determine where the farthest point is in your pool.4
D. Cutting the Feed Hose5. Attach the quick disconnect at the end ofthe white hose to the universal wall fitting.1. Straighten the feed hose by soaking it inhot water or laying it in the sun.6. Stretch the hose to the farthest point of thepool. (The Polaris will not usually climb ontothe top step, so do not count it in your measurement.) If the hose is within 6" of thefarthest point of the pool, go to Section E.2. Measure and mark the deepest part of thepool (usually the main drain) with a telepole.If the pool depth is 10 feet or more, do notcut the clear hose and skip to step 5.FarthestPoint fromUniversalWall FittingTelepoleMark Water LevelGreatest Depth of PoolUniversalWallFittingIf the hose is more than 6" short, add a10-foot section of white hose with floats(part #9-100-3104), two nuts (part #D-15),and one swivel (part #D-20). Do not addmore than one 10-foot hose section.3. Lay the telepole next to the clear hose. If theclear hose is longer than the mark on thetelepole, cut the excess from the end attachedto the white hose. Do not cut off the float.7. Measure the amount of hose that extendspast the farthest point of the pool. This isthe overage measurement. Do not cutthe hose yet.TelepoleWater Level MarkWhite Hoses8. Lay the hose on the deck. Go to the swivelbetween the 10-foot white hoses. Slide thefloats away from the swivel and removethe swivel.Swivel9. Cut an equal amount of the overage measurement from each 10-foot white hose.Cut Clear HoseEqual to GreatestDepth of PoolRemove ExcessHose From ThisEnd10. Reinstall the swivel with the flow arrows on theswivel pointing toward the Polaris. (Refer to the“Proper Nut Placement” diagram.)4. Reattach the clear hose to the white hoses. OverageMeasurementIt is easier to reinstall the swivels when thehose and swivels are wet.Overage MeasurementProper Nut PlacementFeedHoseNutFloatsRemove RemoveHereHereSwivelWater FlowTo PolarisSwivelWhite Hoses areCut to Equal Lengths5Floats
release water at the quick disconnect. The wheelRPM of the Polaris should be between 28 and 32.11. On the clear hose, make sure one float isagainst the back-up valve on the side opposite the cleaner and another float is upstreamwithin 2-3 feet. On the white hoses, spacethe floats no less than 1-1/2 feet and nomore than 3 feet apart, so the white hosesdo not sag. It may be necessary to removefloats to maintain proper spacing.Approximately every 2 minutes the Polaris 280will go into back-up mode. At this time the backup valve will pull the Polaris away from potentialobstacles and increase its random pattern.The sweep hose operates in a gentle sweepingmotion to prevent debris from becoming trappedin hard-to-reach corners of the pool.12. When the feed hose has been cut properly,it should look like the one in the “ProperlySized Feed Hose” diagram on page 4.If the Polaris does not operate as describedabove, turn off the pumps and make the necessary adjustments below.E. Assembling the Polaris1. Put the nut on the feed pipe. Attach the clearhose to the feed pipe and tighten the nut.If there is a curve at the end of the hose,align it with the curve of the feed pipe.G. Fine Tuning1. Thrust Jet AdjustmentThe position of the thrust jet determines thedirection of the Polaris. Its standard positionis straight back.Assembling the PolarisClear HoseNutFeedPipeHead FloatSweepHoseSweep HoseAdjustmentScrewTo change the direction of the thrust jet, loosen(but do not remove) the screws, and move thethrust jet to the desired position. Retighten thescrews, being careful not to overtighten. For thelocation of the thrust jet, see the Exploded PartsDiagram on page 14.2. Pull out the bag. With the bag on the singlewheel side of the feed hose, snap the bagcollar onto the feed hose.2. Head Float Adjustment3. Turn on the pool filtration pump. Wait at least30 seconds and turn on the booster pump.The head float keeps the cleaner stable andin an upright position. Its standard position isbetween 1/2 to 1 inch from the feed pipe.Moving the float out from the feed pipe will keepthe nose down. Moving the float completelyforward, toward the feed pipe, will increase theclimbing ability. For the location of the head float,see the “Assembling the Polaris” diagram.F. Checking OperationWhen operating correctly, the Polaris 280 willtravel randomly throughout the pool, vacuuming,sweeping and scrubbing the bottom, sides, andmost of the steps and swimouts. The Polaris willclean an average pool in 3 hours or less.The Polaris comes equipped with an automaticpressure relief valve in the quick disconnect. If thePolaris is receiving too much water pressure, it will6
Count the revolutions of the marked wheel forexactly one minute, beginning after the Polaris hascompleted a back-up cycle. This gives you thecleaner’s wheel Revolutions Per Minute (RPM).3. Sweep Hose AdjustmentThe sweep hose should move in a gentlesweeping motion. To decrease its motion, turnthe sweep hose adjustment screw clockwise.See the “Assembling the Polaris” diagram onpage 6. Make sure the sweep hose scrubberdoes not block the water flowing from thesweep hose.For proper operation, the wheel RPM should bebetween 28 and 32.If the Polaris is operating above 32 RPM: Remove the universal wall fitting by attaching4. Universal Wall Fitting PressureRestrictorsthe quick disconnect. Pull it away from thepool wall as you unscrew the universal wallfitting.The universal wall fitting comes with a bluerestrictor installed and an optional red restrictorfor use if needed. These special restrictors aredesigned to work in combination with the pressurerelief valve. Together they will release excesswater pressure so the Polaris can operate at itsoptimum level of efficiency. The red restrictorprovides maximum water restriction, while theblue restrictor provides less restriction. Push the blue restrictor out of the universalwall fitting and snap in the red restrictor. Reinstall the universal wall fitting. Recheck the wheel RPM.If the Polaris is still operating above 32 RPM,unscrew the pressure relief valve (#46 on page 16)until the proper RPM are reached.To determine whether a restrictor is needed,follow the instructions below.If the Polaris is operating below 28 RPM:5. Checking Wheel RPM Remove the universal wall fitting byattaching the quick disconnect. Pull itaway from the pool wall as you unscrewthe universal wall fitting.To determine whether the Polaris is receiving proper water pressure, turn off and carefully removethe Polaris from the pool. Mark the outer edge ofa tire. Place the Polaris back in the pool and turnon the pumps. Push the blue restrictor out of the universalwall fitting.Hold the Polaris suspended on its side just belowthe water level. Hold it away from the wall withthe marked tire up. Reinstall the universal wall fitting. Recheck the wheel RPM.If you still have less than 28 RPM: Clean the filter screen in the quick disconnect. A dirty filter screen will restrict thewater flow from the pump to the Polaris.VacuumTube Check the hoses, connections, and swivelsfor leaks that could cause loss of waterpressure. If there is a gate valve installed on thebooster pump or the Polaris cleaner line,open it completely so water can flow freelyto the Polaris.SweepHose Clean the skimmer and pump baskets.Hold the sweep hose to avoid being squirted.Please Note: If the above suggestions do notwork, contact our Customer Service Departmentat 1-800-VAC-SWEEP (USA and Canada only)7
III. Operation and MaintenanceA. What to Expect From YourPolaris 280and pull away from the pool wall to secure.To disconnect, turn off both pumps. Push thequick disconnect in and turn counterclockwise.When operating correctly, the Polaris 280 willtravel randomly throughout the pool, vacuuming,sweeping and scrubbing the bottom, sides, andmost of the steps and swimouts. The Polaris willclean an average pool in 3 hours or less.Universal WallFitting (Installed)The Polaris comes equipped with an automaticpressure relief valve in the quick disconnect. Ifthe Polaris is receiving too much water pressure,it will release water at the quick disconnect.PegThe wheel RPM of the Polaris should bebetween 28 and 32.Quick DisconnectApproximately every 2 minutes the Polaris 280will go into back-up mode. At this time the backup valve will pull the Polaris away from potentialobstacles and increase its random pattern. The sweep hose operates in a gentle sweepingmotion to prevent debris from becoming trappedin hard-to-reach corners of the pool.To make connecting and disconnecting thequick disconnect even easier, periodicallylubricate the quick disconnect o-ring witho-ring lubricant.E. Cleaning the Filter Bag1. Remove the bag collar from the feed hose.Depress the prongs and remove the bagfrom the cleaner. There is no need to removethe bag collar from the bag.B. Turning On/Off the PolarisNever run the booster pump without the poolfiltration pump running. Turn on the filtrationpump. Wait at least 30 seconds and turn on thebooster pump. If the Polaris has been installedwith time clocks, set them so the Polaris is turnedon at least one half hour after the filtration pumphas been turned on and shuts off one half hourbefore the filtration pump shuts off. Failure tofollow these instructions could cause pumpdamage not covered in the Polaris warranty.Bag CollarVelcroClosureDepress HereC. Operating TimeTo find the optimum running time for your pool,start by running the Polaris for 3 hours. Decreasethe time until you notice that your pool is not getting clean. 2. Open the velcro closure and dump outthe debris.If you have a lot of debris in your pool (i.e.after a storm), you can run the Polaris in twoshorter cycles per day and empty the filter bagbetween cycles. If the velcro closure begins to lose its “grip”,rinse it, let it dry and clean it with a stiff brush.3. Align the prongs and attach the bag to thecleaner. With the bag on the single-wheelside of the feed hose, snap the bag collar onthe feed hose.D. Connecting/Disconnectingthe PolarisTo connect, turn off both pumps. Turn the quickdisconnect clockwise into the universal wall fitting8
3. Tires (#20)Some Polaris owners have told us it is easierto empty the filter bag when it is dry. Theyalternate between two filter bags. When onebecomes full, they remove it and put on theclean bag. They let the full bag dry completelybefore emptying it.The tires provide traction and protect both thePolaris and the bottom of your pool. Replacethe tires when the edges become rounded.4. Sweep Hose Scrubber (#5)The sweep hose scrubber helps keep the bottomand sides of your pool clean. It also helps prevent the sweep hose from spraying water out ofthe pool. Replace the scrubber when it becomesworn. The scrubber may need to be replacedoften depending on the surface of your pool.F. Periodic MaintenanceThe following parts are wear items that shouldbe periodically checked and replaced as needed.Please Note: Wear items are not coveredunder warranty. 1. Filter Screen (#44)Inside the quick disconnect there is a filterscreen. It acts as a safety filter to keep anydebris that is not caught by the pool filtrationsystem out of the Polaris. If the filter screenclogs often, consult your pool professional.G. Backwashing the Pool FilterAlways disconnect the Polaris from the pool wallbefore cleaning or backwashing the pool filter.After cleaning or backwashing, let the pool filtrationsystem run for at least five minutes to flush out thereturn lines before reconnecting the Polaris.Please Note: Running the Polaris without thefilter screen can damage the Polaris.To clean the filter screen, pull it out of thequick disconnect, rinse it and press it firmlyback into place.H. StorageNever store the Polaris in direct sunlight or withthe feed hose coiled. Quick DisconnectIf coils do form, lay the hose in the sun orsoak it in hot water to help straighten itbefore reinstalling.I. WinterizingTabFreeze damage is not covered under warranty.Remove the Polaris from the pool and drain allthe water from the Polaris before storing for thewinter. Also, drain all the water out of the boosterpump by removing the drain plug (see indexnumber 14 on page 13).SlotFilter ScreenUse the quick disconnect to remove the universalwall fitting. Attach the quick disconnect, pull itaway from the pool wall and unscrew. In somecases, it may be necessary to use the universalwall fitting removal tool (part #10-102-00) available from your participating Polaris dealer.2. Wear Rings (#8)The sweep hose is fitted with rolling wear ringsthat protect the sweep hose. Replace thembefore the weights on either side of the wearrings begin to wear. To maximize the life of the sweep hose scrubber,we recommend that you turn it as it wears.To maximize the life of the wear rings, werecommend that you rotate them as they wear.Please Note: If quick freeze conditions exist, besure the filtration pump is running and forcingwater through the booster pump. If there is agate valve installed, open it completely so waterwill flow through the booster pump.9
J. Accessories4. Filter Bags1. Sweep Hose Weight (Part #B-2)The Polaris comes with an all-purpose bag forgeneral use in all pools. You may want to purchase one of our special bags listed below androtate between them as needed.If the sweep hose or the thrust jet tend to breakthe surface of the water – squirting nearby windows, pool decking, or innocent bystanders –a sweep hose weight can be installed.Sand/Silt Bag (Part #K-14)2. Ladder Guard Kit (Part #G-21)The sand/silt bag is made of a mesh materialdesigned to trap very fine silt and dust. The bagprovides a secondary filtering system, removingdebris as small as 9/1000 of an inch.The ladder guard kit will help prevent the Polarisfrom getting hung up around the pool ladderor handrails.Leaf Bag (Part #K-15)3. WaterStars (Part #7-400-00) andWaterStars WF (Part #11-100-00)The leaf bag is a large bag made of a moredurable material. It is specifically designed tocollect larger, heavier types of debris such aslarge quantities of leaves and acorns.Both of the Polaris WaterStars fountains comeequipped to connect to a universal wall fitting.Once the Polaris 280 is installed with the universal wall fitting, you can quickly and easilyswitch from pool cleaner to Polaris fountainand back again.Disposable Sand/Silt Bags (Part #G-45)These bags are designed to be used in conjunction with any of the other bags. They are made ofan ultra fine material that will help catch even thefinest silt. They also make cleaning your bageven easier. Sold in packages of four.5. SpaWand (Part #5-100-00)This simple, effective hand cleaning deviceallows you to rapidly clean your spa and poolsteps without hoses or hook-ups. It’s also greatfor fish ponds and other bodies of water.10
IV. Troubleshooting the PolarisFor best results, follow the troubleshootingsolutions in the order they are listed below.The numbers in parentheses refer to theExploded Parts Diagram on pages 14-16.A. Problems and SolutionsProblem:Hangs up on corners or obstacleslonger than 2 minutes.Solution:1. Check the wheel RPM. See page 7.2. Make sure the back-up valve pullsthe Polaris back approximatelyevery 2 minutes.3. Adjust the thrust jet (#23).See page 6.4. Remove unnecessary pool hardware or install a ladder guard kit(part #G-21). See page ion:Problem:Solution:Problem:Solution:Sweep hose sprays too muchwater out of the pool.1. Check the sweep hose scrubber(#5) and replace it if it’s worn ormissing (part #9-100-3105).2. Decrease the sweep hose action.See “Sweep Hose Adjustment”on page 7.3. Add a sweep hose weight(part #B-2). See page 10.Problem:Solution:Polaris goes in circles and doesnot clean the entire pool.1. Check the wheel RPM. See page 7.2. Adjust the thrust jet (#23) to makethe Polaris go in more of a straightdirection. See page 6.Polaris will not climb walls.1. Check the wheel RPM. See page 7.2. Position the thrust jet (#23) to12:00 o’clock for maximumclimbing ability. See page 6.3. Push the head float forwardtoward the feed pipe. See page 6.4. Verify that the rear wheel is beingdriven by the idler wheel. If not,push the idler wheel (#24) downward to dislodge any sand or dirt.If it will still not move freely,remove the wheel screw (#18) andpull the idler wheel off the axle.Problem:Solution:11Clean away any debris caughtunder the wheel. It may help tomove the swing axle (#28) downward several times. Reattach theidler wheel.Sweep hose is sucked into thevacuum tube.1. Make sure the opening at the end ofthe sweep hose (#7) is not blockedby the sweep hose scrubber (#5).2. Adjust the sweep hose (#7) to agentle sweeping motion.See page 6.Polaris runs on its side.1. Empty the bag (#1).2. Check the head float (#4). If it’s fullof water, remove and replace it(part #A-20).3. Check the floats (#51)
Important Information The Polaris Vac-Sweep 280 automatic pool cleaner comes ready to connect to a threaded 1-1/2" female pipe fitting on a dedicated return line. Other connections are possible, but they require additional fittings (see Section B on page 4). The Polaris 280 is intended for use with a Polaris Booster Pump.