Transcription
Buffalo Technology:Migrating your data to Windows Storage Server 2012 R21
Buffalo Technology:Migrating your data to Windows Storage Server 2012 R2ContentsChapter 1 Data migration method: . 3Chapter 2 File Server Migration Toolkit . 5Chapter 3 Windows Server Migration Tools . 122
Buffalo Technology:Windows Storage Server 2012 R2 Data migration procedureSupport for Windows Server 2003/R2 and Windows Storage Server 2003/R2 will end on July14, 2015. If you are using a product equipped with these operating systems, we recommendpurchasing a product equipped with the most up-to-date systems, and migrate the storeddata.Chapter 1 Data migration method:There are 2 ways you can migrate your data:1. File Server Migration Toolkit.The File Server Migration Toolkit helps you copy files and folders from servers runningMicrosoft Windows 2003 Server/R2, Windows Storage Server 2003/R2 operating systems toa server running Windows Server 2012/R2 / Windows Storage Server 2012R2.Whether you plan to consolidate multiple file servers or migrate data from one file server toanother, the File Server Migration Toolkit is designed to simplify the process of copying dataand minimize the impact of the consolidation or migration on end users.The toolkit utilizes the Distributed File System (DFS) and is capable of maintaining UniversalNaming Convention (UNC) paths thus providing a simplified migration process.Benefits: Simplifies the complex and error-prone migration process with an easy to useGraphical User Interface (GUI).Maintains original Universal Naming Convention (UNC) paths of files and eliminatesbroken shortcuts and links with DFS consolidation roots ensuring a transparentmigration experience for end users.Maintains security settings after the migration to ensure the security of files andfolders.Consolidates shared folders with the same names from different servers by usingdefault target shared folder names.Supports server clusters as source and target file servers by creating DFSconsolidation roots on server clusters, and the necessary File Share resources torepresent shared folders on the target server clusters.Provides roll-back functionality by attempting to restore access to the source fileserversLimitations: Communication during the transition is not encrypted.3
The DFS Namespaces are unavailable at several times during the migration process.You should plan your migration when you can take the namespace that is hosted onthe source server offline.2. Windows Server Migration Tools:Windows Server Migration Tools, available as a feature in Windows Server 2012/R2 /Windows Storage Server 2012/R2, allows an administrator to migrate some server roles,features, operating system settings, shares, and other data from computers that are runningcertain editions of Windows Server 2003/R2 to computers that are running Windows Server2012/R2 / Windows Storage Server 2012/R2.Benefits: Uses HTTPS to securely transfer files between servers i.e. communication during thetransition is encrypted.Migrations between physical operating systems and virtual operating systems aresupported.Maintains the DFS namespace during the migration of data.Limitations: Knowledge of PowerShell operations is a prerequisite.Can only be used to migrate small datasets, up to 100 GB in size. If you need tomigrate larger amounts of data, Microsoft recommends using Robocopy commandline tool.4
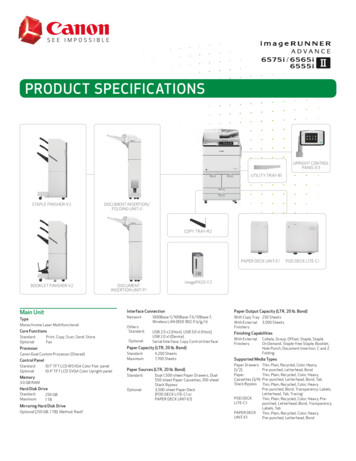
Chapter 2 File Server Migration ToolkitBest practice:As with any migration, a backup of the system or data being migrated isrecommended prior to using the File Server Migration Tool.Prior todecommissioning any migrated server, confirm the new server is functioningproperly.The following example describes the procedure to migrate data to Buffalo products that areequipped with the Windows Storage Server 2012 R2.1. Download the "Microsoft File Server Migration Toolkit 1.2" from the following URL, andthen install on the destination tails.aspx?id 102682. Run the fsmigrate x64.msi and follow through the Setup Wizard:Next Accept Next Next Complete Next Install3. On the Windows Storage Server 2012 R2, log in as Domain Administrator orAdministrator depending whether you are in a Domain or Workgroup environment.4. Open Windows Explorer and navigate to Program Files Microsoft File ServerMigration Toolkit, click & run FSMigrate application.Image 1: FSMigrate.5
5. At welcome screen, click New.Image 2: Welcome to File Server Migration Wizard.6. At New Project Wizard, click Next.Image 3: New Project Wizard 1.Image 4: New Project Wizard 2.6
7. Click Next.Image 5: New Project Wizard 3.8. New Project Wizard: DFS Consolidation Root Server, check or uncheck Use thefollowing DFS root server depending on whether using one or not, select NextImage 6: New Project Wizard 4.Note: In the continuing example, a DFS root server is not used.9. New Project Wizard: Default Location for Migrated Shared Folders, specify location andselect NextImage 7: New Project Wizard 5.10. Click Yes to create the directory.7
Image 8: New Project Wizard 6.11. Click Finish.Image 9: New Project Wizard 7.12. At Microsoft File Server Migration Wizard, Click Add Server ’ to add a Source fileserver, verify Settings, then click ContinueImage 10: File Server Migration Wizard 1.12.1.Type 03FileServer, click OK.8
Image 11: File Server Migration Wizard 2.Note: 03FileServer is the example of the server used here; you can also enter its IP address.Image 12: File Server Migration Wizard 3.12.2.Next to View by, select Target volumes.12.3.Select temp\03FileServer\Accnt.Image 13: File Server Migration Wizard 4.You can modify the share name and target location for each folder.Note: There is an option to help you create DFS link in the DFS root. temp\03FileServer\Accnt is theexample used here.13. Validating Settings/Ready to copy: settings will be validated and if all is okay, clickContinue again to copy the shared files and folders.9
Image 14: File Server Migration Wizard 5.14. Ready to finalize: click Continue and click Yes to the Warning regards ‘ access to thesource shares will be disabled ’Image 15: File Server Migration Wizard 6.15. Click OK. And then click View Report.Image 16: File Server Migration Wizard 7.10
Image 17: Example of report.As you can see from the above process the File Server Migration Toolkit is a tool which letsadministrators easily migrate and consolidate shared folders.We recommend creating a test environment that closely reflects your current setup beforeperforming this on the production Windows Server 2003 File Server.Additional reference:Overview of the Microsoft File Server Migration tails.aspx?id 1795911
Chapter 3 Windows Server Migration ToolsThe following procedure shows how to install and configure the Windows Server MigrationTools on a destination server running Windows Server 2012 R2 / Windows Storage Server2012 R2.To use Windows Server Migration Tools, the feature must be installed on both the sourceand destination computers.Best Practice:As with any migration, a backup of the system or data being migrated isrecommended prior to using the Windows Server Migration Tools.Prior todecommissioning any migrated server, confirm the new server is functioningproperly.In order to use the Windows Server Migration Tools, you must have the "WindowsPowerShell 2.0" installed. If you are using Windows Server 2008 and earlier OS to thedestination of the product, download and install the Windows Management Framework Coreonto the source server from the following URL:http://support.microsoft.com/kb/968929/The TCP and UDP port number "7000" will be used for the data transfer. Make sure to allowport number "7000" on both the source and destination.When specifying the destination of the product with an IP address, and when performing themigration between different IP subnets, the following ports also need to be allowed: TCP"7001" and UDP "7002".1. On the Windows Storage Server 2012 R2 machine via Server Manager, navigate toManage Add Roles and Features; Click Next until the Select Features screen isvisible; Select the Windows Server Migration Tools from the Server Manager in theAdd Roles and Features Wizard to destination of product12
Image 18: Server Manager.Image 19: Add Roles and Features Wizard.Note: The Windows Server Migration Tools include additional cmdlets that assist in the migration ofserver roles, OS settings files and shares from legacy Windows Servers2. On the Windows Storage Server 2012 R2 machine, open PowerShell in Administratormode and navigate to the following folder:C:\Windows\System32\ServerMigrationTools3. Then type the following:.\SmigDeploy.exe /package deployment folder path /architecturex86/OSWS03/Path13
Image 20: PowerShell command line.Note: Insert your desired path replacing deployment folder path in the script above (in the examplethe deployment folder path is C:\MIG). If the source server is 64-bit change x86 to amd64.4. On the Windows Server 2003 machine, create the C:\MigrationTools folder5. Copy the content from Windows Storage Server 2012 R2 folder deployment folderpath to the Windows Server folder C:\MigrationTools\ either via the network or usb key.6. On the Windows Server 2003 machine, open Windows Explorer and navigate toC:\MigrationTools folder, then click SmigDeploy.EXE (this will register the WindowsServer Migration Tools in PowerShell).Image 21: SmigDeploy.exe PowerShell command line.7. On the Windows Storage Server 2012 R2 machine, still running PowerShell inAdministrator mode and type the following:Add-PSSnapin nd -Module migServerData14
Image 22: PowerShell commands.Enter a desired migration password when prompted.8. On the Windows Server 2003 machine, open PowerShell in Administrator mode andtype the rName"DestinationPath "X:\Users" -Include All -SourcePath "F:\users"–RecurseNote: Insert your Windows Storage Server 2012 R2’s name replacing Computer Name andthe appropriate DestinationPath and SourcePath in the script above.Enter the same password as on Windows Storage Server 2012 R2 machine when prompted.9. To reflect the Windows Shares from the old machine onto the new one, perform thefollowing:On the Windows Server 2003 machine, open the registry editor and navigate toHKEY LOCAL MACHINE SYSTEM CurrentControlSet Services LanmanServer SharesRight-click on the Share Key and select ExportSave the exported key to a folder accessible by the Windows Storage Server 2012 R2machine.On the Windows Storage Server 2012 R2 machine, right-click the saved registry fileexported from the Windows Server 2003 machine and select MergeRestart the Windows Storage Server 2012 R2 machine.Note: If your new server uses different drive allocations than the Windows 2003 Server, runthe registry editor on the Windows Storage Server 2012 R2 machine, navigate to:HKEY LOCAL MACHINE SYSTEM CurrentControlSet Services LanmanServer Shares and click on the share in question. Edit the Multi-String Path value to reflect the newdrive allocation.This concludes the process of migrating Windows File Server 2003 onto Windows Server2012/R2 / Windows Storage Server 2012 R2. It is also possible to migrate other roles andfeatures with this tool, see the additional reference section for more information.15
We recommend creating a test environment that closely reflects your current setup beforetrying this on the production Windows Server 2003 File Server.Additional reference:Install, Use, and Remove Windows Server Migration jj134202.aspxMigrating Roles and Features in Windows server/jj554790.aspxFor information about Buffalo TeraStation Windows Storage Server 2012 R2 line torage-server/?no cache 116
The toolkit utilizes the Distributed File System (DFS) and is capable of maintaining Universal Naming Convention (UNC) paths thus providing a simplified migration process. . transition is encrypted. . trying this on the production Windows Server 2003 File Server. Additional reference: Install, Use, and Remove Windows Server Migration Tools: .