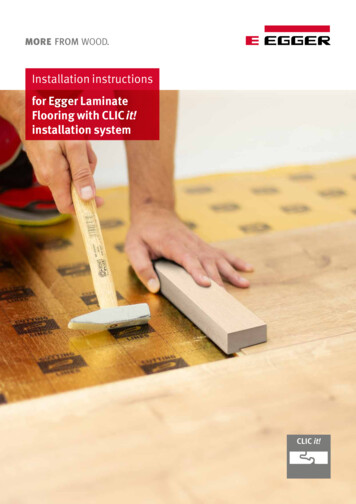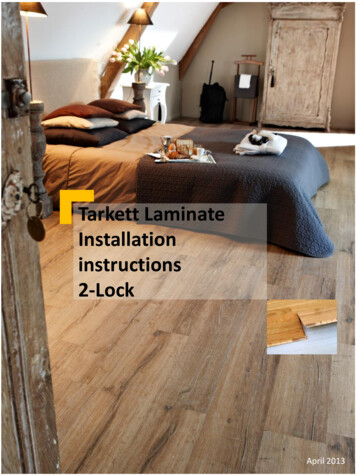
Transcription
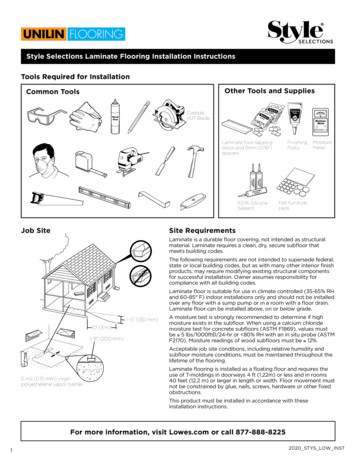
A-Tech Flooring Laminate Flooring Installation GuideTools and Materials Needed to Lay Laminate FlooringPencil, angle, folding ruleCircular saw, jigsaw or laminate cutterSpacerPE foil, insulation, Stanley knife or box cutter, possibly sticky tapeLaminate flooring, skirting boards, transition profilesLaminate Flooring InstallationBasics: Inspect every plank for any shipping damage when removing from the carton. Lay the flooring at an ambient temperature of at least 18 C, a floor temperature of atleast 15 C and relative humidity between 50% and 60%. These conditions should alsopersist during the first three days after installation. Keep windows and doors closed theroom while laying. Laminate flooring looks best when laid with the panels parallel to the main light source. Before starting to lay, calculate the width that the last row of panels will have. It shouldnot be less than 5cm. This may make it necessary to trim the first row accordingly. Remove any existing quarter round molding. Always remove carpet, pad and tack strips. A-Tech Flooring laminate flooring is intended to float on the subfloor. In other words,it shouldn’t be glued, nailed or otherwise fastened. As wood is a natural material, thelaminate works and moves. The floating installation and wall gap ensure enoughleeway for it to flex and expand slightly. Use foam underlayment to absorb sound and to make the floor more comfortable towalk and stand on. Fix skirting boards to the walls, not the floor!Subfloor Preparation & Precautions: Subfloors must be clean and free of dirt and debris prior to installation.Subfloors must be structurally sound prior to installation.
Subfloor moisture must be tested prior to installation and should not exceed 12%throughout the installation area.Carpet is not a suitable underlay for laminate floors. All carpet, carpet pad and carpettack should be removed prior to installation.Variations in the subfloor flatness should not exceed 1/16” per 3ft (2mm/m). Floorsmust be leveled to meet this specification prior to installation. Level by fillingdepressed areas with floor leveling compounds and sanding or grinding down raisedany areas.The subfloor must not slope more than 1 inch in 6 feet.Any existing wood flooring on concrete subfloors must be removed prior to A-TechFlooring installation.Creaking subfloors must be repaired before installation of the finished floor covering.Installations over radiant heated subfloors are acceptable but temperature shouldnever exceed 72 F. Radiant heat systems must be operating for a minimum of 3weeks prior to installation of A-Tech Flooring laminate floors.Concrete subfloors must be properly cured and allowed to dry for at least 60 daysprior to installation. Test concrete subfloor for moisture prior to installation.Vapor barrier must be used when installing over concrete.Wood subfloors must be structurally sound and screwed or nailed to supportingbeams.Please follow the installation instructions precisely. If the flooring is improperly laid, thewarranty will be voided. If any problems arise, stop work immediately and contact your salesrepresentative.Important:Laminate flooring expands and contracts due to changes in temperature and humidity. That iswhy it is so important to leave a 3 8" expansion space around the perimeter of the floor andany fixed objects such as pipes or, columns to allow for movement. Doorjambs and casingsmust be undercut. A-Tech Flooring laminate must be placed at least a 3 8" beneath theundercut jambs and casings. A 3 8" expansion space must also be included beneath theundercut jambs and casings. Areas greater than 40 feet in length or width must have a Tmolding installed across the width of the room, archway or at the beginning of the hallway toprovide additional expansion space. Doorways of less than 4 feet must always have a Tmolding or other transition molding regardless of floor length or width. Failure to meet theserequirements can result in the floor buckling.Step-by-Step Instructions for Installing Laminate FlooringImportant: Always inspect each plank to make sure it is not damaged prior to installation. Donot install damaged planks.
It is recommended that planks be mixed from at least three cartons to achieve the mostnatural and varied results.After making sure that the subfloor is suitable and letting the laminate flooring panelsacclimate in the room for at least 48 hours, you can proceed with installation:If you are laying the flooring on screed or concrete, put down a vapor barrier first. Eitheroverlap the sheets of membrane by 20cm or glue them edge to edge. Make sure that theyextend up the walls by about 3cm.The next step is to apply an acoustic underlayment. Lay sheets of it at 90 angles to thedirection that the laminate panels will run and use sticky tape to fix them to one another.Lay the first row of laminate flooring. Start in the right-hand corner of the room and lay thepanels so they run parallel to the window or other light source. Lay the panels lengthwisealong the wall leaving a gap 10mm wide and snap their short sides together. Wood wedges areexcellent spacers. You will almost certainly have to shorten the last panel in the row. To do so,use a circular saw, a jigsaw or a special-purpose laminate cutter. The last piece shouldn’t beshorter than 40cm. It may be necessary to shorten the first panel as well to prevent this(making sure that it is also at least 40cm long).Always place panels with the décor side facing down for cutting. Make your marks on theback. Use a circular saw, jigsaw or laminate cutter.You can start the next row with the piece left over from cutting the first, provided that it is atleast 40cm long. This will result in an attractive stepped pattern. The tongue-and-groove jointsin adjacent rows should be staggered by at least 40cm to stabilize them. Insert each newpanel at a sharp angle into the edge of the already-laid panel and press it down until you hear itaudibly click into place. It’s very easy to do by lifting both up them up a bit at the joint and thenpushing down on it until it clicks. The angle is right if you can easily connect the panelswithout exerting any force. You’ll get the hang of it fast!The last row of laminate flooring will almost certainly be too long, making it necessary to trimit. Remember to leave a sufficient gap along the wall. If the panels there are also too wide, theymust be made narrower. Remove the blue springs at their ends and join the panels using awater-free glue.Before attaching the skirting boards, first use a Stanley knife or cutter to trim excessmembrane so it won’t protrude above them. It’s best to cut the skirting boards to size with amitre saw.Transition rails must be mounted between different floor coverings in adjacent rooms.Depending on the type, they have to be glued, screwed or snapped into place.PLANK REMOVAL:
To remove planks, simply reverse the installation process. If you plan to re-install them, careshould be taken so as not to damage the installation mechanism. Uninstall the last installed row all at once by lifting the long edge of the row toapproximately 30 in order to disconnect the long edge installation mechanism. Then, disconnect each individual plank from one another by starting at the right-mostplank and lifting its right end approximately 30 to disconnect the short edgeinstallation mechanism.Installing Laminate Flooring on StairsComponents of a typical stair:1. The Tread: This is where you walk on.2. The Riser: The part from the tread to the stair noise is called the riser. It is vertical inshape.3. The Stringer: It is what is on the wall along the stair.4. The Stair Nose: This is where the riser meets the tread.Note: Don’t attempt to install laminate flooring on stairs unless you’re at the upper end of theskill level or you’re a professional installer.Basics: The depth of most stair treads is 11 inches. Because the width of most laminateflooring planks is a little over 7 inches, you’ll have to piece two planks together to coverthe entire tread surface. To make the process easier, we recommend gluing two plankstogether the night before (while engaging the locking system, of course), doing enoughto cover all the treads of the staircase. That way you’re making one cut per tread — notattempting to match up two separately cut plank pieces precisely. If you have carpet on the stairs, you need to remove it before installing the laminateflooring. You also have to remove the numerous staples and tack strips holding it.Make sure to wear gloves while you are removing carpet, the staples can be very sharpand may cause injuries. Even if the stairs were not covered in carpeting, you can prepare them by removing anyold paint or adhesive and repairing any loose or creaking steps by nailing them securelyin place. You will also need to make sure each of the steps is level, so the laminateboards will sit properly. If they are uneven, you can use a belt sander to level them out,or simply use a scraper to get rid of any debris or high spots. If you already have an overhang, it is better to remove it prior to installation. It will givethe stair a better finish and it is better to replace the current one with a laminateoverhang.
Start your installation at the top of the stairs, for the simple reason that you can avoidstanding on freshly installed flooring that way.Note: Do NOT use underlayment while installing laminate flooring on stairs. You will need toglue and screw (or nail) the laminate down to the stairs themselves. The glue should be aliquid nails or construction-type glue dispensed from a glue gun. To ensure a stronger grip bythe adhesive to the back of the laminate-flooring plank, we recommend scratching the backsurface of the plank with either a knife, screwdriver or scoring tool normally used to helpremove wallpaper.Don’t use glue alone, though — once glue is in place, we recommend drilling pilot holes andusing screws, then using filler to hide the screws. Some people will recommend using a nailgun. Just make sure the nails you use are ribbed for better holding power.Steps-by-Step Instruction for Installing Laminate Flooring on Stairs1. Install the Tread PiecesMeasure the exposed edge of the tread and cut a piece of laminate to fit. Apply a bead ofconstruction adhesive to the back of the piece, then press it into place and hold it for a fewminutes to let it bond.2. Install the RisersThe installation is similar to the tread pieces, the only difference being the installation wouldbe vertical here. Also, after placing the wood plank, do not let the glue fall on the installed treadpieces. If you want to secure the riser piece further, you can use a nail gun to nail the very topof the plank in place, as the nails will be concealed by the thread edge.3. Install the Stair NoseAllow sufficient time for the tread and riser to fit in. Then, apply some glue to the sub floor andpress the nosing firmly on to it. You will also need to screw the top nosing into place, in orderto properly secure it. To do this, cover the nosing with a strip of clear plastic tape, to protectthe laminate. Mark out where each of the screws should be placed with a pencil - they shouldbe spaced about 9 inches (22.9 cm) apart, and should be centered in the middle of the nosing.Then drill a countersink hole for each of the screws, using a combination bit. Insert the woodscrews, leaving the plastic tape in place until after you've covered the screws with putty.Note: It is up to you whether you wish to put all of the riser pieces and tread pieces in placefirst, before installing the nosing, or if you want to complete each step fully before moving onto the next one. Whichever method you use, make sure you take your time and install yourlaminate flooring carefully.4. Finishing TouchStart at the top of the stair.Fill all the screw holes with matching putty. Use a plastic putty knife to smoothly and carefullyfill in the screw holes. Once you've filled in every hole on the nosing strip, remove the plastictape covering the nosing. Leave it for 30 minutes and then wipe off the extra putty with a dampcloth.
Sweep away any sawdust and make sure there is no putty left on the stairs. Once it dries, itcan be extremely tough to get rid of.Once all this is done, it is recommended to leave it for at least a day so that everything fits inperfectly. Make sure no one uses the stairs during this time.After the 24-hour setting time, you may use your newly installed laminate flooring on yourstairs.Installing Laminate Flooring in KitchenKitchen cabinets should be installed before the floor is installed.Install the planks up to the kick plate of the cabinet, leaving a 3 8" expansion space. Cover theexpansion space with a quarter round molding.Place sealant only in the specific expansion spaces listed: Cabinet with kitchen sink: The 3 8" expansion space in front of the cabinets that housethe dishwasher and kitchen sink MUST be filled with 100% silicone sealant. Dishwashers: When installing A-Tech Flooring laminate flooring in the dishwasherspace beneath cabinets, 100% silicone sealant MUST be used in the perimeterexpansion spaces where the dishwasher is sitting. When flooring abuts the dishwasher,place a full bead of sealant beginning at the top edge of the floor down to the subfloorin front of the dishwasher. Refrigerators: When installing A-Tech Flooring laminate flooring in the refrigeratorspace, 100% silicone sealant MUST be used in the perimeter expansion spaces wherethe refrigerator is sitting. Be sure to place sealant around openings for water supplylines to the icemaker of the refrigerator.NOTE: For built-in refrigerators, follow instructions for sealing as for dishwashers. Exterior doors: The expansion space in front of any exterior door MUST be filled with100% silicone sealant. A-Tech Flooring laminate flooring must not be installed in rooms with a floor drain.Installing Laminate Flooring on WallThe installation process is very similar to installing laminate on your subfloor, however, theplanks must be permanently attached to the wall so they stay in their place.
It is important to remember that you still need an expansion gap when installing on your walls,as the material will still expand and contract with changes in temperature and moisture levels.Laminate Flooring can be installed horizontal or vertical.Basics: Acclimate unopened product lying flat in the room where it is to be installed for at least48 hours.Measure the height and width of your wall in order to determine the amount of flooringyou need. As with floor installations, you will need to purchase 5-10% extra flooring toallow for errors as well as cutting pieces to fit.Laminate is suitable for an accent wall when used in climate controlled (35-65% RH and60-85 F) indoor installations only. It’s not appropriate for sloping walls, ceiling orsoffits.The desired installation wall should be primed or painted drywall only. Do not installdirectly over wallpaper or paneling.Use a stud finder to determine where the studs are. Mark them both horizontally andvertically with a pencil, making a reference grid on your wall.Turn off power while working around wall outlets and light switches. Pay specialattention to avoid contact with electrical wiring.Inspect each plank for damage before installing. Do not install damaged planks.You will need to make sure you have a 1/4″ expansion gap around the entire perimeterof the wall. You may want to purchase 1/4″ shims in order to assure you have a properexpansion gap.Steps-by-Step Instruction for Installing Laminate Flooring on WallPreparation:Lay boards out on the floor to plan which will fit and which will need to be cut to fit, settingaside boards that will need to be cut. Make sure the end joints of adjacent rows arestaggered at least 6″ apart. You will also want to avoid allowing plank ends to align. Youmay need to rip your first row of planks to assure everything fits nicely. Ripping a plankmeans making a straight cut lengthwise.Once you have your planks laid out how you want, it’s time to begin your install. Prepare todo this by loading your nail gun and by cutting off the tip of your construction adhesive andplacing it in the caulk gun.Horizontal Installation:1. Assemble the short ends of the planks together and measure length to fit the first row(bottom).
2. Cut the last piece as needed leaving a 3/16” gap against any adjoining walls, ifapplicable, and click it into place.3. Carefully flip the connected row of planks over so the décor side is now face down andthe tongue side is toward the wall. You may need assistance to flip the connected rowof planks over, depending on the length of your installation. Make sure that the first rowis perfectly straight and the aligned joints remain square and tight. Apply a bead of100% silicone adhesive caulk to the back side of each laminate plank in the first row.4. Carefully tilt the row of connected planks against the wall with the tongue side towardthe floor, re-level and press to the wall.5. Drive a brad nail into each plank at each wall stud through the shallow area of theextended groove. Take care that the brad nail heads are not raised, but also don’t forcethem all the way through the groove. This will allow easy connection of the next row ofplanks. You must also place drywall screws every 16” into the wall studs or sill platealong the bottom edge of the first row of planks where they will be covered by the wallbase.6. Start the second row from the right side. Cut and glue with silicone adhesive caulk thefirst plank. Fit plank by angling tongue into groove and wiggle into place. Use tappingblock as needed. Drive a brad nail into each plank through the shallow area of theextended groove at each wall stud. Avoid allowing plank ends to align.7. Plank 2 of row 2 (and each plank thereafter in row 2) will be modified by removing theshort end tongue. Score the tongue with a utility knife 3 – 4 times to remove. You willnow have a square end.8. Apply silicone adhesive caulk in an “S” pattern and install modified boards by tiltinginto place. Tighten joints as needed with a tapping block or pull bar. Drive a brad nailinto each plank through the shallow area of the extended groove at each wall stud.9. Repeat this process for each plank working your way up to the last row.10. For the last row of the installation, use painters tape to mark the stud location for bradnailing. Cut all planks in the last row to the required width to complete the installation.Complete the installation as you have the earlier rows. Do not forget to leave thatexpansion gap at the top.11. Lastly, add trim work to create a finished look.Vertical Installation:1. Apply silicone adhesive to the back side of the plank in an “S” pattern.2. Adhere the plank to the wall leaving a 3/16" gap from the corners of the wall and a 1"gap at bottom. Drive brad nails ½" from the top and bottom of each plank to secure towall. Place nails where the trim will cover. Continue with the installation for eachsubsequent plank by first applying silicone adhesive to the back side of the plank in an“S” pattern. Then angle the groove over the tongue of the previous plank and wiggleinto place. Tighten joints as needed with a tapping block or pull bar. Finally, drive bradnails ½” from the top and bottom of each plank to secure to wall. Place nails where thetrim will cover. Be sure to drive the brad nails into a stud whenever possible.3. Finish wainscot accent to ending wall.4. Install trim over the top edge. Install quarter round in the corners. Finish by installingthe baseboard of your choice.
Special Installation Situations1. Heating PipesWhere heating pipes etc. stick out of the floor, first cut the panel to the right length, then lay itnext to where it will go and use a folding rule to measure and mark where the openings areneeded. Here too, remember to leave a 10mm gap round them. Now you can use a drill toremove the marked areas. Next, use a saw to bevel the edges of the hole at a 45 angle. Thisincreases the surface area for gluing. Apply D3 glue to the sawed-off piece, place it behind theheating pipe and tightly join it to the other piece of panel.2. Door FramesWooden doorframes should be shortened. Lay a panel next to the frame with the décor sidedown. Use a suitable saw to sufficiently shorten the frame, then slide the panel under it withthe décor side up. With steel doorframes that can’t be shortened, make an appropriatelyshaped cut-out in the panel instead.3. Expansion Elements for Large RoomsIn rooms that are more than 12 meters long and/or eight meters wide, an expansion element isalso needed in the middle. This also applies to doorways, archways (doorless openingsbetween rooms), protruding masonry and rooms with complex shapes.
Laminate flooring, skirting boards, transition profiles . Laminate Flooring Installation . Basics: Inspect every plank for any shipping damage when removing from the carton. Lay the flooring at an ambient temperature of at least 18 C, a floor temperature of at least 15 C and relative humidity between 50% and 60%. These conditions should also