Transcription
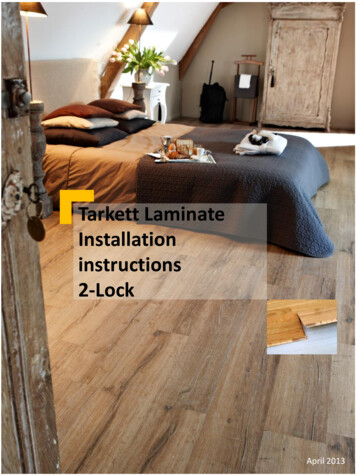
LAMINATEFLOORINGINSTALLATIONINSTRUCTIONS
NOTE: To protect the surface of the flooring material, apply the suppliedfelt pads to the bottom of the pull bar. The felt pads should be applied inthe shape of a triangle to prevent any of the pull bar from coming in contactwith the surface of the flooring material.TABLE OF CONTENTSTools and Materials . . . . . . . . . . . . . . . . . . . . . . . . . . . . . . . . . . . . . . . . . . . . . . . . . . 3-4Introduction . . . . . . . . . . . . . . . . . . . . . . . . . . . . . . . . . . . . . . . . . . . . . . . . . . . . . . . . . . 5Care Instructions . . . . . . . . . . . . . . . . . . . . . . . . . . . . . . . . . . . . . . . . . . . . . . . . . . . . . . 7Subfloor Requirements . . . . . . . . . . . . . . . . . . . . . . . . . . . . . . . . . . . . . . . . . . . . . . . 7-9Room Preparation . . . . . . . . . . . . . . . . . . . . . . . . . . . . . . . . . . . . . . . . . . . . . . . . . 10-11Angle Angle Lock, Locking Laminate Planks - Wood and Tile Visuals . . . . . . 11-14Compact Lock . . . . . . . . . . . . . . . . . . . . . . . . . . . . . . . . . . . . . . . . . . . . . . . . . . . . . 15-17 Getting StartedWall IrregularitiesCuttingInstalling the First RowInstalling Remaining RowsInstalling the Last RowInstalling Under a Door Jamb or Toe KickFinishing the InstallationLock and Fold . . . . . . . . . . . . . . . . . . . . . . . . . . . . . . . . . . . . . . . . . . . . . . . . . . . . . 18-21 Getting StartedWall IrregularitiesCuttingInstall UnderlaymentsInstall First RowInstall Remaining RowsInstalling Under a Door Jamb or Toe KickFinishing the InstallationFull Bathroom Installation Recommendations For Locking Laminate . . . . . . 21-22Coordinated Transitions & Moulding Pieces . . . . . . . . . . . . . . . . . . . . . . . . . . . 22-26Flush Stair Nose Installation for Stair Treads and Risers . . . . . . . . . . . . . . . . . 26-27Special Cutting Procedures . . . . . . . . . . . . . . . . . . . . . . . . . . . . . . . . . . . . . . . . . . 28-29Repairing Locking Laminate . . . . . . . . . . . . . . . . . . . . . . . . . . . . . . . . . . . . . . . . . 29-31Repairing Glued Laminate . . . . . . . . . . . . . . . . . . . . . . . . . . . . . . . . . . . . . . . . . . . 32-342www.armstrong.com
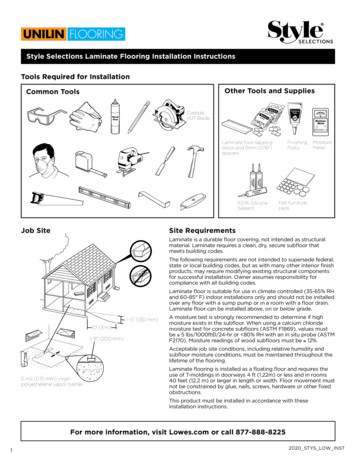
A. LAMINATE TOOLS AND MATERIALS Armstrong Laminate FlooringArmstrong Two-in-One Premium Underlayment S-1832Armstrong Two-in-One Advanced Underlayment S-1830Armstrong Moisture Barrier Sheeting S-1831Armstrong Laminate Flooring Accessories Armstrong S-1800 Laminate Glue Bruce Everseal Adhesive Tapping Block S-1814 Pull Bar S-1812 Spacers S-1813Armstrong Laminate Flooring Coordinated Transitions & Moulding Pieces Quarter-Round Moulding T-Moulding Multi-Purpose Reducer Reducer Strip Baby Threshold Wall Base Flush Stair Nose Over-the-Top Step NoseCarpenter’s SquareTape MeasurePolyethylene TapeHammerUtility KnifeSafety GlassesNIOSH-Designated Dust MaskSaw (see optional tools)100% Silicone Caulk (for bathroom & high moisture installations)Bucket of Warm WaterClean Cotton ClothsTouch-Up Kit/Filler KitPlastic Scraper for Glue Removal1 800 233 38233
B. OPTIONAL TOOLS AND MATERIALS RouterDrillSaws Table Saw Miter Saw Circular Saw Hand Saw JigsawDividersChalk LineCleaner such as Armstrong Hardwood & Laminate Floor Cleaner(S-302) or Bruce Dura-Luster No-Wax Floor CleanerWhite VinegarPocket Plane! CAUTIONWOOD DUSTSawing, sanding or machining wood products can produce wood dust.Airborne wood dust can cause respiratory, eye and skin irritation. TheInternational Agency for Research on Cancer (IARC) has classified wood dustas a nasal carcinogen in humans.Always follow the manufacturer’s recommended safety instructions and practiceswhen using power tools.Precautionary Measures if Power Tools Are Used:The power tools must be equipped with a dust collector. If high dust levels areencountered, use the appropriate NIOSH-designated dust mask. Avoid dust contactwith eyes and skin.First Aid Measures in Case of Irritation:Flush eyes and skin with water for at least 15 minutes. Seek medical attention ifirritation persists.! WARNING EXISTING IN-PLACE RESILIENT FLOOR COVERING ANDASPHALTIC ADHESIVES. DO NOT SAND, DRY SWEEP, DRY SCRAPE, DRILL,SAW, BEADBLAST, OR MECHANICALLY CHIP OR PULVERIZE EXISTINGRESILIENT FLOORING, BACKING, LINING FELT, ASPHALTIC “CUTBACK”ADHESIVE, OR OTHER ADHESIVE.These existing in-place products may contain asbestos fibers and/or crystalline silica.Avoid creating dust. Inhalation of such dust is a cancer and respiratory tract hazard.Smoking by individuals exposed to asbestos fibers greatly increases the risk ofserious bodily harm.4www.armstrong.com
Unless positively certain that the existing in-place product is a non-asbestoscontaining material, you must presume it contains asbestos. Regulations mayrequire that the material be tested to determine asbestos content and may governremoval and disposal of material.See current edition of the Resilient Floor Covering Institute (RFCI) publicationRecommended Work Practices for Removal of Resilient Floor Coverings forinstructions on removing all resilient floor covering structures or contact yourretailer or Armstrong World Industries, Inc. 1 800 233 3823.The floor covering or adhesive in this package does NOT contain asbestos.C. INTRODUCTIONFloating Floor StructureArmstrong Laminate Flooring is considered a “floating” floor and is installed using afloating floor system. These floors are intended for indoor use only and can beinstalled over virtually any existing floor structure. Since these floors arecomposed of natural cellulose fibers, they will expand and contract with changes inrelative humidity. Do not attach to the subfloor at any point. Do not fit flush against any fixed vertical surfaces like walls, pipes,passageways, or staircases. For most installations, where the relative humidity is between 45% and 65%,a minimum 1/4″ (6.35 mm) to 1/2″ (12.7 mm) expansion zone is requiredaround the perimeter of the room as well as against any fixed objects. Thiszone accounts for the normal movement of the floor system. Where the room is larger than 40′ (12.19 m) but less than 80′ ( 24.38 m) inplank length or wider than 26′ (7.92 m) but less than 52′ (15.85 m) aminimum of 1/2″ (12.7 mm) expansion zone is required around theperimeter of the room as well as against any fixed objects or T-mouldingsmust be used to compensate for this movement. Refer to Section K,Transitions & Moulding Pieces, for further details. Temperature changes will have little effect on the movement of these floors. The number of square feet of laminate required is not equal to the numberof square feet in the area of the room because the laminate must be fit to wallsand objects. An approximate cutting allowance of 10% for wood visuals and 15%for tile visuals or herringbone must be added to the square footage estimate.1 800 233 38235
Laminate Flooring Glue Specifically designed to create a strong, water-resistantbond between the tongue and groove. The integrity of the floor installation depends on the useof the appropriate glue, the amount of glue and theproper installation techniques. Use for Locking Laminate installations in full bathrooms, high moisture areas,and light commercial environments. Easy cleanup. Coverage for Locking Laminate using glue: up to 150 sq. ft. (500 Lin. ft.)/16 ounce bottle.Two-in-One Premium Hard-Surface Flooring Underlayment Recommended under all laminate flooring with no attached underlayment(use Armstrong Moisture Barrier Sheeting under laminate flooring withattached underlayment). A rubber-like layer over 100% synthetic fiber. Acts as a moisture barrier when the seams are taped together with polyethylenetape. (Refer to Section E Subfloor Requirements for further details.) Provides a cushion between the floor and the subfloor and compensates forslight subfloor irregularities. Provides a thermal barrier, reducing the “cold floor” feeling common to floorsthat are directly bonded to the subfloor. Absorbs underfoot noise and provides greater underfoot comfort. Eliminates the need for a separate vapor barrier. Installed with logo side up. Coverage: 100 sq. ft./roll.Two-in-One Advanced Hard-Surface Flooring Underlayment Recommended under all laminate flooring with no attached underlayment(use Armstrong Moisture Barrier Sheeting under laminate flooring withattached underlayment). A polyethylene closed-cell foam product. Acts as a moisture barrier when the seams are taped together withpolyethylene tape. (Refer to Section E Subfloor Requirements forfurther details.) Provides a cushion between the floor and the subfloor and compensates forslight subfloor irregularities. Provides a thermal barrier, reducing the “cold floor” feeling common to floorsthat are directly bonded to the subfloor. Eliminates the need for a separate vapor barrier. Installed with the logo side up. Coverage: 100 sq. ft./roll.6www.armstrong.com
Moisture Barrier Sheeting Recommended under all laminate flooring with attached underlayment wheninstalled over concrete. .005″ (.127 mm) polyethylene film. Acts as a moisture barrier when seams are taped together withpolyethylene tape. Coverage: 30″ x 40′ roll –100 sq. ft./roll60″ x 400′ roll – 2,000 sq. ft./rollD. CARE INSTRUCTIONSArmstrong Laminate Flooring is extremelyeasy to clean. DO NOT WAX OR POLISH your floor. For everyday cleaning, vacuum with a wandattachment or damp mop. To remove excessive dirt buildup, useArmstrong Hardwood & Laminate FloorCleaner (S-302) or Bruce Dura-Luster No-Wax Floor Cleaner. Before using water, or Armstrong Hardwood & Laminate Floor Cleaner(S-302) or Bruce Dura-Luster No-Wax Floor Cleaner, thoroughly wring out yourmop or sponge. An excessive amount of moisture is not necessary. As with any hard-surfaced material, laminate flooring can be slippery whenwet. Promptly wipe up spills with a moist sponge or soft cloth. DO NOT CLEAN THIS FLOOR WITH ABRASIVE CLEANSERS, ABRASIVESCRUBBING PADS, STEEL WOOL, OR SCOURING POWDER. To avoid scratching, use Armstrong Floor Protectors or protective padsunder chairs and furniture legs. Use walk-off mats at entryways to collect tracked-in dirt and grit and toabsorb excess moisture. Because metal rolling casters can damage the floor, we do not recommendthem. If rolling casters are used, we recommend only soft wheels wide enoughto support the load.E. SUBFLOOR REQUIREMENTSArmstrong Laminate Flooring can be installedover most subfloors and existing floors onall grade levels.All substrates must: meet applicable building codes be structurally sound show minimal deflection be dry, clean and flat1 800 233 38237
Precautions: Armstrong Laminate Flooring may be installed in bathrooms followingthe guidelines outlined in the Bathroom Installation Section J. Armstrong Laminate Flooring is not recommended over most carpets or inhigh-humidity areas where the floor is normally wet – e.g., steam rooms, orsaunas. The slope should not exceed 1″ in 6′ (2.54 cm in 1.83 m). Variations in subfloor flatness should not exceed 3/16″ in 10′ (4.76 mm in3.05 m) or 1/8″ in 6′ (3.17 mm in 1.83 m). Level floors with a suitablecement-based self-leveling underlayment following the manufacturer’srecommended guidelines. Radiant heated subfloors should not exceed 85 F (29 C).Concrete Subfloors Concrete floors must be cured properly and allowed to dry for at least60 days after the curing process. Concrete floors must not show any signs of moisture or alkali. Use Two-in-One underlayment for laminate with no attached backing (orMoisture Barrier Sheeting for laminate with attached underlayment), buttthe edges together and tape the seams with polyethylene tape.Test for moisture in concrete prior to installation. Too much moisture can causesignificant damage to laminate flooring. Tape 3′ x 3′ (91 cm x 91 cm) pieces of polyethylene film to the subfloor. After 24 hours, if moisture condensation appears on the film or the concreteappears dark-colored, it is likely excessive moisture is present and a CalciumChloride test must be run. The maximum acceptable moisture emission level for Armstrong LaminateFlooring installations is 5.0 lb./1000 sq. ft./24 hours (2.26 kg/101.6 m2/24 hours).Wood Subfloors Wood subfloors must be suspended and have a minimum of 18″ (45.7 cm) ofwell-ventilated crawl space. Regardless of grade level, do not install over wood subfloors applied directlyto concrete or on sleepers over concrete. Installation of a polyethylene film vapor barrier such as Armstrong MoistureBarrier Sheeting over the ground in the crawl space is recommended. Use Two-in-One Underlayment for Laminate with no attached backing. Noadditional underlayment is needed for Laminate with attached backing. Theseams do not need to be taped.Underlayment Boards Armstrong Laminate Flooring can be installed over any wood, cement, orgypsum-based underlayment boards that are installed according to themanufacturer’s recommended guidelines. Use Two-in-One Underlayment for Laminate with no attached backing. Noadditional underlayment is needed for Laminate with attached backing. Theseams do not need to be taped.8www.armstrong.com
Wood Flooring All wood flooring must be dry, level, flat and installed over suspended subfloors. Sand any ridges or uneven portions and repair squeaks. Use Two-in-One Underlayment for Laminate with no attached backing. Noadditional underlayment is needed for Laminate with attached backing. Theseams do not need to be taped. Install Armstrong Laminate Flooring at a 90 angle to existing wood plankflooring. Wood flooring over concrete must be removed.Ceramic and Resilient Tile Tile installed over concrete:Use Two-in-One Underlayment for Laminate with no attached backing (ormoisture barrier sheeting for laminate with attached underlayment), butt theedges together and tape the seams with polyethylene tape. Tile installed over wood:Use Two-in-One Underlayment for Laminate with no attached backing. Noadditional underlayment is needed for Laminate with attached backing. Theseams do not need to be taped.Vinyl Sheet Vinyl sheet installed over concrete:Use Two-in-One Underlayment for Laminate with no attached backing (ormoisture barrier sheeting for laminate with attached underlayment), butt theedges together and tape the seams with polyethylene tape. Vinyl sheet installed over wood:Use Two-in-One Underlayment for Laminate with no attached backing. Noadditional underlayment is needed for Laminate with attached backing. Theseams do not need to be taped.Carpet Fully adhered, maximum 1/4″ (6.35 mm) carpet over a suspended woodsubfloor is a suitable substrate. All other carpet and any carpet pad must be removed. If the carpet wasglued in place, remove all remaining debris and excessive adhesive residue.Do not install laminate over carpet adhered to concrete. Two-in-One Underlayment is not recommended. Use moisture barrier sheeting over the carpet. The seams do not need tobe taped.1 800 233 38239
F. ROOM PREPARATIONConditioning1. Armstrong and Bruce Laminate floors do not require acclimation.2. The room temperature should be at a minimum of 65 F (18 C) for 48 hoursbefore, during, and 48 hours after installation.3. During and after installation, the room temperature should not exceed amaximum of 100 F (38 C).Preparation1. Removal of existing wall base, millwork, or trim is optional.2. Door trims and doorjambs must be undercut to allow the floor to move freely.Use a discarded piece of floor and foam underlayment to support the sawblade at the correct height for undercutting.3. Sweep the subfloor and remove all dust anddebris.4. If the drywall is slightly elevated at the floor andwall juncture, create a solid wall surface byfastening a 2″ – 3″ (5 cm – 7.6 cm) wide facing stripsuch as 1/4″ (6.35 mm) plywood to the wall at thestud location.5. New wall base or moulding must be installed atthe end of the job to cover the 1/4″ (6.35 mm) to1/2″ (12.7 mm) expansion zone around theperimeter of the floor.6. It may be necessary to plane or cut the bottom of the door to accommodatethe change in floor height.Layout Install parallel to incoming light from anywindows or if lighting is not a concern, parallelto the longest wall in the room.High Moisture Areas It is a good idea to use 100% silicone caulkin areas of rooms where excessive moisturemay be present, such as at kitchen sinks,dishwashers and ice makers. See BathroomInstallation section for instructions on FullBathroom Installations Section J.Installing Cabinets Install Cabinets and then the laminate around the cabinets leaving the 1/4"(6.35 mm) to 1/2 " (12.7 mm) expansion zone. If installing cabinets after the laminate has been installed, most or all of thecabinet weight should be supported by the wall mountings. To secure thecabinets to the substrate with screws or nails, drill holes through thelaminate 1/2″ (12.7 mm) diameter larger than the screw or nail to allowfor expansion.10www.armstrong.com
Installing Kitchen Islands The island must be free standing and weigh less than 250 pounds if it is to beinstalled over the laminate. If the island weighs more than 250 pounds, the laminate is to be installedaround the island allowing the normal 1/4″ (6.35 mm) to 1/2″ (12.7 mm)expansion area around the base of the island. If the laminate has already been installed, and the island must be installedover the laminate, and the island weighs more than the 250 pound maximum,drill holes through the laminate 1/2″ (12.7 mm) diameter larger than the bolts(to allow for expansion) and bolt the island to the subfloor.G. ANGLE ANGLE LOCK, LOCKING LAMINATE PLANKS –WOOD AND TILE VISUALSGetting StartedAlways check each board for damage before installing.1. Avoid narrow pieces at the finish wall. Measure the distance between thestarting wall and the finish wall.2. Divide this number by the width of the board.3. If the remainder is less than 2 1/2″(6.35 cm), cut off 2 1/2″ (6.35 cm) from thewidth of the first row or to balance theroom add the difference to the plank widthand divide by two.4. Roll out Armstrong Two-in-One Premium orAdvanced Hard-Surface FlooringUnderlayment or Moisture Barrier Sheetingalong the starting wall, and cut to length.Kitchen and bathroom installations require folding the underlayment up thewall 2″ (5 cm). Place additional sections with butt seams as the installationprogresses.5. To minimize pattern repeats in the floor,always pull from at least three cartons offlooring while installing.Wall IrregularitiesAll wall irregularities require cutting the first orlast row of boards to fit the contour of the wall.1. Use dividers or a spacer turned sideways 1″(2.54 cm) wide to mark the contour.2. Cut to shape.3. Position the cut piece, using the pull bar totighten the last piece in place.4. Place a spacer between the end of the boardand the side wall.1 800 233 382311
5. Two tapered spacers can be used as wedgesto accommodate irregular walls.Cutting1. A good quality carbide-tipped cutting blade that has been designed forcomposition and laminate materials such as melamine, coreboard, or otherhard, dense, man-made materials is recommended. When extra clean cut edgesare required — e.g., custom installations — you may need more elaboratecutting equipment.2. When using a hand saw, cut with the decorative side of the board facing up.3. When using power saws, the direction of blade must cut into the decorative sideof the board to minimize chipping.4. Use a square to keep your cut line straight.5. Cut the marked piece in another area to keep the sawdust away from theinstallation site.Installing the First RowGrooveTongue1. Begin on the left side of theroom and work right.2. Lay the first full piece withthe small, tongue side facingthe wall.3. Install second andsubsequent full pieces inthe first row by aligningshort ends of boards andlocking into place.4. Use spacers along all sidesthat butt up against wallsto maintain 1/4″ (6.35 mm)to 1/2″ (12.7 mm)expansion zone.5. Continue laying boards inthe first row until you needto cut the last piece.6. Measure the distance between the wall andthe face surface of the last board. Subtract1/4″ (6.35 mm), and cut the board. (Seecutting instructions above).1/4″7. If this distance is less than 8″ (20.32 cm)go back to the first full plank and cutapproximately 8″ (20.32 cm) from the end closest to the starting wall.This will leave a longer piece at the end of the first row.8. When installing tile visuals, grout lines can be aligned or off-set. If the tiles arebeing balanced in the room with equal-sized tile along each wall, measurementsand adjustments should be done before proceeding to second row.12312www.armstrong.com
Installing Remaining Rows1. Begin the second row of planks with the piece cut from the last piece in thefirst row. If the piece is shorter than 8″ (20.32 cm) cut a new plank in half anduse it to begin the second row. Whenever practical, use the piece cut fromthe preceding row to start the next row. End joints of all boards should bestaggered 8″ (20.32 cm) or more. Grout lines on planks with tile visuals canbe aligned, or off-set as long as end joints are staggered.2. Install the long end of the first board atan angle to the board in the previous row.Keep this board at its natural angleslightly raised off the subfloor. Use ascrap piece of laminate to support therow if needed.3. Continue installing full boards in theNOYESsecond row by angling the short end ofthe next board in the row to lock into theprevious board. Position the board sothat the long side of the board is closeto boards in the previous row andoverlapping the groove of the boardsin the previous row.4. Angle up and push forward until theboards lock together.5. Continue installing full boards in thesecond and subsequent rows until youreach the wall on your right.6. Mark the last piece, cut and install. Afterall boards in the row are installed, pressor walk all boards flat to the subfloor tobegin the next row.7. Use a pull bar when necessary to ensurejoints are tight.Installing the Last Row1. The last row in the installation may needto be cut lengthwise.2. Place the row of planks to be fit on topof the last row of installed planks. Use adivider or a piece of the plank as a scribeto trace the contour of the wall.3. Be sure to place a spacer between themarking pen and “scribe” piece of board.This adds the 1/4″ (6.35 mm) to1/2″ (12.7 mm) space you need atthe finish wall.1 800 233 382313
4. Mark where the board should be cut.5. If the fit at the finish wall is simple andstraight, just measure for the correctwidth and cut.6. After the last row is installed, use thepull bar to tighten the joints.7. When appropriate, cut the underlaymenteven with the top of the floor.Installing Under a Door Jamb or Toe KickInstallation of locking laminate through a doorjamb or under a toe kick requires the lip of thegroove to be reduced in size.1. Using a small plane or utility knife, plane orshave off 75% of the ledge of the groove.2. Be careful not to trim too much. Excessivereduction can weaken the joint.3. After the groove ledge hasbeen trimmed, place the boardin position laterallyand lightly pull the boardinto place using the pull bar.4. Sometimes, more than one passing may be necessary in order to trim the ledgeof the groove to the correct height.5. Joint should be tight with no movement, however a thin, 3/32″ (2.4 mm)bead of glue on top of tongue only, should be used at this juncture to ensurejoint integrity.Finishing the Installation1. Remove spacers and install moulding pieces. (See Coordinated Transitions andMoulding Pieces Section K.)2. Always predrill transitions or mouldings prior to nailing. To allow the floatingfloor to move freely, do not fasten the trim to the laminate flooring.3. For everyday cleaning, vacuum or dampmop. To remove excessive dirt buildup,use Armstrong Hardwood & LaminateFloor Cleaner (S-302) or Bruce Dura-Luster No-Wax Floor Cleaner.4. DO NOT WAX OR POLISH your floor.14www.armstrong.com
H. COMPACT LOCKGetting StartedAlways check each board for damage beforeinstalling.1. Avoid narrow pieces at the finish wall.Measure the distance between the startingwall and the finish wall.2. Divide this number by the width of theboard.3. If the remainder is less than 2 1/2″ (6.35 cm), cut off 2 1/2″ (6.35 cm) from thewidth of the first row. Or to balance the room, add the difference to the plankwidth and divide by two.4. Roll out Armstrong Two-in-One Advanced Hard-Surface Flooring Underlaymentalong the starting wall and cut to length. Kitchen and bathroom installationsrequire folding the underlayment up the wall 2″ (5 cm). Place additional sectionswith butt seams as the installation progresses.5. To minimize pattern repeats in the floor, always pull from at least threecartons of flooring while installing.6. Dry fit the first three rows.Wall IrregularitiesAll wall irregularities require cutting the first orlast row of boards to fit the contour of the wall.1. Use dividers or a spacer turned sideways 1″(2.54 cm) wide to mark the contour.2. Cut to shape.3. Position the cut piece, using the pull bar totighten the last piece in place.4. Place a spacer between the end of theboard and the side wall.5. Two tapered spacers can be used as wedgesto accommodate irregular walls.Cutting1. A good-quality carbide-tipped cutting bladethat has been designed for composition andlaminate materials such as melamine,coreboard, or other hard, dense, man-madematerials is recommended. When extraclean cut edges are required — e.g., custominstallations — you may need moreelaborate cutting equipment.2. When using a hand saw, cut with the decorative side of the board facing up.1 800 233 382315
3. When using power saws, direction of blade must cut into decorative side of theboard to minimize chipping.4. Use a square to keep your cut line straight.5. Cut the marked piece in another area to keep the sawdust away from theinstallation site.Installing the First Row1. Begin on the left side of the room and work right.2. Lay the first full piece with the small, tongue side facing the wall.3. Install second and subsequent full pieces in the first row by aligning short endsof boards and locking into place.4. Use spacers along all sides that butt up against walls to maintain 1/4″ (6.35 mm)to 1/2″ (12.7 mm) expansion zone.5. Continue laying boards in the first row until you need to cut the last piece.6. Measure the distance between the wall and the face surface of the last board.Subtract 1/4″ (6.35 mm), and cut the board. (See cutting instructions above).7. If this distance is less than 8″ (20.32 cm) go back to the first full plank and cutapproximately 8″ (20.32 cm) from the end closest to the starting wall. This willleave a longer piece at the end of the first row.8. When installing tile visuals, grout lines can be aligned or off-set. If the tiles arebeing balanced in the room with equal-sized tile along each wall, measurementsand adjustments should be done before proceeding to second row.Installing Remaining Rows1. Begin the second row of planks with the piece cut from the last piece in the firstrow. If the piece is shorter than 8″ (20.32 cm), cut a new plank in half, and useit to begin the second row. Whenever practical, use the piece cut from thepreceding row to start the next row. End joints of all boards should be staggered8″ (20.32 cm) or more. Grout lines on planks with tile visuals can be aligned oroff-set, as long as end joints are staggered.2. Install the long end of the first board by raising the board to a 45 angle to theboard in the previous row. Keep this board at its natural angle slightly raised offthe subfloor. Use a scrap piece of laminate to support the row if needed.3. Continue installing full boards in the second row by angling the short end of thenext board in the row to lock into the previous board. Position the board so thelong side of the board is close to boards in the previous row and overlapping thegroove of the boards in the previous row.4. Angle up at a 45 angle and push forward until the boards lock together.5. Continue installing full boards in the second and subsequent rows until youreach the wall on your right.6. Mark the last piece, cut and install. After all boards in the row are installed, pressor walk all boards flat to the subfloor to begin the next row.7. Use a pull bar when necessary to ensure joints are tight.16www.armstrong.com
Installing the Last Row1. The last row in the installation may need to be cut lengthwise.2. Place the row of planks to be fit on top of the last row of installed planks. Use adivider or a piece of the plank as a scribe to trace the contour of the wall.3. Be sure to place a spacer between themarking pen and “scribe” piece ofboard. This adds the 1/4″ (6.35 mm) to1/2″ (12.7 mm) space you need at thefinish wall.4. Mark where the board should be cut.5. If the fit at the finish wall is simple andstraight, just measure for the correctwidth and cut.6. After the last row is installed andglued, use the pull bar to tighten the joints if necessary.7. When appropriate, remove spacers and cut the underlayment even with the topof the floor.Installing Under a Door Jamb or Toe KickInstallation of locking laminate through a door jamb or under a toe kick requiresthe lip of the groove to be reduced in size.1. Using a small plane or utility knife, plane or shave off 75% of the ledge of thegroove.2. Be careful not to trim too much. Excessive reduction can weaken the joint.3. After the groove ledge has been trimmed, place the board in position laterallyand lightly pull the board into place using the pull bar.4. Sometimes, more than one passing may be necessary in order to trim the ledgeof the groove to the correct height.5. Joint should be tight with no movement, however a thin, 3/32″ (2.4 mm) beadof glu
Use for Locking Laminate installations in full bathrooms, high moisture areas, and light commercial environments. Easy cleanup. Coverage for Locking Laminate using glue: up to 150 sq. ft. (500 Lin. ft.)/ 16 ounce bottle. Two-in-One PremiumHard-Surface Flooring Underlayment Recommended under all laminate flooring with no attached underlayment